


March in Vermont: one day you step out of your car and, if your Bean boots aren’t laced tightly enough, lose a shoe in shin-deep mud. The next day, snow drifts out of a gunmetal-gray sky and covers the soft ground, turning the landscape wintry again.
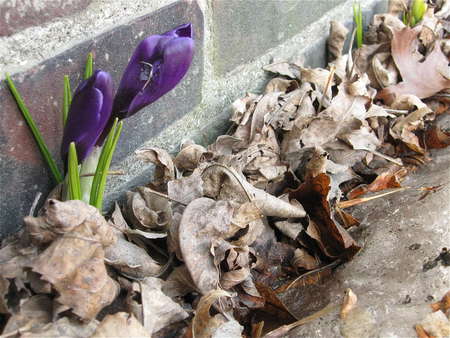
Thaw. Freeze. Thaw. Freeze. Yesterday it was 50°F. The crocuses alongside my south foundation made their first appearance.
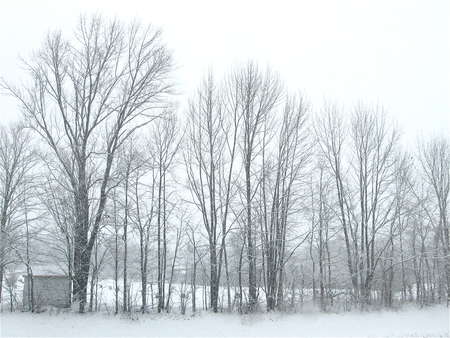
Last night, 25°F. And today, snow. (This is the view from our IT team's window. If they ever get a chance to glance away from their computers, they can enjoy it.)
All of this adds up to absolutely perfect weather for maple sugaring.
The sap in our Vermont sugar maples flows best when it’s cold at night, warm during the day. Driving on back roads now, you’ll see tapped trees drip-drip-dripping sap into buckets. Or, just as likely, you’ll see tubes snaking among the trees, siphoning out the sap and delivering it, sometimes with a vacuum assist, to a common collection point. The sap is boiled, producing billows of sweet-scented steam, and gallons of maple syrup: one gallon of syrup for every 25 to 75 gallons of sap.
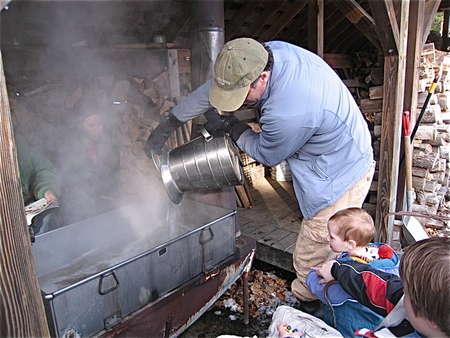
Here's what it looks like out at the Sands home, where three generations gather to boil sap each year. Frank Sands is King Arthur's chairman of the board; his wife, Brinna, wrote our “200th Anniversary Cookbook.” Frank and Brinna owned the company for years, before selling it to us, the employees, about 10 years ago. It's a wonderful responsibility—carrying forward a 219-year-old company.
Anyway, you can see why real maple products are expensive: they’re both labor- and material-intensive.
Not only that, the flavor of real maple is so subtle that it’s difficult to bake with. But once you figure it out—ahhh, SO much better than supermarket syrup.
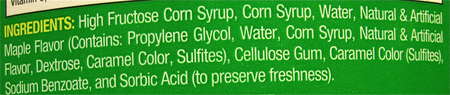
Most of which, you’ll notice, is no longer labeled “maple syrup,” but simply syrup, or pancake syrup. Maple doesn’t really enter into it much at all.
So, how DO you bake with maple syrup or sugar? By using it judiciously as an integral ingredient, and more generously as a topping or glaze. For instance: our recipe for Vermont Maple Oatmeal Bread originally called for ½ cup maple sugar in the dough. Maple sugar is a pricey ingredient; to save money, I substituted 1/4 cup maple syrup in the dough, then used a mere 2 teaspoons maple sugar on top, to add crunch and stronger maple flavor.
And to enhance the dough’s “mapleness”—1/2 teaspoon maple flavor.
The resulting loaf isn’t going to scream maple. Like the change from winter to spring, it’s subtle, gradually creeping up on you. Toasting brings out the maple flavor. And, of course, maple butter (a.k.a. maple cream)—which is simply maple syrup, whipped till thick and smooth.
Ready to experience a taste of Vermont? Let's bake Vermont Maple Oatmeal Bread.
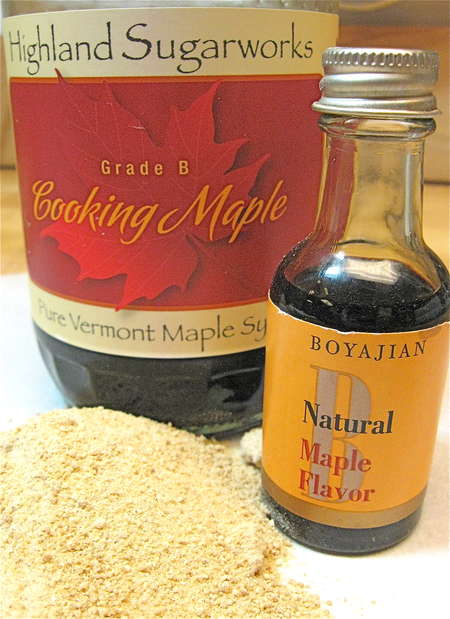
There's more to maple than Mrs. Butterworth's. Let's start with three ingredients that'll enhance your maple baked treats: real maple syrup; maple sugar, and maple flavor. I've tried making this bread with supermarket pancake (“maple”) syrup, and not only does the flavor not come through; the bread doesn't rise as well, probably due to the fact that real maple syrup incudes a lot of minerals (good for yeast growth) that fake maple syrup doesn't.
In the case of maple syrup for baking, go with the most flavorful, like this maple syrup.

Let's get started. Mix hot water, oats, maple sugar or syrup, maple flavor, butter, salt, and cinnamon.
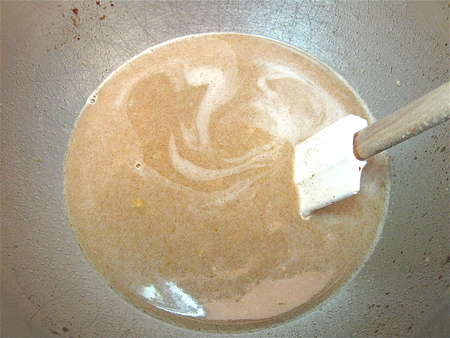
Stir to combine. As you stir, the butter will soften and melt. Let the mixture cool to lukewarm; it'll be most of the way there just by virtue of you stirring it.

Add the yeast and the flours: all-purpose and whole wheat. I love King Arthur golden wheat flour; and the organic version is great in yeast bread, as yeast seems to love organic flour.
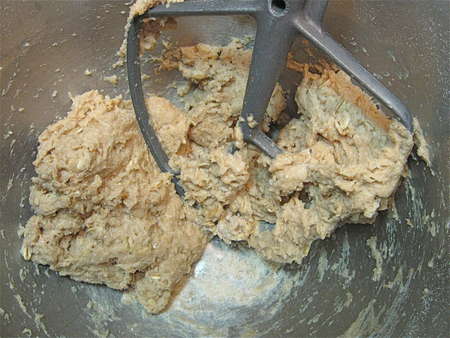
Mix for a couple of minutes with your mixer's flat beater, till the dough comes together and starts to smooth out. You can also do this dough start to finish in the bread machine, set on the dough cycle.
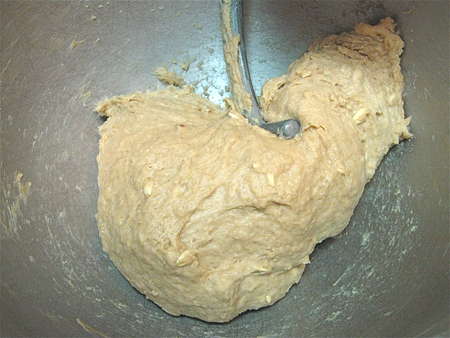
Switch to the dough hook, and continue to knead for 5 minutes or so. The dough will feel soft and elastic. It won't be totally smooth due to the oats, but will definitely feel stretchy.

Place the dough in a lightly greased container. As usual, I use my 8-cup measure, so I can easily track the dough as it rises.
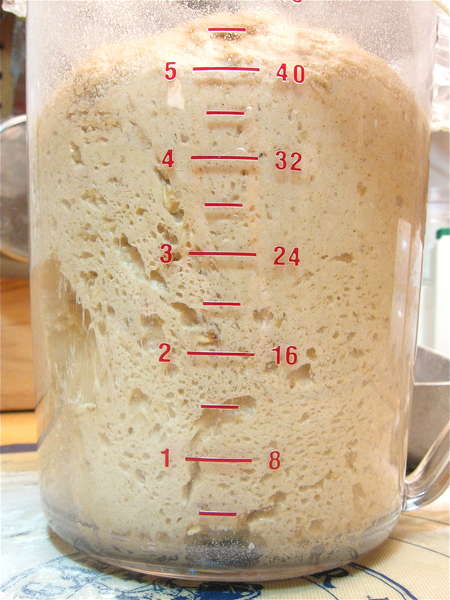
Let the dough rise for an hour or so; it should just about double in bulk. Look at those nice air bubbles!
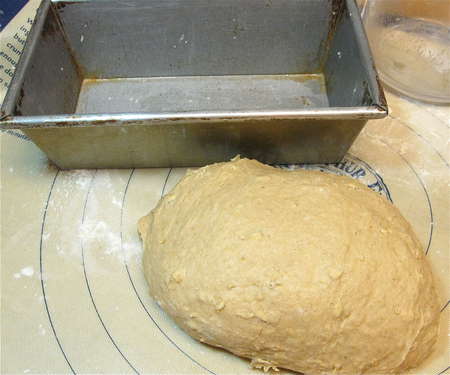
Shape the dough into a rough log. As you work with it, it'll gently deflate. There's no need to punch down or pound yeast dough; all that does is toughen the gluten, making it more difficult to shape.
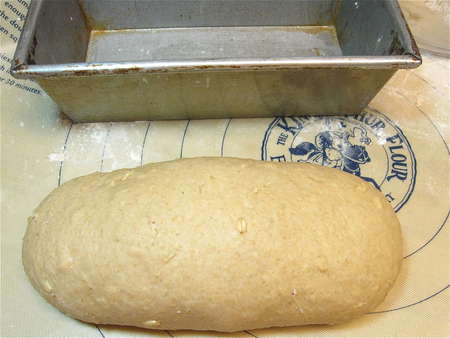
Smooth the dough into a log about 8 1/2” long...
...and nestle it into an 8 1/2” x 4 1/2” loaf pan.
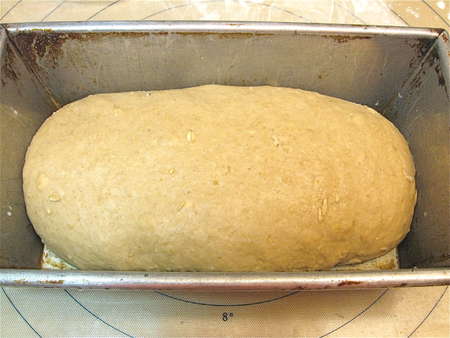
Ah, I feel a rant coming on... Measure your loaf pan, inside/top dimensions. Is it an 8 1/2” x 4 1/2” standard pan? Or a larger 9” x 5” quick bread pan? The smaller pan will produce a high-rising, domed loaf. The 9” x 5” pan, which is actually 30% larger, makes a shorter, flatter loaf. So yes, that 1/2” DOES make a huge difference. A word to the wise.
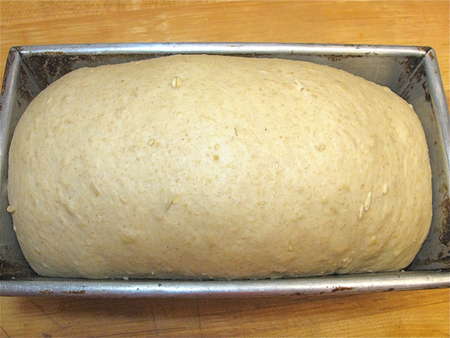
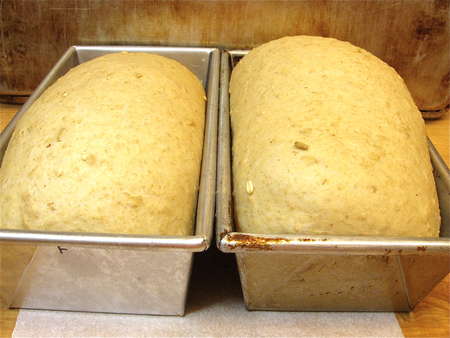
Let the loaf rise, covered, till it's crowned about 1” over the rim of the pan; this will take about an hour or so.
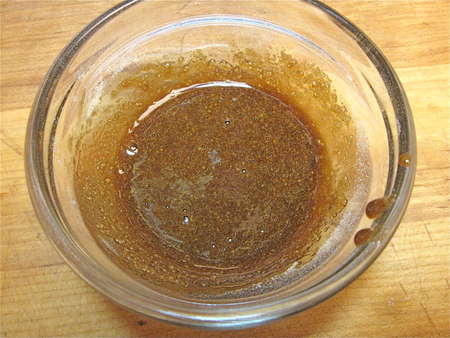
Here's the first glaze I tried for the crust: granulated sugar, maple flavor, and water.
Brushed on the loaf before baking, it produced a golden-brown, slightly crunchy crust.
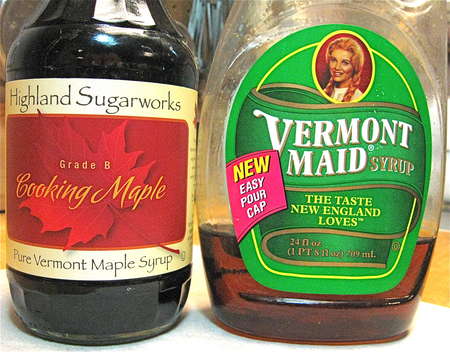
Now let's take a side trip down the “real vs. fake” maple syrup path.
I made two loaves, the one on the left with 1/3 cup fake maple syrup, the one on the right with 1/4 cup real maple syrup. Since real maple syrup is sweeter than fake, I was able to use less of it. But look how much better the yeast liked the real maple syrup—again, it's probably the extra minerals.
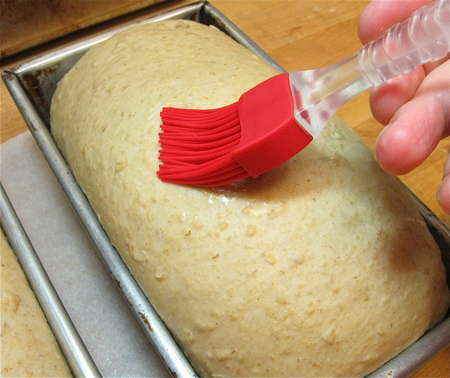
OK, back to crust glazes. This time, I brushed the crust with water...
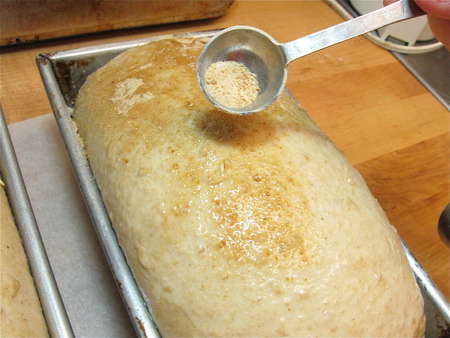
...and sprinkled with maple sugar.
Be generous. Even a thick coating requires less than 1 tablespoon of maple sugar.
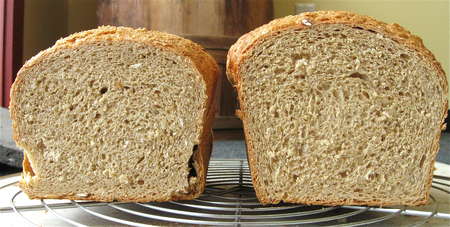
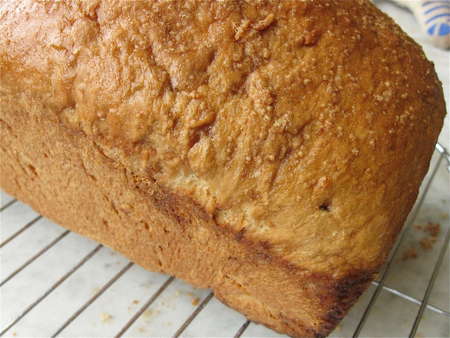
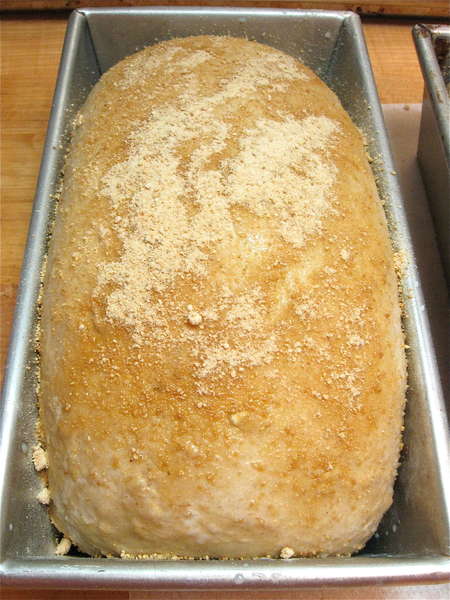
And here are the finished loaves. “Fake” on the left, “real” on the right.
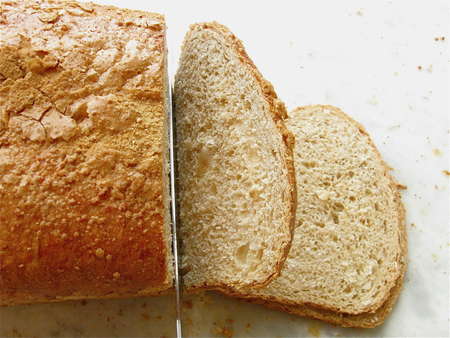
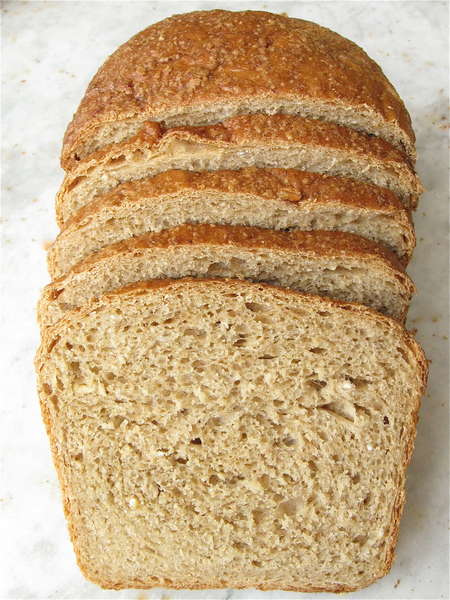
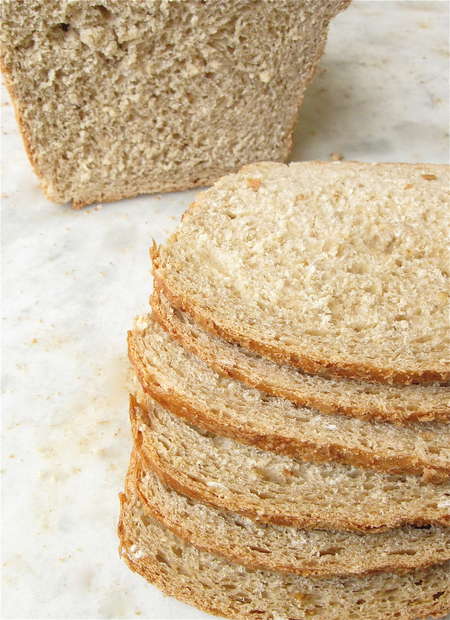
Notice the crust: a little bit crunchy-crackly, and VERY tasty, due to the maple sugar. And look how nicely the loaf slices!
Now THAT'S a thin slice of bread!
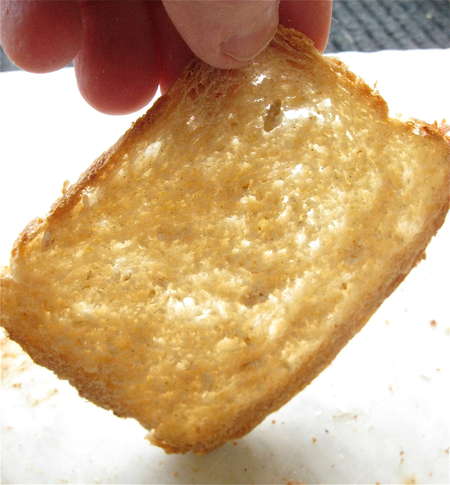
Moist, good texture, slices like a dream—yes! This bread is especially good spread with maple butter—maple syrup whipped to a thick, creamy, nonfat spread.
Read, rate, and review (please?) our recipe for Vermont Maple Oatmeal Bread.
