-
To make the sauce: In a food processor, blend the tomatoes, olive oil, garlic, salt, and pepper until you reach your desired texture; if you prefer a sauce with some chunks, mix less. If you like it smooth, mix more. Set aside until ready for assembly. (The sauce can be made up to 3 days in advance and stored, covered, in the refrigerator. It will become more flavorful over time.)
-
To make the dough: Weigh your flour; or measure it by gently spooning it into a cup, then sweeping off any excess. In a medium bowl, combine the dry ingredients, then add the water. Stir until just combined, making a rough but cohesive dough.
-
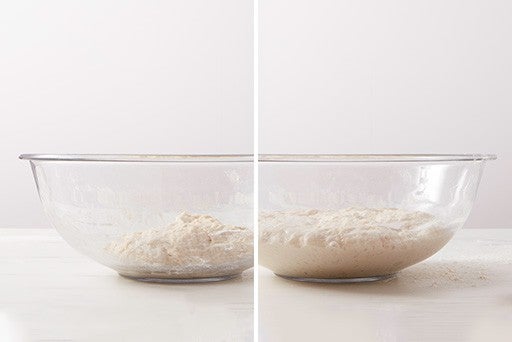
Cover the bowl and allow the dough to rise at room temperature overnight, for at least 12 hours and up to 24 hours.
After being mixed (left) this dough probably won't double in size; instead it will simply become a bit puffy (right).
-
Place a rack in the center of the oven, at least 8" below the broiler, and preheat the oven to 500°F to 550°F (if your oven goes to 550°F) with a baking steel or stone inside. Make sure your oven is at the required temperature for at least 30 minutes before baking, so the steel or stone can fully preheat.
-
Divide the dough in half (about 200g per piece). Working with one piece at a time, transfer the dough to a well-floured surface.
-
Stretch and fold the dough as follows: Holding onto the dough at both ends, pull one end away from the other, then fold it back onto itself. Repeat on the other side. The dough will likely be sticky — don't worry about it looking neat as you fold. Be sure to keep your hands floured as you work.
-
Repeat this process on the other side of the dough, so that all four corners of have been stretched and folded.
-
Next, pull the ends of the dough towards the middle, then turn it over. Using your fingers, pull the dough under itself to make a smooth, round ball with the seams tucked into the bottom.
-
Repeat with the second piece of dough and place each ball seam-side down into a floured bowl.
-
Cover the bowls and allow the dough to rise for 45 minutes to an hour, while your oven preheats. In colder weather, place the bowls near the preheating oven to stay warm.
-
Generously flour a baker's peel; if using a wooden peel, rub flour into the board to completely coat. If you're using a metal peel, or if this is your first attempt at homemade pizza, place a piece of parchment on the peel or the back of a baking sheet instead of using flour.
-
Gently transfer the risen dough to a well-floured work surface seam-side down (a bowl scraper is helpful here), using care to keep it as round as possible for easier stretching. If the dough feels wet, dust the top generously with flour. If dough feels drier, use less flour.
-
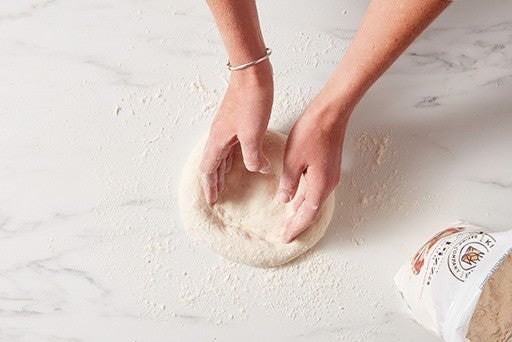
Use your fingertips to gently depress the dough, being careful not to touch the outer edge of the crust. This step is important — leaving the circumference untouched at this stage will result in a beautiful, bubbly outer crust post-bake.
-
Again, using care not to touch the outermost edge of the crust, lift the pizza from the work surface and use your knuckles to gently stretch the dough into a 10" to 12" circle. If the dough is at all sticky, use more flour. Use two hands at once to gently move the dough in a circle, allowing gravity to perform the stretch. Let gravity do most of the work for you, as pulling will stretch the center more than the edges. If you find your dough is difficult to stretch, set it down on a floured surface for 5 to 10 minutes to allow the gluten to relax.
-
Move the dough to the floured peel (or floured sheet of parchment) and adjust it so none is hanging off the edge. Remember — if the dough is sticky when you put it on the peel, it will stick to the peel so flour generously.
-
If you're using parchment, trim the excess around the dough to prevent it from burning. To be safe, trim the paper flush with the dough, especially if your parchment's heat rating is below 500°F, as many are.
-
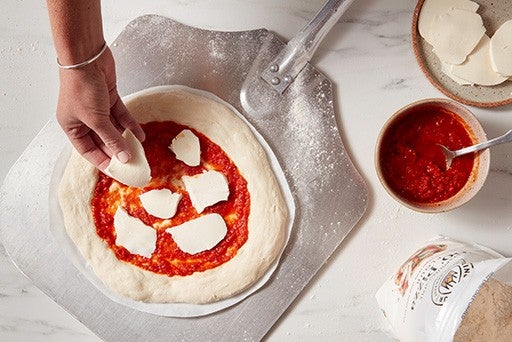
To assemble the pizza: Add about 1/4 cup (roughly 74g) of sauce to the dough and spread to cover, leaving a 1" to 1 1/2" border around the edges. Distribute half the mozzarella on top of the sauce.
-
If you're using a wooden peel, jiggle the uncooked pizza back and forth until it moves easily on the peel before quickly transferring it to the steel. If you're using parchment, gently slide the pizza and parchment onto the steel. The parchment will blacken around any exposed edges but remain intact under the pizza.
-
Bake the pizza for approximately 6 minutes on the steel or 7 minutes on the stone (give or take).
-
Turn on the oven’s top broiler and continue cooking the pizza for 2 to 3 minutes or until bubbly and charred around the edges. Keep a close eye on the pizza at this stage and rotate it as needed to prevent burning on the top. Remove the pizza from the oven and top it with fresh basil leaves.
-
Switch your oven back to bake mode and allow the steel or stone to reheat while you shape your second pizza with the remaining dough and toppings. Bake the second pizza using the method described above (steps 18 through 20).
-
Storage information: Margherita pizza is best enjoyed fresh from the oven but can be stored, covered, in the refrigerator for up to 3 days. Slices can be reheated in a 300°F oven for 5 to 10 minutes or until warm.