Berry Mirror Glaze

Recipe by Lydia Fournier

Mirror glaze is one of the most spectacular ways to finish a cake: as its name suggests, it’s wonderfully smooth and shiny, making your layer cake positively sparkle. And you can make it in a variety of berry flavors to complement whatever it’s covering. A note of caution: Timing and temperature are critical here; be sure to follow the recipe exactly and see our blog post on how to make mirror glaze for details.

Prep
16 mins
Total
1 hr 31 mins
Yield
2 1/4 cups, enough for two to three 8” layer cakes
This page contains affiliate links that allow King Arthur Baking Company to earn a sales commission at no additional cost to you.
Berry Mirror Glaze - select to zoom
Berry Mirror Glaze video - select to zoom
Berry Mirror Glaze - select to zoom
Hide images

Instructions

Prevent your screen from going dark as you follow along.
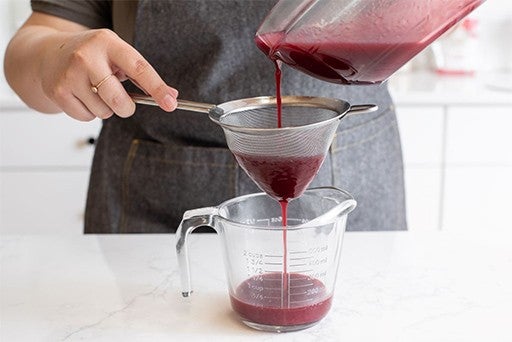
  1. To make the glaze: If you’re using frozen berry purée thaw it first, then stir to recombine any standing liquid. If the purée includes seeds, strain them out. If using fresh purée, strain it to remove the seeds. 

    Berry Mirror Glaze – Step 1
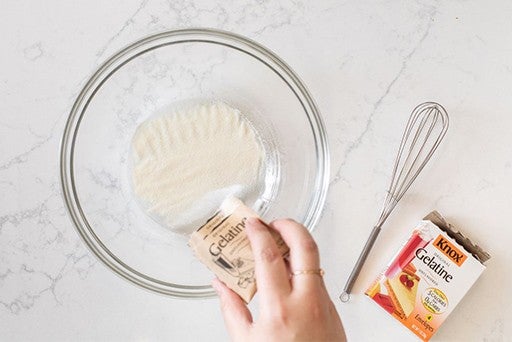
  2. In a medium heat-proof bowl, sprinkle both packets of gelatin at the same time over the bowl of cold water and quickly stir to combine; it will gradually soften (“bloom”). Set it aside. 

    Berry Mirror Glaze – Step 2
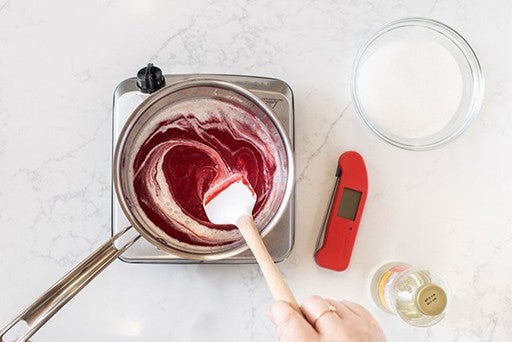
  3. In a medium saucepan set over medium-low heat, mix the purée with the heavy cream or coconut milk, sugar, and corn syrup. 

    Berry Mirror Glaze – Step 3
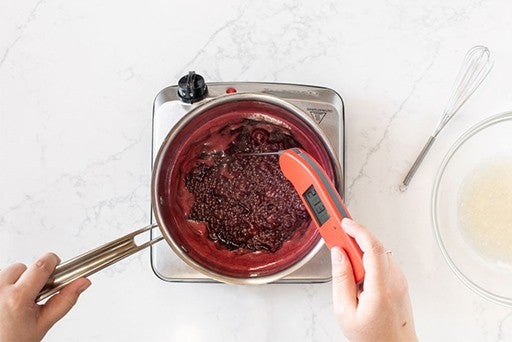
  4. Cook, stirring occasionally, until the mixture boils, the sugar has fully dissolved, and the temperature reaches 215°F. 

    Berry Mirror Glaze – Step 4
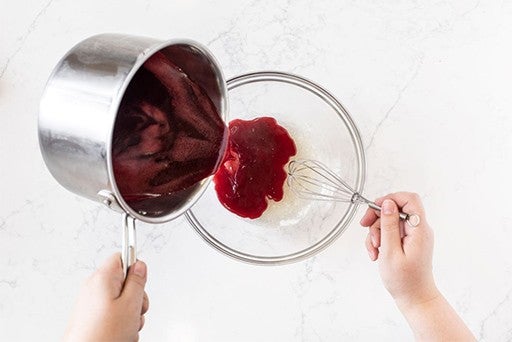
  5. Turn off the heat and pour the hot fruit mixture over the bloomed gelatin. Stir gently with a spatula or whisk until the gelatin melts and dissolves. 

    Berry Mirror Glaze – Step 5
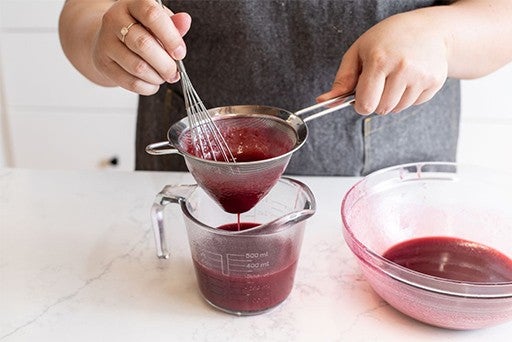
  6. Pour the mixture through a fine-mesh strainer into a bowl or large liquid measuring cup. Let it cool at room temperature (stirring occasionally to prevent a skin from forming) for about an hour, until it measures 90°F on a digital thermometer. To cool the glaze more quickly, set the bowl over an ice bath. Stir constantly while monitoring its temperature to prevent the edges from getting lumpy. 

    Berry Mirror Glaze – Step 6
  7. Once the glaze is between 85°F to 88°F, use it immediately; or continue cooling to room temperature, then pour it into an airtight container. Refrigerate for up to two weeks before using; or freeze for up to a month. 

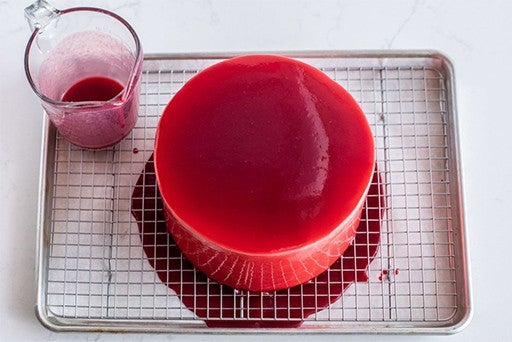
  8. To glaze a cake: Start with a frosted, thoroughly chilled cake. Set the cake onto a wire rack over a half-sheet pan lined with parchment (to catch the drips). Note: Timing is important here: don't remove the cake from the freezer until just before it's glazed. Removing it too early may cause condensation, which in turn can cause the glaze to slide off. 

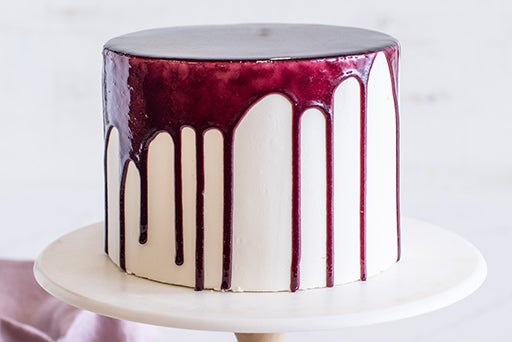
  9. Pour the 85°F to 88°F glaze over the cake, starting in the center and slowly moving outward in a circular motion. Stop pouring once the sides of the cake are fully covered; the glaze will set up very quickly.  

    Berry Mirror Glaze – Step 9
  10. Run a hot knife or offset spatula around the bottom edge of the cake to release it from the rack and transfer it to a serving plate or cake stand.  

    Berry Mirror Glaze – Step 10
  11. The cake will be at its best if it rests at room temperature for two to three hours before serving. Or refrigerate it overnight, well covered; then bring it to room temperature and serve the following day. 

  12. If your glaze has been refrigerated or frozen: Reheat the glaze over medium heat on the stovetop, stirring frequently, until smooth. Or reheat in the microwave in 20- to 30-second bursts, stirring with a spatula between bursts; avoid using a whisk, as you don’t want to incorporate any air. Let the glaze cool at room temperature, stirring occasionally, until it reaches 90°F.  

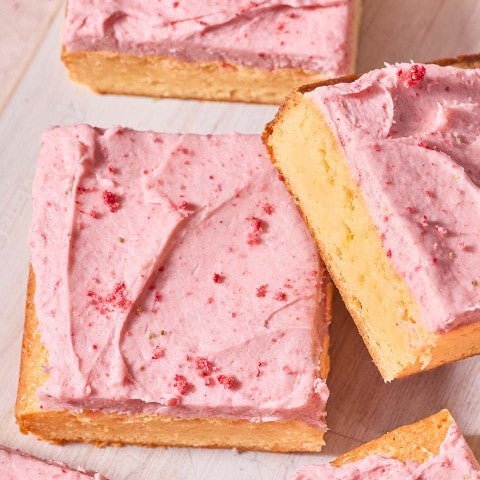
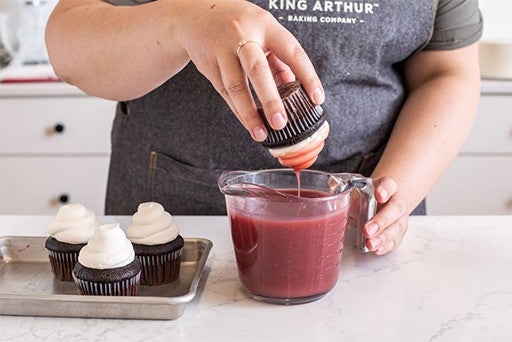
  13. Immediately pour the glaze over cold cake, cupcakes, fruit bars (like our Raspberry-Lime Rickey Bars), or a mousse dessert.

    Berry Mirror Glaze – Step 13

Tips from our Bakers

  • Berry purée can be purchased online – our test kitchen used Ravifruit in all our testing. Ravifruit makes raspberry, strawberry, blackberry, blueberry, and mango purées that work well in this recipe.

  • To make your own berry purée: Add 20 ounces (570g) of fresh or frozen unsweetened berries to the bowl of a food processor or blender. (If using frozen berries, thaw before using. Do not drain any excess liquid.) Purée the fruit until smooth. Pour the purée into a large measuring cup or small mixing bowl and add 1/4 cup (50g) granulated sugar before using. 

  • Berry purée works best in this recipe, as other fruits have enzymes and acid in them that can cause the gelatin to break down. That being said, we’ve found that mango purée also works well in this recipe. To make a mango version, use 1 cup plus 2 tablespoons (300g) mango purée (not mango nectar) and proceed with the recipe as written. 

  • Mirror glaze is very thin and designed to be poured over a frosted cake rather than a “naked” one. For best results use a very smooth frosting, like Italian or Swiss buttercream

  • This is a good make-ahead recipe. All the components (cake layers, frosting, glaze) can be made in advance, then the cake assembled, chilled, and finished just before serving.   

  • Another option for styling mirror glaze is to create a drip cake. Use the same setup and approach as you would to fully coat a cake but pour the glaze more slowly and use less glaze overall. Stop pouring once it starts to drip down the sides of the cake, a bit before you're satisfied with the number of drips. The glaze will continue to spread over the sides of the cake after you've stopped pouring.

    Berry Mirror Glaze