How to frost cupcakes for any skill level
Decorate like a pro (even if you’re just a beginner).

Date
October 21, 2022

Baking is both a science and an art. But when it comes to cupcakes, it’s all about embracing the creative side. You need to know a thing or two about how to bake cake, but once your cupcakes are out of the oven, you’ll have dozens of blank canvases to decorate. Whether you’re a beginner baker or a decorating pro, here's a range of techniques to frost your cupcakes with style.
Before diving into decorating, make sure you’re setting yourself up for success by choosing a reliable cupcake recipe (or turning one of your favorite cake recipes into cupcakes). Make sure the cupcakes are properly baked and fully cooled before attempting to decorate. (Putting frosting on a warm cupcake will turn it into a melty mess.)
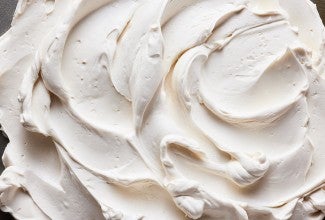
As for frosting, choose your own adventure: If you’re more of a beginner, consider using Easy Vanilla Buttercream Frosting (American-style buttercream), Super-Simple Chocolate Frosting, or Cream Cheese Frosting (which is super forgiving).
If the idea of double boilers and hot sugar syrup doesn’t scare you, consider making Swiss or Italian Buttercream, both of which are ideal for decorating because they pipe smoothly and hold their shape. There’s also meringue, a marshmallow-like spread that’s soft and sticky — we’ll use that for one of our more advanced techniques (brûléed cupcakes!).
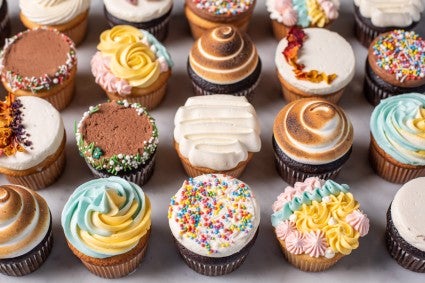
Once your cupcakes are baked and the frosting prepared, it’s time to decorate. Here are seven techniques to try, starting with the easiest approach to the most advanced.
Technique #1: No pastry bag required
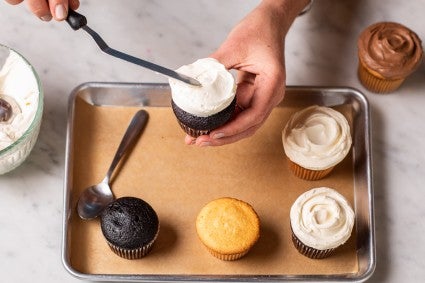
If you’re a baker without any special decorating equipment, you can still create elegant cupcakes using basic kitchen tools, like a spoon or butter knife.
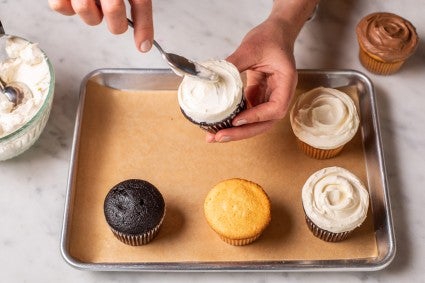
How to decorate: Use a cookie scoop or a large tablespoon to dollop about 1 1/2 to 2 tablespoons of frosting onto a cupcake. Use the back of a spoon, a non-serrated butter knife, or a small offset spatula to spread the frosting to the edge and remove any excess. While pressing down on the frosting slightly, move your tool in a spiral pattern from the outer edge to the center of the cupcake, which will create a pretty swoop as a finishing touch.
Technique #2: The classic swirl
Once you’re ready to begin working with pastry bags and tips, you’ll enter a whole new world of decorating options. Read this post about how to use a pastry bag so that you begin with a cleanly filled bag. You’ll also want at least one basic star tip (either open or closed); you can use any size, but larger tips tend to look more professional.
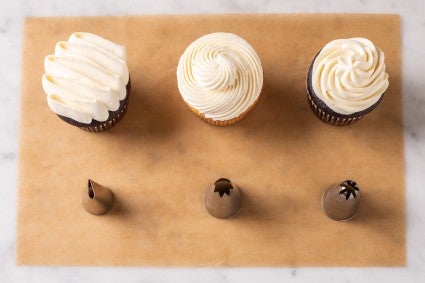
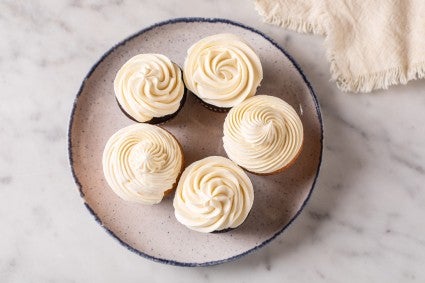
How to decorate: Fit your pastry bag with a closed or open star tip and fill it with frosting. Starting at the outside edge of the cupcake, pipe frosting in a swirl with the tip about 1/4" to 1/2" above the cupcake, exerting even pressure on the bag continuously. Finish the swirl in the center of the cupcake by removing pressure and lifting up the tip slightly as you near the center.
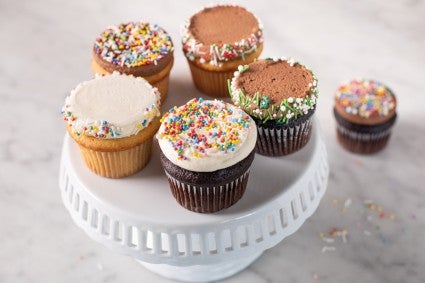
Another option is to start your swirl in the center of the cupcake and work your way to the edge to create a rosette look (see the cupcake at the top of the plate in the photo below). Try switching between open and closed star tips, as well as swirling from the center out and the center in. All will produce slightly different-looking swirls. You can’t go wrong; find which one you like best!
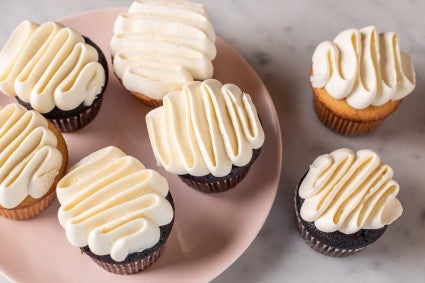
Technique #3: The squiggle
Once you can handle the classic swirl, use the same skills to create a more unique-looking approach. We affectionately call it “the squiggle.”
How to decorate: Fit your pastry bag with a petal tip (it looks like a teardrop) and fill it with frosting. The smaller the petal tip, the more intricate the squiggle will be.
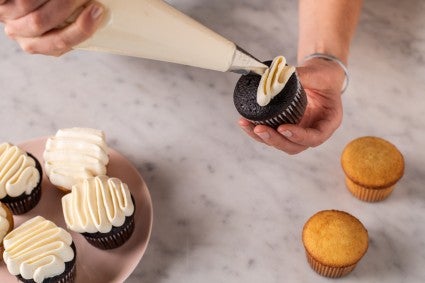
Hold the cupcake in your non-dominant hand at roughly a 45-degree angle. Start with the tip at the top of the cupcake oriented so that the thin, pointed edge of the tip is at the top. Exert pressure on the pastry bag continuously as you move the tip back and forth, working your way to the bottom edge of the cupcake until the top is fully covered.
While some might call this next set of decorating approaches more advanced, they only require a bit more patience to set up and/or execute.
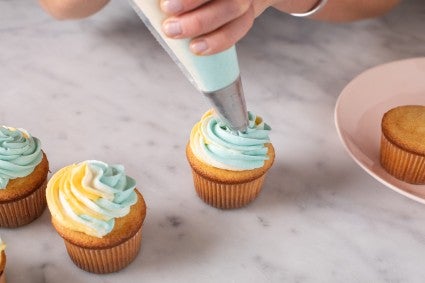
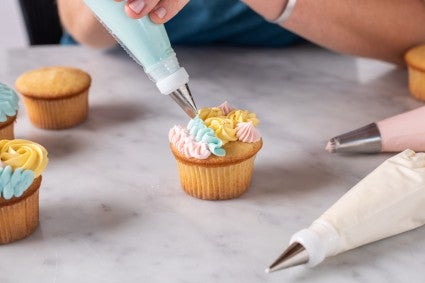
Technique #4: Multicolored frosting
If you love color, this technique is for you. You can create a two-tone or three-tone effect by putting multiple pastry bags (each holding a different color of frosting) into one.
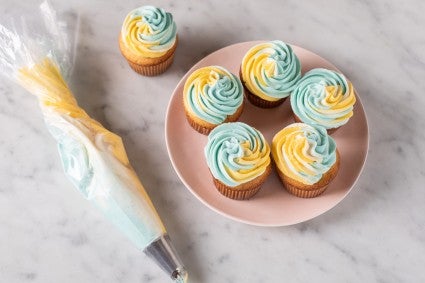
How to decorate: Use food coloring to tint two or three portions of white frosting. (It’s helpful to leave at least one portion of frosting uncolored to prevent the colors from blending too much.) Put each color of frosting into its own pastry bag, filling it only about a third of the way. If using disposable pastry bags, snip about 1/2" off the tip. Place the prepared pastry bags into another (ideally larger) pastry bag fitted with your tip of choice.
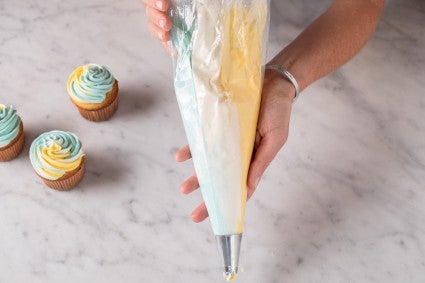
Pipe the initial bit of frosting onto a piece of parchment or a practice cupcake; all the colors may not appear at first. Once all the colors are coming out of the tip, pipe as you wish.
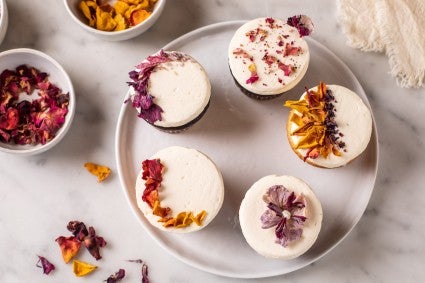
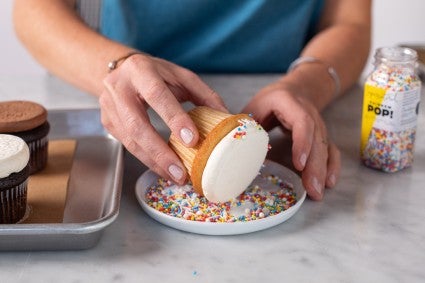
Technique #5: Flat-topped cupcake
This is my new favorite frosting technique — I love the flawless appearance of the flat surface and the ability to coat only the edges in garnish. It’s very simple but does require some planning ahead because of necessary chill time.
How to decorate: Fit your pastry bag with an open tip that’s about 1/2" to 3/4" in diameter; I used a size #807 for these cupcakes. Fill it with the frosting of your choice; note that the higher the butter content, the smoother the final frosting will be.
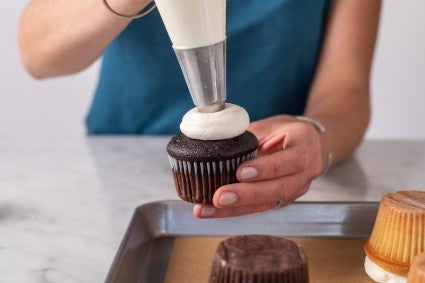
When you’re ready to pipe, hold the tip about 1/2" above the center of the cupcake and exert even pressure so that the frosting forms a disk on the surface. Stop squeezing when the entire top is covered, leaving a 1/2" ring around the outer edge.
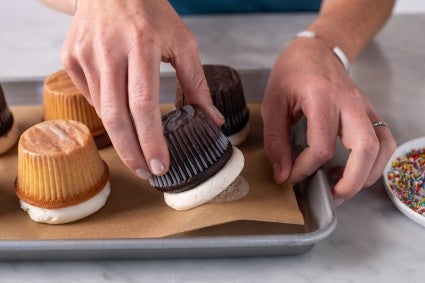
Turn the cupcake frosting-side down onto a parchment-lined baking sheet. Gently press the bottom of the cupcake so that the frosting expands to the full width of the cupcake. Repeat with the remaining cupcakes, then place the baking sheet into the refrigerator and let the cupcakes chill, frosting-side down, for about 15 minutes.
Once the cupcakes have chilled, turn each cupcake frosting-side up, gently peeling off the parchment. At this point, you can press the frosted cupcake tops into a shallow bowl of sprinkles; the edges can be rolled in a garnish, like chopped chocolate or sparkling sugar; or you can arrange edible flower petals on top in a pretty design. Or they can be left “naked,” and will look elegant as is!
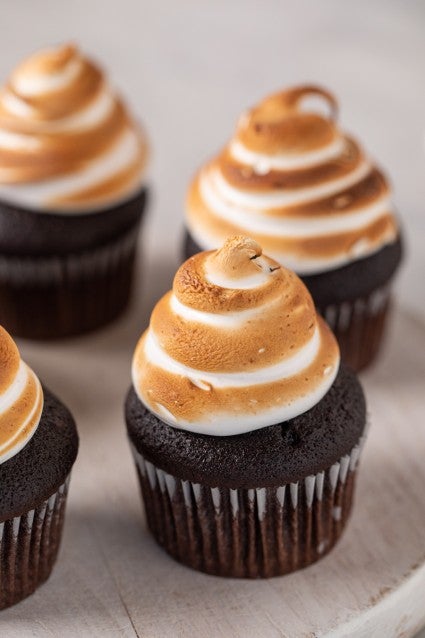
Technique #6: Brûléed cupcakes
If you don’t like working with fine details but want to make striking, unique cupcakes, try this brûléed technique. It requires meringue topping or homemade marshmallow spread for best results. (You can swap in full-sized or mini marshmallows for a shortcut.)
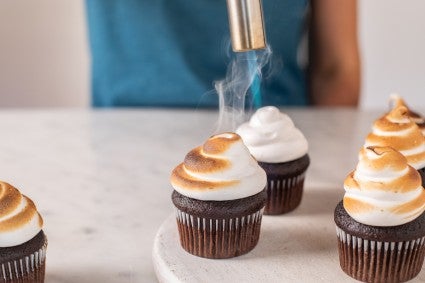
How to decorate: Fit a pastry bag with an open tip about 1/2" to 3/4" in diameter. Fill with meringue (or marshmallow spread) and pipe frosting in the center of the cupcake in three mounds, stacking one on top of the other to create a “high hat” or three-tiered look.
Use a baker’s torch to brûlée the topping; start with the torch 8" to 10" away from the cupcake. Slowly move the torch closer to the cupcake until the topping starts to take on color, then rotate the torch around the cupcake, continuously moving the flame to prevent over-browning. Stop once the cupcake is as golden brown as you like.
If you don’t have a torch, you can use your oven’s broiler on high to toast the meringue. The cupcakes will only need a few minutes in the oven before they start to take on color; don’t walk away because cupcakes can go from golden brown to burned quickly. (Although don't worry too much if some parts become quite dark — some people like their marshmallows burned!)
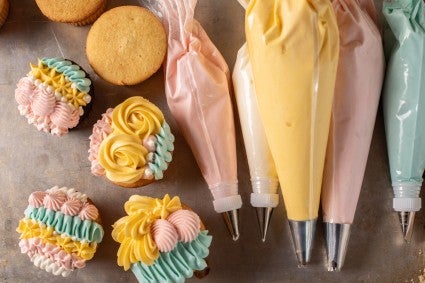
Technique #7: Combination approach
If you love more detailed work, this approach is for you. We call this the “combination approach,” because it allows you to mix and match your favorite piping techniques all on one cupcake.
If you try this technique, use a helpful tool called a coupler. (It comes in many basic pastry sets.) If you put a coupler inside the pastry bag before adding frosting, you’ll be able to switch between tips quickly and easily.
How to decorate: Fit a pastry bag with a coupler or prepare a few pastry bags fitted with tips of varying sizes and shapes. Start with the tip that’s the largest and frost a portion of the cupcake with the design of your choice: A few large rosettes is a good start.
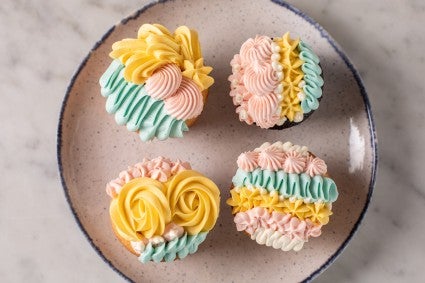
Next, move onto a medium-sized tip and pipe a different design next to the first. You can repeat this process using as many tips as you like. One final element that can help the decoration look cohesive is very small dots piped with a fine tip placed across all the elements, filling any empty spots.
Find recipes for both cupcakes and frosting on our recipe site. Pick up a set of pastry bags and piping tips to get started! (Then learn the best way to eat a cupcake!)
Cover photography by Jenn Bakos; food styling by Lydia Fournier and Kye Ameden.