


I have to admit that when it comes to holiday candy, I'm a "day after" kind of gal. I shop for my Valentine's chocolates on Feb. 15, I shop for my Halloween fun-sized goodies after November 1st, etc. etc. etc. However, there is one exception...
Easter candy. I love Easter candy and will start buying jelly beans and gumdrops as soon as they start appearing on shelves. I truly believe that chocolate bunnies are meant to be scoops for peanut butter and that a Reese's peanut butter egg is the best shape ever for a peanut butter cup. (It just tastes better that a round one, I swear).
Another perennial favorite are Jolly Rancher candies. Each one is like a little jewel, crystal clear sparklingly colorful, and scrumptiously flavorful. A bowlful on the table looks like you've captured a rainbow.
Luckily, there is a great technique that allows me (and YOU) to combine luminous candy and baking into some of the lovely cookies you've ever seen.
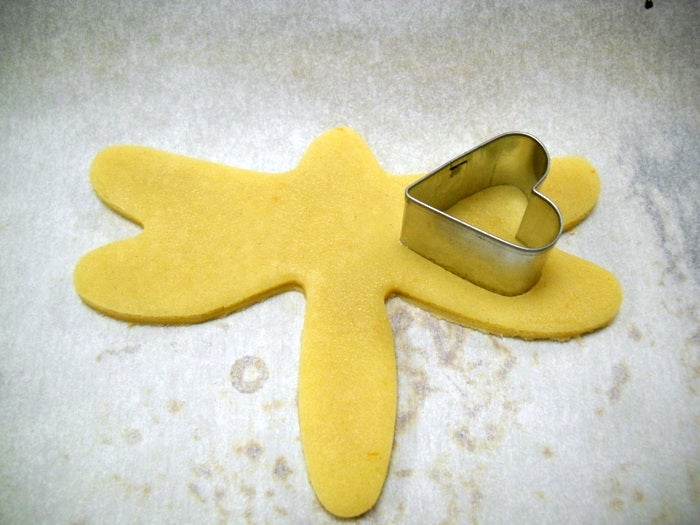
You'll need a batch of your favorite roll-out cookie dough, a bag of colorful hard candies (Jolly Rancher and Life Savers are test kitchen favorites), and an array of cookie cutters. With the range of cutters we have, your imagination will be running wild in no time.
Let's get started making these stained glass cookies.
Roll your cookie dough out to 1/4" thickness. You want the cookies a little on the thicker side to give the candy a deep "well" to sit it.
Cut out shapes and designs, being sure to leave plenty of cookie between cuts for structure.
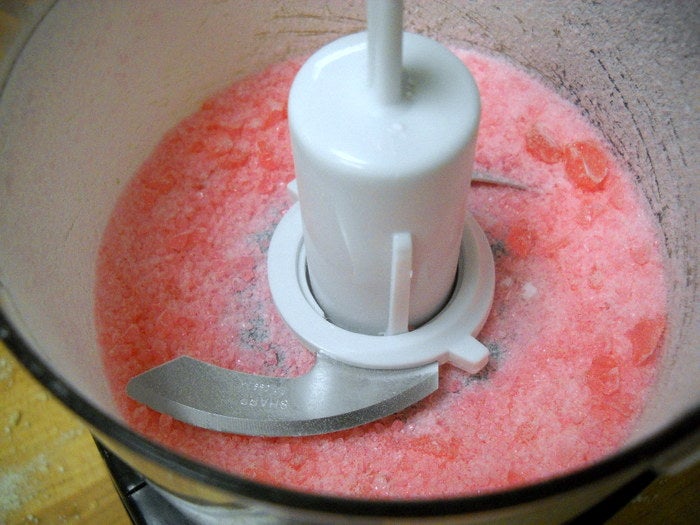
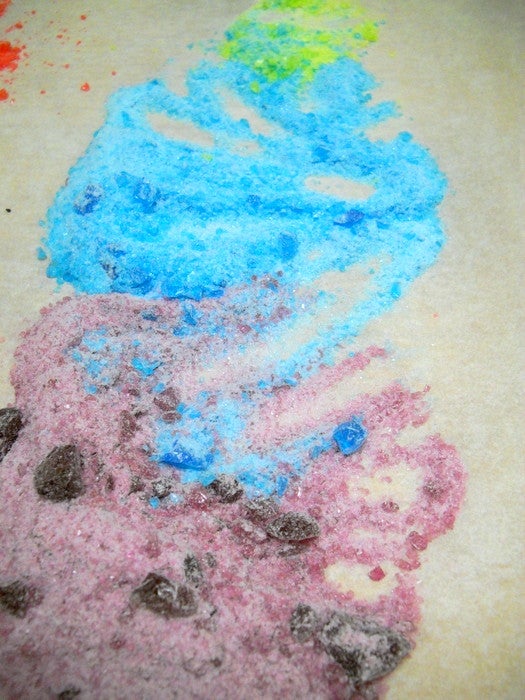
If you are using multiple colors of candy, a mini food processor can be a real time-saver. Start with your lightest color of candy and progress to the darker colors. You won't need to wash the chopper between batches either, which is a huge bonus in my book.
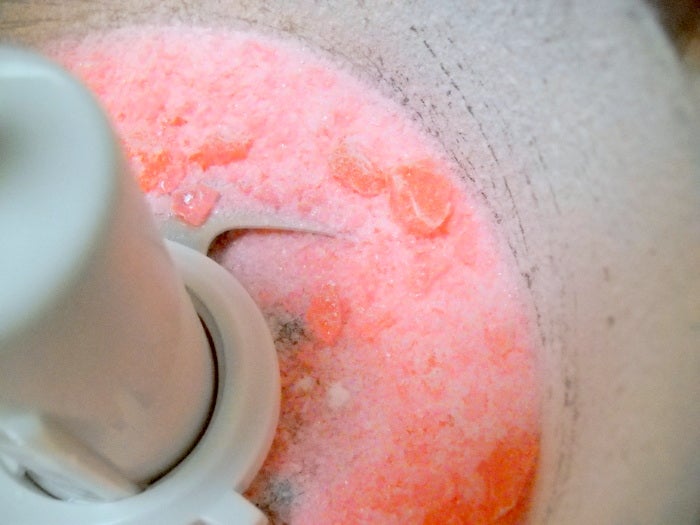
Grind or break the candy until you have a good amount of chunks, but also some finer pieces. You don't want to blend the whole mixture to powder, that's actually a bit too fine. Shoot for pieces the size of mini chocolate chips.
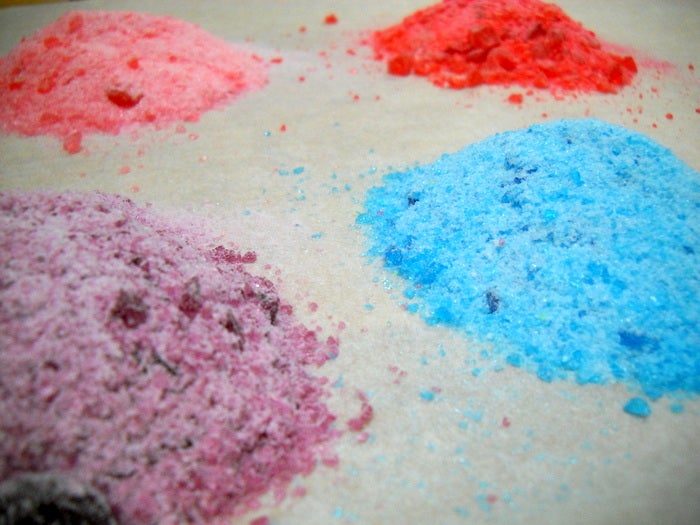
To make your "palette" , pour your crushed candy out onto a parchment-lined baking sheet or tray. Gather several small measuring spoons or baby spoons. I'm partial to 1/8 and 1/4 teaspoons.
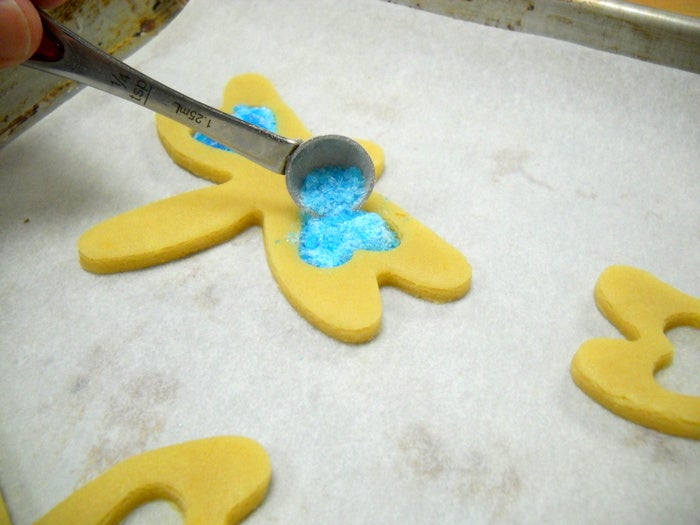
Use the small spoons to fill the cut-outs with crushed candy. You'll want the candy slightly mounded in the wells, but not so much that it spills over onto the cookie.
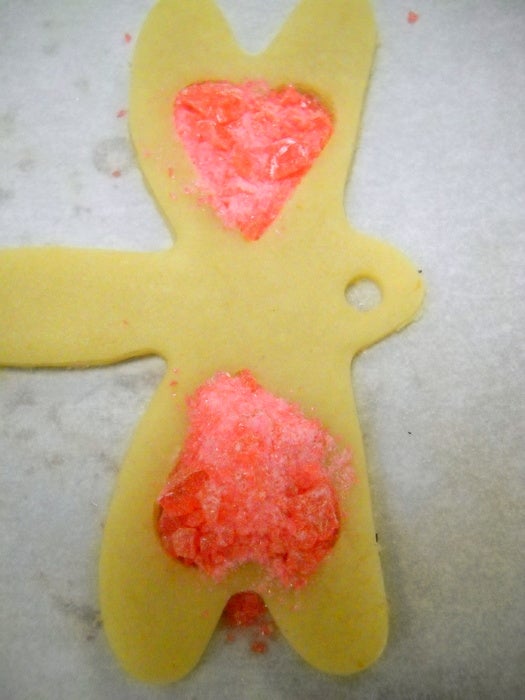
The top well of this cookie is filled just right. The bottom, not so much. You can see how the candy has spilled over already, which will bake onto the outside of the cookie. Not a ruination by any means, but try to avoid overfilling.
These cookies are beautiful already and they haven't even been baked yet!
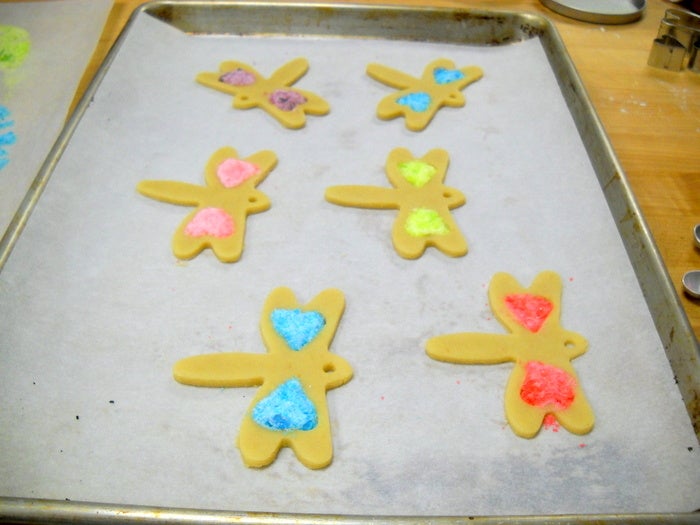
One of my favorite things about making these cookies is when the colors begin to get blended together. Try scooping from the mixed sections, you can get some amazing swirls and stripes in your "glass".
Bake the cookies in a 350°F oven for 10 to 12 minutes or until lightly browned. If your cookies are larger, baking time may be longer. I do recommend sticking to the smaller cookies for this technique so that your candy does not burn before your cookies are done.
Allow the cookies to cool completely on the parchment. The candy needs a chance to set and firm up again, so don't move them too soon.
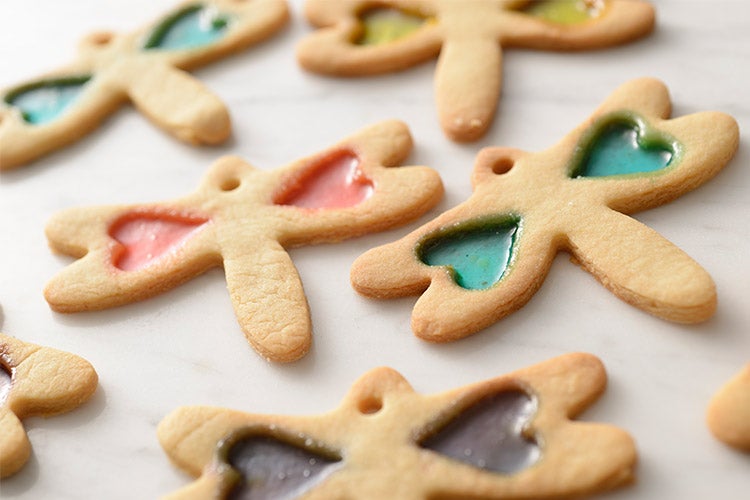
Once they are cool and firm you can peel them up and serve them, or use them to decorate your home and kitchen. These dragonflies had holes added before baking, and would look enchanting hanging in a bright window.
Enjoy trying this technique as spring approaches and the outside world begins to blossom with color. And if you are still buried in snow, well you'll just have to make your own rainbows!
Do you make stained glass cookies? What are your favorite flavors and colors to make them with? Let us know in the comments, below!