How to make caramel (without breaking a sweat)
Caramel is harder than boiling water, but not by much. Here's how to do it.

Date
December 12, 2022

Homemade caramel can be intimidating. Who isn’t a little hesitant about boiling sugar syrup?!
But it’s also worth making, because caramel made at home is deeply flavorful, with an intense combination of bitter, sweet, buttery, toffee, and vanilla flavors that make for intriguing complexity. Compare that to the sickly sweet and oddly one-note flavor of store-bought caramel, and you’ll see why it’s worth making yourself.
And there’s good news: Despite its formidable reputation, caramel is actually incredibly simple to make. Here’s how to successfully make caramel at home, even if you’re a beginner.
Caramel is made by heating sugar to the point where it melts, causing a breakdown of sucrose molecules into different flavor compounds. Think about the flavorless sweetness of white granulated sugar and the deep, dark complexity of caramel sauce. Caramelization is the process through which heat transforms the former into the latter.
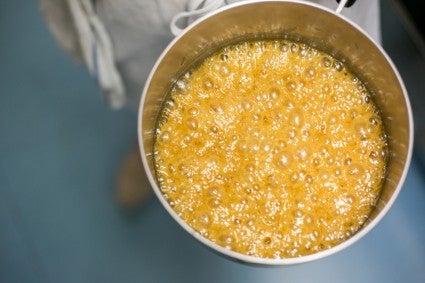
Caramel is made by heating sugar (either with a liquid or by itself, more on that below!) in a heavy-bottomed saucepan until it melts and becomes clear. The liquefied sugar is then cooked, without stirring, until it darkens in color, taking on additional flavor notes the longer it remains on the heat. You want to hit the sweet spot here: If the caramel is too light, it won’t have much flavor, but if it gets too dark, it will taste burnt and bitter. Keep an eye as the sugar cooks, as it can gain color quickly! (If possible, choose a light-colored pot, so you can more clearly see the color of your caramel as it cooks.)
Some form of dairy — typically butter and/or heavy cream — is usually added to the mixture at either the beginning or the end of cooking. This addition makes the caramel richer, thicker, and lighter in color, lending more viscosity and rounder flavor.
Once the caramel has reached your desired done stage, it’s important to stop the cooking by placing the pan in an ice water bath — otherwise, the sugar may keep cooking, becoming too dark and potentially burning. Alternatively, remove the caramel from the heat when it’s a shade or two lighter than what you want — it will continue to cook.
Wet caramel is made by combining sugar and a liquid and cooking them together, while dry caramel is made from just sugar, heated in a dry pan until it liquefies and browns.
“For the dry caramel method, it’s best to have a shallow, wide saucepan,” says Mel Wanders, a former caramel class instructor at the King Arthur Baking School. Mel adds, “Gently moving the sugar in a paintbrush-like fashion helps the sugar melt and caramelize evenly without forcing the mixture up the sides of the pot and causing crystallization. Using a heatproof silicone spatula, move the spatula gently back and forth on the bottom of the pot, as if you were painting a wall with a paintbrush (side to side like a brush stroke as opposed to stirring in a circle).”
When making a dry caramel, ensuring all the sugar granules are melted before caramelization starts is key. Mel explains that if the heat is too high, some of the sugar will melt and start to caramelize before the rest of the sugar is melted, which can result in grainy caramel. To keep this from occurring, go low and slow: Heat the sugar over low to medium-low heat and keep it in motion by gently moving it back and forth with a silicone spatula in that brush stroke motion. It also helps to spread your sugar in the pot in an even layer; leaving it in a big mound can make some sugar burn before the rest has liquefied.
Dry caramel is quicker to make than wet caramel, but it’s also trickier: Without additional liquid, the sugar can caramelize very quickly, burning before you realize it. Using moderate heat, as Mel suggests, can help safeguard against burning, as can vigilance: Don’t walk away from the pan once you’ve started. Keep a close eye on the color of the sugar and as it approaches a reddish-brown, remove it from the heat.
When making a wet caramel, water is added to help dissolve the sugar before cooking. Like dry caramel, you want to gently move the sugar mixture in that same side-to-side paintbrush-like fashion until the sugar dissolves. Then, as soon as the mixture comes to a boil, it should not be stirred, as the agitation can cause crystallization. “It’s best to start a wet caramel over low heat until the sugar has dissolved, then increase the heat to medium for caramelization,” says Mel. “As the water evaporates, the sugar eventually caramelizes.”
The wet method is used to take the caramel to various stages, including soft ball, firm ball, hard ball, etc. It also has a bigger margin of error since the sugar is more evenly distributed — because it’s dissolved in water, there are no places in the pan where you may have a thicker (or thinner) layer of sugar, as in dry caramel — and less likely to burn, so it’s recommended if you’re new to caramel or still getting the hang of things.

Temperature matters when making caramel. How hot the liquid mixture gets will determine its consistency once it cools. Typically, recipes will provide temperature guidelines, which is why it’s helpful to have a thermometer on hand to quickly and accurately evaluate your caramel.
If you don’t have a thermometer, you can approximate your measurements by dropping a spoonful of the hot caramel into a bowl of ice water. The caramel will seize up, and its consistency once it does so will give you a sense of its temperature. If the caramel forms a pliable soft ball, for instance, it’s around 240°F. If it forms a hard ball, it’s between 250°F to 260°F, etc. Sometimes recipes will even use the descriptors below to specify the stage your caramel should be cooked to.
| Stage | Degrees Fahrenheit | Uses |
|---|---|---|
| Thread | 215°F to 230°F | Pourable sauce/syrup |
| Soft ball | 240°F | Soft, sticky caramel candies |
| Firm ball | 245°F | Chewy caramel candies |
| Hard ball | 250°F to 260°F | Firm caramel candies |
| Soft crack | 265°F to 270°F | Butterscotch, taffy |
| Hard crack | 295°F to 310°F | Hard toffee, brittle, etc. |
| Caramel | 320°F | Praline, brittle, etc. |
Adapted from Mastering the Art and Craft: Baking and Pastry
One of the biggest potential pitfalls of caramel is having it turn out grainy, rather than smooth and velvety, because the sugars crystallize. Several techniques can prevent this:
Brush the side of the pot with water: Stirring caramel after it has come to a boil incorporates air and forces sugar granules up the side of the pot — which can be cooler than the base — and causes recrystallization. If the crystallized sugar drops into the liquid caramel, it can seed additional crystals. “Ensure there are no granules of sugar on the sides of the pot by brushing them down with water,” recommends Mel.
Cover the pot: Alternatively, Mel says you can periodically cover the pot with a lid to trap steam, which causes water drops to fall down the sides of the pot and melt any crystallized sugar on the sides. Uncover once the crystals are dissolved.
Swirl, don’t stir: While slow, deliberate stirring will help the sugar dissolve evenly, you want to stop stirring once it has fully melted. From this point on, gently swirl the pan while the caramel cooks to ensure the sugar solution caramelizes evenly and to avoid too much agitation than can potentially lead to recrystallization.
Add an acid: Adding an acid keeps sugar from recrystallizing by breaking down a portion of the sucrose molecules into fructose and glucose molecules. Our Caramel Sauce, for instance, includes cream of tartar as insurance against the sugar crystallizing.
Add an inverted sugar: Adding an inverted sugar (like corn syrup, honey, etc.) keeps sugar from recrystallizing by diluting the sucrose molecules with glucose molecules. That’s why a recipe like Mom’s Caramels includes corn syrup.
It’s important to be careful while making caramel, as the mixture will reach high temperatures that can burn your skin. Here are tips for safely working with caramel:
Gently heat any liquids prior to adding them to caramel — if they’re cold when added to the hot mixture, they may splatter.
Add liquids slowly and carefully while wearing long sleeves or oven mitts in case the mixture does splatter.
Use a pot with plenty of excess room, so the caramel has room to bubble up in the pan without overflowing.
Quickly rinse your skin with cold water (instead of wiping off) if the caramel splatters or spills on your skin.
Don’t taste the caramel until it’s cool. It may not look bubbly or sizzling, and after you add butter and cream you may think it has cooled enough to taste. But beware: The caramel is still super-hot, so wait until it has completely cooled down to avoid burns.
The hardest part of making caramel yourself may be cleaning up afterward. The sticky syrup can solidify in the pan, clinging to it with a dedication that might be admirable if it didn’t take so much scrubbing to undo.
Here’s how to avoid a sore arm and ruined sponge: Fill your used caramel pot with water and bring it to a boil on the stovetop; this quickly melts the caramel and makes the pot easy to wash without soaking for hours.
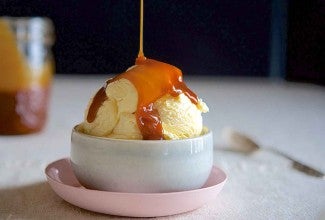
Caramel Sauce: If you need a classic caramel sauce to drizzle over ice cream or serve alongside pie, this is it. It’s a wet caramel that starts with sugar and water, as well as an optional touch of cream of tartar as insurance against crystallizing. Flavor with vanilla, rum, or a dash of boiled cider at the end for extra dimension.
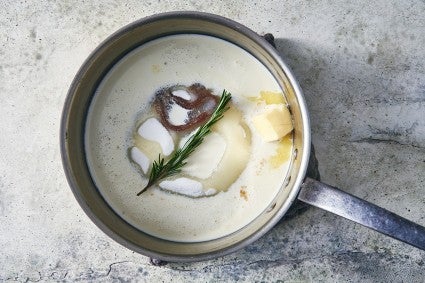
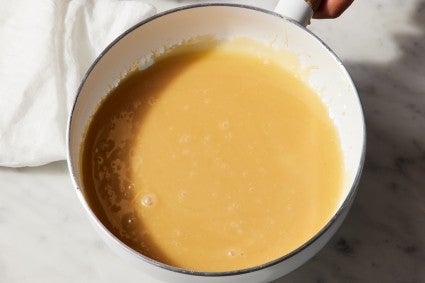
Salted Rosemary Caramel Sauce: With a heavy dose of salt, savory notes from the rosemary, and tart zing from boiled cider, this herbaceous sauce has even more complex flavor than standard caramel. It’s also slightly simpler to make — the recipe has all the ingredients combined in a saucepan at the beginning; from there, simply cook and swirl until it reaches the desired color and temperature.
Apple Cider Caramels: The best choice for people who don’t have a strong sweet tooth, these chewy caramels are alternately tart, spiced, and sweet — like a caramel apple in candy form.
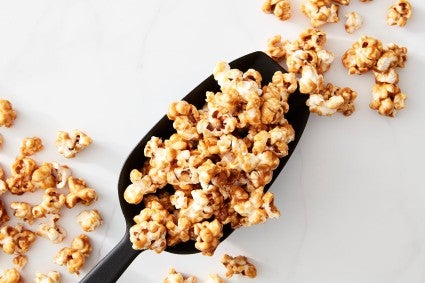
Carol’s Caramel Corn: This recipe starts with a caramel made from molasses and brown sugar for additional bitter and toffee flavor notes; there’s also corn syrup, which helps ensure a smooth, velvety texture. The caramel is drizzled over popcorn for a nostalgic ballpark treat.
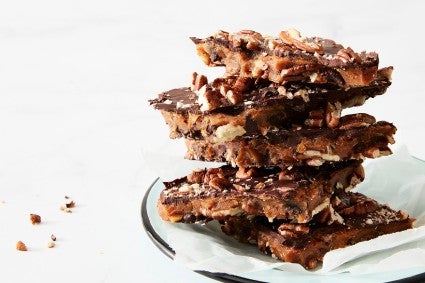
Milk Stout Caramel Tart: Dark stout beer adds notes of bitter hops, coffee, and malt to this tart's brown sugar caramel filling.
Cover photo (Salted Rosemary Caramel Sauce) and food styling by Liz Neily.