-
To make the rye sour: Weigh your flour; or measure it by gently spooning it into a cup, then sweeping off any excess. Mix the ingredients until all the flour is fully moistened; the mixture will be very stiff. Place the sour in a nonreactive container, sprinkle with a light coating of pumpernickel flour, cover, and let rest for 13 to 16 hours, preferably at a temperature of 70°F.
-
To make the old bread soaker: Cut the bread into 1" cubes and place them in a lidded container. Add the cool water, shaking the container to fully moisten the bread. Store the mixture overnight in the refrigerator. Next day, squeeze out the excess water and stir the bread until it breaks down and becomes the consistency of stiff oatmeal. Measure out 1/3 cup (3 ounces, 85g), and bring to room temperature (or warm briefly in the microwave). The remainder can be stored in the refrigerator for up to a week.
-
To make the dough: Place all of the dough ingredients in a mixing bowl. For best (and easiest) mixing and kneading, use a stand mixer; see manual kneading directions in "tips," below. Using the dough hook, mix on lowest speed for 3 minutes, then speed 2 for 3 minutes. Ideal dough temperature after mixing is 78°F.
-
Place the dough in an oiled bowl and cover. Allow the dough to rise in a warm spot (78°F) for 1 hour.
-
Deflate the dough; for best technique, see our video, how to deflate risen dough. Cover the dough and allow it to rest for 10 minutes on a floured surface, folded side up.
-
Preheat the oven and a baking stone (if you have one) for 1 hour at 460°F. For added steam, preheat a cast iron frying pan on the shelf below the stone for the same amount of time.
-
Shape the loaf into a bâtard, or football shape, taking care not to rip the surface of the dough. Use flour on your hands and the table to help prevent sticking. Pinch the bottom seam closed, if necessary.
-
Place the loaf on a lightly greased piece of parchment paper; sprinkle the parchment with coarse cornmeal before adding the loaf. Cover and let rise for 40 to 45 minutes in a warm spot (78°F).
-
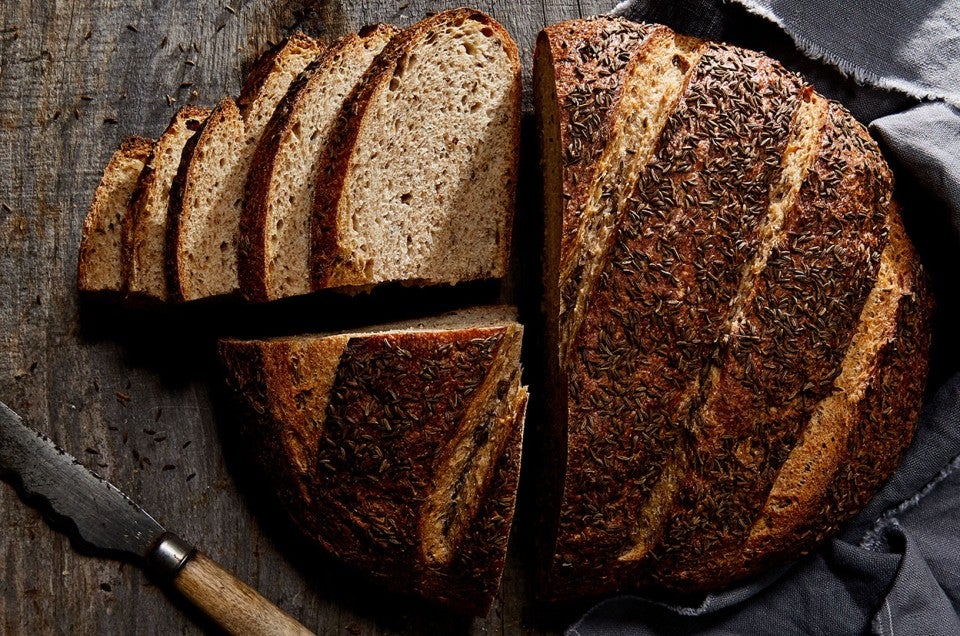
Spray or brush the top of the loaf with room-temperature water and sprinkle with additional caraway seeds. Score the loaf with five horizontal cuts across the top of the loaf, holding the blade perpendicular to the surface of the loaf. The cuts should slightly diminish in length as they approach the tips of the loaf.
-
Carefully place the parchment onto a peel (or the outside bottom of a baking sheet), and slide parchment and loaf onto the hot stone, partially covering the loaf with a stainless steel bowl (see "tips," below), to trap the rising steam. If you're not baking on a stone, simply transfer the parchment and loaf to a baking sheet, and place in the oven — cover partially with a stainless steel bowl.
-
Pour 1/2 cup boiling water into the frying pan and shut the oven door; this will create the steam necessary for a chewy, shiny crust. Bake the bread for 10 minutes, then remove the bowl.
-
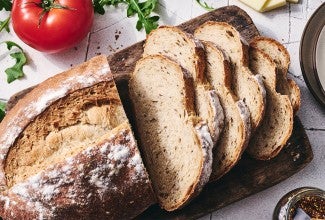
Reduce the oven temperature to 430°F, and bake 30 to 35 minutes more, checking often for color. The finished loaf should be a deep golden brown when done; its internal temperature should be at least 205°F.
-
Spray or brush the loaf with water again after removing it from the oven. Cool the bread on a rack overnight before slicing.
