
Editor's note: Since we first published this blog post, we've made some tweaks to our Gluten-Free Cinnamon Roll Recipe. You can follow along directly in this blog post to bake the original recipe, or we recommend baking directly from the recipe page and using this post as a reference for steps and baking tips. Happy baking!
Biting into a cinnamon roll fresh from the oven is a simple pleasure that everyone should experience, even those with dietary restrictions. Our test kitchen bakers have come up with a tried and tested cinnamon roll recipe that everyone — even those eating gluten-free — can enjoy.
When you need a special breakfast treat, turn to our Gluten-Free Cinnamon Rolls recipe: an easy-to-mix dough that encases cinnamon in each bite.
In this post, you'll learn everything you need to know to make this recipe. We’ll include make-ahead tips so you can bake this recipe for breakfast without waking up at dawn. Plus, we’ll share a dairy-free version that lets you share these rolls no matter what special diet you’re accommodating.
Before you know it, your kitchen will smell like butter, sugar and, of course, sweet, spicy cinnamon. It’s time to head to the kitchen!
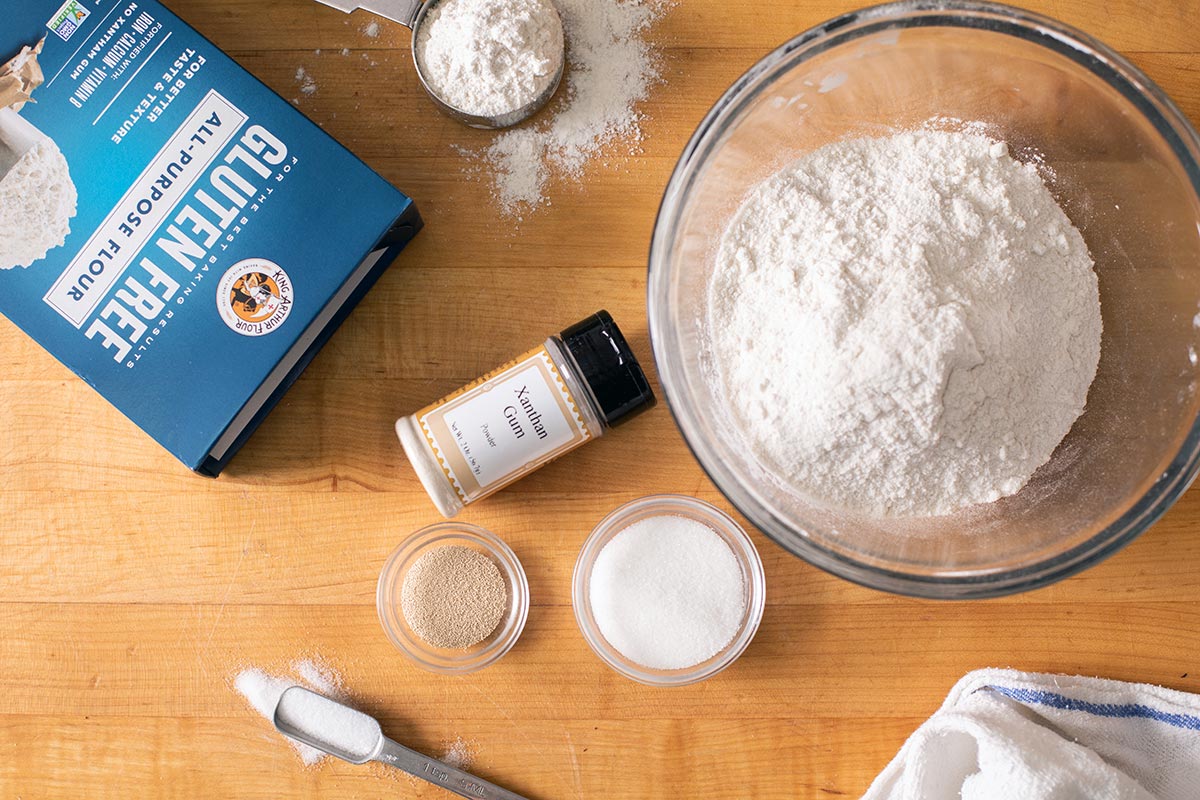
Before you start making these Gluten-Free Cinnamon Rolls, gather your ingredients. This ensures you have what you need and can proceed through the recipe quickly.
To make the dough, start by measuring the following ingredients into a large mixing bowl or the bowl of your stand mixer:
2 1/2 cups (390g) King Arthur Gluten-Free All-Purpose Flour
3 tablespoons (35g) granulated sugar
1 teaspoon salt
1 teaspoon xanthan gum
2 teaspoon instant yeast
Add 1/4 cup (57g) of soft unsalted butter to the dry ingredients. Mix, using the paddle attachment or a dough scraper until coarse crumbs form.
Next, measure these liquid ingredients into a small mixing bowl:
2 tablespoons (25g) vegetable oil
1 cup (227g) warm milk (about 90°F to 100°F)
1 large egg
1 teaspoon vanilla extract
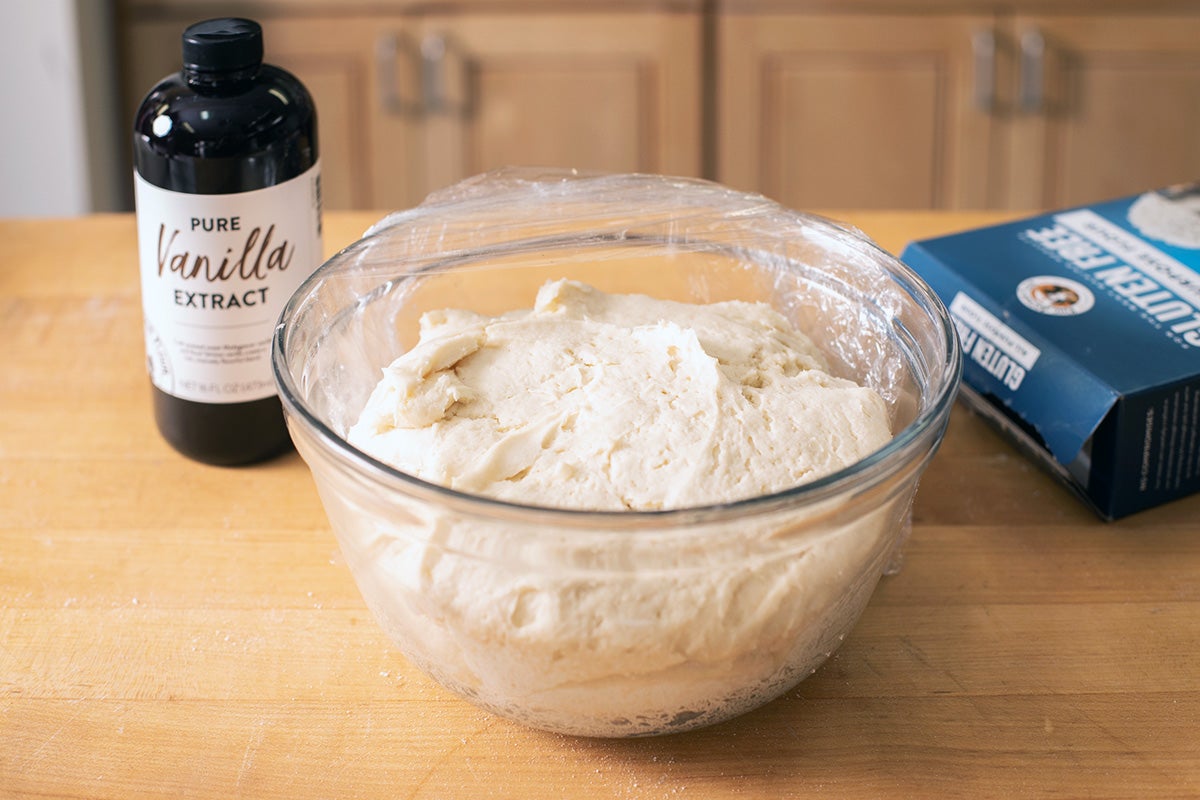
Add the liquid ingredients to the dry, and beat until the mixture is smooth. Scape down the sides of the bowl, removing any sticky bits. Beat on medium-high speed for 3 minutes. Beating adds air to the batter, making it lighter and improving the rolls' rise. It’s important to mix for the full 3 minutes for best results.
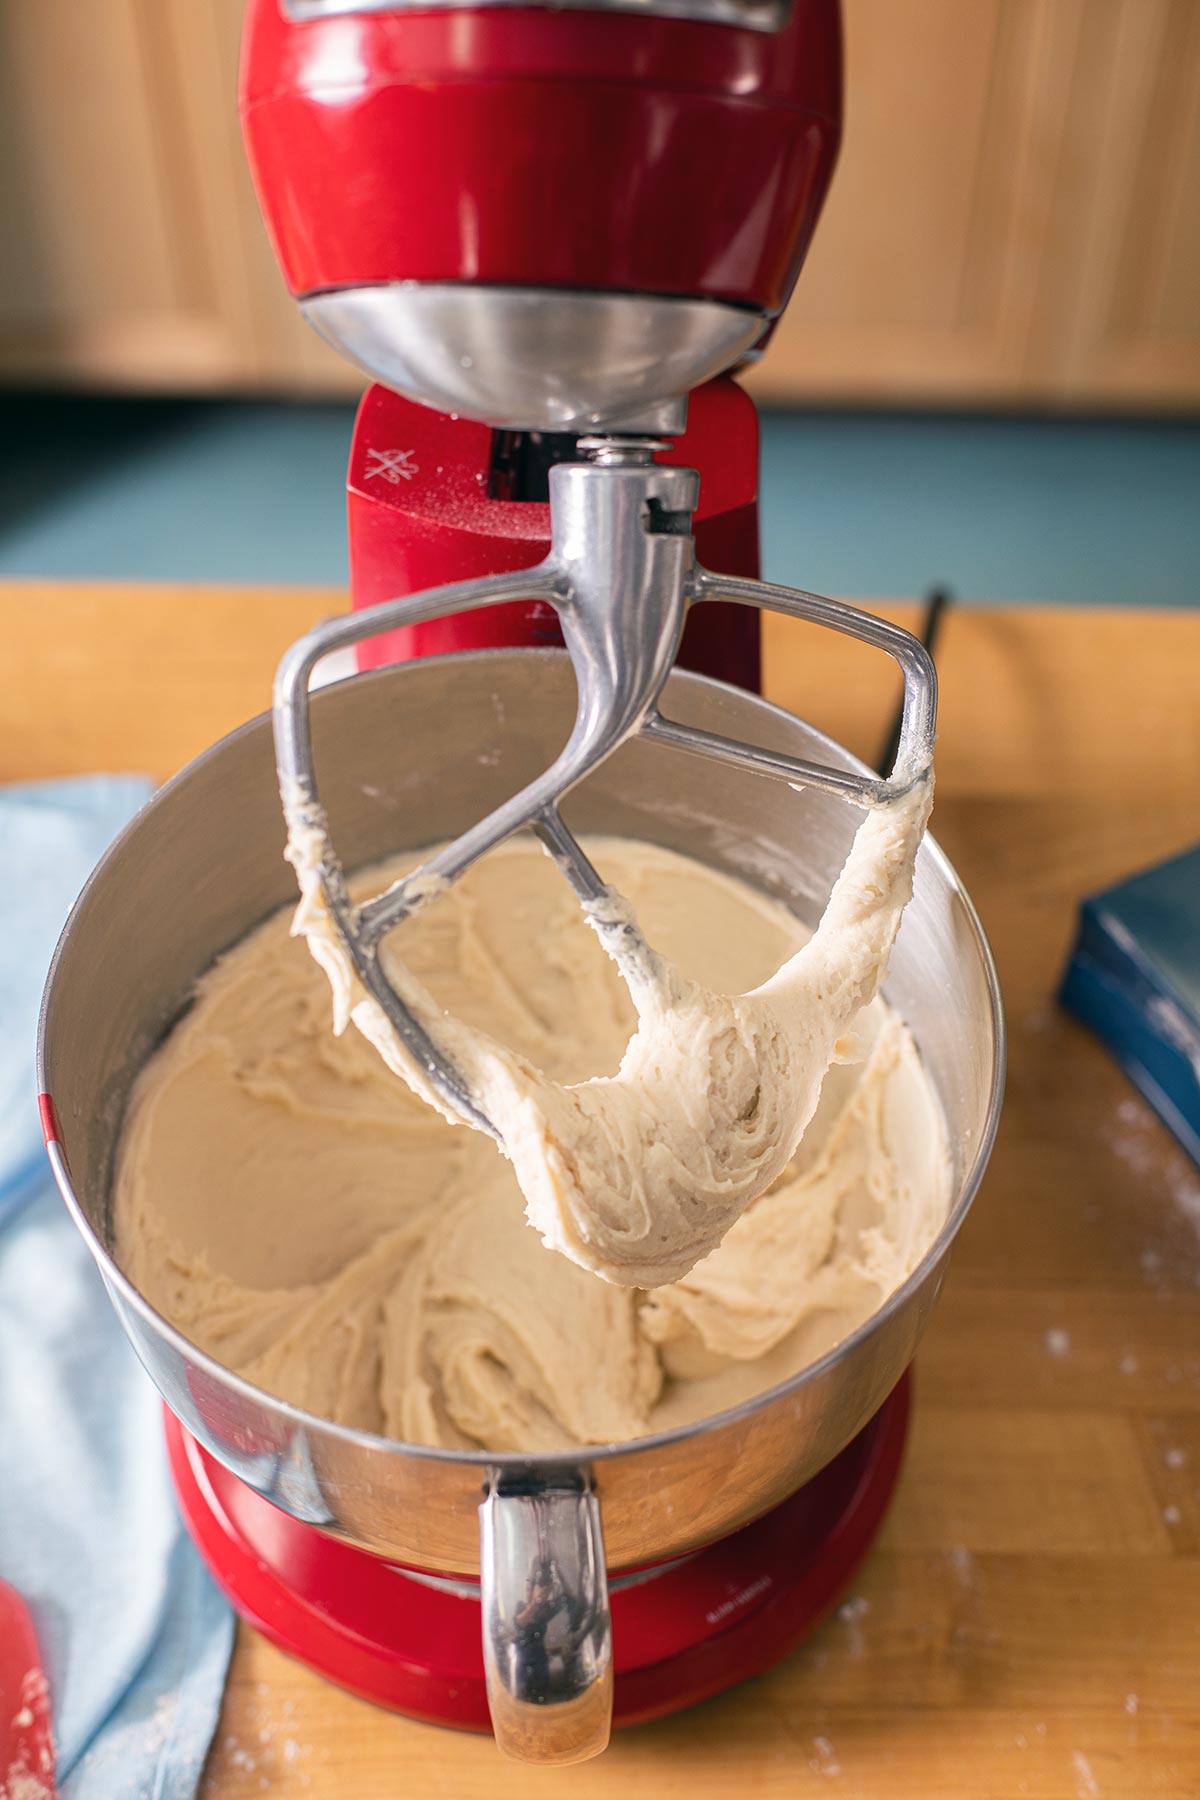
Scrape down the bowl a final time, cover it, and let the dough rise for about 1 to 1 1/2 hours.
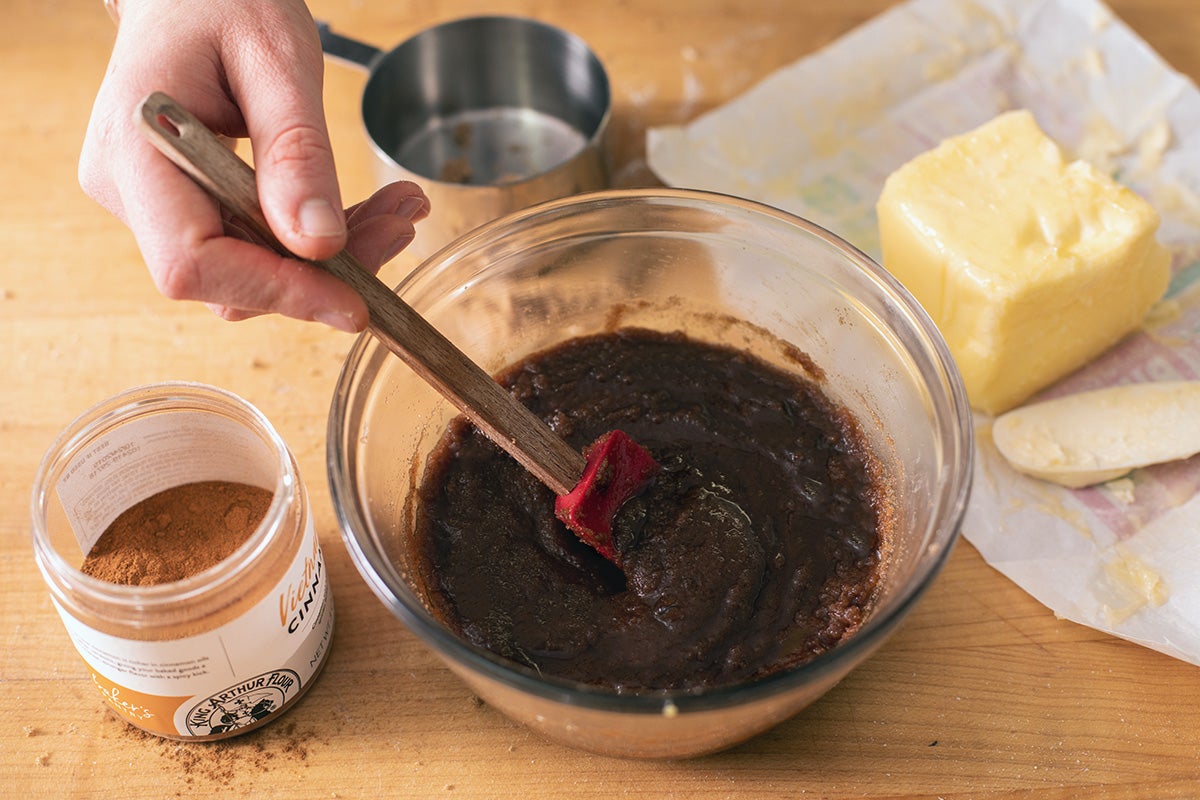
Mix together the cinnamon filling, the element that makes these rolls utterly delicious. Combine the following ingredients in a small bowl:
1 cup (213g) brown sugar, firmly packed (light or dark, you choose)
4 teaspoons cinnamon
6 tablespoons (85g) soft butter
Using a spatula or spoon, mix everything together to make a smooth paste. Set the filling aside until it’s time to assemble the rolls.
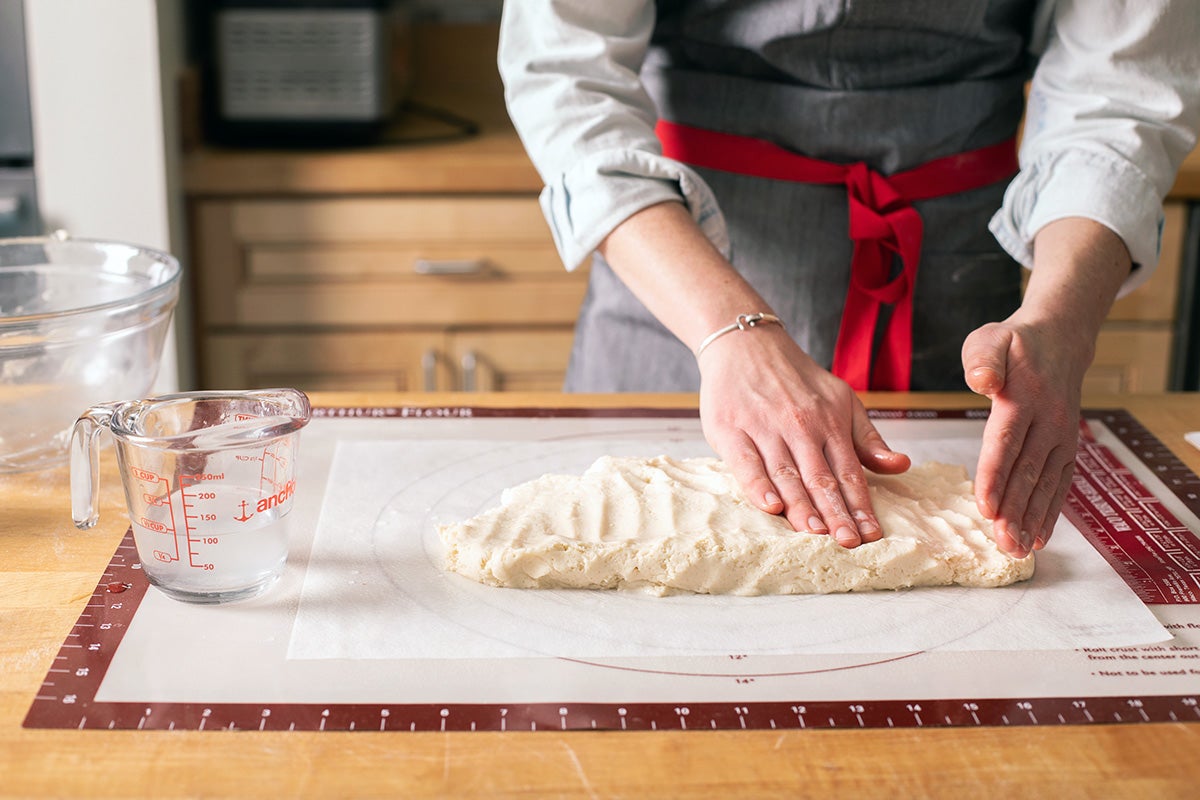
When the dough has risen, turn it out onto a greased piece of parchment paper or waxed paper. (A bowl scraper is a helpful tool when working with this dough.) Conventional cinnamon roll dough is usually shaped on a floured surface, but gluten-free cinnamon roll dough is quite delicate and sticky. Turning it out onto a piece of greased parchment paper ensures easy shaping.
Wet your hands and gently press the dough into an 8” x 16” rectangle.
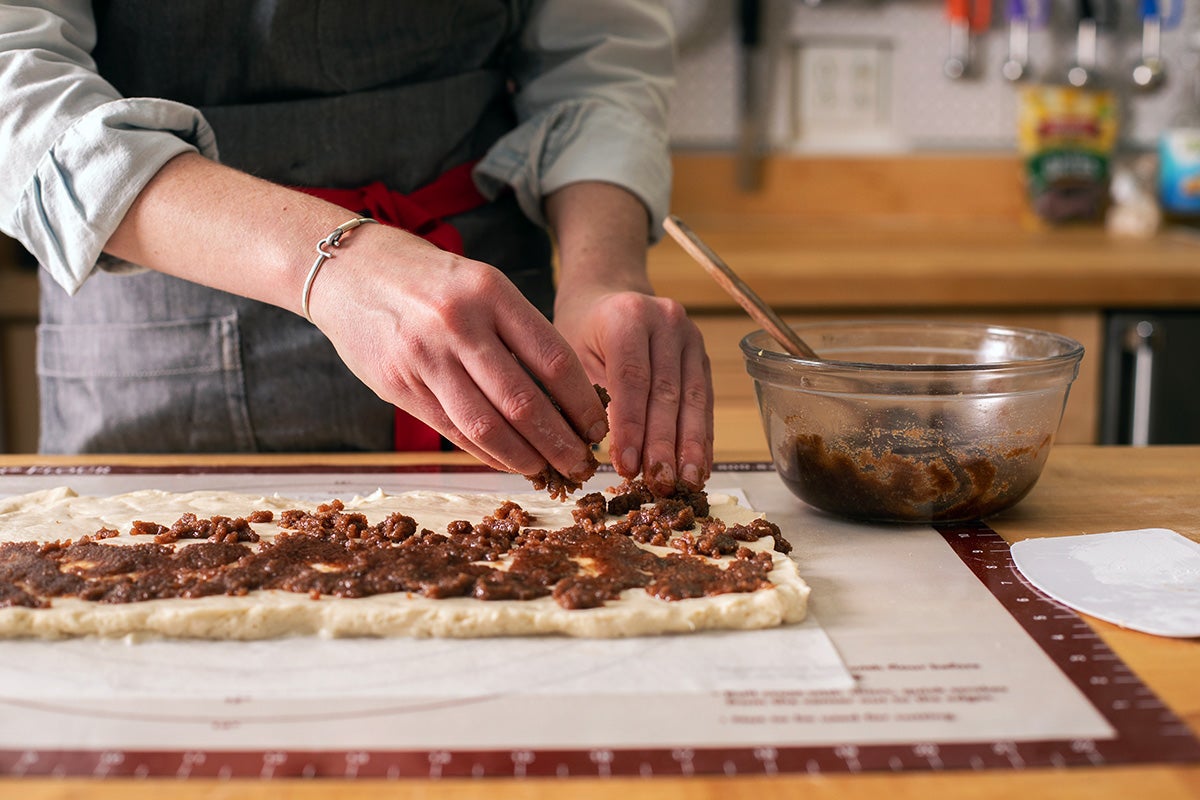
Using a pastry brush, coat the surface of the dough with milk. This will help the cinnamon filling stick to the dough and keep the spiraled rolls from separating as they bake.
At this point the filling will be slightly stiff. Crumble it into small pieces so it’s easy to sprinkle across the dough.
Cover the entire surface of the dough with the filling, leaving a 1/2” to 1” border bare around the edges. This will make it easy to seal the dough when you roll it up into a log.
Bring the long edge of parchment paper close to you and pick it up slightly. The dough should start to roll over onto itself. Roll it forward, using the parchment paper to encourage the rolling motion. The dough should release easily from the paper (you’ll be glad you greased the paper!). If it starts to stick, use a bowl scraper or a spatula to separate the dough from the paper.
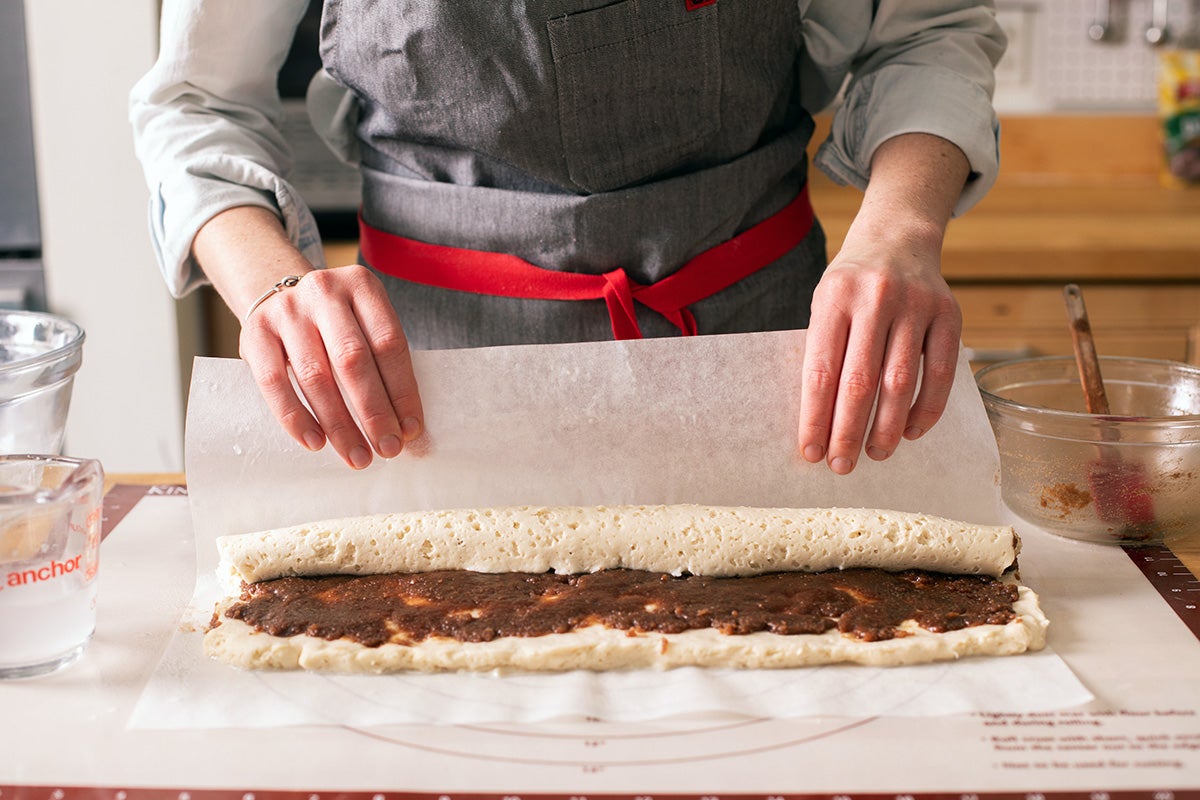
Once the log is rolled up, pat the edge of the dough slightly to seal all that delicious cinnamon filling inside.
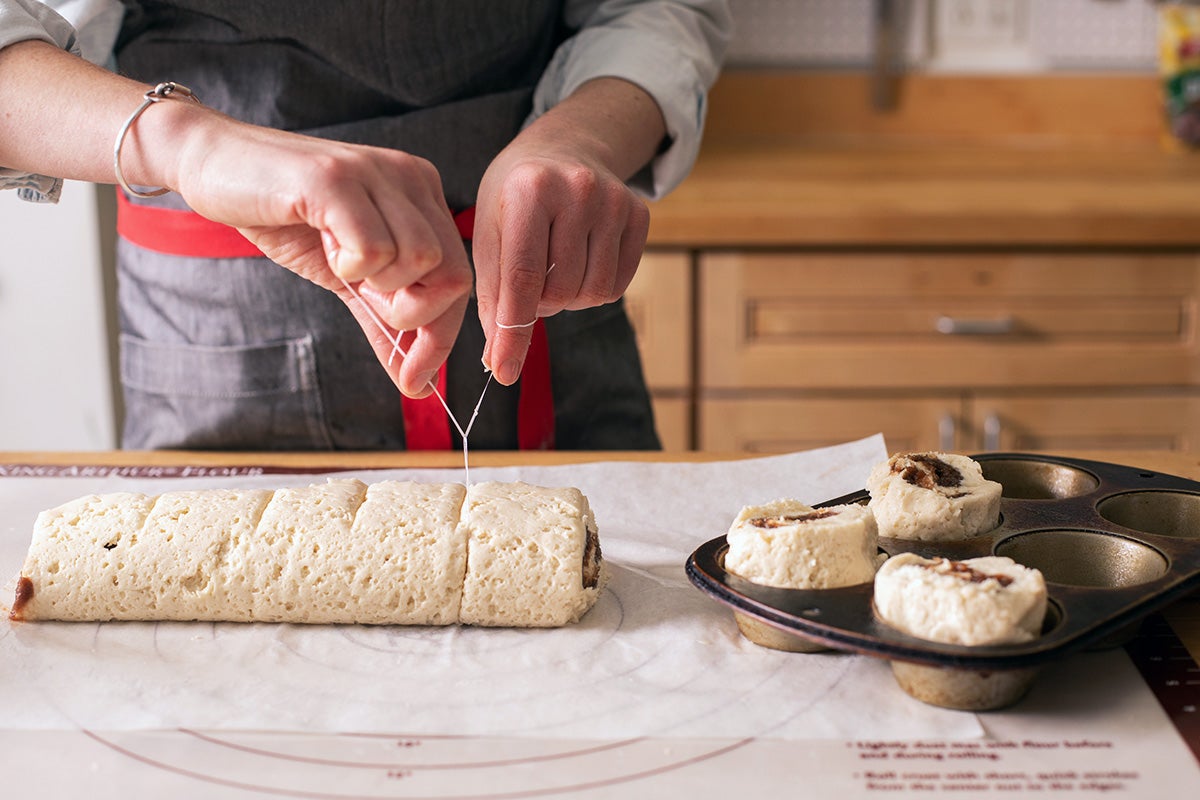
Now it’s time to slice the log into rolls.
If you want generously sized cinnamon rolls (and who doesn’t?), slice the log into eight pieces. The easiest way to end up with even slices is to mark the dough at the halfway point, then divide each half in two, then each quarter in two again.
You can also slice the log into 12 rolls if you want more modestly-sized gluten-free cinnamon rolls.
To slice the dough, use either a sharp serrated knife or dental floss. Really, dental floss works like a charm! (See our blog post, A simple trick for cinnamon rolls, for details.)
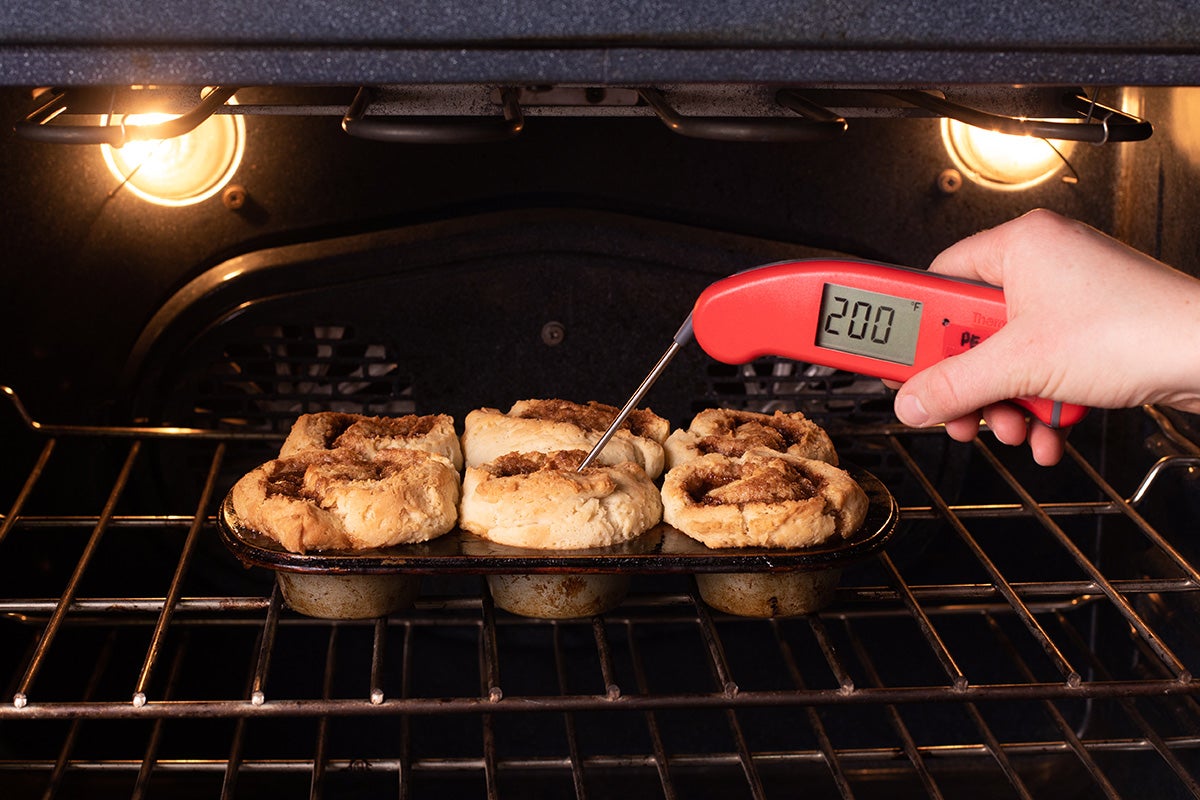
Since gluten-free yeasted dough is quite delicate, these cinnamon rolls are baked in a muffin pan. The round wells help the rolls hold their shape during baking.
Be sure to grease the muffin pan well before adding the dough, or line the pan with cupcake liners. Using liners ensures the cinnamon filling stays inside the rolls and reduces the amount of cleanup.
Let the rolls rise for about 45 minutes to an hour, until they look puffy. This may take longer or shorter depending on the warmth of your kitchen. Don’t rush this final rise or you’ll end up with dense cinnamon rolls.
Toward the end of the rising time, preheat the oven to 350°F.
Bake the rolls for 20 to 25 minutes, until they're golden brown and the internal temperature measures about 200°F when measured with a digital thermometer.
While the rolls bake, soak up the wonderful smells of butter, sugar, and cinnamon wafting from your oven.

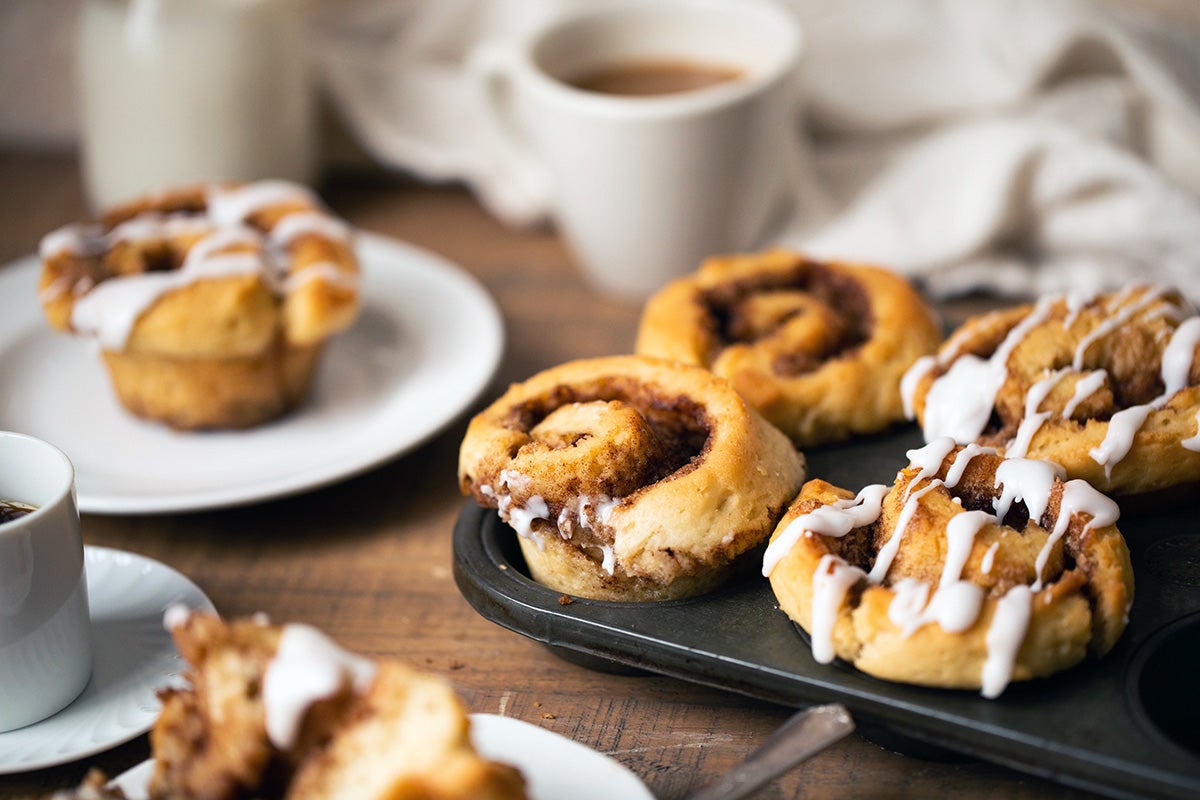
Do these cinnamon rolls need icing? No.
Are they all the better because of it? Most definitely, yes.
This recipe makes a generous amount of cream cheese icing. If you’re not an icing-lover, feel free to halve the amount or leave it out altogether.
If you’re going to go big and make the icing (which you should), gather these ingredients:
6 tablespoons (85g) soft cream cheese
1 1/2 cups (170g) confectioners’ sugar
4 tablespoons (57g) soft butter
1/2 teaspoon vanilla extract
Let the cream cheese come to room temperature to make mixing easy. Then use an electric mixer or the paddle attachment on a stand mixer to make a smooth, spreadable frosting.
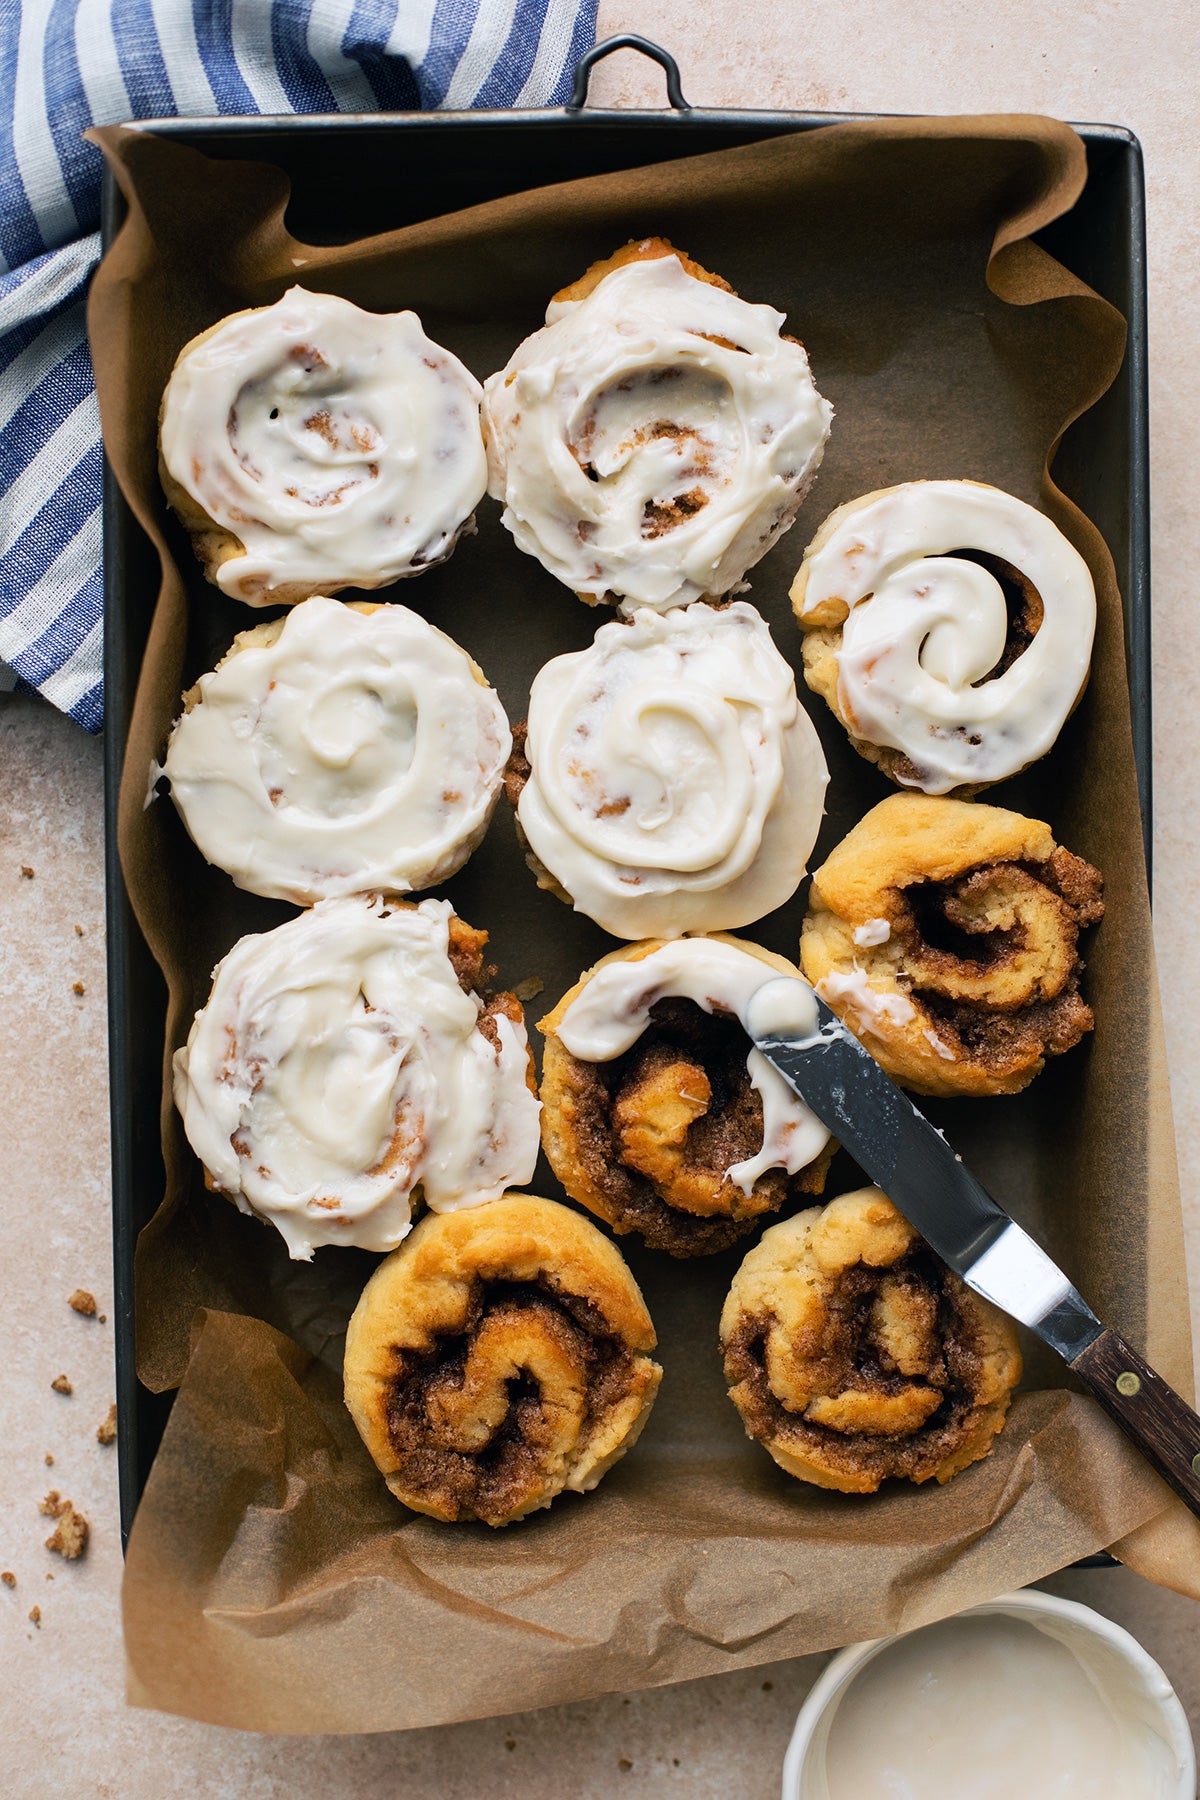
Most recipes warn you not to frost cinnamon rolls while they’re still warm because the frosting will become a melted mess. Since this recipe uses a relatively stiff cream cheese frosting, you can frost these rolls while they’re still warm.
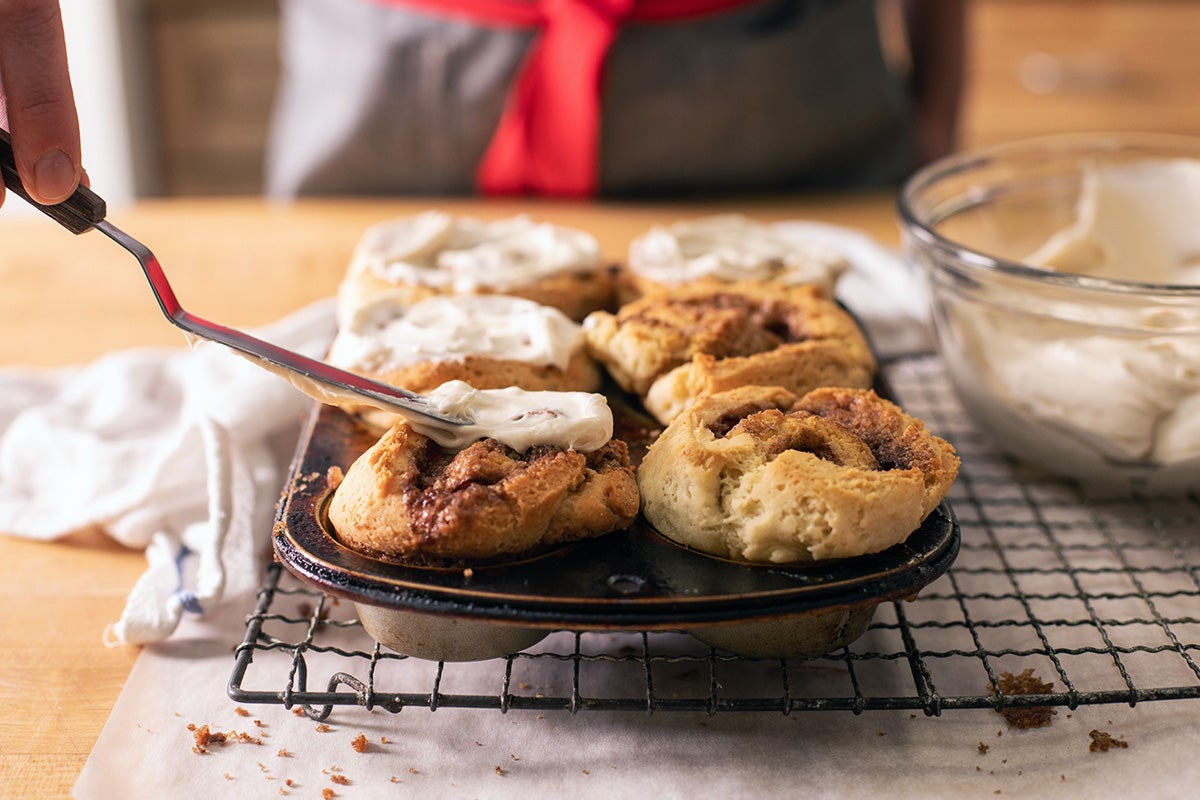
Some of the sweet icing may sink into the rolls and even pool a bit around the bottom. That’s just fine — let the rolls cool then scoop up any extra icing with a spoon. (If it then goes directly into your mouth, I won’t tell.)
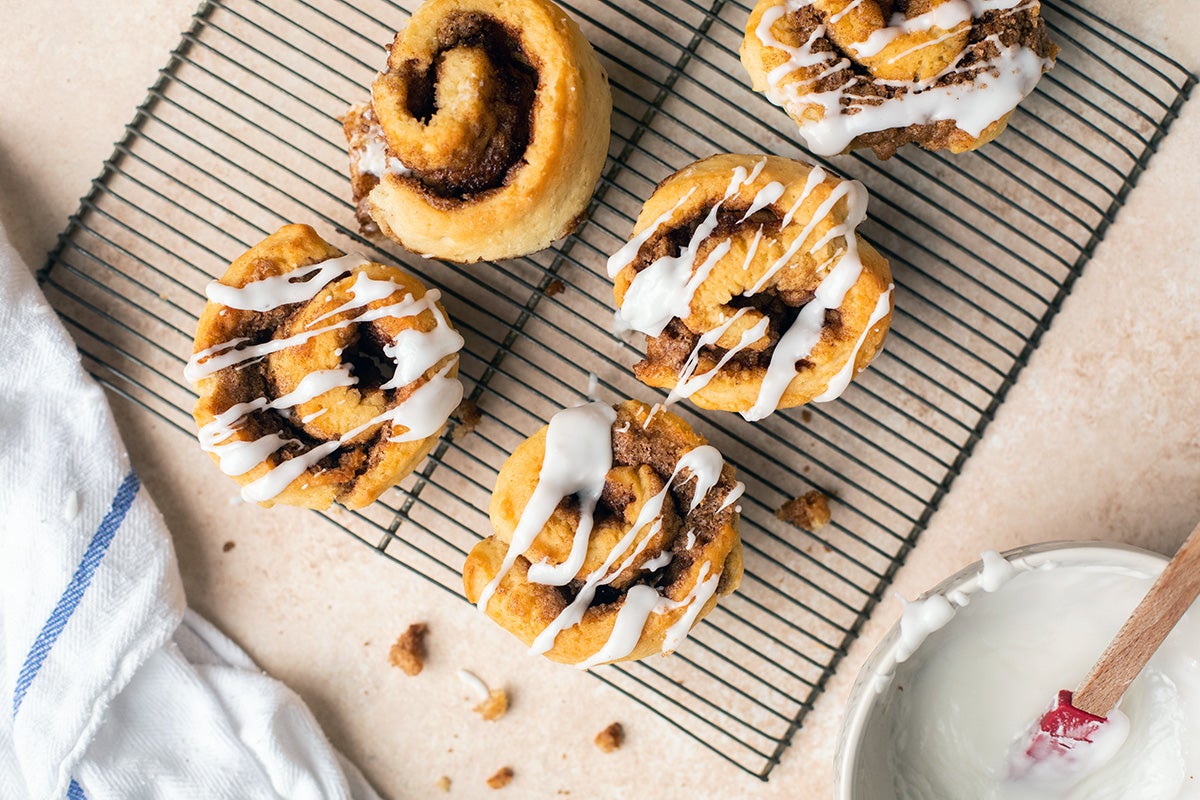
If you want to show off the cinnamon swirl, divide the icing recipe in half to make a smaller batch. Add about 1 tablespoon of milk to make icing with a pourable consistency. Drizzle it over the rolls whimsically.
If you’re working within the confines of multiple dietary restrictions, this recipe can still be your go-to option. In place of butter, use an unsalted vegan butter like Earth Balance Vegan Buttery Sticks. Use unflavored, unsweetened plant-based milk to replace the dairy milk — I’m loving oat milk these days.
Skip the cream cheese frosting or mix together a simple frosting of 2 cups (227g) confectioner’s sugar and 1 to 2 tablespoons plant-based milk, along with a pinch of salt and 1/2 teaspoon vanilla extract. Use just enough milk to bring the icing together.
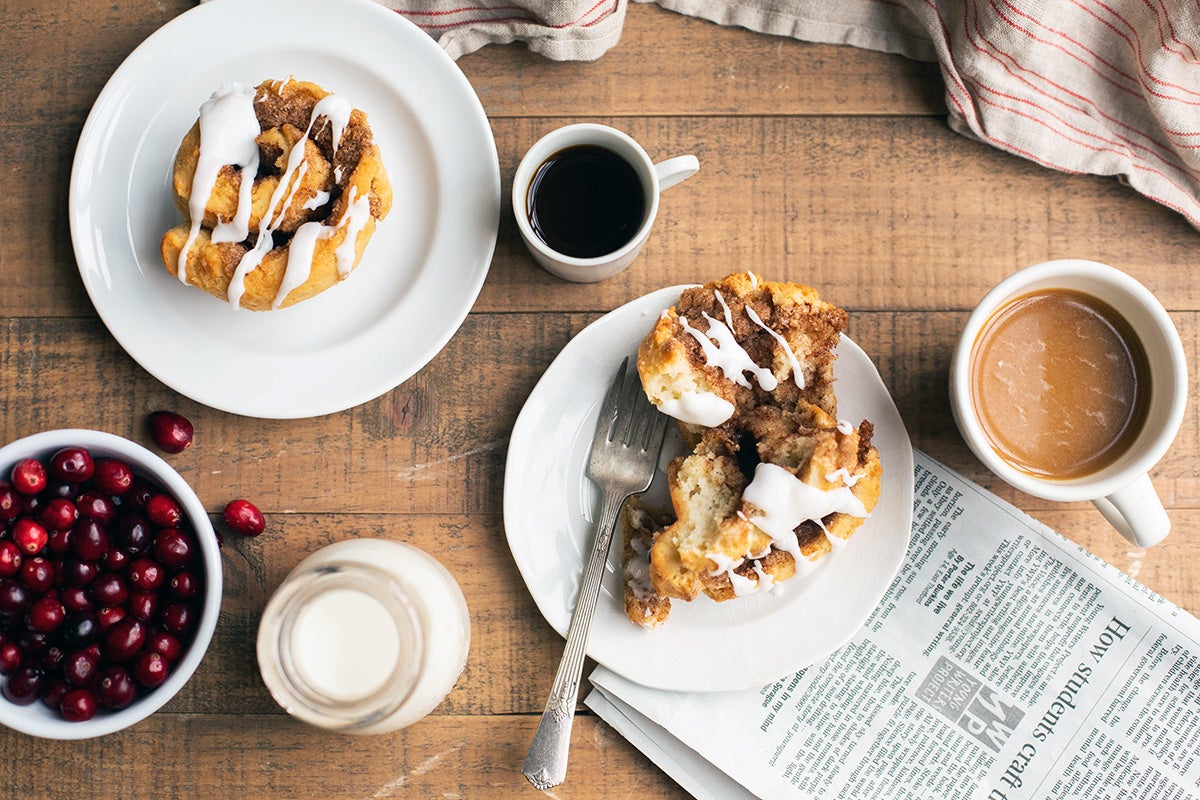
Cinnamon rolls often feel like a labor of love. The good news? They don't require getting out of bed hours before dawn in order to serve them hot for breakfast. Make the rolls the night before, removing them from the oven after about 15 minutes, when they're just slightly golden brown around the edges.
Next morning, turn on the oven and bake the rolls for 10 minutes, until they’re beautifully brown and about 200°F in the center. While they’re baking, mix up the icing and get ready to be applauded by all those in your home.
Slather on the cream cheese icing or let breakfast eaters do it themselves. They’ll feel pleased that they “helped,” and you can watch smiles spread across faces as the crowd licks their frosting-coated fingers.
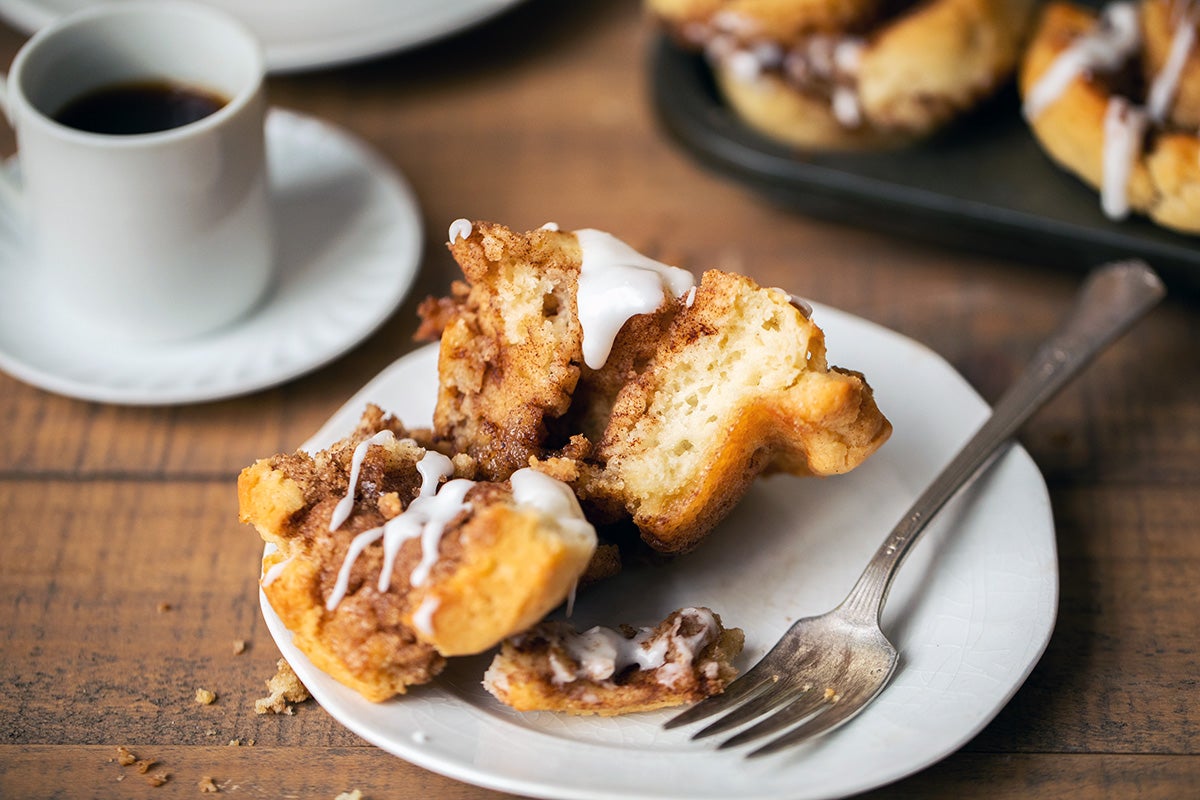
Make this breakfast treat for someone who loves cinnamon, sweets, and maybe has a dietary restriction too. Or not — everyone will love them just the same.
Want more special-diet sweets? Check out our collection of recipes perfect for anyone going Gluten-Free for the Holidays.
Thanks to Jenn Bakos for taking the photographs for this post.