How to make homemade frozen pizza
Fresh-baked pizza, ready whenever you are.

Date
April 25, 2014

Americans spend between $4 and $5 billion on frozen pizza each year. According to industry statistics, at any given time about two-thirds of U.S. refrigerators include at least one frozen pizza. All of which makes pizza the #3 frozen food in America — after frozen dinners and ice cream, respectively, which usually jockey for top position.
So, with all the boxes of frozen pizza out there, just waiting to be tossed into your shopping cart — why make your own homemade frozen pizza?
Because its crust is deliciously chewy and fresh-tasting, the exact thickness you like; its toppings personalized to taste; and because you know exactly what's in it.
If you want your favorite pizza, plus the convenience of just-pop-it-in-the-oven frozen — you can do that. Here's how to make homemade frozen pizza.
First, make your favorite pizza dough recipe. Our Now or Later Pizza is a great option; it's versatile (bake it now, bake it later — the name says it all). Plus, the touch of olive oil helps keep it from drying out too much in the freezer.
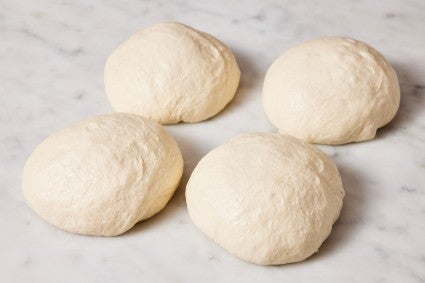
Gently deflate the dough. Round the deflated dough into a ball, then decide how many pizzas you want to make. A 150g piece of dough makes a medium-crust, single-serve (8") pizza; while a 100g piece makes a thin-crust, single-serve pizza. A scale makes this whole process quite easy. You may want larger pizzas; feel free to make whatever size you like out of whatever amount of dough you have.
Round each piece into a ball, then flatten into a disk.
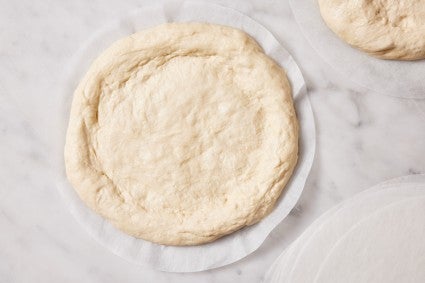
Parchment rounds are the perfect solution for shaping pizza crusts. If you don't have parchment, simply roll the crusts on a lightly greased surface; but parchment makes rolling, transporting, and baking these crusts a lot easier.
Grease one piece of parchment; lay one of the disks on the parchment. Cover it with another piece of lightly greased parchment. Pat or roll the dough as wide as you like; it'll inevitably shrink a bit when you quit pushing it around, so take that into account.
Shape into the thickness and diameter you'd like; pinch a rim around the edge of the crust, if you prefer.
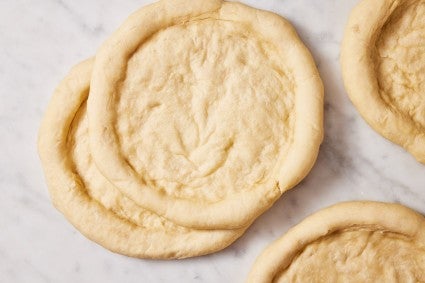
For thicker crusts, let the dough rise for a while; 45 minutes, an hour, 2 hours, your choice. For a thinner, cracker-type crust, you can bake right away.
Depending on when you're going to bake your crusts, preheat the oven to 425°F. If you have a pizza stone in your oven, use it. If you don't, get out a baking sheet.
Put the crusts into the oven, parchment and all. You're going to par-bake the crusts — in other words, bake them just until they're set and won't deflate. You don't want them to brown.
The optimum time is about 5 to 6 minutes for a thin crust, and 7 to 8 minutes for a thicker crust. To double check, feel the crust; it should feel barely set, and not at all "doughy;" but again, it shouldn't be at all brown.
Watch carefully the first few minutes, as the crusts will bubble — and sometimes even turn into fat balloons! As soon as you see this happening, open the oven door and poke them with a sharp knife, gently deflating any bubbles.
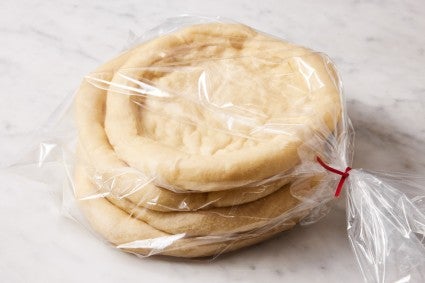
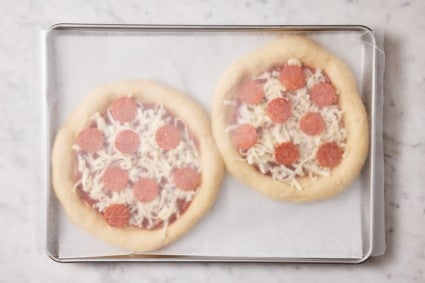
Remove the crusts from the oven and transfer them to racks to cool; it's OK to layer them on the cooling rack, if you have to. Once the crusts are cool, you have two choices. Bag them, and store at room temperature for several days (or in the freezer, for up to a month) or jump right into assembling your fully topped pizzas.
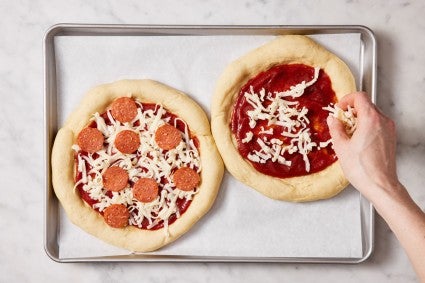
Assemble the pizza with tomato sauce (my favorite is Marcella Hazan's, but feel free to choose your own), cheese, and whatever combination of toppings you want.
Next: into the freezer they go.
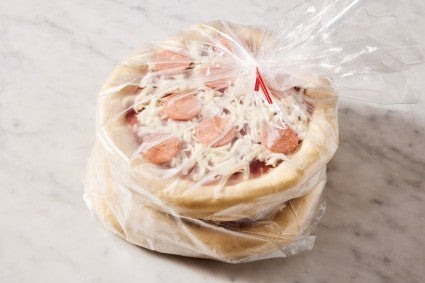
Place your pizzas onto a pan; tent the pan with something (waxed paper, plastic wrap, parchment, foil) to keep the frost off; and place in the freezer until the pizzas are stiff enough to handle easily, about an hour or more.
You can actually wrap these pizzas without pre-freezing; however, the tomato sauce is less messy, and the toppings stay in place better, after an hour or so in the freezer.
Once you can handle the pizzas easily, wrap each individually in plastic wrap; then bag them together in a large plastic bag, including a label with what kind of pizzas they are, and the date you froze them. Bake directly from the freezer.
Storing homemade frozen pizzas longer than a month results in their gradual decline; they dry out, and when you bake them the crust is hard rather than crisp/crunchy.
Why doesn't this happen to supermarket frozen pizzas? Because of all those added ingredients you see on the package label, which help to preserve them for a year or more.
That's the tradeoff you make for preservative-free pizza — its shelf life isn't as long. But, considering the average American family eats pizza at home between once and twice a week, you probably won't have a problem eating up your stash within a month.