How to keep pie crust from shrinking, once and for all
Many pies later, we've got the tips you need to follow.


You’re baking a homemade pie, and you can’t wait to see how it turns out. After 30 minutes you open the oven just a crack to peek — oh, no! The formerly crimped crust around the pie’s edge has mysteriously shrunk into a thin, sad ribbon of pastry slumped halfway down the inside of the pan. So disappointing!
What happened? And how can you prevent it from happening in the future?
Any number of things can contribute to a slumping crust. Maybe your recipe uses an extra-high amount of shortening or butter, or you rolled the crust too vigorously, or you didn’t let it rest and chill before baking. Perhaps you used the wrong size pan, or not enough filling.
The good news is all of this is controllable. Make the right choices along the way and you’ll create a picture-perfect pie, one whose crust looks as good as it tastes. The following tips will help keep your pie crusts from slumping and shrinking — I know, because I tested every single one of them to ensure they make a difference in your pie baking.
To maintain its shape during baking, pastry needs liquid to activate the flour’s gluten. For flaky, tender texture, it also requires fat. The balance of those two ingredients is critical. Too much fat and the crust loses its structure and shrinks; too much liquid, it’s hard and leathery. I’ve found that a fat ratio of between 60% and 80% (using baker’s percentage), with the addition of just barely enough water to make the pastry cohesive, will yield pastry that keeps its shape in the oven and has a flaky, tender texture.
Because butter has a lower melting point than vegetable shortening, pie crust made with butter is more likely to lose its structure (shrink) than one made with shortening, or with a combination of the two. Our Classic Double Pie Crust recipe gives you the best of both worlds: You get butter’s flavor and shortening’s “setting power.” This isn’t to say you can’t make a structurally sound all-butter crust; you’ll just need to be a bit more careful about following the rules below.
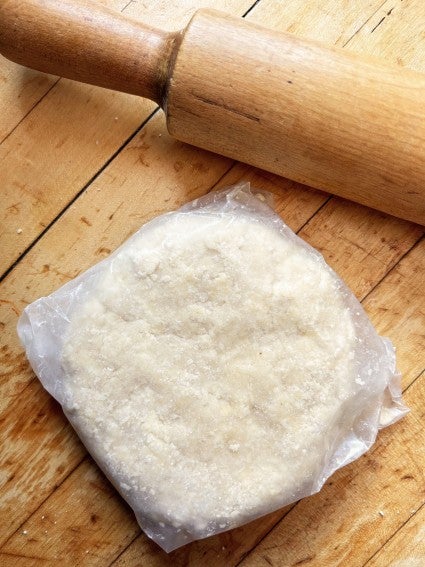
This step accomplishes two things: It ensures the fat is cold, which encourages pastry that’s flaky rather than crumbly. And it gives the gluten in the flour a chance to relax, making it easier to roll (and less likely to shrink later on).
What’s the best way to chill pie pastry? Wrap it and place it in the refrigerator for 20 to 30 minutes, or until it feels cold all the way through but is still pliable. This is sufficient time to both relax the gluten and lower the temperature of the butter or shortening — both of which will help your crust stay in place as it bakes.
Wouldn’t putting the dough in the freezer be faster and work just as well? No; by the time the innermost part of the pastry disk is cold, the outside will have become brittle and hard to handle. A slower, gentler chill in the fridge is preferable.
Gluten responds to handling by tightening up, which can then lead to shrinkage in the oven. You respond to tight gluten (and pastry that keeps contracting) by whacking the dough even harder with the rolling pin, right? You will never win that battle. Try this instead: Once your pastry has completed its rest, use a minimum of firm, smooth strokes, rolling from the center out (rather than back and forth, which can tighten the gluten even more).
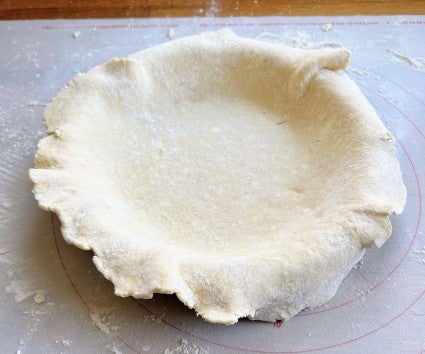
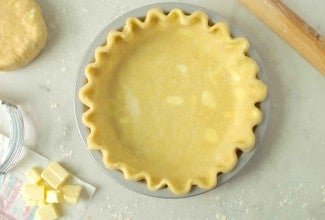
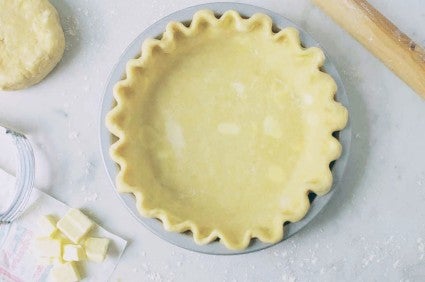
Your goal is to have at least 1" of crust overhang all around the pan’s rim. A good rule of thumb is to roll your crust at least 2" wider than the pan’s inside measurement: Use a flexible measuring tape to measure the pan starting at the rim, traveling down the side, across the bottom, and up to the opposite rim. (Don’t have a measuring tape? Use a piece of string and a ruler.) This overhang allows you to gently settle the crust into the pan without stretching it. Because, gluten: Stretch it out and it’ll try to shrink back, and shrinking is exactly what you want to avoid.
If you want to make a tall crimped edge rather than simply pressing the dough onto the rim of the pan with a fork, leave yourself even more overhang. For a 9" pie in a standard 1 1/2" deep pan, roll your crust 13" to 14" wide.
This tip comes from our Baking School, where we teach students that this helps “anchor” the crust to the pan: just a bit of extra insurance against shrinking and sliding while the pie is baking. Just make sure not to stretch the crust while pressing.
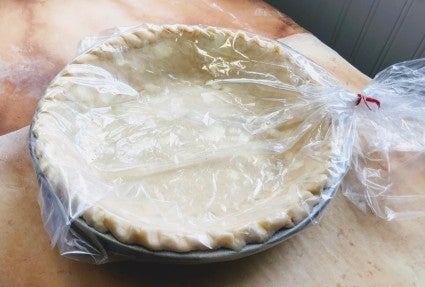
Again, it’s all about fat and gluten. You've just rolled out the dough, which warms the fat and "exercises" the gluten. This is your last chance before baking to make sure the fat is chilled and the gluten relaxed, both of which will help keep your crust from slumping.
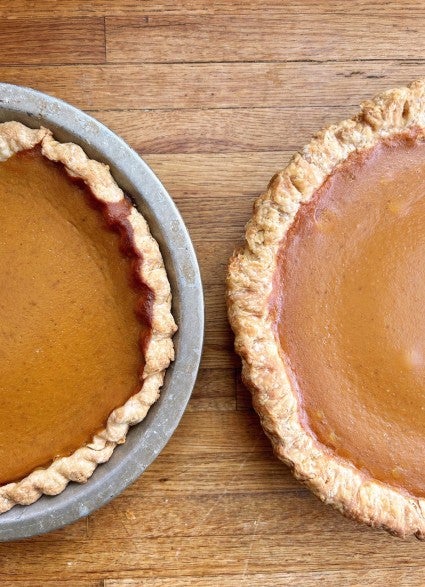
Whether it’s a pourable custard (think pumpkin) or cupfuls of fresh fruit, your pie filling is an effective anchor for the crust beneath and around it. Without sufficient filling to keep it in place, crust may slide down the edges of the pan as the pie bakes. A good recipe will accurately specify both the amount of filling and the size of the pan. But what if it doesn’t — or you decide to use a larger pan?
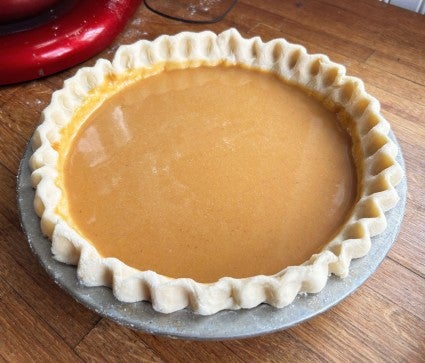
For pies with liquid filling, use enough to just about (but not quite) reach the rim of the pan. For fresh fruit pies (where the berries, peaches, apples, etc. will shrink as they bake), make sure the fruit is mounded considerably higher than the pan’s rim. (If you’re prebaking a crust without the pie filling, you’ll still fill it to keep the pastry in place, as noted below.)
What happens if your recipe calls for a prebaked crust? Follow the steps above up to the point where the crust is ready to bake, then fill it with the weights of your choice: dried beans, uncooked rice, pie weights, and even sugar are good options. Bake as the recipe directs. This controlled prebake will set the crust’s structure, making it impossible for it to shrink after adding the filling. For details, see Prebaking pie crust.
Wondering how to make sure your pie’s crust browns perfectly — top AND bottom — or how to thicken fruit filling perfectly? Find answers to all your pastry challenges in our Pie Baking Guide.
Cover photo by Mark Weinberg; food styling by Liz Neily.