How to ensure perfectly proofed bread (almost) every time
The bread proofer creates the ideal cozy environment for your dough.


Technically, proofing a loaf of bread should be easy. It literally requires no effort: You just sit back and wait for your dough to rise to new heights.
But in reality, proofing is one of the most difficult elements of bread baking.
“Controlling the proof is one of the hardest things to do at home,” says King Arthur Baking Ambassador Martin Philip. And there's no getting around this vital part of the process. “Proofing is every bit as important as the other foundational aspects of bread making, from mixing to baking. It’s key to bread’s structure, oven spring, and the beauty of the final loaf,” Martin says.
When it comes to proofing, “the most important thing is to know the environment your dough is proofing in,” he explains. Where your dough is stored plays the biggest role in how fast and robustly it rises. Different conditions mean different timelines, even for the same recipe: Making a dough in the cold, dry winter versus warm, humid summer can mean over an hour’s difference in proofing time.
We can’t control the weather or the seasons, but we can control how we proof our dough. And for Martin, that means relying on one very special tool: the bread proofer.
“I’m not a tool person,” he says. But when it comes to baking in cooler kitchens, “I can’t remember a single time I didn’t use my proofer.”
Martin explains that there are three primary environmental controls to nail while proofing: temperature, humidity, and air flow.
Most impactful is temperature. “Breads do really well in the low 70s, like around 72°F,” he says. That’s just the right range to encourage yeast activity without having your dough move so fast that it overproofs or fails to develop flavor.
Humidity, meanwhile, is essential to prevent your dough from drying out and failing to fully rise. When dough becomes too dry, it develops a thin skin that constricts rising and prevents it from expanding to full capacity.
Air flow is similar: Many recipes direct bakers to leave dough in a “draft-free” environment to proof because moving air wicks away moisture from the surface of the dough, exacerbating drying and leading to that same constricting skin.
These three conditions vary in your kitchen from day to day, making it hard to develop a consistent timeline for your bread and even causing the proof itself to suffer. That’s why creating a cozy setup for your bread is essential for reliable success.
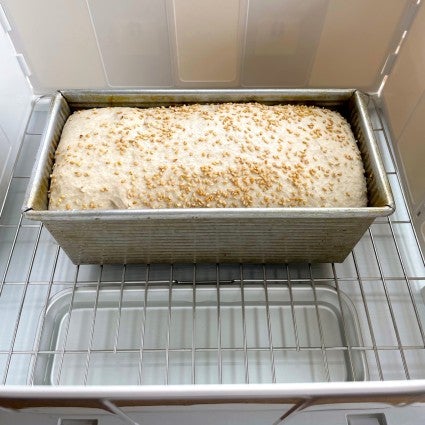
To control each of these critical elements, Martin leans on a collapsible, temperature-controlled proofing box. It enables a consistently warm environment to keep yeast happy; creates humidity so the dough never dries out; and prevents air flow so the surface remains soft and supple.
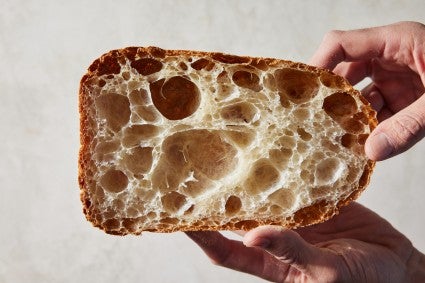
Such controls increase a baker’s ability to nail the proof, which in turn means great bread. Martin points to a recipe like Pan de Cristal as an example: A gorgeous bread defined by large, gaping holes, it will come out of the oven merely mediocre if it’s not well-proofed. The box isn’t just for bread doughs either: Martin advises using a proofing box for sourdough starter, preferments, and even Viennoiserie like croissants.
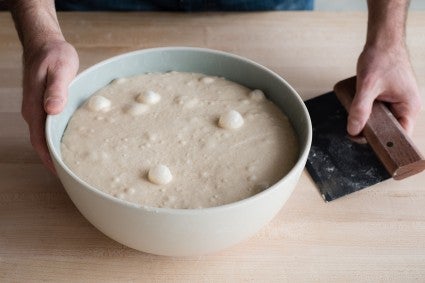
Of course, creating the ideal proofing conditions doesn’t always mean you’ll get a perfect proof. You still need to evaluate your dough and use your instincts and knowledge to gauge the Goldilocks window at which it’s well-proofed: not underdone, not overdone.
A recipe will often provide visual guidelines to evaluate when a dough is fully proofed — use them. There’s also the poke test. As King Arthur Baker's Hotline member MaryJane Robbins explains in her post on how to avoid over-risen bread, “Lightly flour your index finger and press it gently into the dough, about to the bed of your fingernail. If the indentation remains and doesn't spring back/fill in, then the bread is well risen and ready for the oven.”
If you start using a bread proofer, you’ll want to keep a close eye on your bread, as the timeline may differ from what’s typical in your kitchen. For instance, if you usually proof in a colder environment, you may be accustomed to longer dough-rising timelines. If you apply a cold-environment schedule to a dough rising in a proofing box, however, it’ll most likely overproof. As a result, check your dough early and remember that it may rise more quickly than you’re used to.
Martin recommends a proofing box if you bake bread frequently, but if you don’t have this tool in your kitchen, you can still be diligent about creating a happy home for your dough for maximum success. Here are some tips:
Cover tightly. Don’t let the dough dry out! “It’s very hard to bring a dough back from that,” says Martin. A dough-rising bucket is a good choice, or any of the solutions listed in this post: How can I get single-use plastic out of my baking?
Keep it warm, but not too warm. Remember, you want your dough to be warm enough to encourage yeast activity and a steady rise, but not so warm that the yeast goes into hyperdrive. (Dough that rises too fast may overproof or fail to develop flavor.) Somewhere in the 70s is good: Use a thermometer to measure the air temperature, if needed.
Get creative. If you struggle to find a warm (but not hot) place for your dough, our own PJ Hamel provides a variety of options for every home and kitchen in her blog post about where to put dough to rise. From a microwave hack to heating pad endorsement, it’s full of excellent tips for any bread baker.
If you’re a frequent bread baker looking for more reliable success (or you’re just sick of storing your rising dough on top of the hot water heater) try out the Folding Bread Proofer for your yeast baking needs.
Cover photo by Mark Weinberg.