Modeling chocolate 101: How to make and use it, and why it's easier than it seems
One of the simplest, most delicious ways to decorate cake.


Decorating cake is no easy undertaking, especially if it’s for a special occasion. There’s pressure to pull out piping bags, create elaborate swirls of frosting, and complete things with an impeccably written message on top.
It’s time to forget that. There’s a technique for decorating cakes that only requires two ingredients, no fancy tools, and can transform any cake into a gorgeous creation: modeling chocolate.
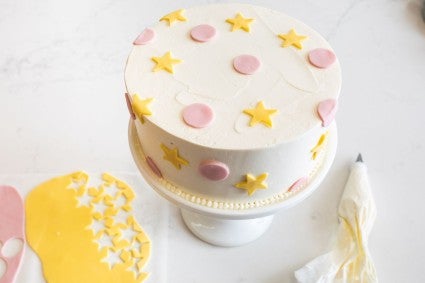
The first time I saw a cake decorated with modeling chocolate in our test kitchen — featuring a professional-looking finish topped with adorable pink polka dots and cheerful yellow stars — I immediately thought, why are we using fondant? To me, it’s all looks, no flavor. But instead of shortening-and-gelatin-based fondant, this cake was topped with something I know is hands-down delicious: chocolate.
What is modeling chocolate?
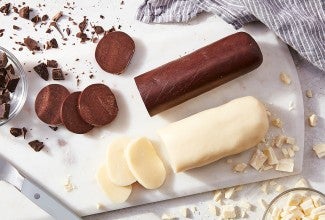
Modeling chocolate is made from a simple mixture of melted chocolate and corn syrup. The ingredients are heated and then combined, resulting in chocolate that's the consistency of Play-Doh; it’s easy to sculpt and shape with your hands, and it becomes moldable the more you work it.
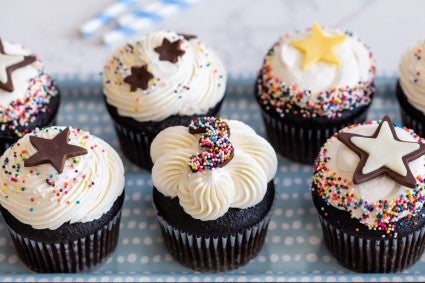
The resulting chocolate can be rolled out and cut into shapes and designs of all kinds. It’s the perfect edible topper for cake, cupcakes, or any dessert you’re looking to dress up.
How to make modeling chocolate
You’ll need 1 1/3 cups (227g) of chopped semisweet, bittersweet, or white chocolate. Avoid using chocolate chips here — chips contain a stabilizer that makes melting challenging.

Melt the chocolate slowly using a double boiler (also known as a bain-marie) or in the microwave at low power. Read our blog post for tips about how to melt chocolate if you’re new to this process.
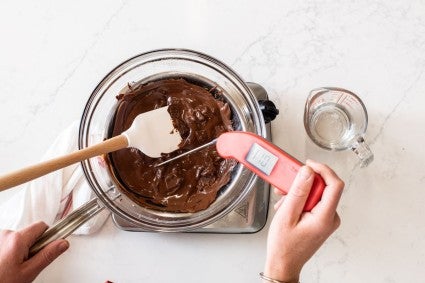
Heat the chocolate until it melts without letting the temperature go above 110°F. (Bottom line: Slow and steady is the name of the game.) Once the chocolate is melted, add 1/3 cup (103g) of light corn syrup that’s also been heated to 110°F.
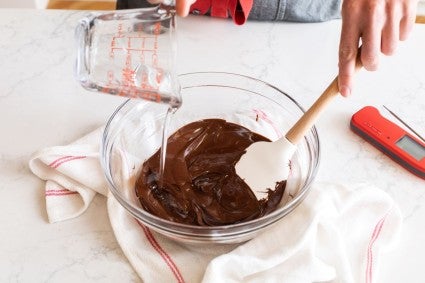
I made the mistake of overheating the corn syrup during my first attempt at making modeling chocolate, and the ratio of ingredients was thrown off. (Too much water in the corn syrup evaporated during the heating step, which left me with a greasy, grainy mess that didn't stay emulsified.) Lesson learned: Keep the corn syrup below 110°F.
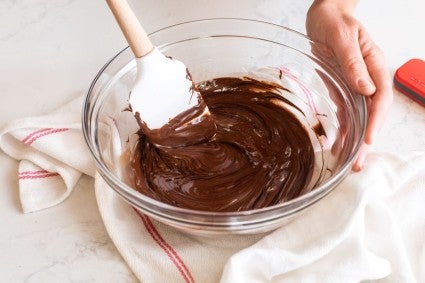
Once you’ve added the corn syrup to the melted chocolate, stir until combined. The chocolate may look grainy after a couple of stirs, but it should become smooth, shiny, and slightly thicker as you continue stirring.
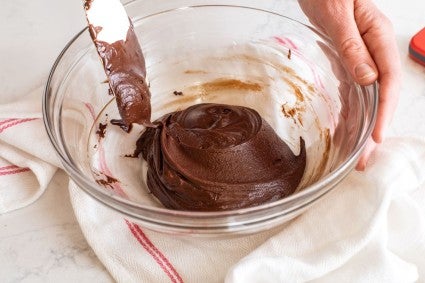
Once the modeling chocolate starts to clean the sides of the bowl, it can be covered or rolled into a log and wrapped with plastic or your favorite reusable wrap. It needs to rest at room temperature for at least two hours before it’s ready to use.
In the meantime, bake your cake, cupcakes, or another dessert that will be decorated with modeling chocolate.
How to use modeling chocolate
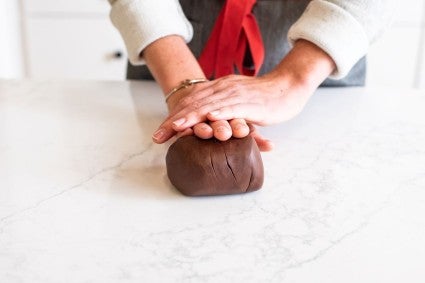
Once cool, the modeling chocolate will become quite stiff. Work it with your hands and begin to knead it; the warmth of your hands will help soften the chocolate and make it easier to shape.
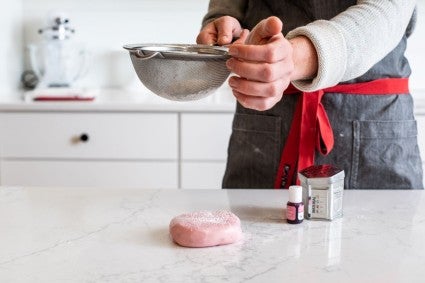
Depending on the percentage of cocoa butter in the chocolate you use, the modeling chocolate may start to look a bit shiny or greasy. If this happens, simply dust your work surface and the chocolate with unsweetened cocoa powder (for dark chocolate) or confectioners' sugar (for white chocolate). This will help reduce the shine and make it easier to handle.
At this point, the modeling chocolate can be colored or left as is.
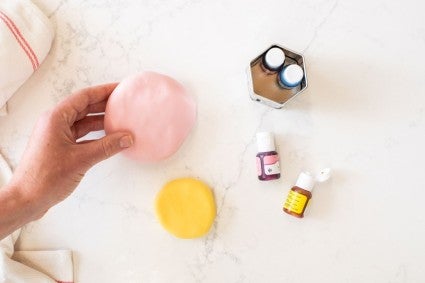
How to make colored modeling chocolate
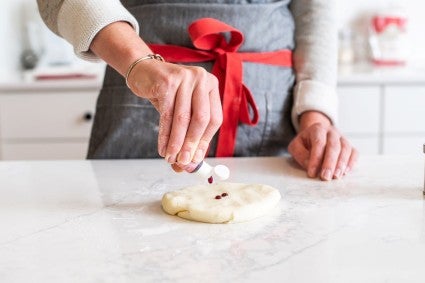
If you’d like to add even more flair to your decorations, consider coloring your modeling chocolate. Here, we use natural food coloring in a gel form so that it blends into the modeling chocolate easily.
Wear gloves if you want to avoid staining your hands, and simply add a few drops of food coloring to the center of the cooled (room temperature) modeling chocolate before folding and kneading it together.
Knead the modeling chocolate for a few minutes until the color has evened out — or use it when there are still some streaks remaining for a more textured, marbled effect.
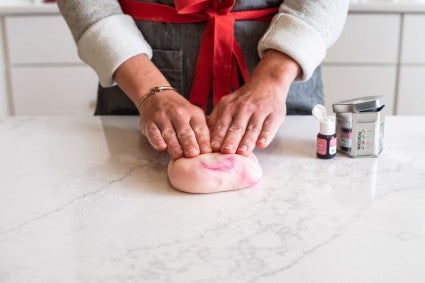
If the shade of your modeling chocolate is a bit too light, add more dye to intensify the color. Add just a few drops at a time to the center of the chocolate until you achieve the desired hue.
Now your modeling chocolate is ready to be rolled out and cut into shapes. It can also be transformed into flowers, letters, or any other adornment you can dream up! Treat it like edible clay and let your inner artist run wild. Here are a few ideas to get you started:
Stencil or press
Treat modeling chocolate like pie dough and roll it out evenly and thinly (about 1/8” thick) using a rolling pin. (Working on a silicone baking mat is helpful here.)
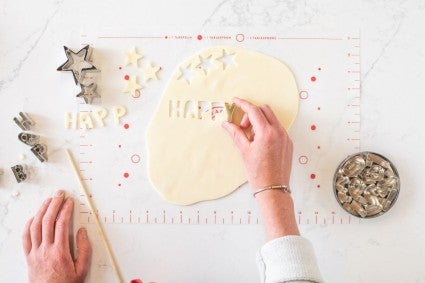
Use pop-out cutters to make embossed designs or use letter-shaped cutters to spell out a special message. (Heads up: At King Arthur, we only recommend the products that we, as bakers, truly love. When you buy through external links on our site, we may earn an affiliate commission.)
Arrange the cutouts on the top and/or the sides of your cake or cupcakes in any way you like — a polka-dot pattern is easy to achieve and especially fun.
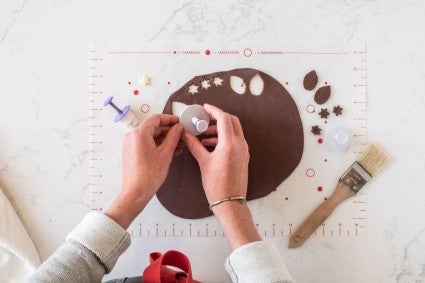
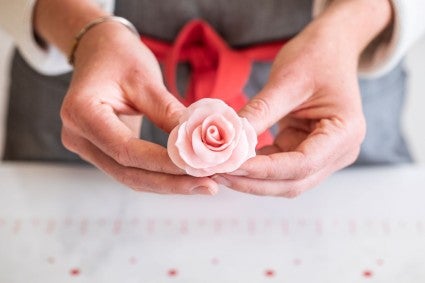
Make roses and other flowers
If you’ve always wanted to make edible flowers but have been too intimidated to try making buttercream roses, now is your time! Modeling chocolate can be used to make a variety of flowers, both simple and complex.
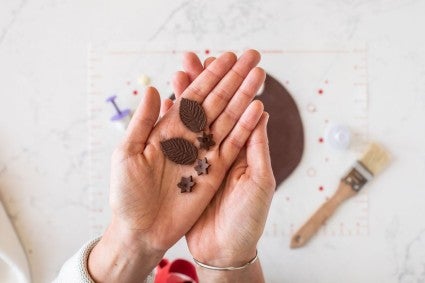
For a simple flower, use a toothpick like a pencil to draw the outline of a flower on rolled-out modeling chocolate. Retrace the lines using a small, sharp paring knife to cut out the full shape. You can use the knife blade to add additional texture to the petals. You can also complete it by adding a small circle to the center of the flower or cutting out a few leaves to place around it.
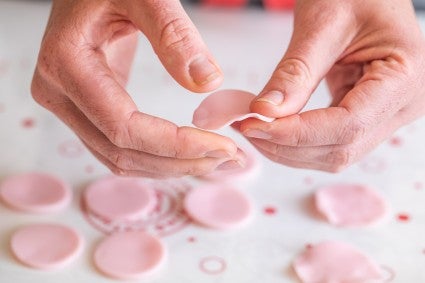
For a more complex design, try making roses. (It’s easier than you think!) Start with rolled-out modeling chocolate about 1/8” thick. Use a round cutter (or the open end of a large piping tip) to cut out about nine circles of the same size.
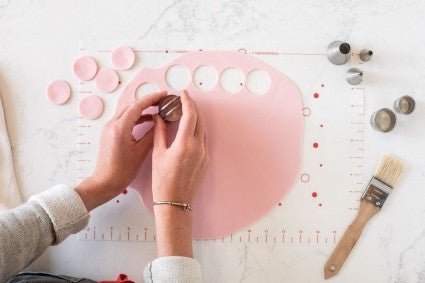
Once all the circles are cut out, begin pinching the edge of one of the circles, using your thumb and forefinger to flatten it and make the edge quite thin. Do this about halfway around the circle, leaving the bottom edge as is. Repeat with the other rounds until you have nine partially pressed circles; these are your petals.
Now it’s time to make the center bud. Start with just one petal and roll it up so that the thinly pressed edge is facing up. You should have something that looks like a cone with a swirl on the top; this is the center of your rose.
Next, add another petal, overlapping the edge of the first petal slightly. Curl the second petal around the first so that it forms a second layer. Pinch the bottom of the petals to keep them in place. Repeat with another petal, pausing to flare out the top edges of the petals slightly before adding another. Continue adding petals and pinching them near the base to adhere to the layers.
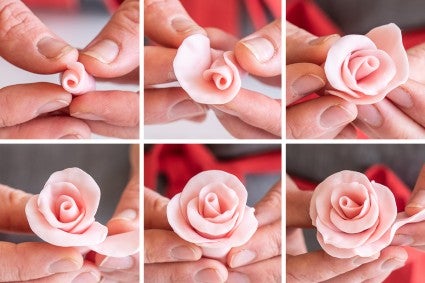
Once you get to the final layer of petals, pinch the thinner top edge of some of the outer petals in a few places to make small points. (This is similar to the motion you’d use to crimp pie crust, just on a smaller scale and only in a few places.)
Depending on how you layer the petals, there may be some extra chocolate at the base of the rose. You can snip off any excess using a pair of kitchen scissors; just be sure to cut below the place where the petals meet or all the petals will fall off.
Two ingredients, endless designs
These are only a few of the decorating possibilities that modeling chocolate offers. Using just chocolate and corn syrup — ingredients you might have in your pantry right now — you can make an edible canvas that’s perfect for transforming into countless designs that also taste delicious. (It’s chocolate!)
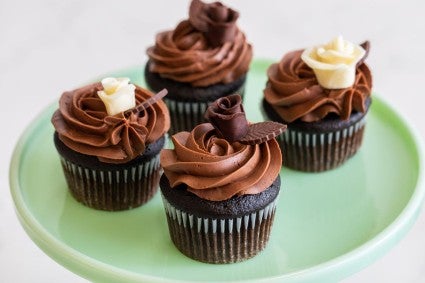
Don’t shy away from letting yourself dream up elaborate options: penguins, nonpareil-covered numbers, colored flowers, or shiny stars. It’s all thanks to homemade modeling chocolate.
Tell us about your favorite way to decorate a special occasion cake or cupcakes in the comments, below.
Cover photo (Classic Birthday Cake) by Jenn Bakos; food styling by Lydia Fournier.