How to make Pan de Cristal with sourdough starter
Keep the gorgeous holes — amp up the flavor.


Love sourdough, but looking for a bit more flexibility and ease when you bake with a starter? In The Casual Sourdough Baker, PJ shows you just how wonderfully stress-free sourdough baking can be, from simple but richly flavored loaves to countless easy ways to use your discard. If you're just beginning your journey, our Sourdough Baking Guide lays out the basics you need for success — whether you decide to become serious or go casual!
* * *
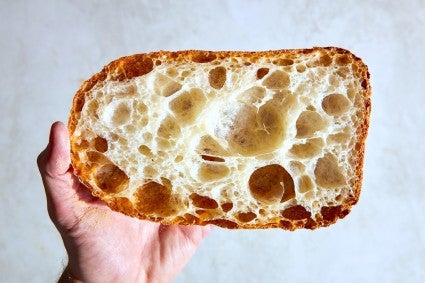
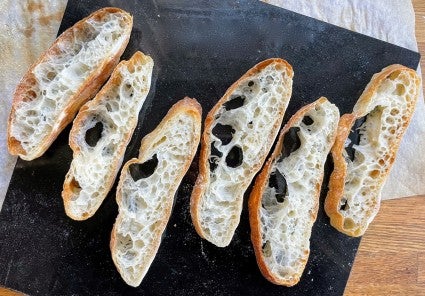
OK, let’s cut right to the chase here. If you’re a sourdough baker who leans into crusty-chewy, light-as-air freeform loaves with an irregularly holey interior to die for, then you HAVE to make Pan de Cristal — aka the "Holey" Grail of crusty artisan bread.
But wait — Pan de Cristal doesn’t include any sourdough starter; this simple straight dough is made with commercial yeast and goes from start to finish in about five hours. Convenient, yes; but for us sourdough fans, we miss the distinctive tang, the rich flavor that sourdough brings to the table.
So what shall we do about that? The Casual Sourdough Baker (me) knows! Let’s turn Pan de Cristal into a “semi-sourdough” bread, using starter for flavor and yeast for speed, convenience, and a guaranteed rise. Sounds like the best of both worlds; and really, how hard could it be?
As it turns out — harder than I thought. The final result is delicious: wonderfully light, holey bread with outstanding flavor. It just took a bit of thinking and tinkering to get there.
I don’t want you jumping right into sourdough Pan de Cristal; it’s going to help if you make it the way the recipe directs first, without starter. Why? Because getting those big holes requires a specific dough consistency based on 100% hydration: the percentage of water to flour, in this case King Arthur bread flour.
Can you substitute all-purpose flour for bread flour? No, please don’t; the higher protein in bread flour is critical to the dough’s structure. Ditto substituting another brand of bread flour, whose protein level will vary from that of King Arthur.
Hydration is easy to control when you’re not using sourdough. But throw in the variable of your starter’s hydration (is it thin and pourable, thick and scoopable, or somewhere in between?), and the picture changes dramatically. If the starter makes the dough too thick, it won’t develop those lovely holes; too loose and liquid, and the bread won’t rise properly.
So to successfully make a sourdough Pan de Cristal, you should first make it “straight,” without starter, to experience exactly what the dough should look and feel like all along the way. I can’t stress enough how important this is: in this particular recipe there’s a fine line between too slack, too firm, and just right, with “just right” yielding the ideal combination of good rise and holey interior.
This actually applies to all of your yeast baking, though. Once you get a feel for any particular recipe’s “perfect” dough — its texture and elasticity, how much kneading it needs, how much it should rise — you’ll be able to achieve success again and again, no matter how your kitchen environment, tools, or even ingredients change.
And how do you get a “feel” for your dough? Same way you get to Carnegie Hall: “practice, practice, practice!” The more you bake with yeast, the better a friend it becomes. And honestly, there’s really no such thing as failure; the birds are always happy to take care of any loaves you deem unsuitable for family consumption.
Our detailed Pan de Cristal recipe offers lots of tips and handholding, including two short videos that show the consistency of the dough as you fold it; pay special attention to those. The sample timeline in the baker’s tips at the end of the recipe is also super helpful.
After you’ve made the original Pan once, you’ll be ready to try it with your sourdough starter.
We’ll follow the standard Pan recipe but substitute starter for 10% of the flour and water (a typical percentage when adding starter to a non-sourdough recipe). The following is Pan’s standard formula. (Note: Measuring by weight is the best way to ensure baking success; but for those of you who prefer using cups and spoons, I'll also provide close approximations of the volume measurements here.)
Now let’s see how it changes (on paper) when we add starter:
I tried this 1:1 substitution (by weight) of starter for flour + water using two different starters, and neither result was up to par. This is where the tinkering started.
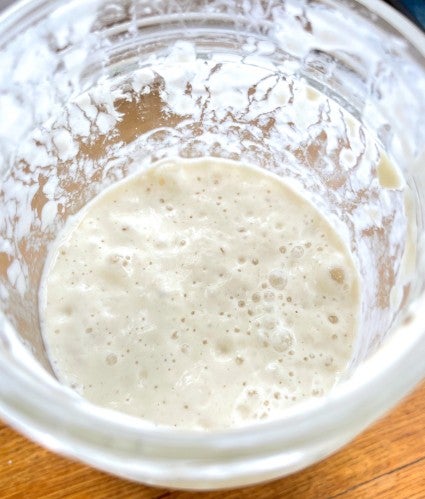
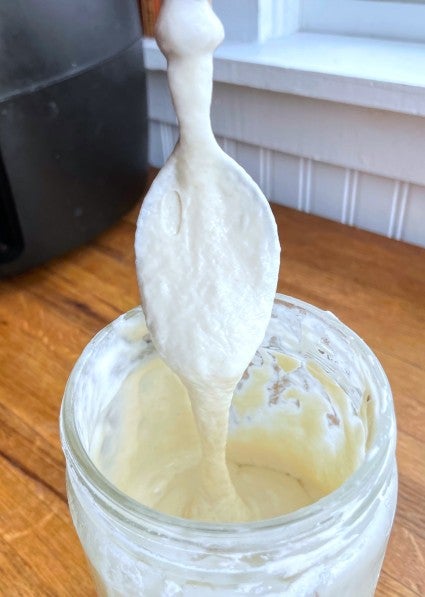
Some starters, especially those that haven’t been fed in a while, are quite liquid; think the consistency of heavy cream or even thinner. Some are thick and need to be scooped from their crock rather than poured. This difference in consistency can be accommodated without making any changes in most recipes, but Pan de Cristal (remember its reliance on hydration for final texture) isn’t one of them.
Of the two starters I keep in my fridge, one gets fed regularly and is “gloppy,” in between pourable and scoopable. The other I feed only occasionally; it’s quite thin.
When I tested the Pan de Cristal with each starter, look what happened:
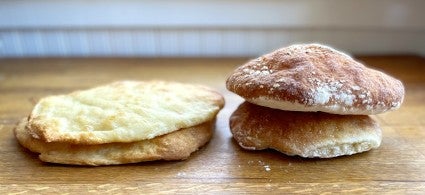
After some further experimentation, I came up with a simple process that allowed me to reach my goal: high-rising sourdough Pan de Cristal loaves with over-the-top holes inside.
I found the key to success is adjusting the amount of water in the recipe up or down based on your starter’s consistency. I realize calling starter “pourable” vs. “gloppy” vs. “scoopable” isn’t very specific. Still, we need to start somewhere, so here’s what to do:
If your starter is very thin: Use 100g starter, 450g bread flour, and start with 300g water. If the resulting dough looks too stiff (like you could knead it), add more water 25g at a time. The dough needs to hold its shape somewhat when you scrape it around the bowl with a bowl scraper, but shouldn’t look like you could pick it up and knead it.
If your starter seems thick (not thick enough to knead, but too thick to pour easily): Use 100g starter, 450g bread flour, and start with 400g water, making any further adjustments (if necessary) as directed above.
In the end, using my “gloppy” starter, I used 100g starter, 450g bread flour, and 375g water. The resulting dough held its shape a bit, but definitely wasn’t kneadable using any standard method (traditional hand kneading, using a stand mixer, etc.)
Once you’ve nailed that initial dough consistency, you’re ready to roll — er, fold.
I’ll walk you through the original Pan de Cristal recipe, offering my own adjustments for tangy flavor and ease of execution.
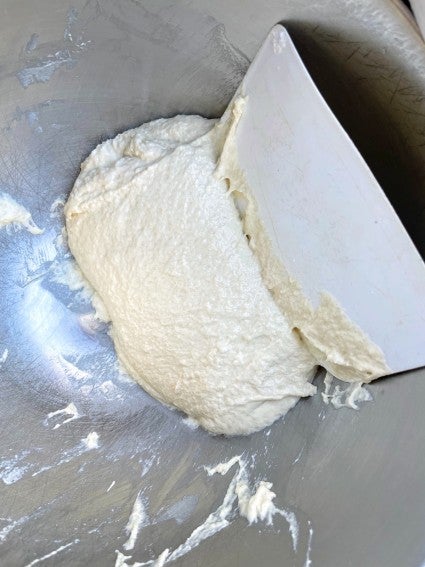
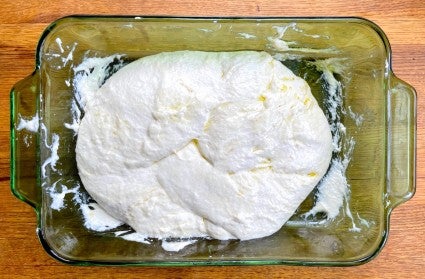
First, mix all the ingredients, adding your sourdough starter and making the amendments suggested above to yield a very soft dough.
Pour/scrape the dough into a shallow, heavily oiled pan (use the 1 tablespoon or 15g of oil called for in the recipe). You won’t be baking in this pan, so any material — glass, metal, stoneware — is fine.
Next, you’ll do a series of folds to develop the dough’s gluten. These folds stand in for kneading; it’s lots of fun to see how, simply through picking the soft dough up and basically letting it drop back down into the pan, it gradually gains more and more structure.
This video, which is also included on the recipe page, shows the process in action.
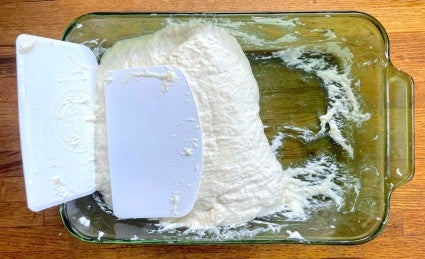
Instead of using my wet hands, as the recipe directs, I used two bowl scrapers. This saved me multiple repeats of “washing” my hands with flour, the suggested method for cleaning your hands when working with very sticky dough.
When it came time to transfer the risen dough to a generously floured work surface, as the recipe directs, I chose instead to transfer it to a piece of parchment coated heavily with olive oil spray. For me, using enough flour under the loose dough to keep it from sticking also resulted in baked loaves with an unpleasantly thick layer of flour coating their bottoms; thus the switch to oil.
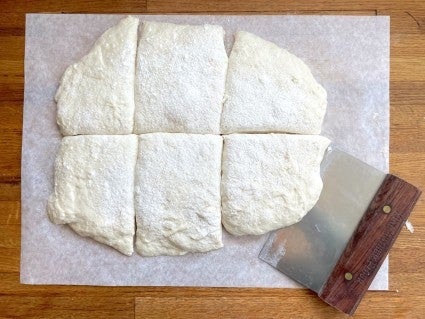
I also chose to use a bench knife to divide the dough into six pieces rather than the four called for. My six pieces resulted in oval loaves ranging from 6” to 7” long, which I find perfect for sandwiches. For larger loaves, feel free to follow the recipe as written.
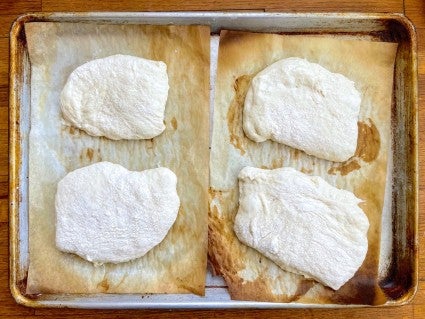
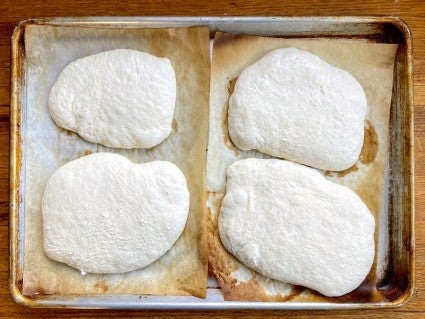
I then transferred the irregularly shaped loaves to parchment. There’s no need to grease this parchment; it’s going right into the oven along with the loaves.
I let the loaves rise longer than the recipe’s suggested two hours; my loaves needed three to four hours to develop the air bubbles indicating they were ready for the oven. (This may be because my kitchen is a bit cool this time of year, when spring is on the way but winter is reluctant to leave.) When letting your loaves rise, go by how they look, not by the clock.
Start preheating your oven to 475°F well before the loaves are ready to bake. For best results, use a baking steel or stone, as the recipe suggests. But if you don’t have either, it’s OK; check the tips at the end of the recipe for alternatives. Your Pan will still be delicious, although perhaps not quite as holey.
Bake the bread as directed. Remove from the oven and cool on a rack. I know you’re dying to cut into a loaf for the big reveal but honestly, be patient — cutting into hot bread makes it gummy. And with all those air holes inside it’ll cool quickly; wait until it’s just warm before wielding your knife.
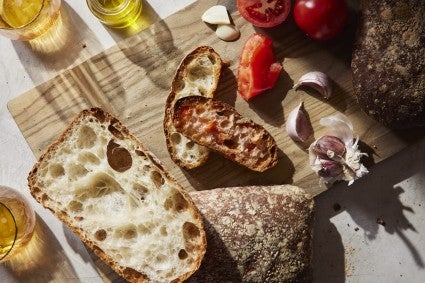
So that’s it: six loaves of sourdough Pan de Cristal, perfect for slicing into tops-and-bottoms for generously sized sandwiches or eating straight with lots of salted butter.
This recipe may seem complicated the first time you try it. But after a couple of go-arounds, when you've figured out how much water to add using your own starter (and how the dough should look and feel), you'll feel confident making these incredibly light, hole-filled loaves whenever the urge for an artisanal triumph strikes!
Remember — make the original Pan de Cristal recipe before you try your sourdough version. This is a journey best started at the beginning.
