5 practical ways to toast nuts
From quick-toasted to slow-roasted, choose the process that works for you.


![]()
Our regular column featuring 5 things you should know about baking: from tips to tools to questions you're always asking yourself in the kitchen.
* * *
Many baking recipes call for nuts. But the really smart ones call for toasted nuts. To say browning brings out the flavor in nuts is a decided understatement: A bit of heat applied for a small amount of time “blooms” raw nuts, releasing their aromatic volatile oils and “caramelizing” their surface. The result? Nuts that start out “Yeah, OK” and end up “Whoa, these taste great!”
So when you see a recipe that calls for “1 cup diced walnuts, toasted,” what do you think? Heat the oven? Get out the frying pan?
Your chosen method for toasting nuts may well depend on balancing how much time you have, how much attention you want to spend, and the tools available to you.
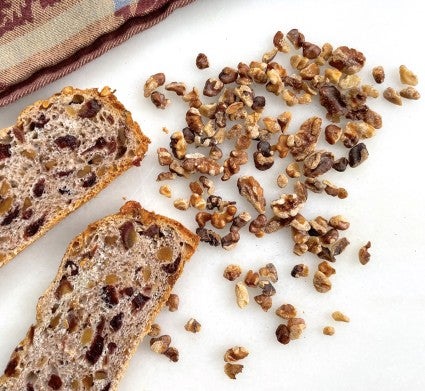
Whichever method you choose, you'll want to transfer the hot nuts to a room-temperature receptacle once they’re toasted to prevent further browning. Oh, and even if your recipe doesn’t call for toasting the nuts before using them — if they’re an interior ingredient (rather than an external topping), go ahead and toast them. You’ll be glad you did.
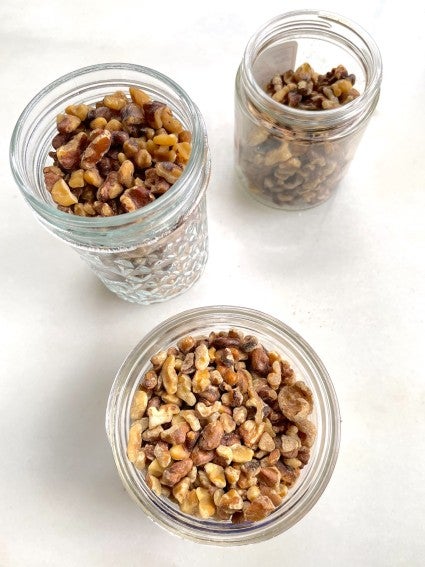
Check out the following five options for toasting nuts to decide what works best for you. I've chosen walnuts for all of my testing here, but keep in mind that the higher the nuts' oil content, the faster they'll toast; pine nuts and macadamia nuts are especially prone to quick browning.
Attention level: High.
Approximate time: 2 to 7 minutes, depending on heat.
Pros: You can see the nuts toast in real time and pull them from the heat when they’re the exact shade of brown you like; no having to open the oven or microwave to check progress.
Cons: It’s very difficult to get the nuts to brown evenly, despite constant stirring. And if your attention wanders for even a few seconds at the end, nuts can go from perfect to burned.
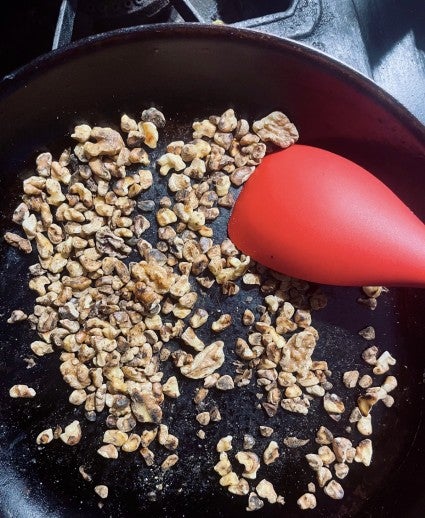
How to do it: Heat a heavy skillet over medium heat; don’t grease the pan. When hot, pour in nuts and spread into a single layer. Cook, stirring constantly, until nuts are as brown as you like and smell “toasty.”
Tip: The hotter your pan, the quicker the nuts will cook and the more likely they are to brown unevenly and exhibit burned spots. Cooking over lower rather than higher heat and stirring constantly is your best bet for even toasting.
Attention level: Moderate.
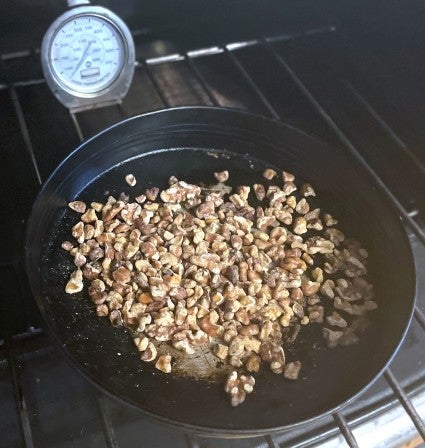
Approximate time (depending on degree of browning): 10 to 15 minutes at 325°F.
Pros: You can toast three half-sheet pans of nuts at once if you like; your oven is perfect for large quantities. It's also a slower, gentler method of toasting (read: easier to control) than pan-frying.
Cons: Even if you’re only toasting a small amount of nuts, be ready to stand by and stir to redistribute them across the pan — perhaps more than once. Nuts on the outer edges will brown more quickly than those in the center, so even toasting requires attention. Also, since the nuts are inside the oven and not in plain view, it’s harder to keep a close eye on them.
How to do it: Spread nuts in a single layer on a parchment-lined baking sheet (or in a smaller baking pan). Bake in the center of a preheated 325°F oven, stirring to redistribute nuts every 5 minutes or so. Keep your eyes peeled and your nose on alert: Nuts in the oven can quickly go from just right to burned. When you start smelling the nuts, they’re probably done.
Tip: Using parchment not only keeps your pan clean, it’s a handy way to move nuts once they’re done. Simply grab the parchment and nuts, gently bend one end into a spout, and pour the nuts into your mixing bowl or a storage container.
Attention level: High the first time; low once you have the process nailed.
Approximate time (depending on degree of browning and power setting): 5 to 12 minutes
Pros: You don’t need to heat your whole oven just to toast a handful of nuts. And once you nail your own microwave’s best process for toasting nuts (power setting and time), you can easily replicate it again and again.
Cons: Nuts can toast quite unevenly if you don’t watch them carefully and stir to redistribute across the plate or pan when necessary.
How to do it: Spread nuts in an even layer on a flat microwave-safe plate. Using the power setting of your choice (I use full power), heat in 1-minute increments, stirring in between. When nuts start to brown, heat in 30-second increments. When done, write down and save exactly how long it took to toast nuts to perfection on your chosen power setting.
Tip: The first time you toast nuts in your microwave, you should stand by and check them every minute — which is a pain. But once you determine your microwave takes 10 minutes to toast nuts on high power, you’re all set. Going forward, there’s no need to check the nuts every minute; simply break that 10-minute toasting time into two 5-minute bursts with a quick stir in between.
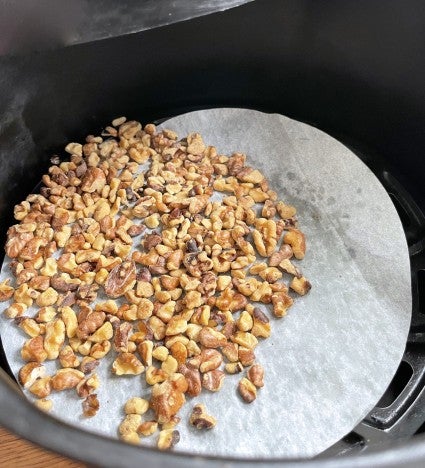
Attention level: Low.
Approximate time (depending on degree of browning): 3 to 7 minutes.
Pros: Speed and ease! Without paying any attention at all, you can toast a cupful of nuts in 5 minutes or so.
Cons: Capacity is limited by the size of your machine.
How to do it: If nuts are small enough to fall through the holes in your air fryer tray or basket, line the receptacle with parchment. Spread nuts in a single layer, not heaped up in a mound or unevenly distributed across the basket or tray’s surface.
If your air fryer doesn’t include a recipe for toasting nuts, experiment with a small amount first — about 1/4 cup should do it. Choose a low temperature (e.g. 325°F), and a short time — say, 3 minutes. Add or omit the preheat cycle, your choice. Press the start button, and after 3 minutes assess whether you need to add more time. Remember, write down your total time at the end (and whether or not you used the preheat cycle) in order to avoid needless experimentation in the future.
Tip: Despite what you might have heard or read online, nuts don’t need to be sprayed with oil before toasting; they naturally contain enough oil to brown nicely on their own.
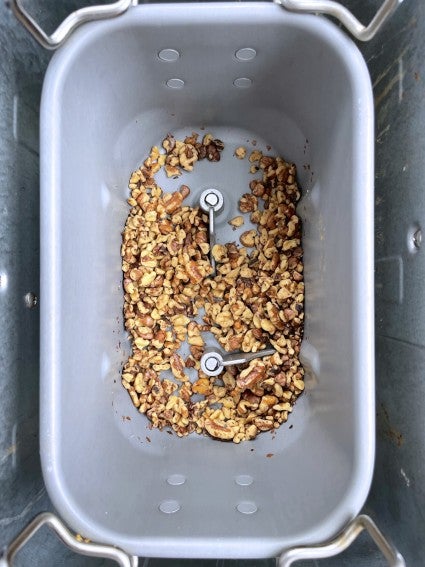
Attention level: Low.
Approximate time (depending on degree of browning): 2 1/2 to 5 hours (in a Zojirushi bread machine).
Pros: Cooking nuts in your bread machine roasts them through and through, as opposed to just toasting their surface; this full-nut roasting can produce superior flavor.
Cons: The process is slow, taking upward of 5 hours for deeply roasted nuts.
How to do it: Place nuts in your machine’s bucket; they don’t need to be in a single layer, though the deeper you pile them, the longer they’ll take to roast through. Select the jam cycle and press Start. One complete jam cycle should roast 1 cup of nuts lightly; two cycles will roast nuts to a deep golden brown. Time-consuming? Yes. But what’s the difference, when you don’t have to stick around to watch the process?
Tip: When you complete one cycle, check the nuts by tasting them; are they as flavorful as you'd like? If not, let the machine cool for a couple of minutes with the lid open, then close the lid and restart, making sure it’s still programmed for the jam cycle.
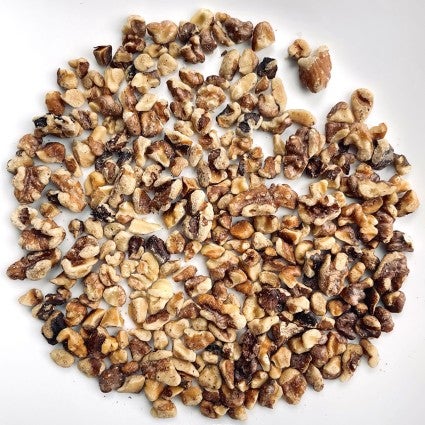
As with most things baking, there are many paths to the same destination: in this case, well-toasted nuts. It’s tempting to think, “Yeah, but which is best?” Ultimately, the best way to toast nuts is the way you like the most.
Try as many of these methods as you like; you’ll soon see that one or two meet your needs better than the others. Personally, I prefer to toast nuts in my air fryer: It’s fast, reliable, and doesn’t heat up the kitchen. For larger quantities, I go with my oven or bread machine. But again: entirely up to you.
How about that other baking staple that frequently calls for toasting, shredded coconut? For me, one method stands head and shoulders above the others: See A better way to toast coconut.
Cover photo (Praline French Toast) by Liz Neily.
