Here’s how I streamline my sourdough baking
Cut to the chase — and still get great results.


Love sourdough, but looking for a bit more flexibility and ease when you bake with a starter? In The Casual Sourdough Baker, PJ shows you just how wonderfully stress-free sourdough baking can be, from simple but richly flavored loaves to countless easy ways to use your discard. If you're just beginning your journey, our Sourdough Baking Guide lays out the basics you need for success — whether you decide to become serious or go casual!
* * *
Information overload: It’s the hallmark of every beginning sourdough baker’s life. Make your starter with whole-grain flour … no, wait, with white flour. Use only spring water and a ceramic container — forget all that, tap water is fine. So is a plastic bucket. It can be a lot to wade through, can’t it?
But let’s assume you’ve finally got your starter cranking: You feed it, it doubles in size within a reasonable amount of time (4 to 8 hours), you successfully use it in a sourdough bread recipe — and you make that same recipe over and over again because you’re hesitant to mess with a good thing.
Now, though, you’re bored. You want to try something different. You see a fabulous-looking loaf on Instagram, click to the recipe — and wilt. So many steps! Folding. Waiting. Folding again. Waiting again. Pre-shaping. Waiting. You want the result — but feel derailed by the stop-and-go process.
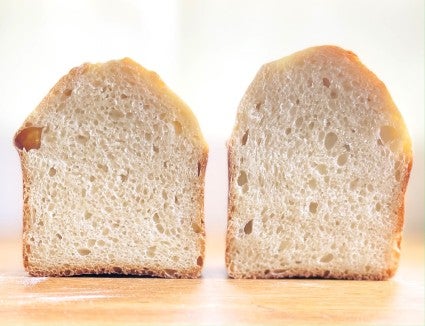
The answer? Streamlining. That’s what I call skipping a lot of the “finer touches” (OK, skipping steps) in a sourdough recipe and still getting good bread. Maybe not the ultimate loaf, the “follow everything exactly down to the minutest detail” loaf — but bread that’s well-risen, tastes good, has a nice crumb, and makes you happy.
Kim, one of our King Arthur employee-owners, recently passed along her husband’s frustration with the no-knead sourdough bread recipe he’s used and loved since getting into bread baking at the start of the pandemic 18 months ago.
Kim says, “Joseph’s #1 pain point is the number of touches involved in his go-to recipe. Can he fold the dough less frequently? Can he cut down on the oven preheat? Even if there’s a slight compromise on the outcome, he’s looking for some shortcuts. He called sourdough a ‘daunting’ task that’s hard to motivate for as his life gets busier again.”
How can we lower Joseph’s stress level — and keep him from giving up on the bread he loves?

The following tips can be tried with many of your favorite sourdough bread recipes. Let’s apply them to Joseph’s favorite No-Knead Sourdough Bread. Which steps can we skip — and still create a good loaf?

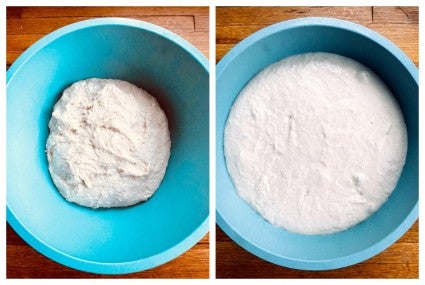
Let’s start at the beginning. The recipe’s very first ingredient is “1 cup (227g) fed (ripe) sourdough starter.” That means feeding your starter, waiting hours for it to become active, then using it at its peak — no matter what time of day (or night) that happens to be.
The challenge: Feeding your starter and then catching it at its very peak of ripeness means you need to be around to keep tabs on it. And since you don’t know exactly when your starter will be ready, you’re not able to choose a time to start your dough — putting other activities in limbo.
The solution: Use unfed starter straight from the fridge. Maura Brickman taught me this trick via her Pain de Campagne recipe. Instead of feeding your starter ahead of time, simply combine unfed starter with the remainder of the dough ingredients; it’ll get all the food it needs from the flour and liquid in your recipe.
This won’t necessarily save you any time; you’ll still need to wait the requisite 4 to 8 hours for the starter to wake up and become active. But you won’t have to keep checking on it to see if it’s ready to add to your dough: It’s already in the dough.
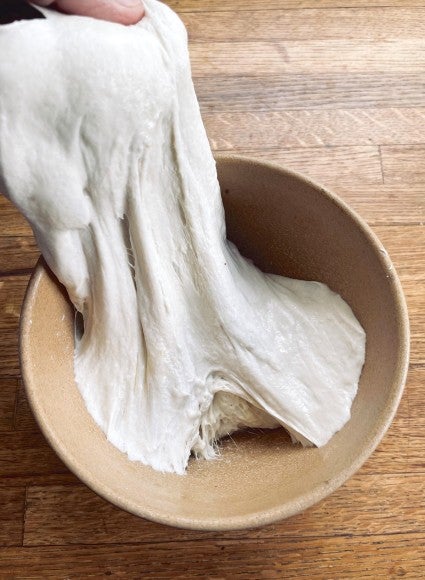
Many no-knead recipes have you fold the mixed dough at regular intervals. This relatively short process of simply stretching the dough and letting it sink back into the bowl, when combined with a long, slow rest, replaces the more vigorous kneading you might be used to.
The challenge: Folding is flexible and can be built into your schedule at various times throughout the day. But it also requires you to revisit your dough on multiple occasions. What if you’re out of the house all day and can’t squeeze in even a few scattered folds?
The solution: Don’t fold; just let the dough continue to rest undisturbed, as it’s been doing since you made it with unfed starter hours ago. This extended fermentation strengthens the dough’s gluten almost as well as folding — and frees you for other pursuits.
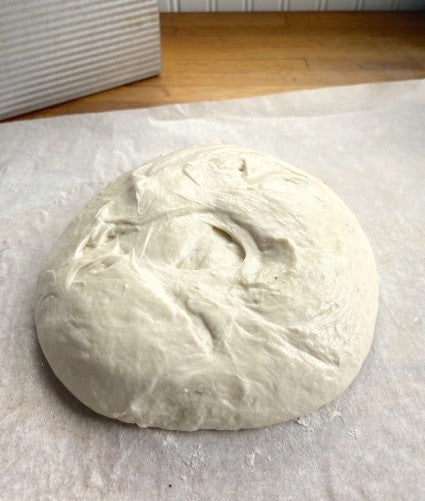
Pre-shaping your dough before forming it into its final loaf shape, like folding, helps with the bread’s structure.
The challenge: Pre-shaping only takes 20 minutes or so. Still, it’s yet another “set the timer” chore.
The solution: Don’t pre-shape. It helps a bit, but it’s not essential.
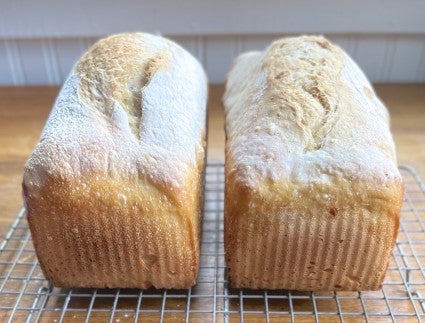
Many sourdough loaves call for an oven stone or steel. Baking on this super-hot surface produces a great rise and deliciously crunchy bottom crust.
The challenge: It takes time and fuel (gas or electric) to preheat your oven for an hour, as opposed to however long it usually takes (generally less than half of that).
The solution: Put your bread into the oven when the oven’s come to temperature, no matter how quickly it gets there. If anything’s lost in the crust by not waiting the entire 60 minutes, I’ve never noticed it.
One note: Make sure you’re using a stand-alone thermometer inside the oven to gauge its temperature. Built-in oven thermometers that beep when the oven’s ready are notoriously unreliable.
So what exactly have we gained here? We’ve minimally shortened the length of time it takes to go from starter to baked bread: Cutting the 20-minute loaf pre-shape and the 60-minute oven preheat will save you about an hour.
But more importantly, we’ve eliminated half the touchpoints (pain points) along the way. You can now mix your dough in the morning, let it sit undisturbed all day, place it in the fridge at night, and shape and bake it the next day, on your schedule. From start to finish you’ll probably spend less than 5 minutes actually dealing with dough; the rest of the time it’s either resting quietly or baking — and doesn't require your attention.
Now that you’ve seen the steps you can consider eliminating from your sourdough bread recipe, here are a couple you should absolutely keep:
At the end of the day, there's really no right or wrong when it comes to bread baking. If you do everything "wrong" and make bread you enjoy, then the path you followed is the right one for you. Sometimes you're up for a leisurely day or two around the house and are happy to fold your dough at the recommended intervals. Other times, you just want to jump on the highway, hit cruise control, and go straight to your destination: no exits, no rest stops, just get there. It's all good when the end result is a loaf of bread you love.
If you’re interested in making this No-Knead Sourdough Bread as written — feeding, folds, and all — join sourdough expert Maurizio Leo as he guides you through the recipe step by step. And if you’re looking for a loaf that’s even quicker and simpler than No-Knead Sourdough Bread, check out our easy everyday sourdough bread.
Cover photo by John Sherman.
