Baker’s tip: Since publishing this post in 2015, we’ve introduced our '00' Pizza Flour, designed specifically to produce classic Neapolitan-style pizza in a home oven. Make our Neapolitan-Style Pizza Crust for authentic taste and texture, and if you don’t have '00' Pizza Flour on hand, this Artisan No-Knead Pizza Crust is still a great option.
I remember when my boyfriend, Jeremy, and I got serious about making the perfect pizza at home. We'd just left LA, and more than the weather, more than sushi, possibly even more than our friends (sorry, guys), we missed our local pizza haunts.
In LA, good pizza was never far, so the motivation to try (and perfect) our own recipe was wholly unnecessary. When we decided to move to the New England woods (far from the reach of delivery) we knew we'd have to find a way to keep great pizza in our lives.
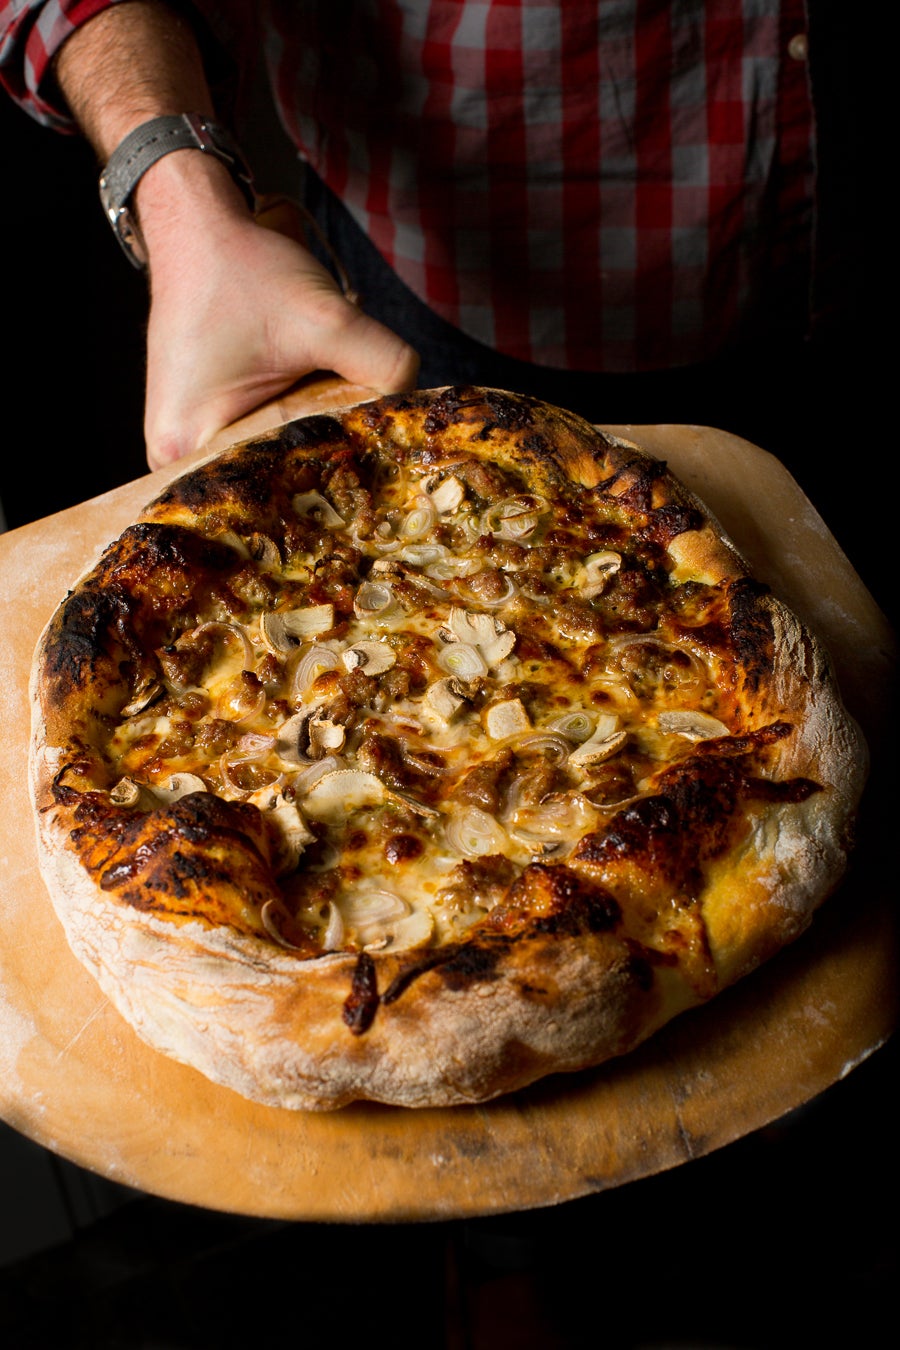
Red sauce and pesto pizza topped with smoked mozzarella, sausage, shallots, and mushrooms.
For nearly a year we searched high and low for the right recipe and technique, trying everything from complicated processes to simple; and sampling more kinds of flour than we previously knew existed. (For the record, King Arthur Flour's Unbleached All-Purpose Flour was, and probably always will be, our favorite go-to for its quality, versatility, and ease of use.)
One day we stumbled upon an article in The New York Times about Jim Lahey's no-knead bread. The process seemed too simple, but to our surprise it rendered beautiful, open-crumbed loaves, with crackly crusts and tender, chewy interiors.
Our eyes were suddenly opened to a way of developing gluten we hadn't previously considered. We decided to give Lahey's no-knead pizza method a shot, and in that first bite, found the slice of pizza heaven we'd been looking for.
These Neapolitan-style pizzas are reminiscent of the artisan wood-fired pies that were all the rage when we were leaving LA. The pizza is light but not flat; substantial but far from bready, with a light and pillowy crust that's equal parts chewy gluten and air. In short, it's pizza perfection.
This pizza does require a little forethought, needing 24 hours (18 in a warm room) to rise. It also requires a little bit of practice to perfect, but don't let that stop you! The dough can be made up to a week in advance, and takes less than 5 minutes to pull together – no kneading required.
We've modified Jim Lahey's recipe by halving it (making two pizzas instead of four), and by adding sugar and a bit more water, which for us proved the key to pizza with a tender and light crust, crispy bottom, and the perfect amount of chew. The fun of this recipe is that it leaves plenty of room for experimentation and modification.
We've fallen deeply in love with our pizza steel, which renders professional pizza-oven quality crusts, without the fuss of actually building a stone oven in your backyard. I highly recommend investing in one, if you're serious about baking pizza at home. A stone will work for half the price; but trust me when I say the steel is worth the extra cash. It radiates more heat than the stone, producing breads and pizzas with professional oven-quality lift.
This recipe is measured in grams, so a kitchen scale is helpful. I've added cup measurements for convenience, but the truth is grams don't convert neatly into cups – for best results, measure by weight.
Depending on the season, you may need a little more or a little less water – use the photos as your guide until you get a feel for how the dough should behave.
In a large bowl, measure the following:
250g King Arthur Unbleached Bread Flour or All-Purpose Flour (approximately 2 cups + 1 tablespoon)*
1/8 teaspoon active dry yeast
2g granulated sugar (1/2 teaspoon)
8g salt (1 1/4 teaspoons)
185g lukewarm water (3/4 cup + 1 tablespoon)
*This recipe was originally developed using All-Purpose Flour, but our test kitchen has come to also love the chewier version of the crust when made with Bread Flour. Choose whichever flour you have on hand.
Mix the dry ingredients, then add the water. Stir until just combined.
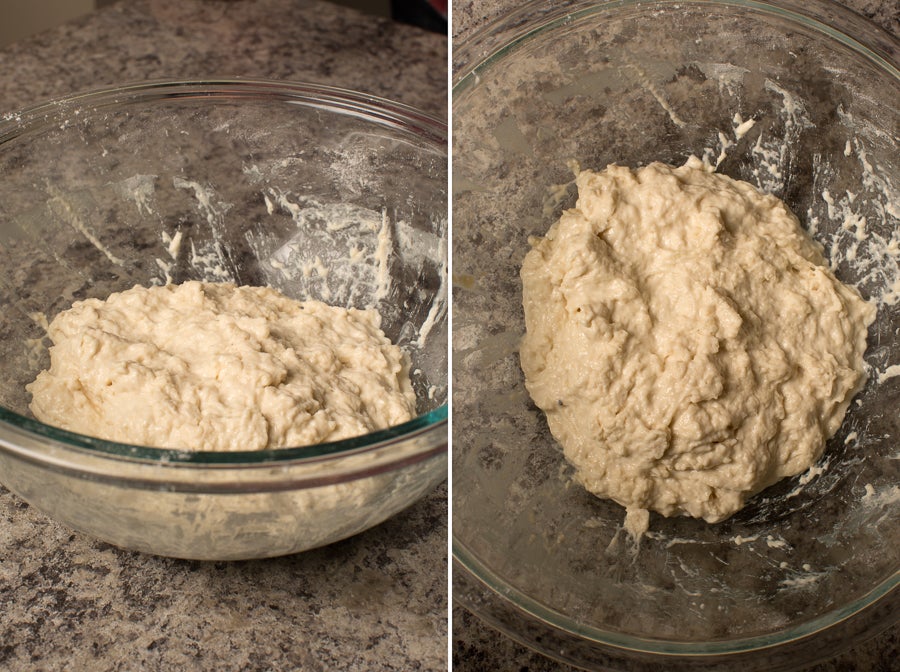
The dough will look a bit dry and lumpy at first, but don't worry.
Cover and allow the dough to rise at room temperature for 24 hours.
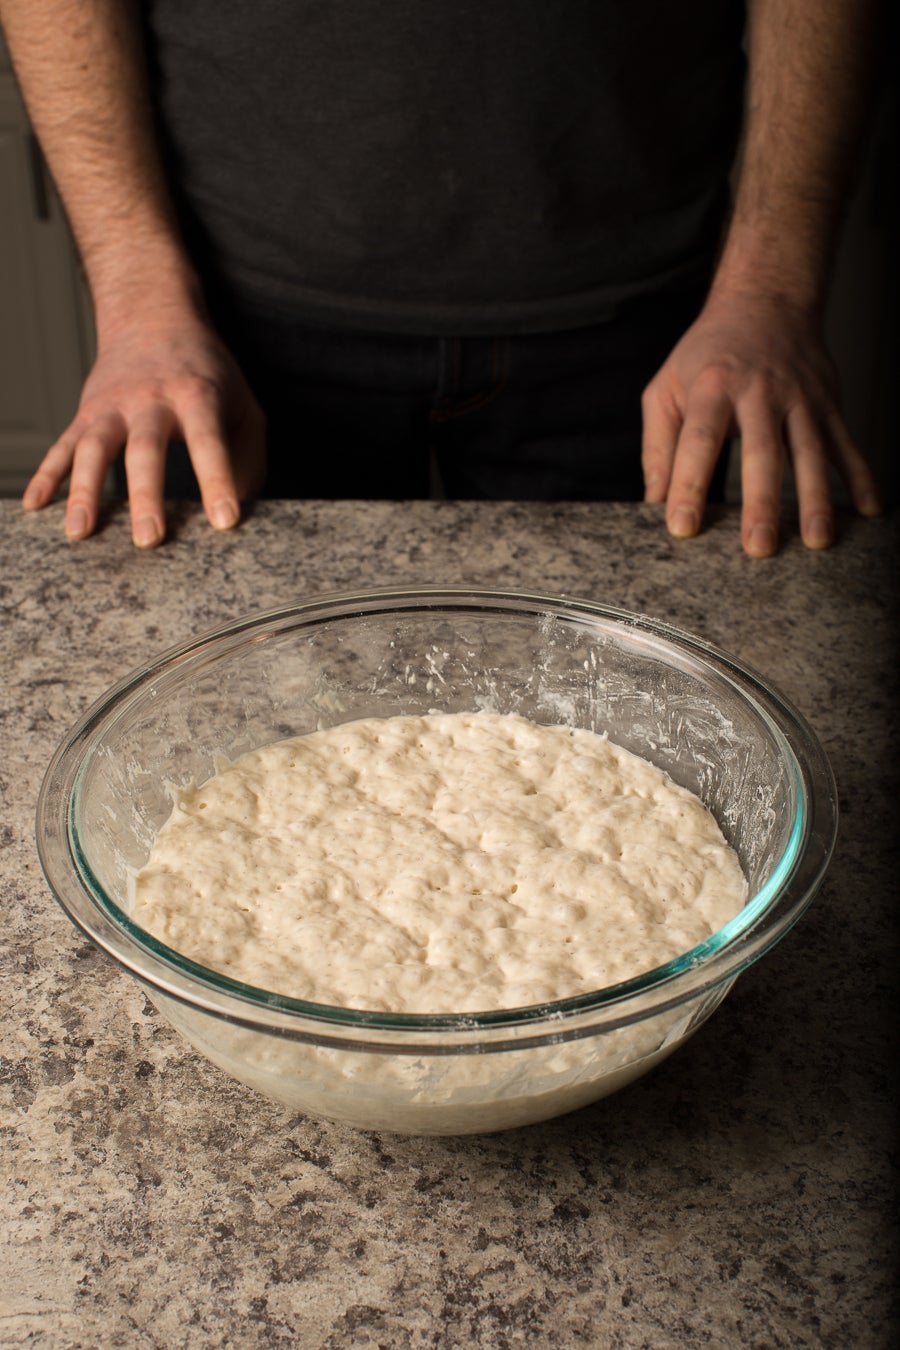
Twenty-four hours later, the dough looks nice and hydrated.
Place your oven rack on the center rung, and preheat the oven to 550°F with the baking steel or stone inside. The position of the rack inside the oven is especially important, particularly if you're using parchment paper – too close to the broiler (you need at least 8" clearance) and the top of your pizza (and the parchment) will burn before the bottom has had time to cook through.
You'll want to allow the oven to sit at temperature for 30 minutes before baking your pizza, in order for the steel or stone to fully preheat. We find that if you turn on the oven right before you do the stretch-and-fold with the dough, it's ready at about the same time your pizza is ready to go in.
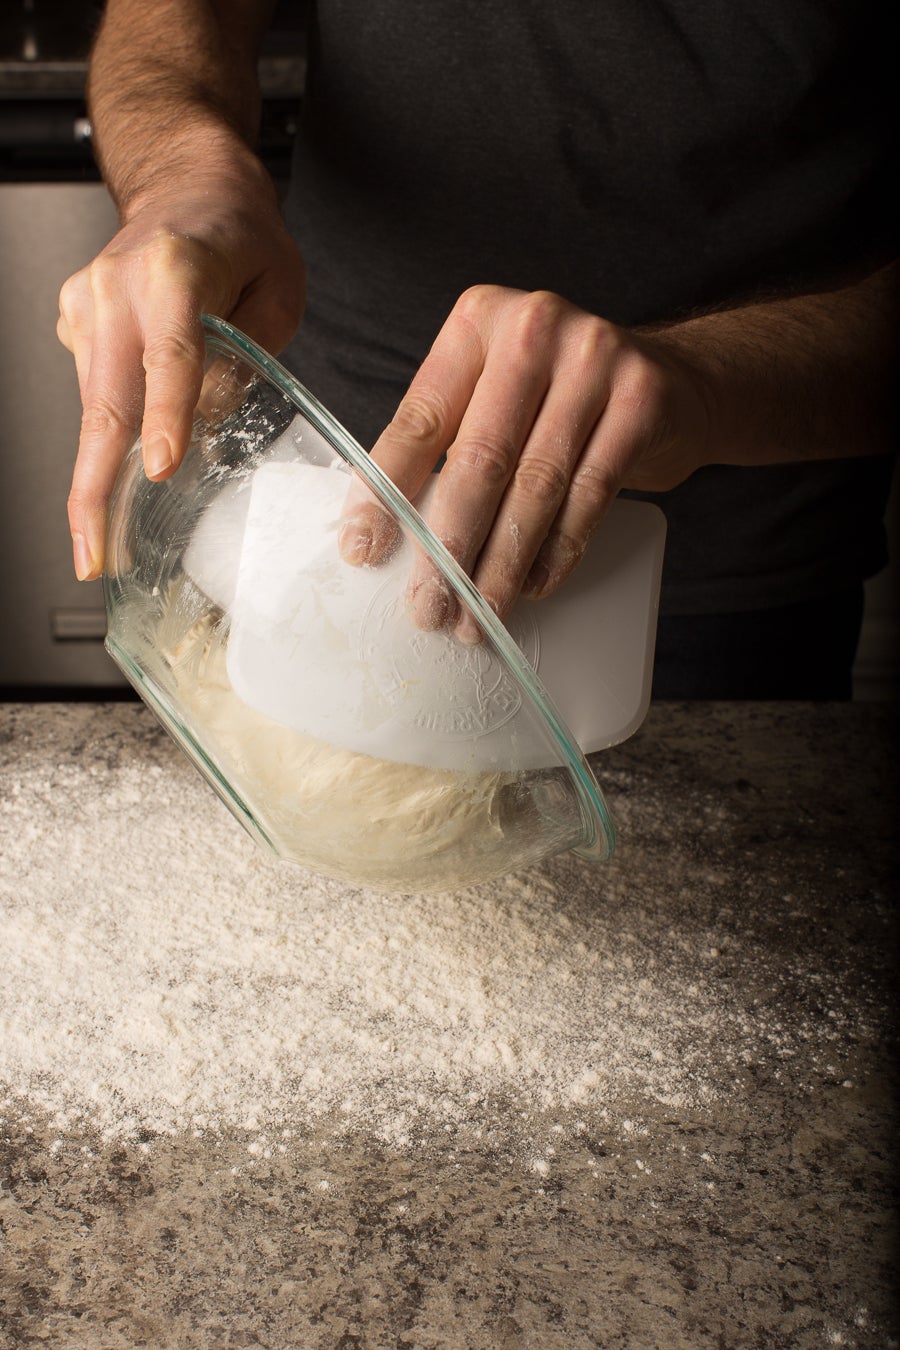
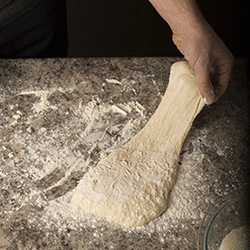
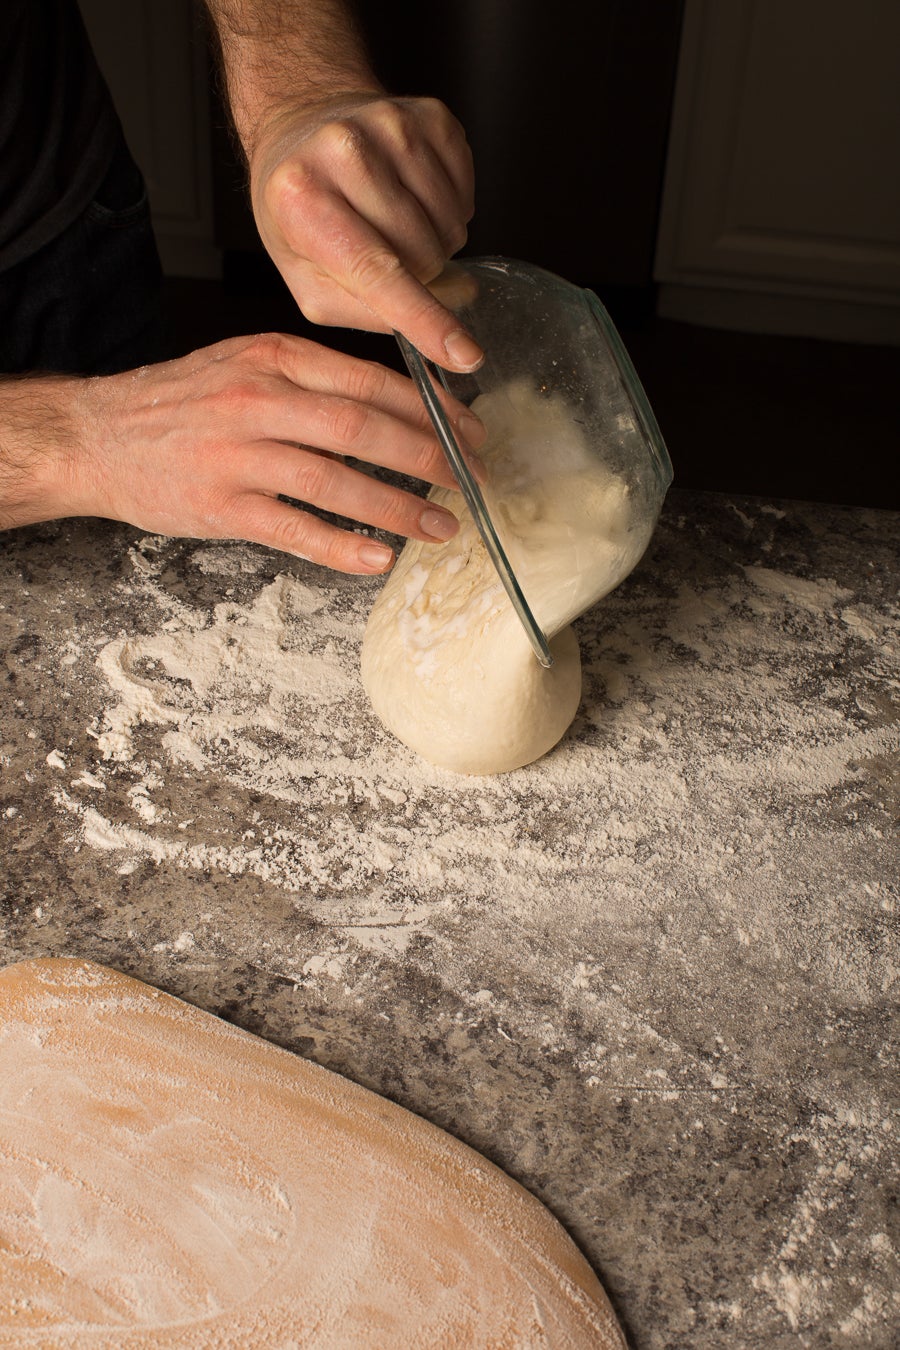
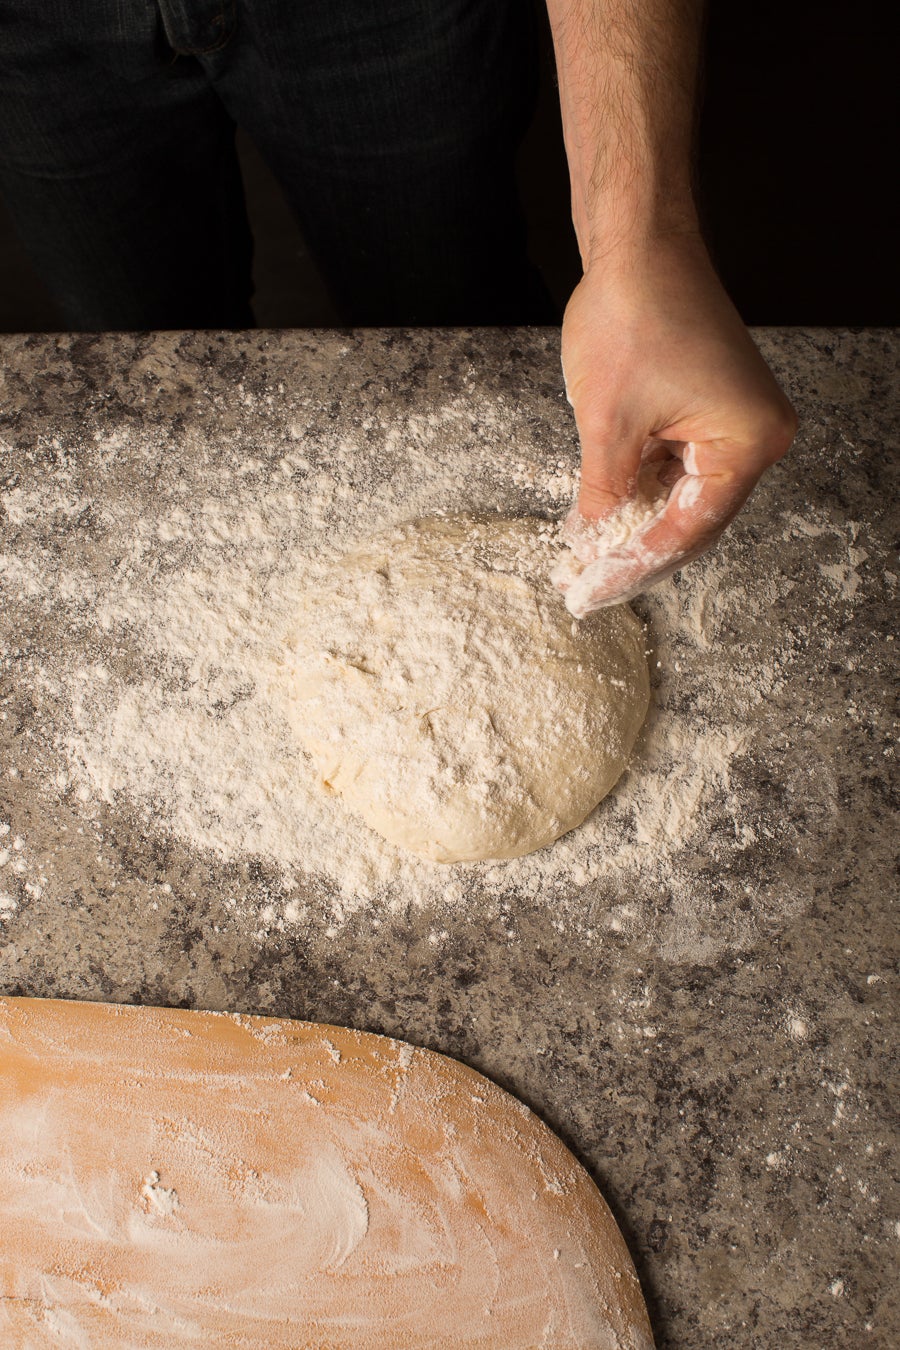
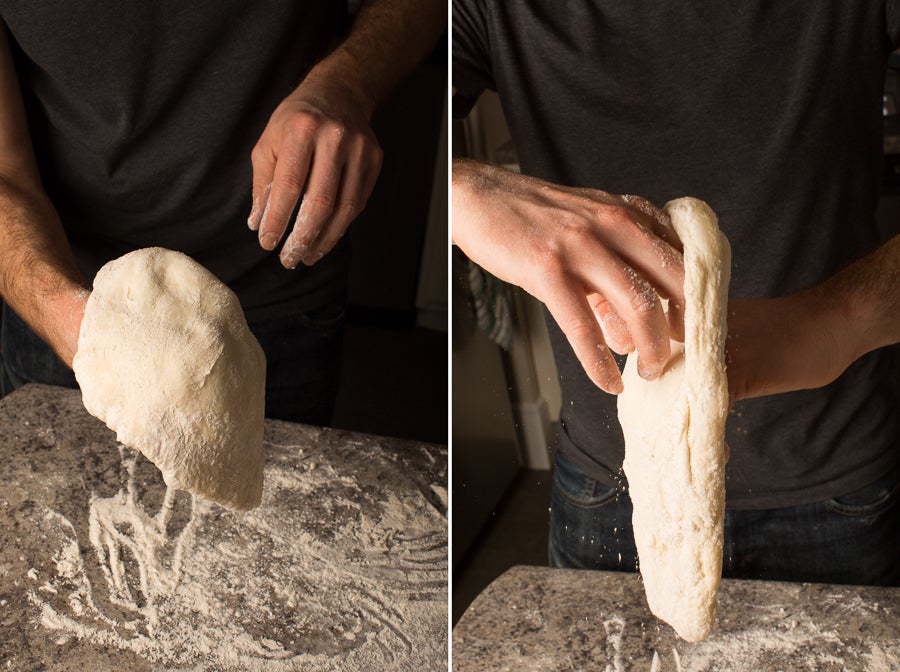
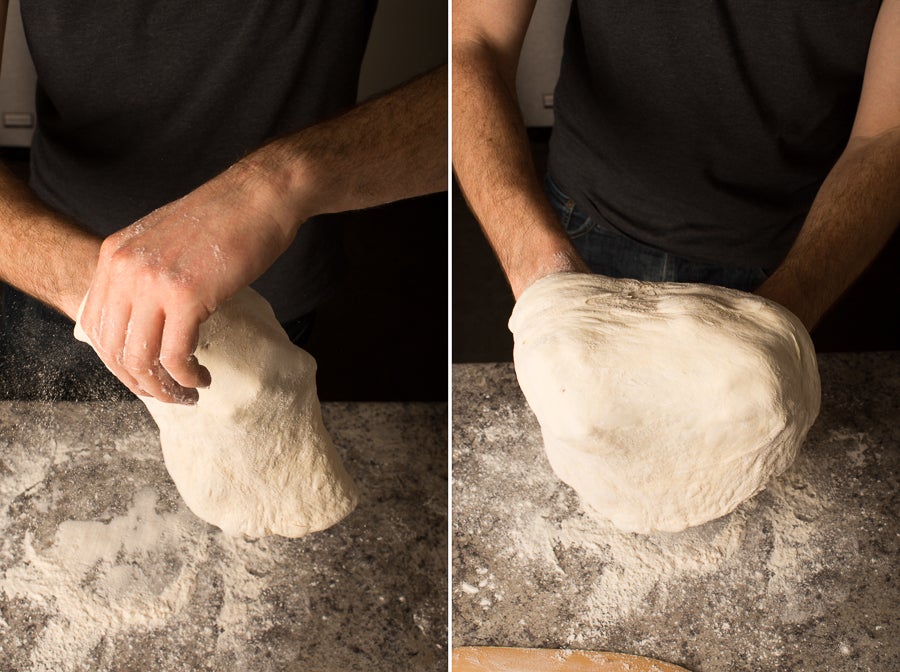
Use a bowl scraper to transfer the dough onto a well-floured surface – this inexpensive item makes it the ideal tool for working with a dough this wet. Make sure you use enough flour to keep things from sticking.
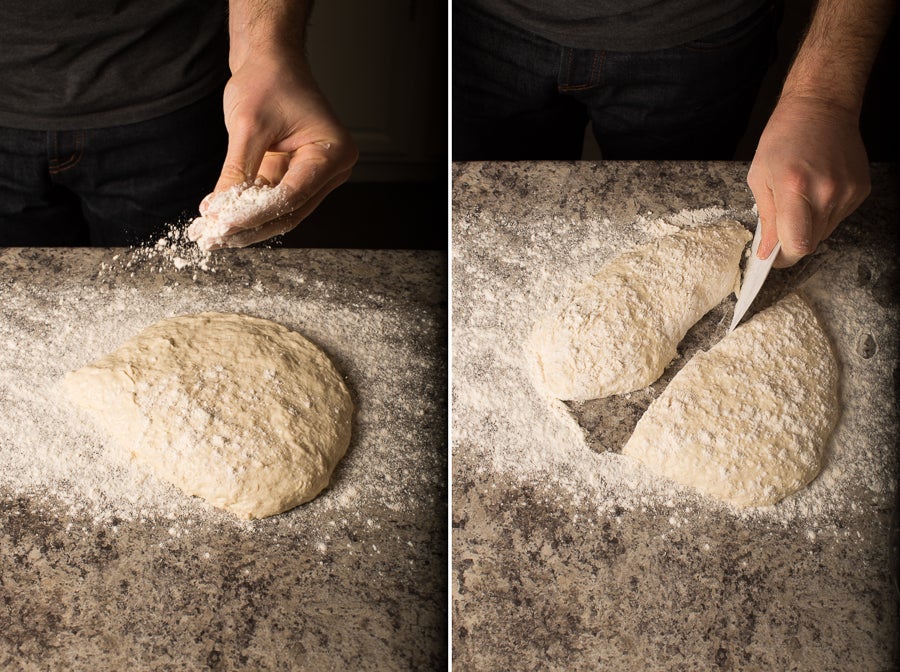
Dust the top of the dough with flour, then use a bowl scraper to cut the dough into two even sections.
Stretch and fold, as follows:
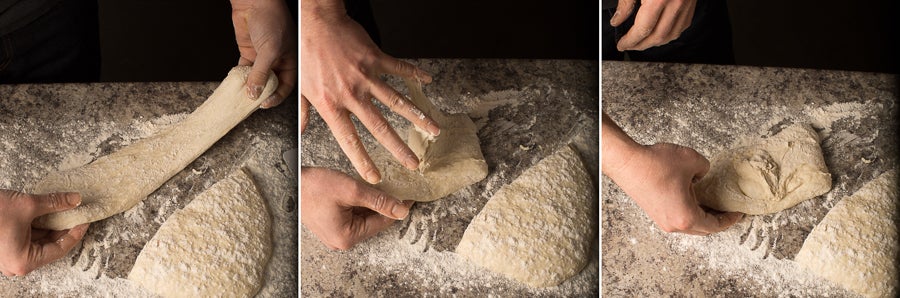
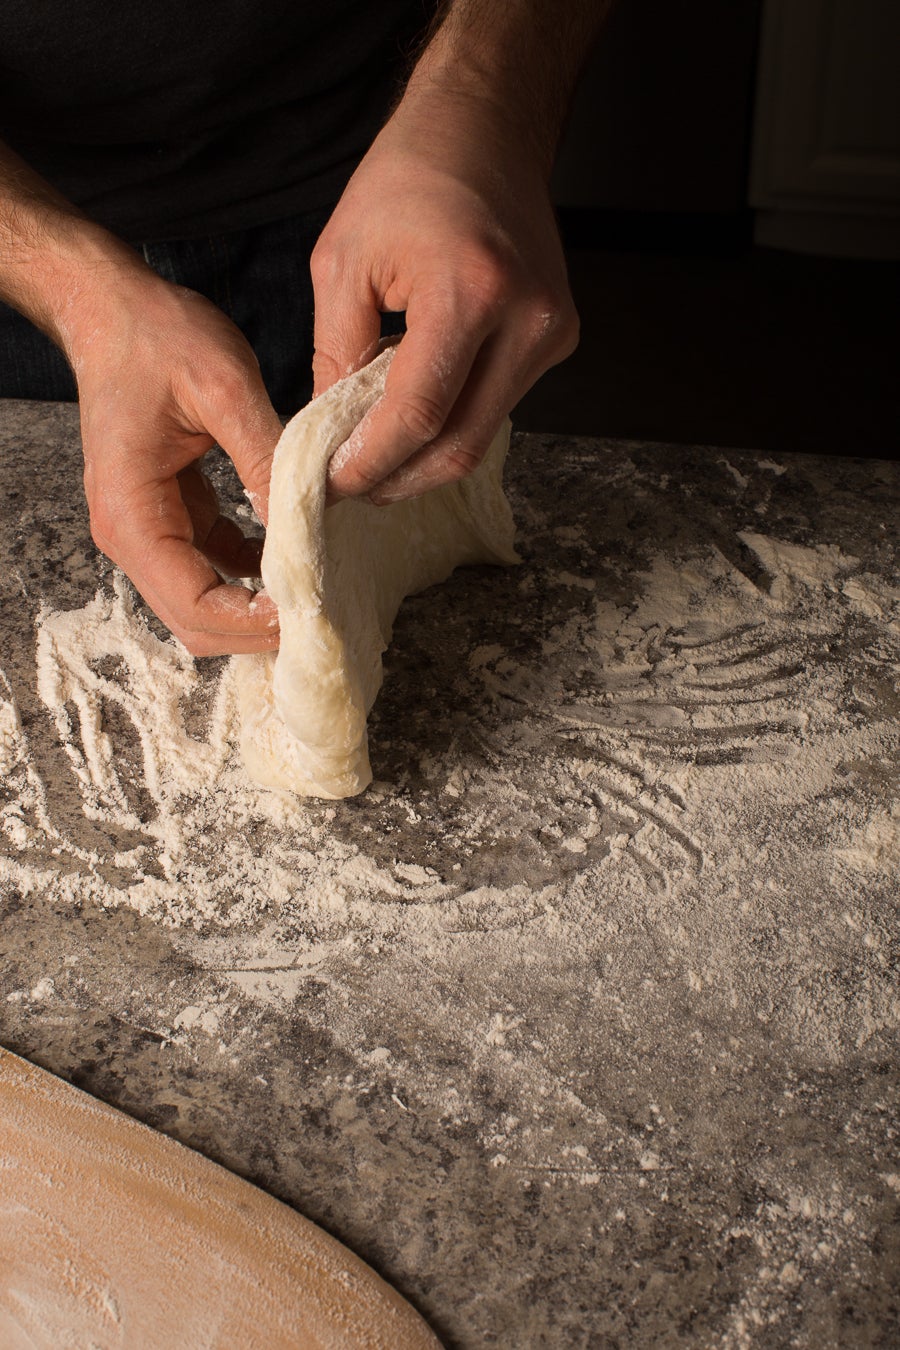
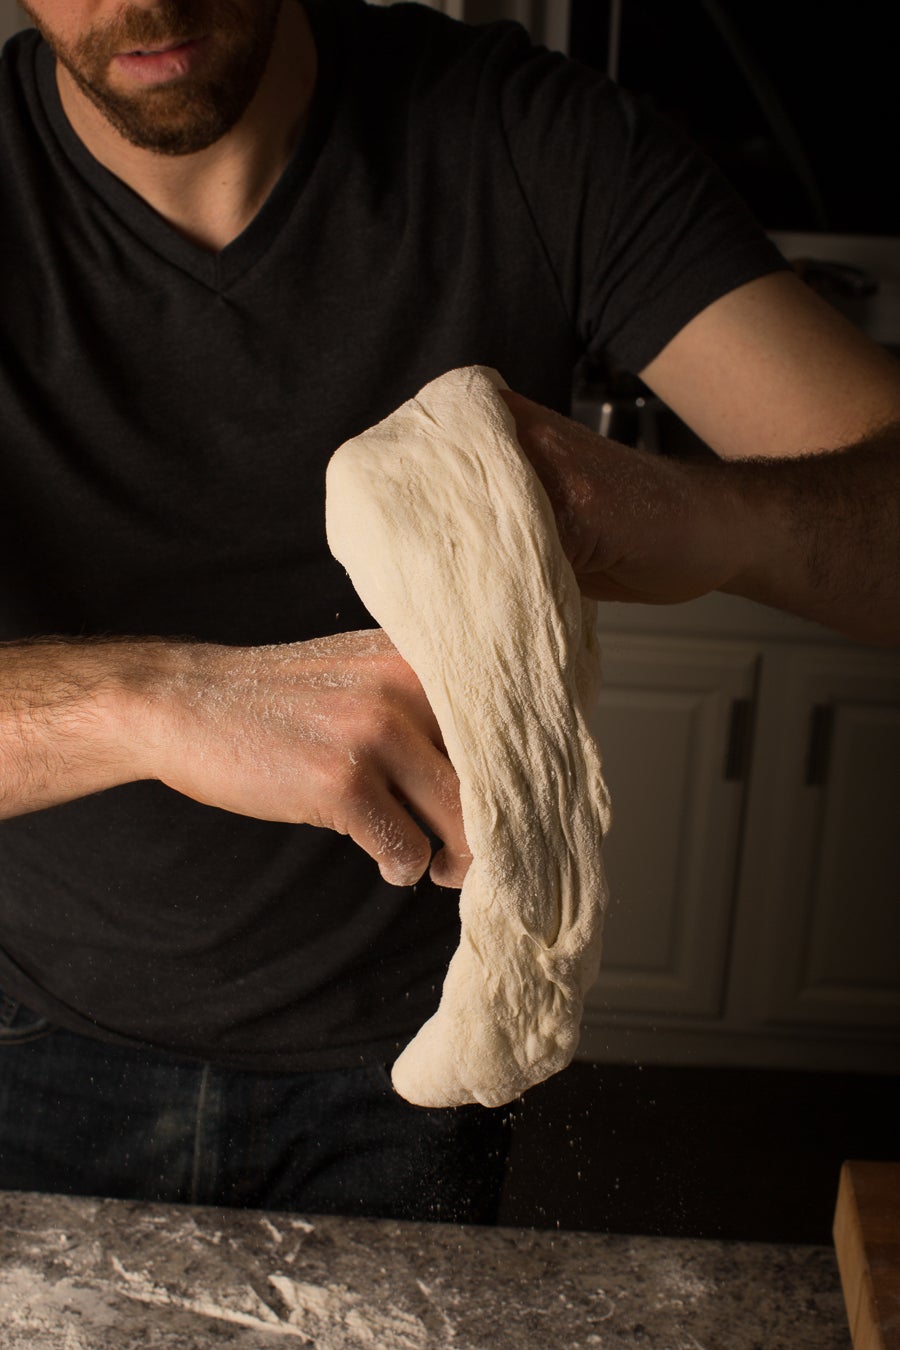
Holding onto the dough at two ends, pull one end away from the other, then fold it back onto itself. Repeat on the other side. As the photos show, the dough will likely be sticky – don't worry about it looking neat as you fold. Be sure to keep your hands floured as you work.
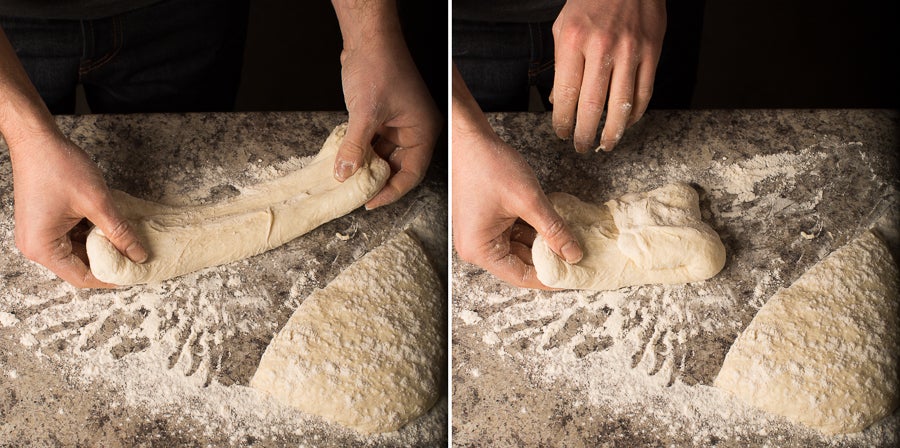
Repeat this process for the other side of the dough, so that all four corners of the dough have been stretched and folded.
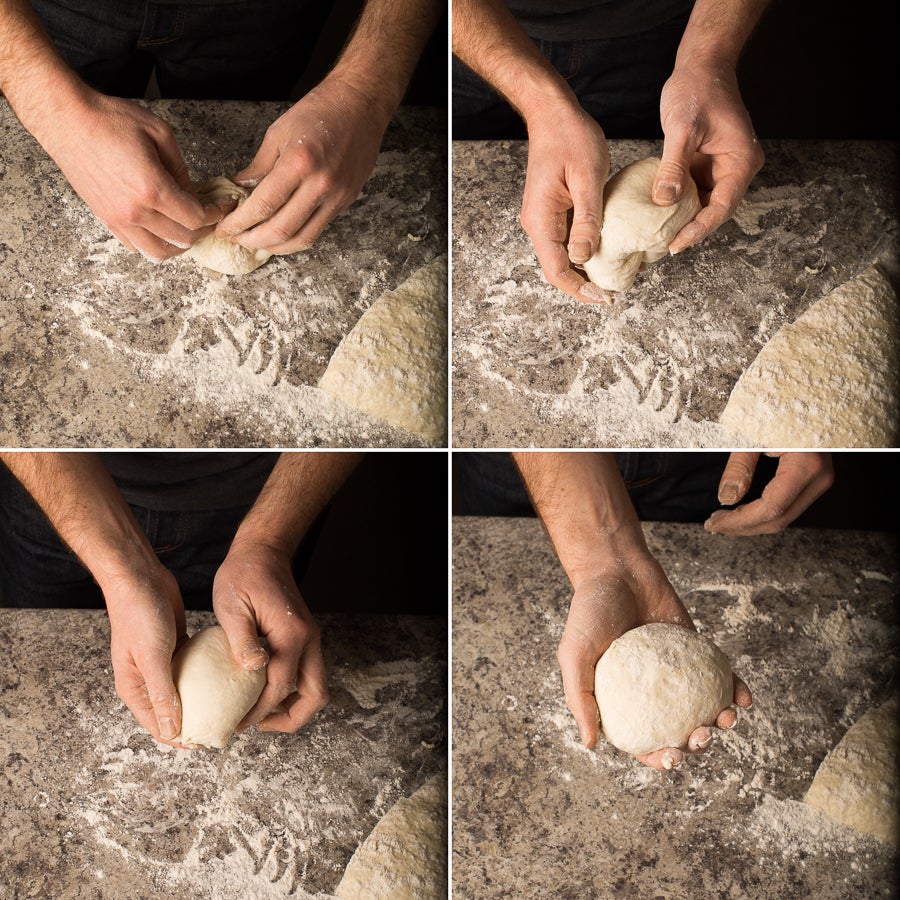
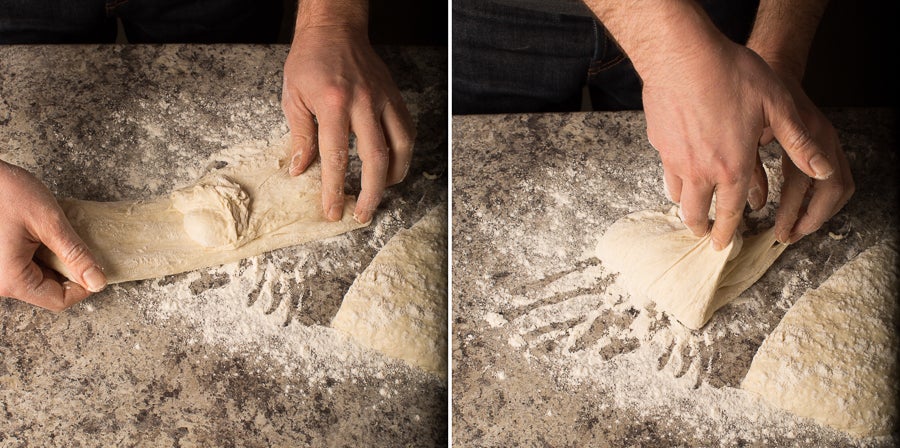
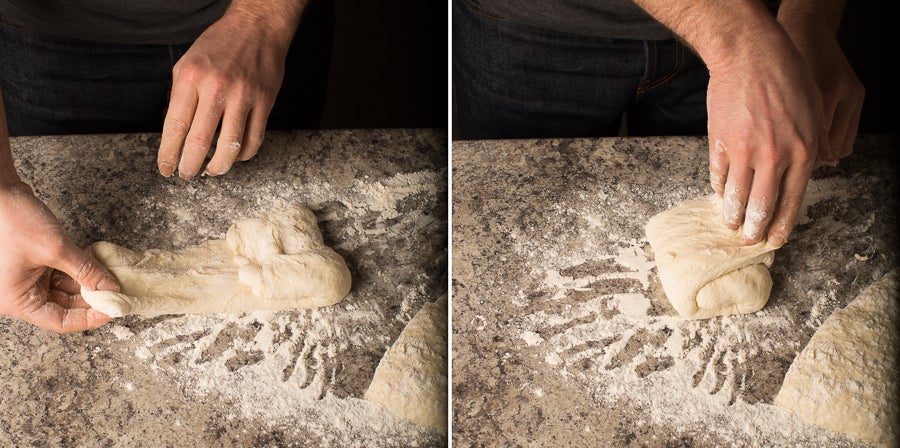
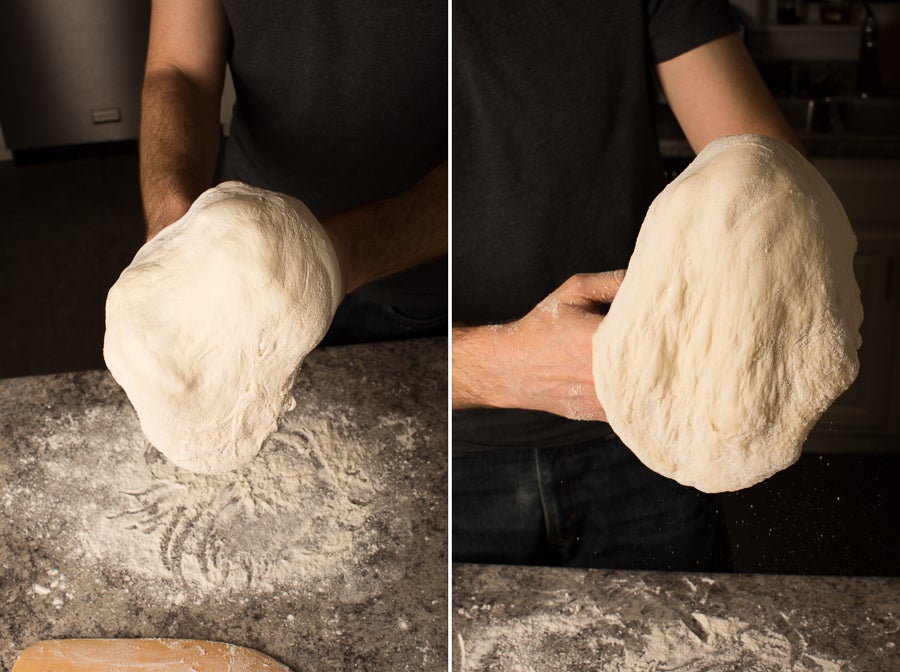
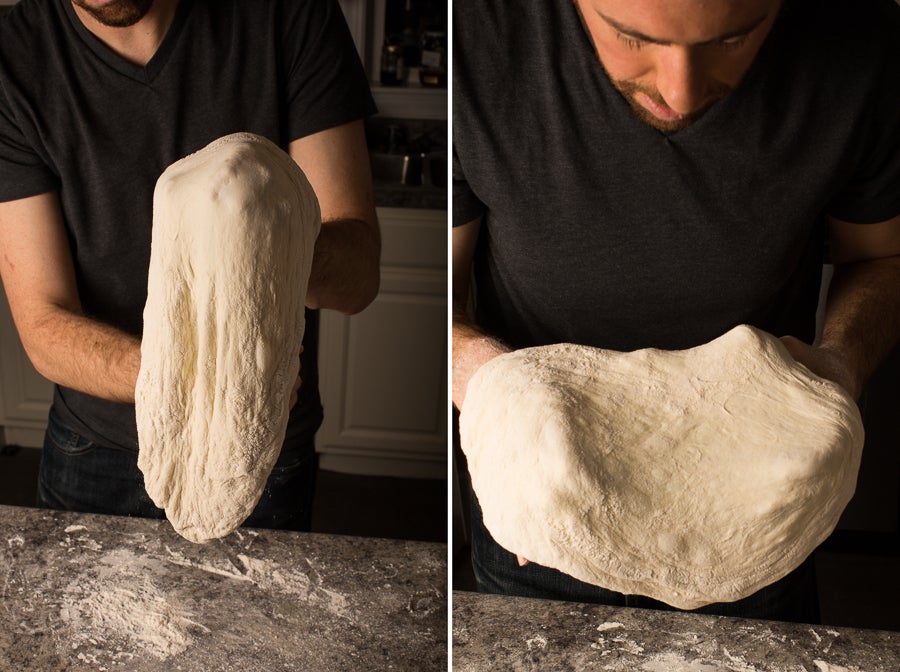
Gently pull the ends towards the middle of the dough, then turn it over. Using your fingers, pull the dough under itself until the top is smooth, and the seams have been worked into the bottom of the dough.
Let's see that again, with some motion:
Finally, here's a complete video of the process.
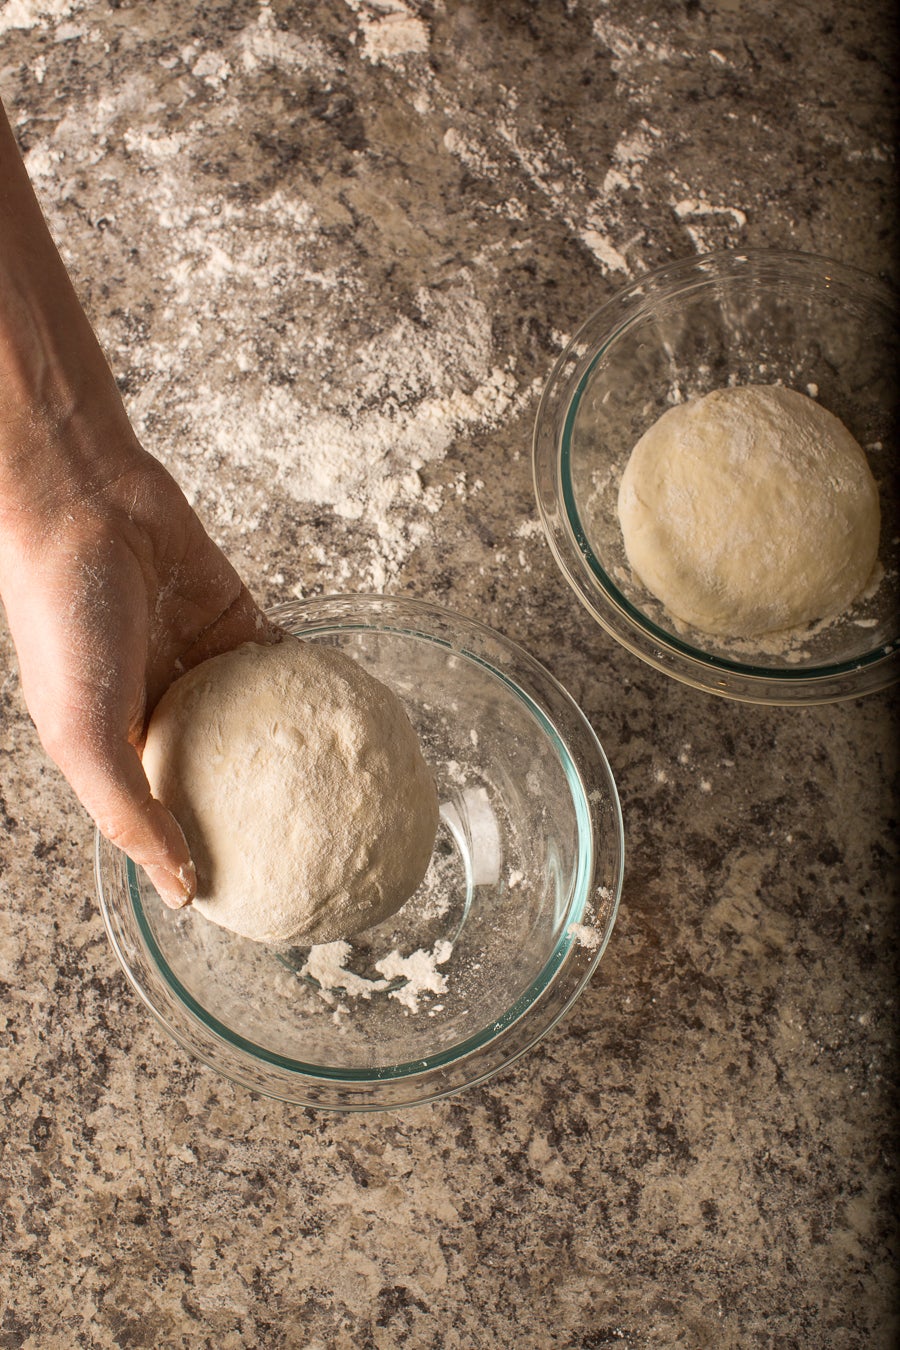
Repeat for the second half of the dough, and place each ball seam-side down into a floured bowl.
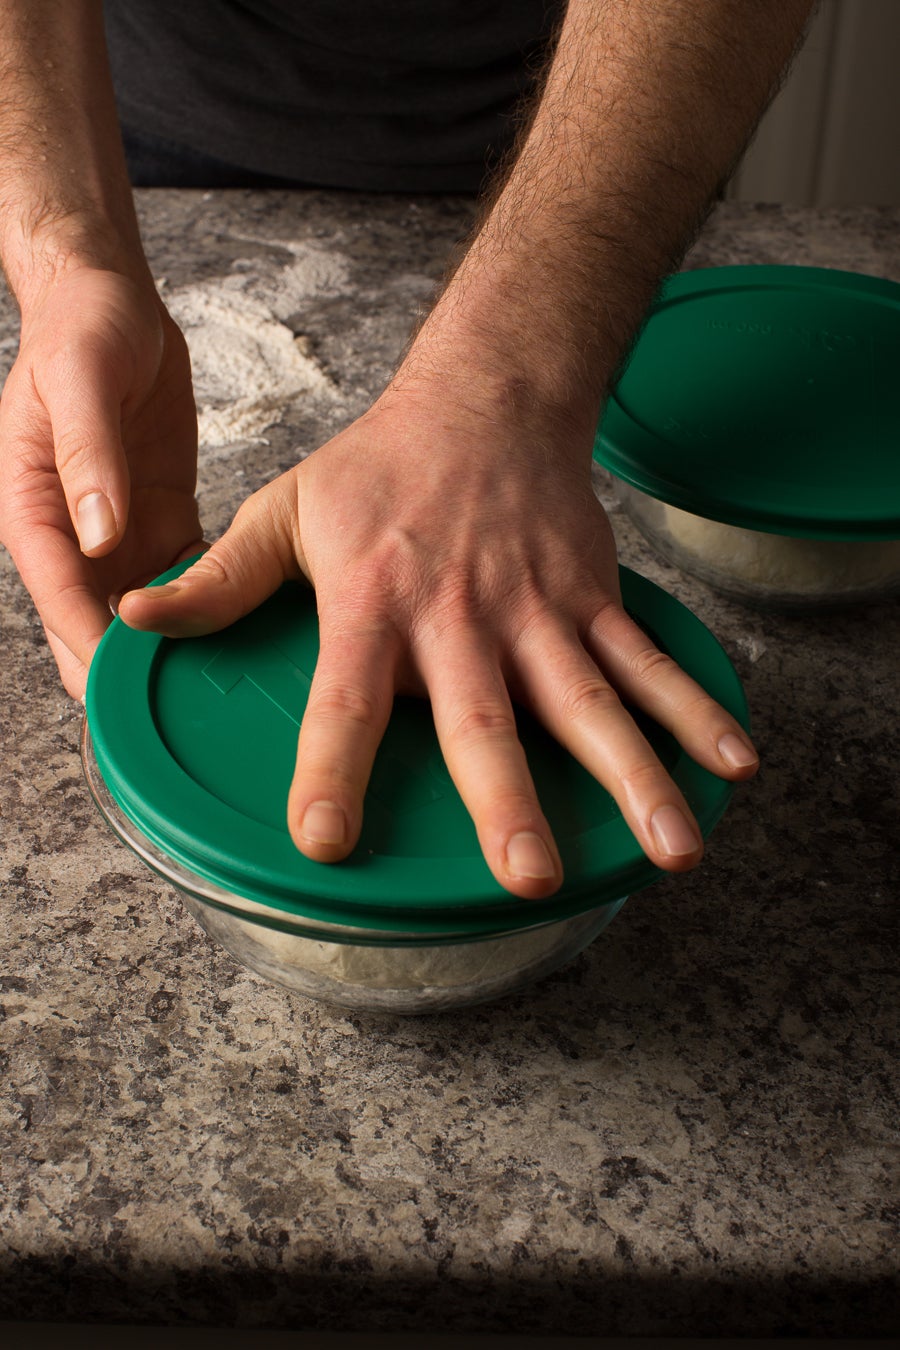
Cover the bowl and allow the dough to proof (rise) for 45 minutes to an hour, while your oven preheats. In the colder months, place the bowls on the stove top to stay warm.
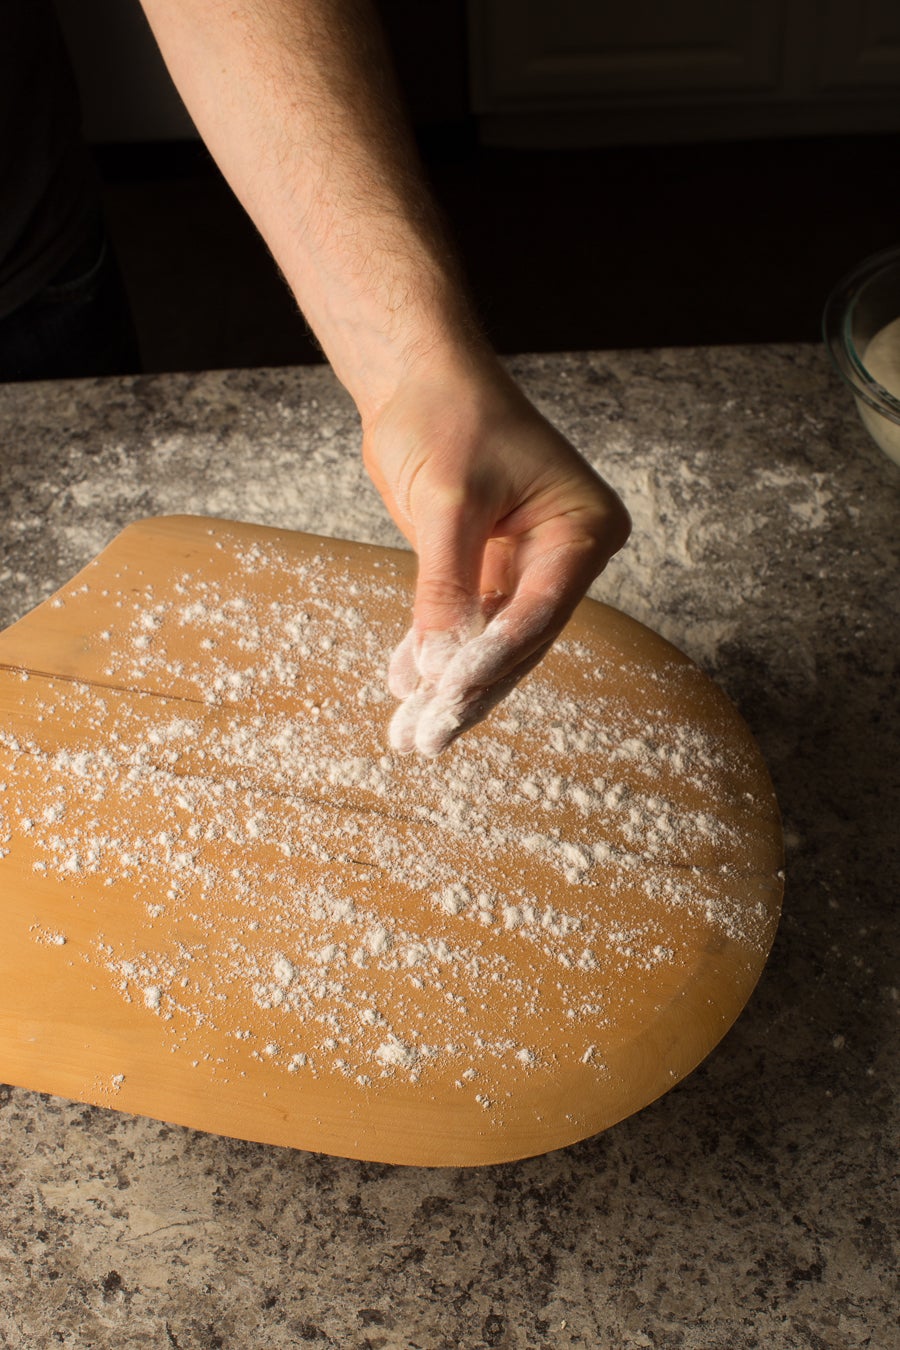
Generously flour a wooden* peel, rubbing flour into the board to completely coat.
*If you're using a metal peel, or if this is your first attempt at homemade pizza, place a piece of parchment on your peel instead of using flour. Releasing the dough from a wooden board (even a generously floured one) takes some practice, and is even more difficult using a metal peel. Parchment is easier to use while you perfect your dough, and renders equally delicious crusts. Trim the parchment after you've stretched your dough onto it, so that it's flush with the remaining dough. Parchment paper is often rated below 500°F, so at 550°F the edges will char. We've never had any trouble with parchment catching fire when baking on the center oven rack, but be sure to keep a close eye on pizzas being cooked on parchment, just to be safe.
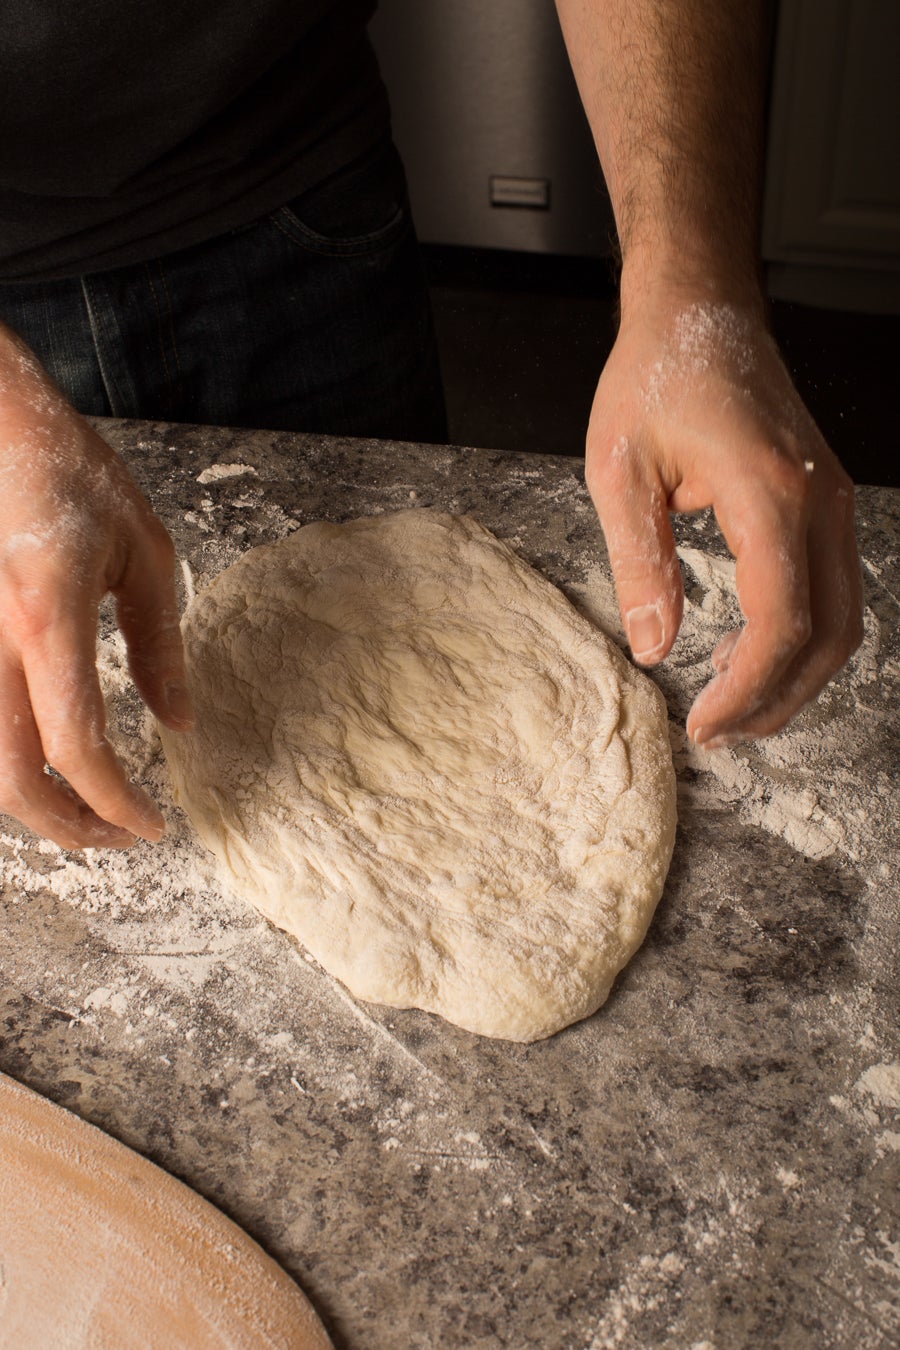
Scoop the proofed (risen) dough onto your well-floured surface, using care to pool the dough in as round a shape as possible for easier stretching.
If your dough feels wet, use a generous dusting of flour on top. For a drier dough, use slightly less flour. Getting the exact amounts down requires some practice, but use these photos as a guide as you get started – for reference, this was a very wet dough.
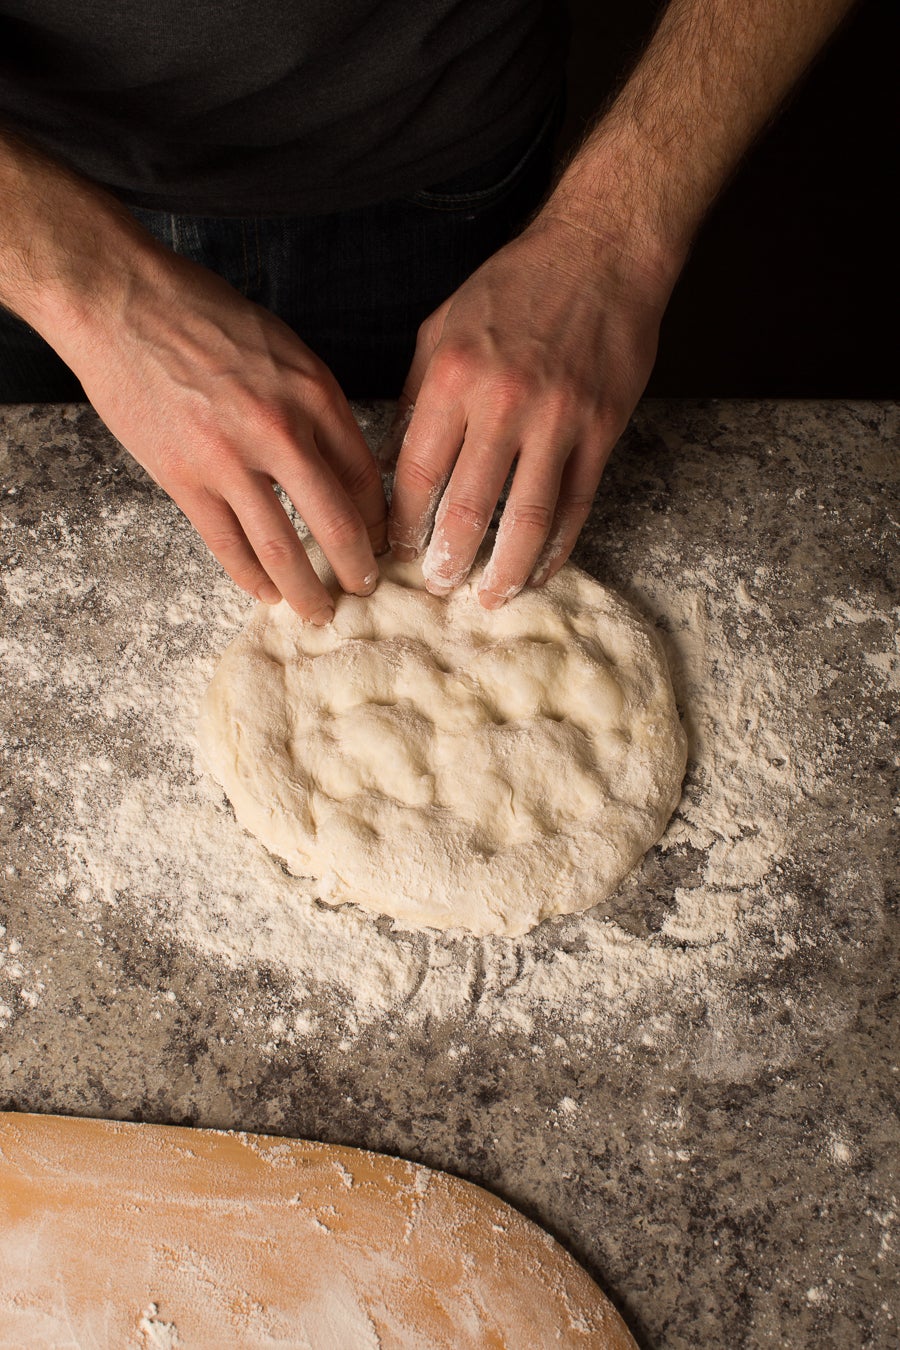
Using your fingertips, gently depress the dough, being careful to not touch the outer edge of the crust. This step is important – leaving the circumference untouched at this stage will result in a beautiful bubbly outer crust, post-bake.
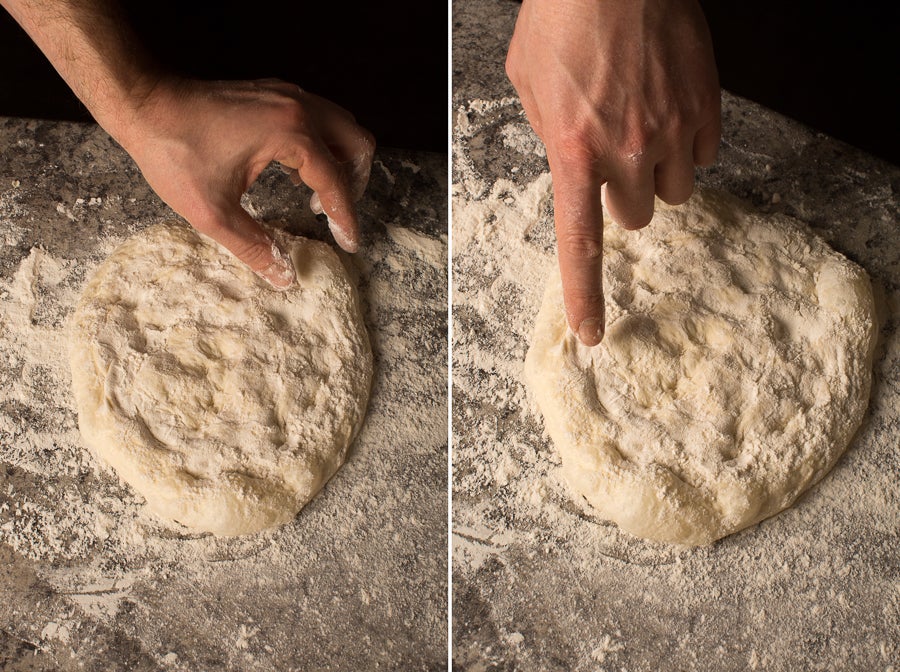
Jeremy points to the outer area of the crust, which he hasn't touched.
Again, using care to not touch the outermost edge of the crust, lift the pizza from the board and use your knuckles to gently stretch the dough. If the dough is at all sticky, use more flour.
Move the dough from hand to hand, gently stretching as you go.
Use two hands at once to gently move the dough in a circle, allowing gravity to perform the stretch. Gravity is your friend! Let it do most of the work for you, as pulling will stretch the center more than the edges.
If you find your dough is difficult to stretch, set it down on a floured surface for 5 to 10 minutes to allow the gluten to relax.
Use the existing flour on the board to keep your dough from becoming sticky. Flour is your friend in this recipe! Don't be afraid to use it, as a sticky dough is an unworkable dough.
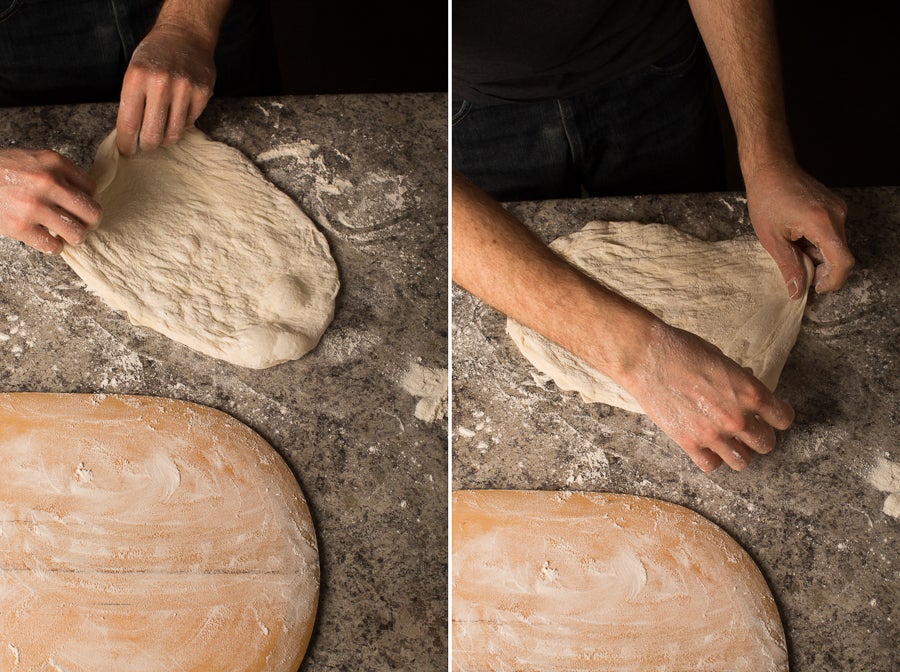
Above, Jeremy drags the dough through the flour on the counter top, making sure to flour both sides.
The dough is just about ready.
Stretch the dough until it's approximately 10" to 12" in diameter.
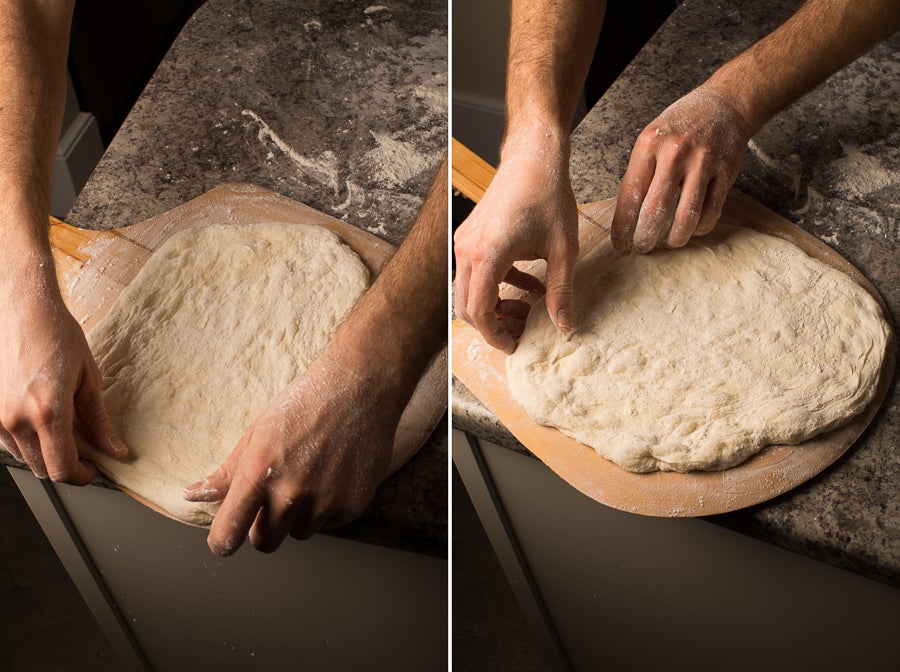
Move to your well-floured peel (or sheet of parchment) and adjust the dough to fit the surface. Remember – if the dough is sticky when you put it on the peel, it will stick to the peel! Make sure it's well-floured.
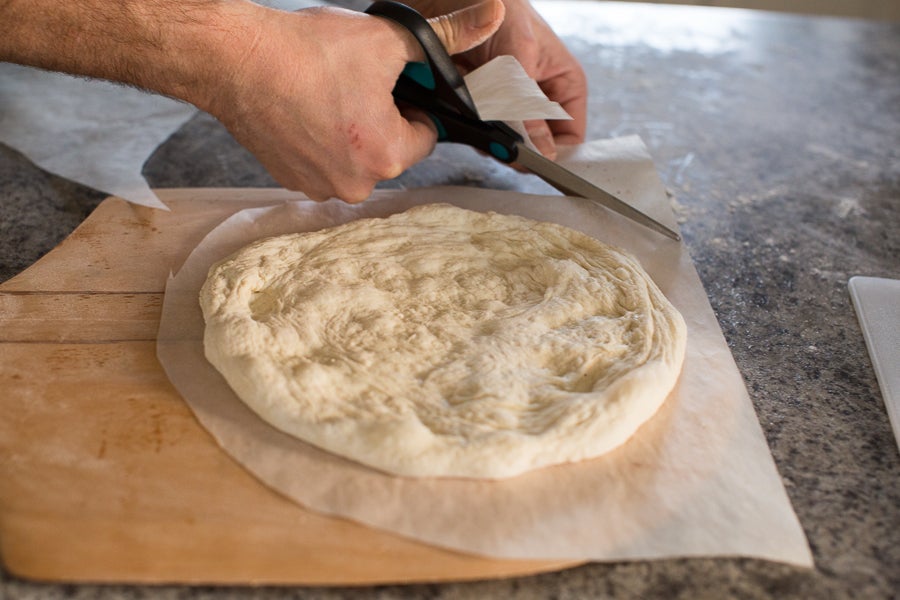
If using parchment, trim the excess around the dough to prevent it from burning. We generally leave an inch around the dough, but to be safe we recommend trimming the paper flush with the dough.
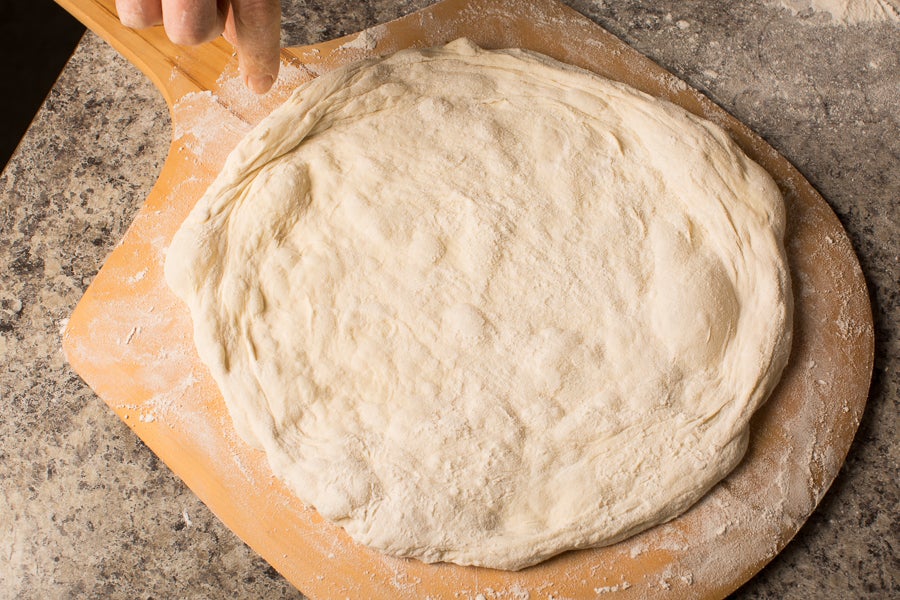
If you've been careful not to compress the outer edge of the dough, you'll notice it's thicker than the interior.
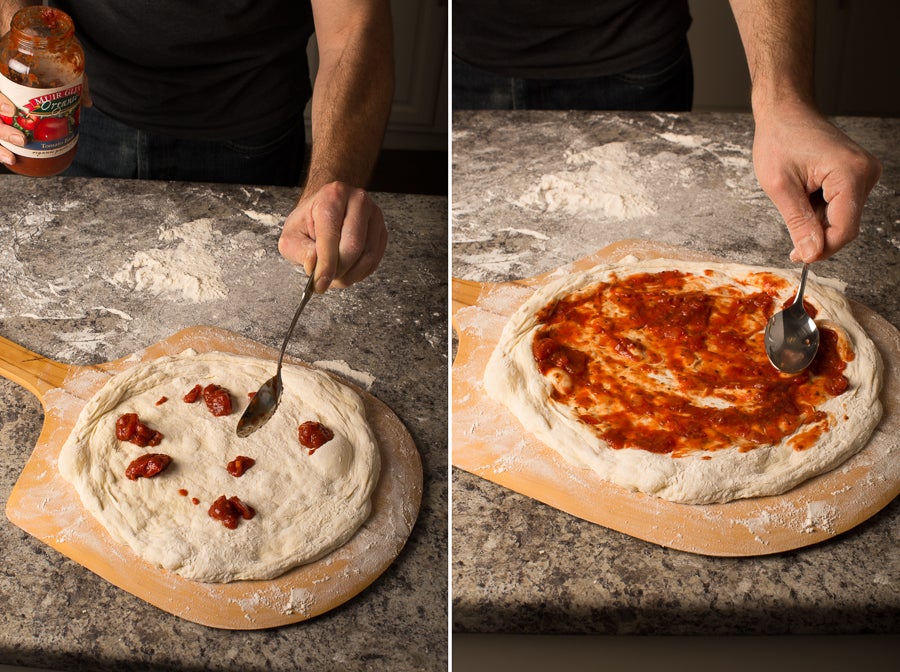
Lightly sauce the dough. We use regular pasta sauce, homemade or from a jar. Just make sure it's not too watery; simmer watery sauce until the above consistency is reached. Depending on the toppings, pesto or béchamel (recipe below) can be used as well.
Add the rest of your toppings.
NOTE: if using a wooden peel with flour, be sure to apply your toppings quickly. The longer the dough sits on the peel, the more difficult it will become to release.
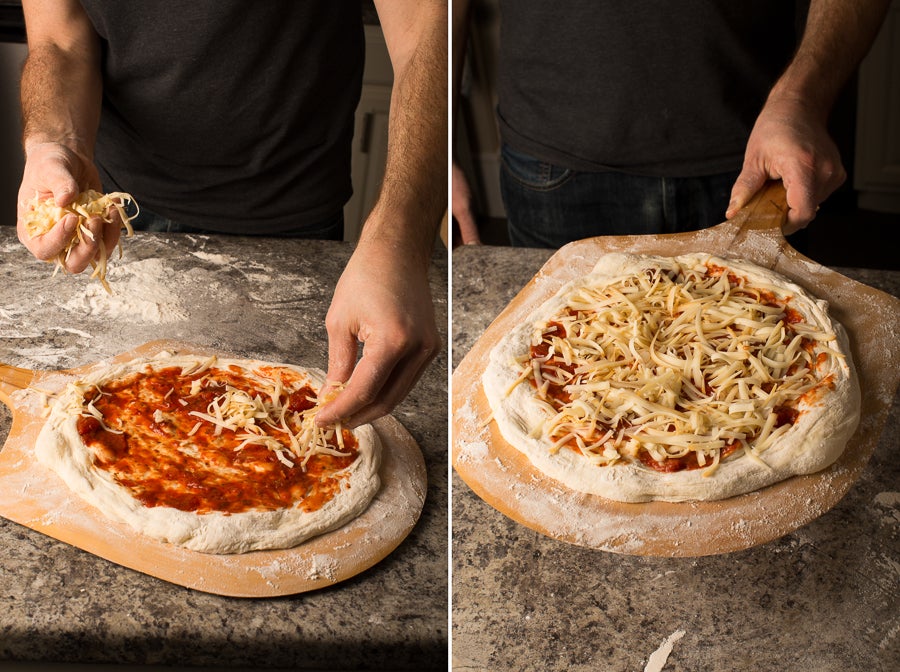
Top with the cheese of your choice; above is shredded smoked mozzarella. Wetter cheeses (such as fresh mozzarella) should be used more sparingly.
Turn on the broiler in your preheated oven, and transfer the pie to your preheated steel or stone. If you don't have a top broiler*, don't sweat it! You may need to bake your pie for a few minutes longer, but with a steel or stone, it will still turn out just fine.
*Warning: DO NOT place your pizza under a broiler with less than 8" of space between it and the cooking surface (as is often found with bottom broilers.) This could cause a fire. Our oven has a broiler on top of the main oven compartment (see image below) and broiling instructions for this recipe are written with this style of oven in mind. If you have an oven where the broiler is on the bottom (usually in the bottom compartment of the oven) or on top in a smaller, separate compartment, make sure there's at least 8'' between the broiler and the cooking surface. If there isn't, do not use the broiler. Your pizza will still be great without being broiled, though it may take a few more minutes to bake.
If you're using a wooden peel, jiggle the uncooked pizza back and forth until it moves easily on the peel before quickly transferring it to the steel. You want to be sure the pizza isn't sticking to the peel before opening the oven; we learned the hard way that jiggling the pizza over the steel usually causes toppings to fly onto the steel, burning immediately and setting off smoke alarms.
If using parchment, gently slide pizza and parchment onto the steel. The parchment will blacken around the edges, but remain intact under the pizza.
Bake the pizza for approximately 6 minutes on the steel, 7 minutes on the stone (give or take), until bubbly and charred on the edges.
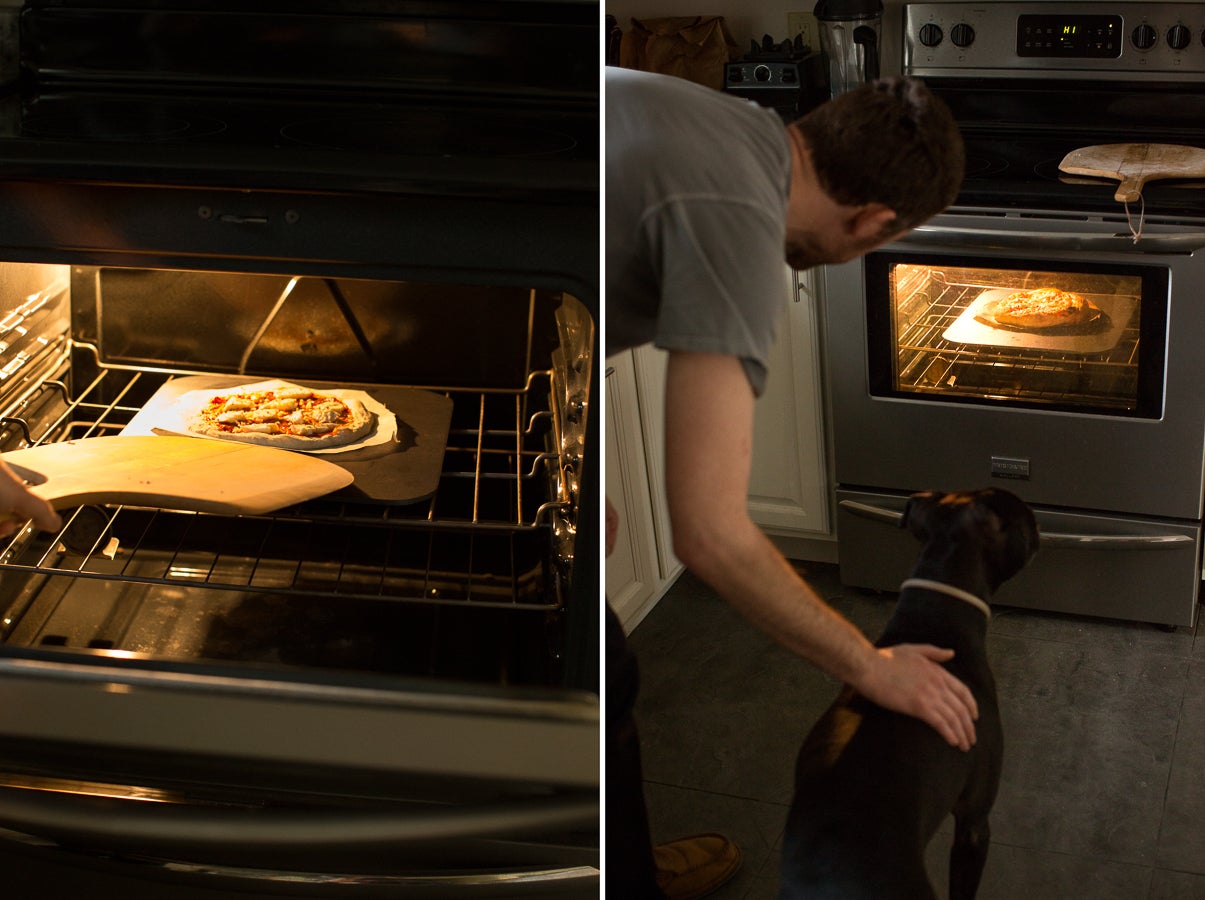
Jeremy and Sandwich (the dog) watch as their pizza bakes, to be sure the broiler isn't burning the parchment.
NOTE: Depending on the strength of your broiler, you may need to turn it off before the 6-minute mark to avoid burning the crust/parchment. In my oven, a pizza placed on the center rack is perfect after 6 1/2 minutes under the broiler; but your oven may be different. Watch your pizza closely, especially the first few times you use this recipe, until you know how your oven performs.
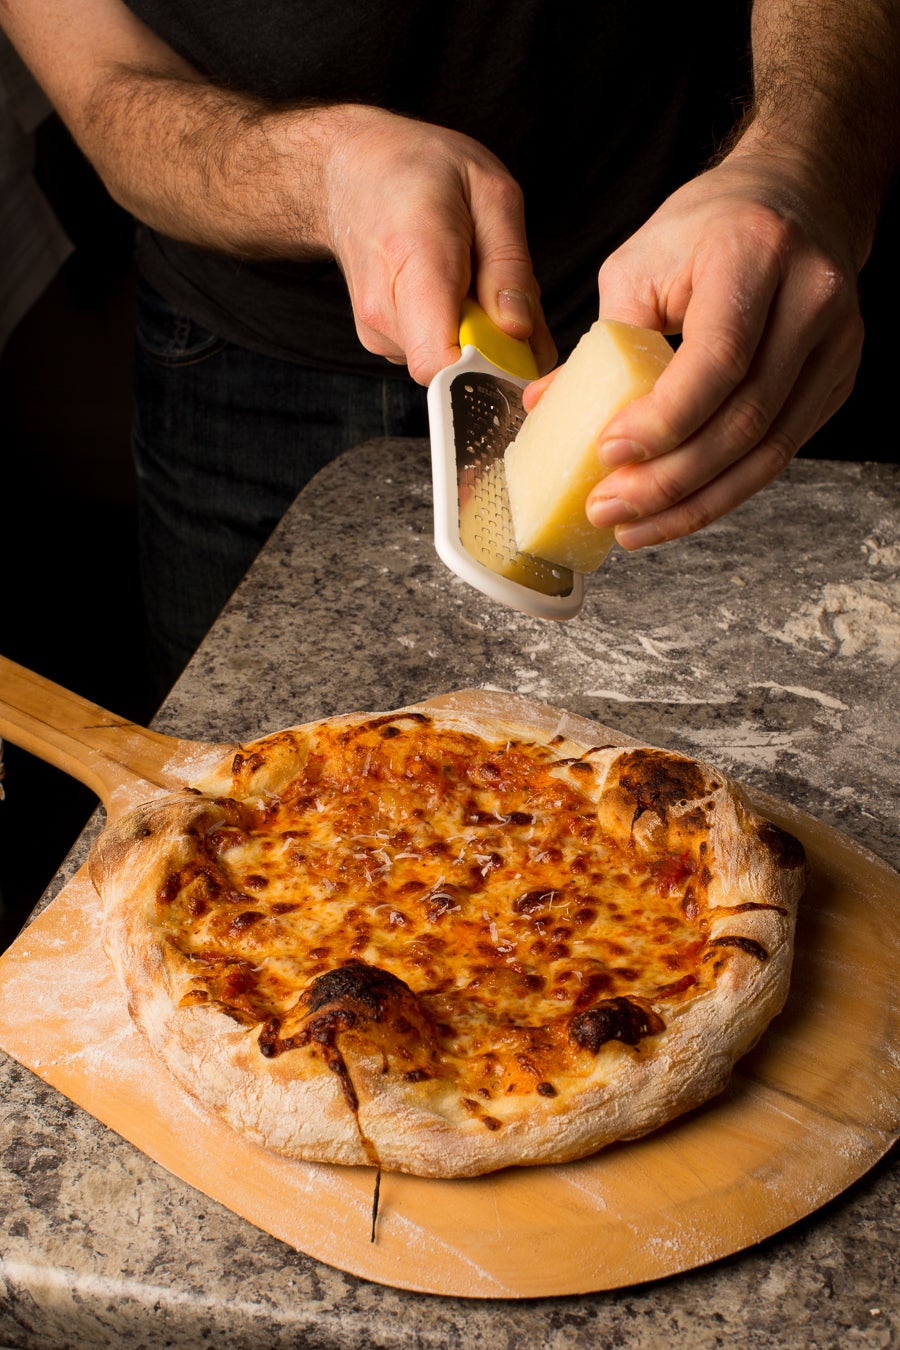
Remove the pizza from the oven, and top it with freshly grated Parmesan, if desired. Repeat the process with the remaining dough.
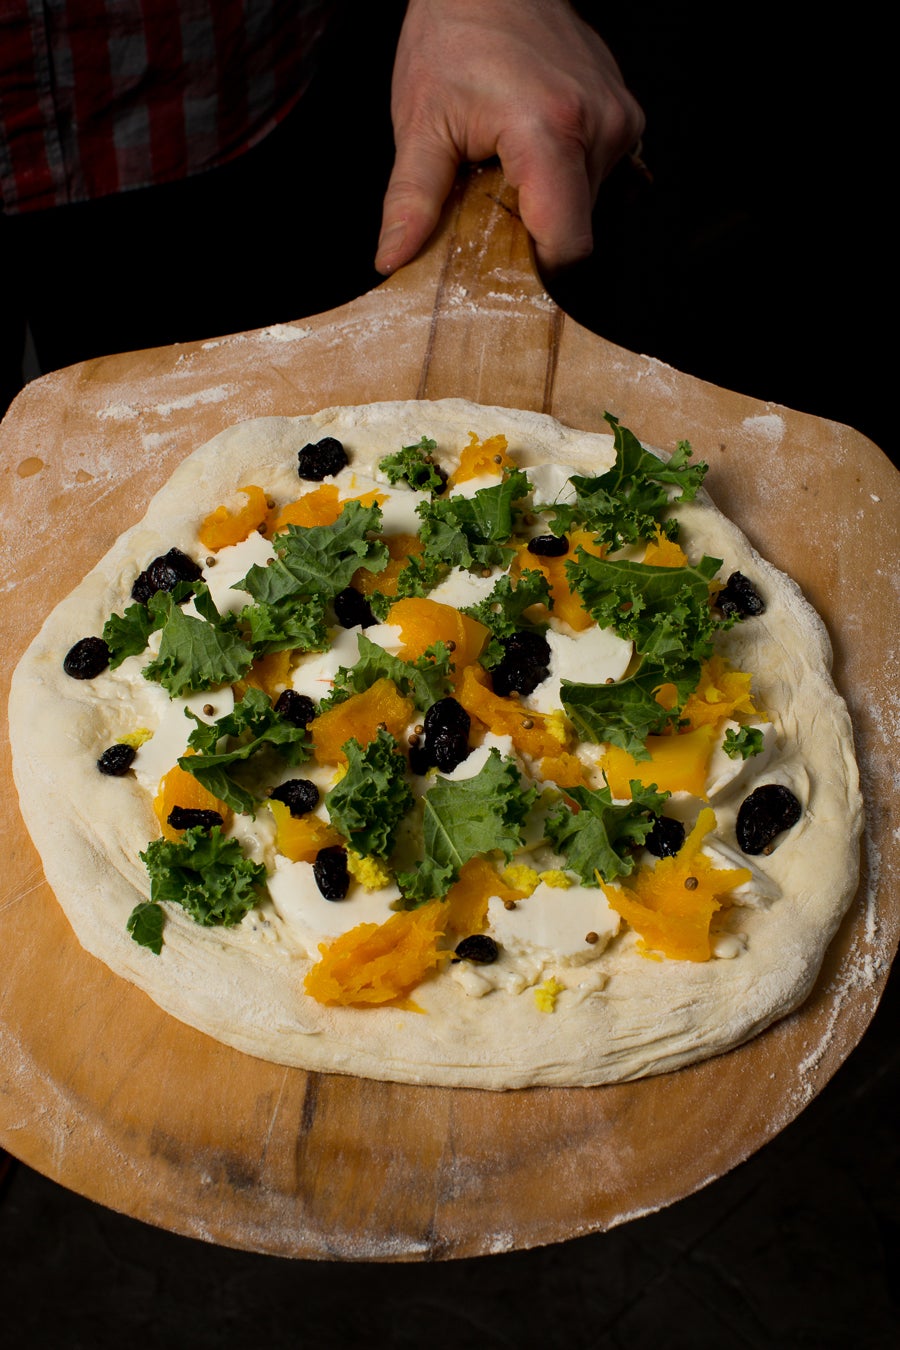
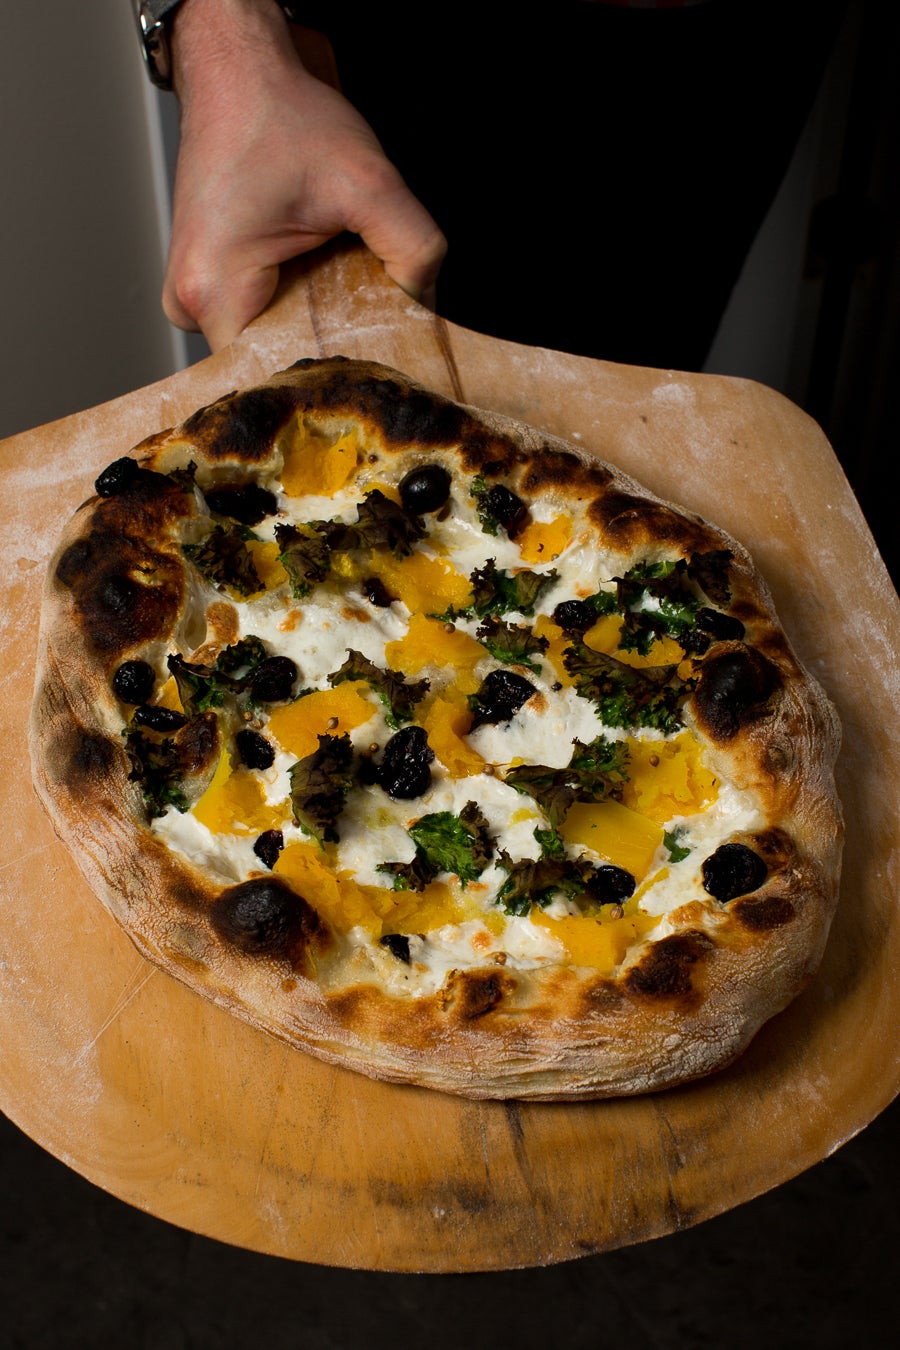
Want to mix it up? The variations are endless! Above is a white pizza, with lemon zest, ginger (also zested, using this amazing Microplane grater), fresh mozzarella, mashed butternut squash (left over from dinner the night before), dried cranberries, coriander seeds, and kale.
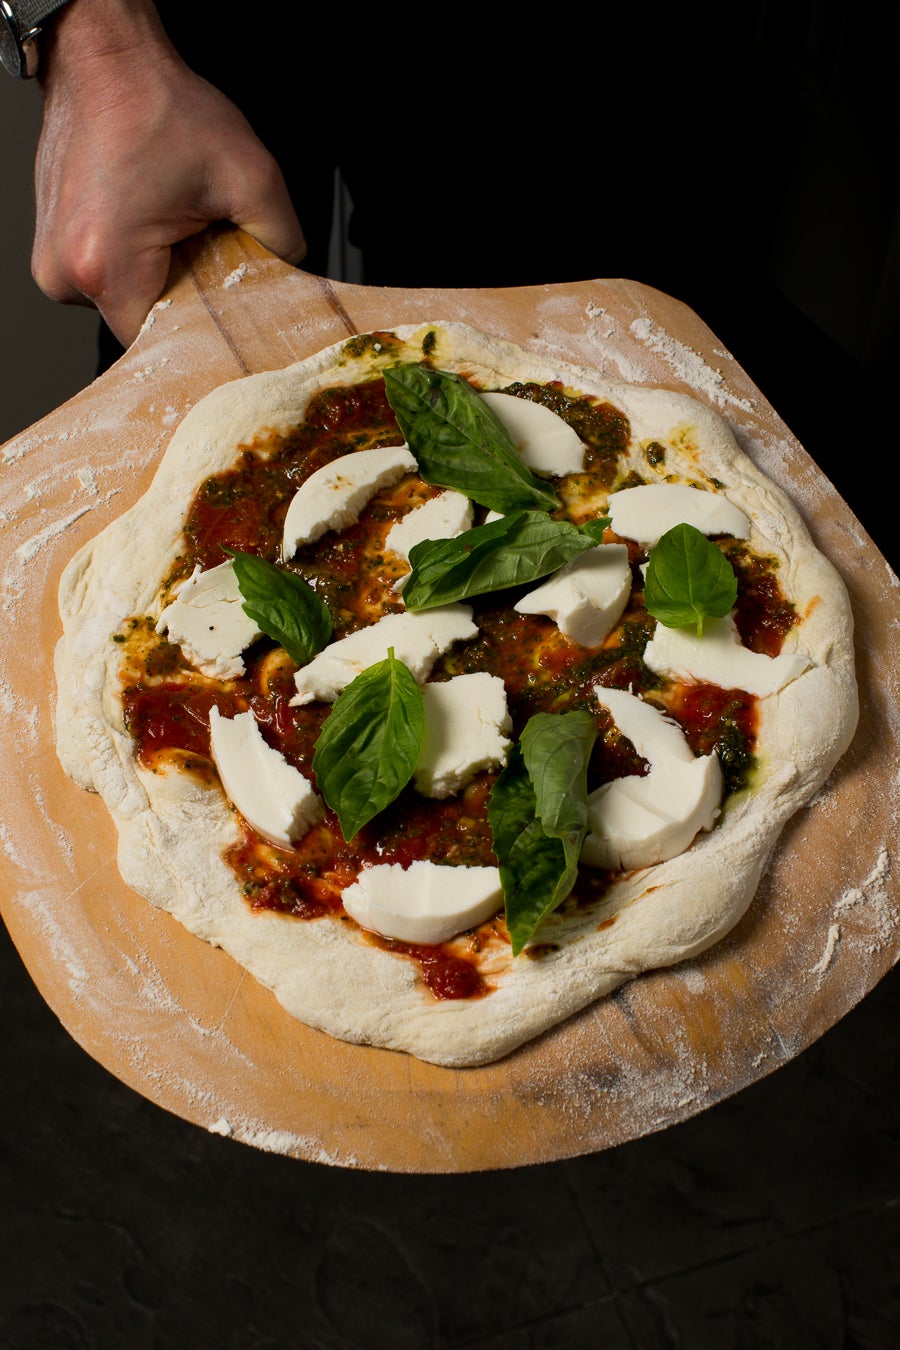
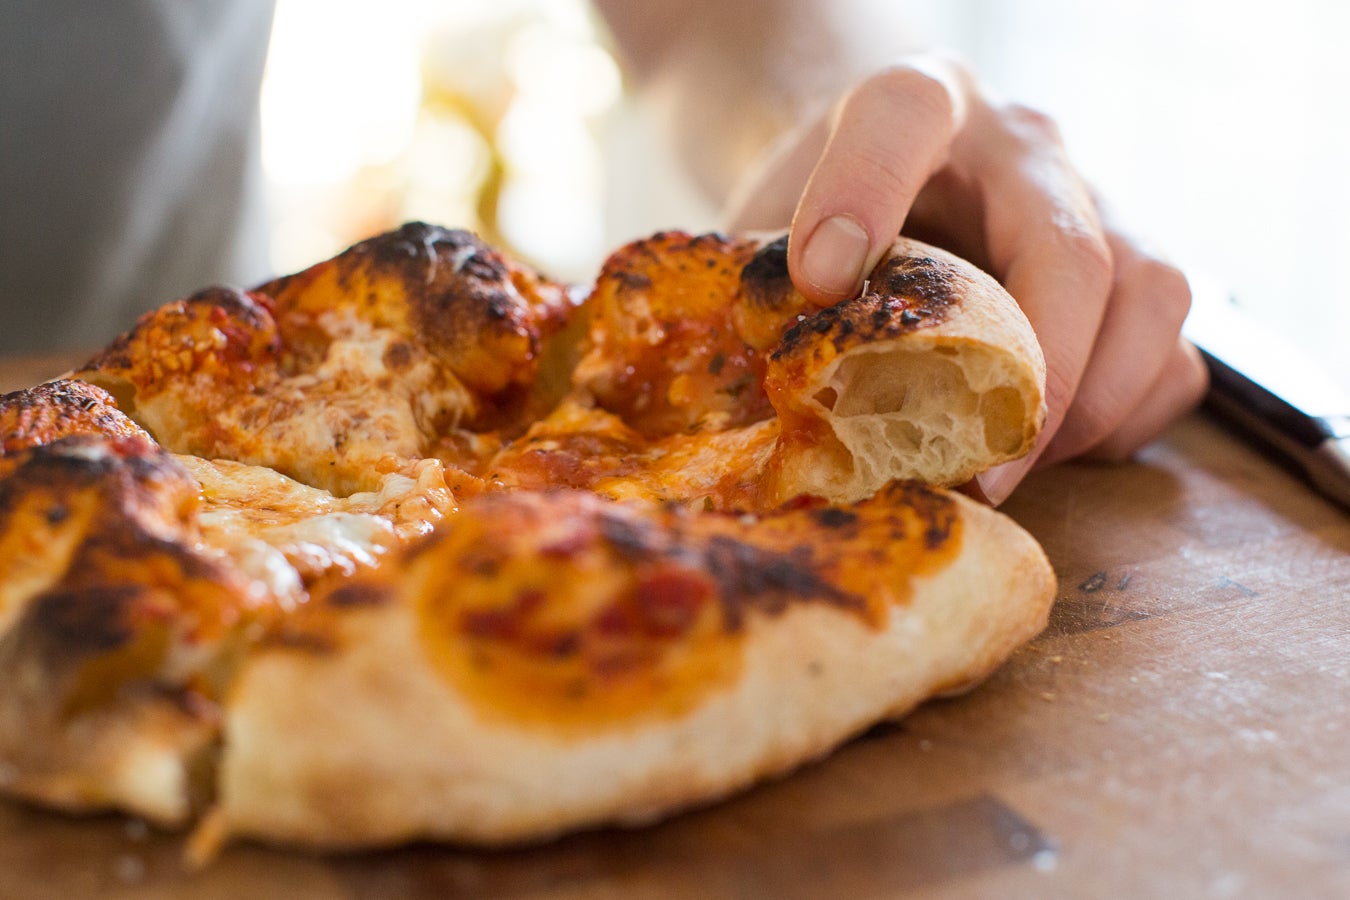
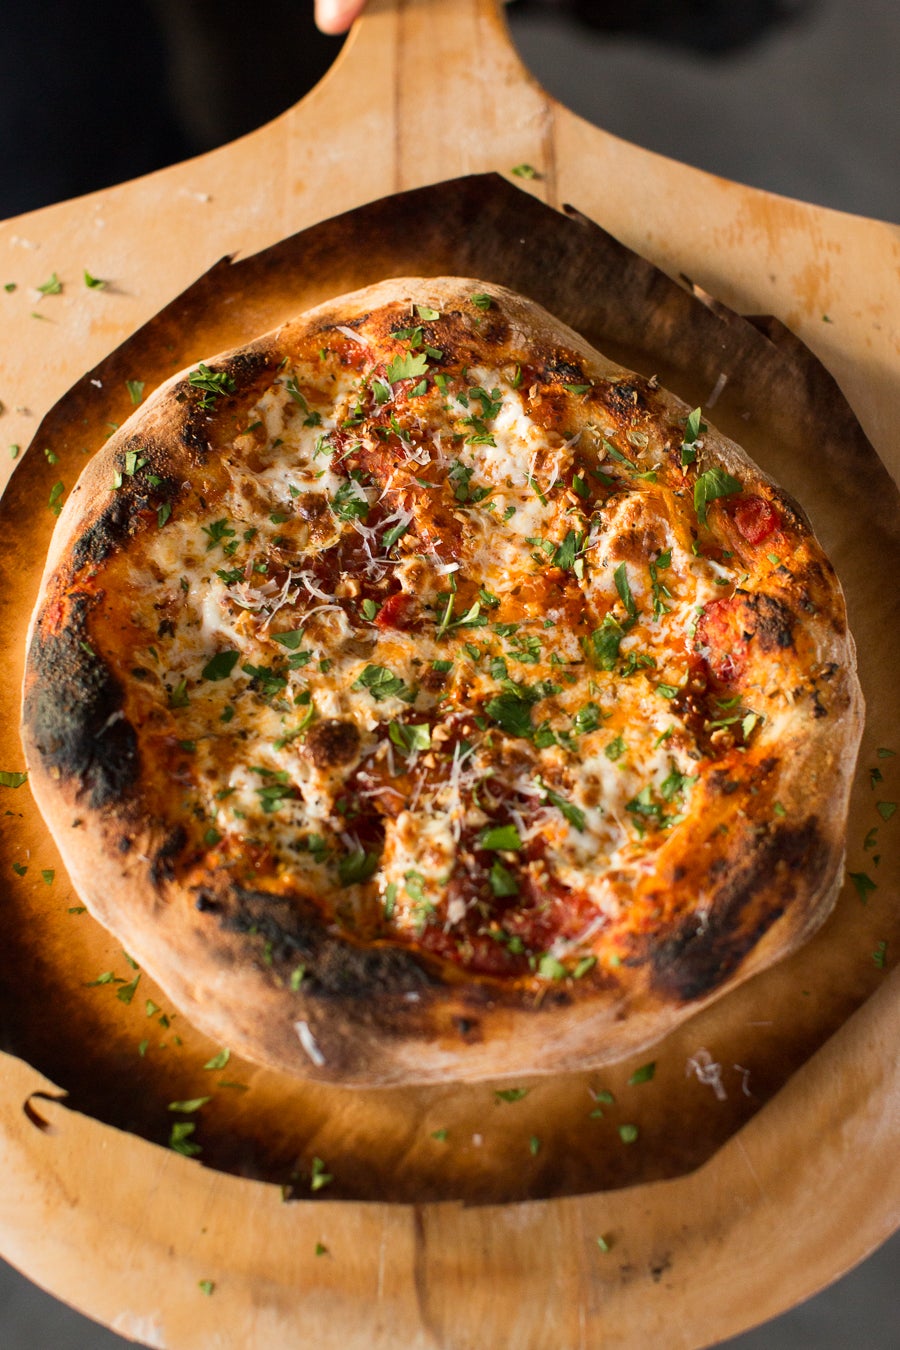
My favorite – a Margherita pizza, with a combination of red sauce and pesto.
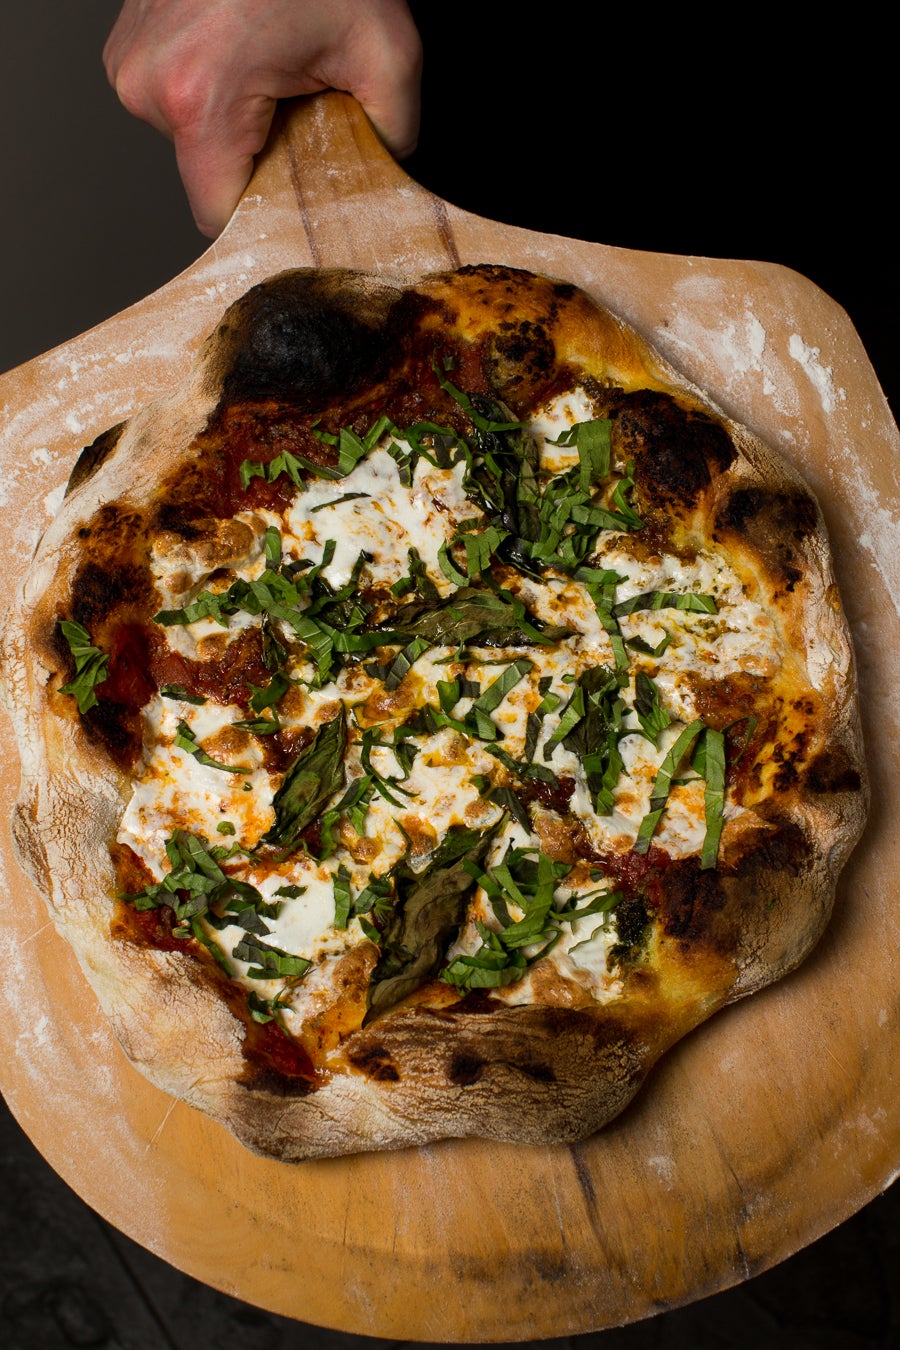
Fresh basil added after it comes out of the oven, for flavor and color.
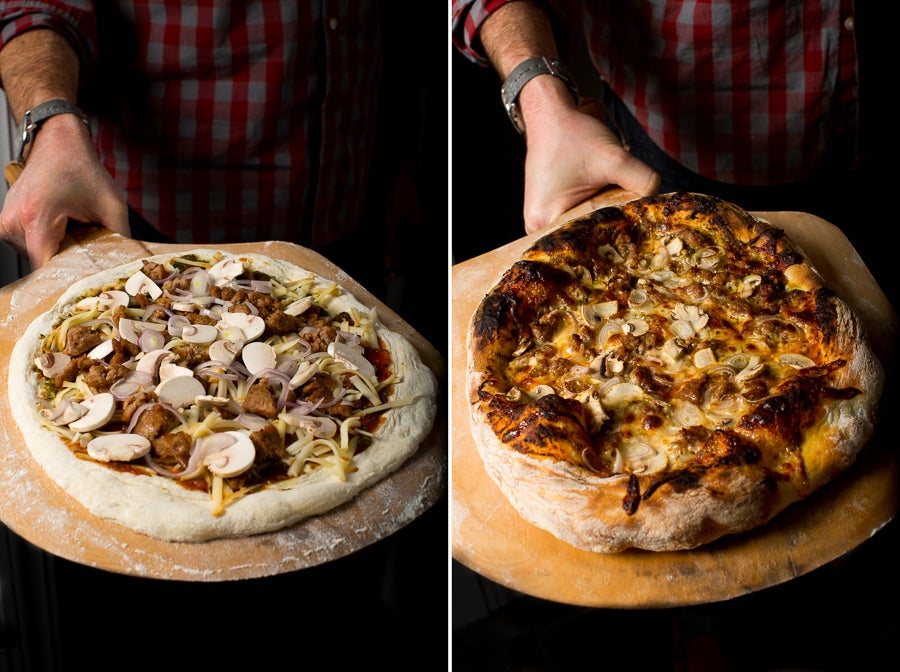
Like it traditional? Try smoked mozzarella, mushrooms, cooked sausage, and shallots. Add black olives if you want it more salty.
Mix and match sauces and toppings, and play with temperature and placement of the steel in the oven. For the most amazing breakfast you've ever tried, crack 2 eggs on a par-baked Margherita pizza with some prosciutto, and bake until the whites have set. Add about 4 minutes to the bake time, and cover with aluminum foil once the crust looks done, to keep it from burning.
Turn last night's meatloaf and mashed potatoes into leftovers pie. The world is your pizza (that's how the saying goes, right?)
A few notes, to get your experimentation started:
•While dough is ready to use within 18 to 24 hours, a prolonged rise deepens the flavor. We've found the sweet spot to be around 72 hours (3 days). Allow the dough to rise for 18 to 24 hours at room temperature, then transfer it to the refrigerator for up to 6 days. Allow dough 2 hours to come back to room temperature before dividing. Dough that's divided and stretched while cold won't proof properly, and will render smaller, breadier pizzas.
•For a crisper crust, try placing the oven rack farther away from the broiler. For a softer crust, add a little more water to the dough. Play around with hydration and oven placement until you've found your pizza crust sweet spot.
•Don't over-top or over-sauce your pizza! If you want five different toppings, use less of each. Cut veggies small, and macerate especially wet veggies, like zucchini or eggplant, in salt prior to cooking, to release some of their moisture.
Béchamel Sauce (for pizza)
2 tablespoons butter
2 tablespoons King Arthur Unbleached All-Purpose Flour
1/2 cup whole milk
salt and pepper
Melt the butter in a small pan over medium heat. Add the flour and whisk to combine. Allow the mixture to cook for 1 minute. Slowly add the milk, whisking constantly, until thoroughly combined. Add salt and pepper to taste.
We often add 1 tablespoon fresh garlic to the finished sauce, and sometimes 1 teaspoon lemon zest (grated lemon rind), depending on the pie we're creating. The garlic will cook on the pie, but retain some of its fresh bite.
I hope you enjoy this recipe as much as we do! And if you're looking to experiment with other pizza varieties, we have plenty of more recipes to try.
Special thanks to Jeremy Clauson, who took lots of notes and made more than a few pizzas in the name of perfecting this post. Thanks as well to my fellow blogger PJ Hamel, who risked flaming parchment and burned pizza to test the limits of this recipe!