


 Love sourdough, but looking for a bit more flexibility and ease when you bake with a starter? In The Casual Sourdough Baker, PJ shows you just how wonderfully stress-free sourdough baking can be, from simple but richly flavored loaves to countless easy ways to use your discard. If you're just beginning your journey, our Sourdough Baking Guide lays out the basics you need for success — whether you decide to become serious or go casual!
* * *
Why do so many of us find naturally leavened sourdough bread both irresistible and endlessly fascinating?
Perhaps it’s the rich, nuanced flavor that comes from long fermentation rather than a packet of yeast. Or maybe it’s the self-sufficient satisfaction of using just three simple ingredients — flour, water, salt — to feed your family. It could be the realization that you’re a living link in the history of this bread, one of the oldest foods known to man.
I feel all of the above. What I don’t feel, though, is obligated to follow every sourdough rule I read online, posted to Facebook, or demonstrated on YouTube.
I consider myself an easy-going rather than serious sourdough baker. And while the science and physics of sourdough is interesting, I often don't have either the time or energy to think about balancing hydration with bulk fermentation, or worrying whether my loaf will develop a proper "ear."
Still, I'm determined to bake delicious bread, something my family will happily slice for sandwiches or pop in the toaster. So what’s a casual sourdough baker to do?
There are lots of good, basic sourdough recipes out there — and Do-Nothing Sourdough Bread is a prime example. With no kneading and very little shaping required, this is almost literally a “do-nothing” loaf of bread. A minute of measuring and stirring, a couple of folds with a bowl scraper, and a long, relaxed rise produce a loaf of bread any sourdough lover will enjoy.
I'm totally happy making this loaf as written ... almost. I do have a few small changes, though, and you know what? That's OK. If you don't want to follow the rules, take an educated chance and make your own.
Sourdough can be a surprisingly forgiving baking process, one that allows you to stray from a recipe without totally ruining your bread. For instance, if your recipe calls for diastatic malt powder and you’re thinking “Yeah, right” — leave it out. If scanning a recipe to fit it into your work schedule reveals you’ll need to get up at 2 a.m. to catch your starter at its perfect moment of ripeness — don’t. I'm here to reassure you that the world won’t come to an end, and you’ll still end up with a pretty fine loaf of bread.
For instance, I recently made Do-Nothing Sourdough Bread for the first time, following the recipe exactly as written.
Well, almost exactly; I was missing a couple of ingredients, and chose to tweak the way the final loaf rises.
Still, the resulting bread was very compelling: great flavor and a supple, chewy texture that’s every artisan bread baker's dream.
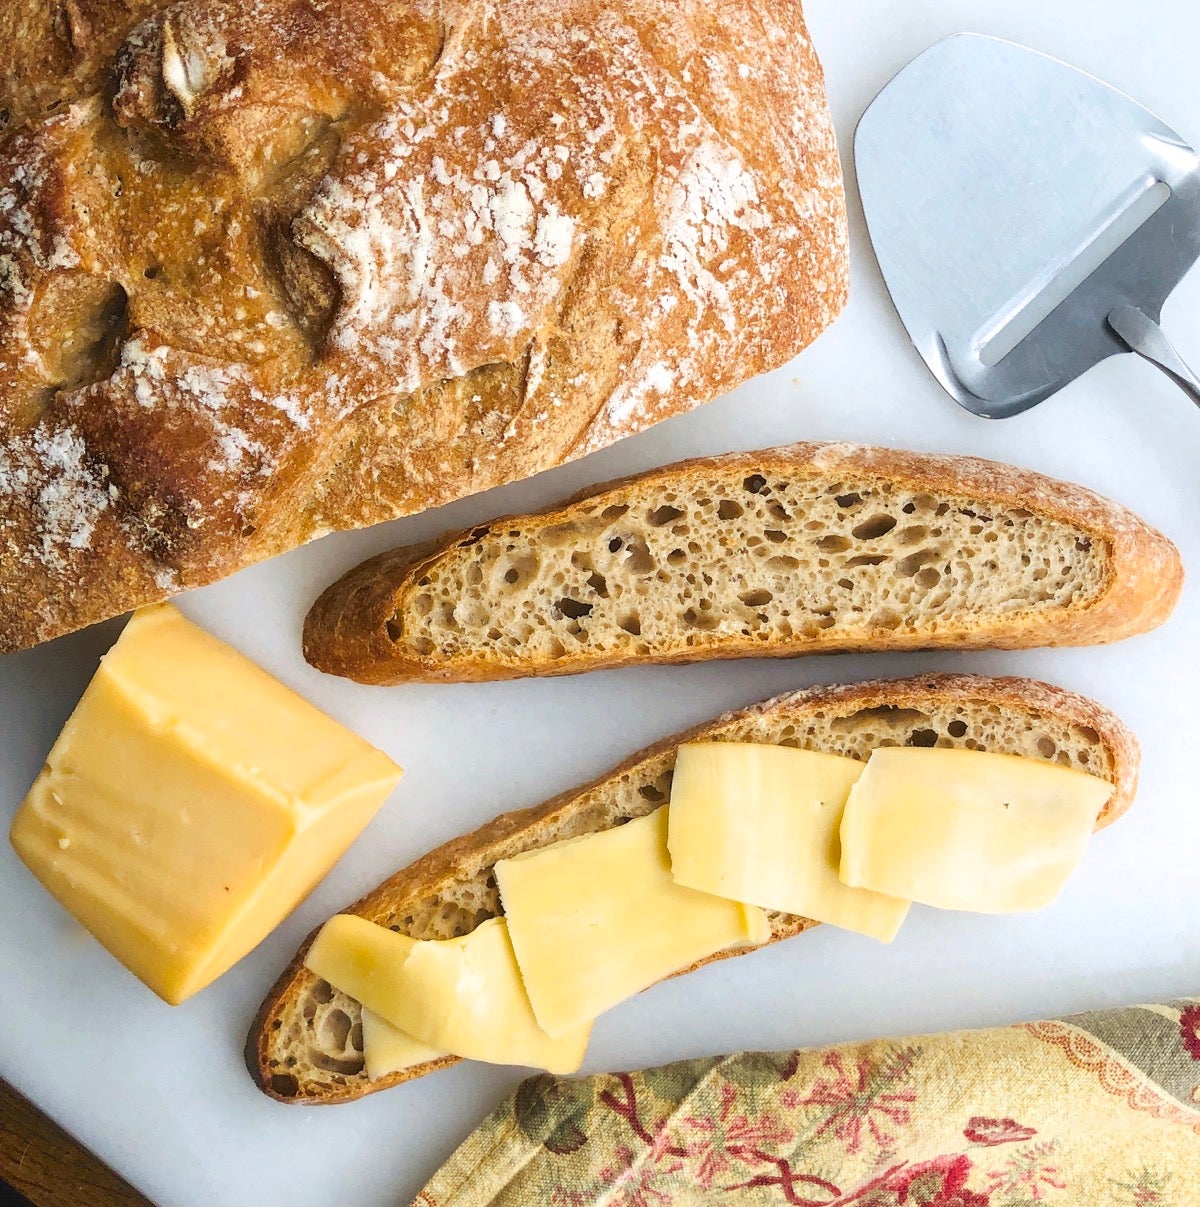
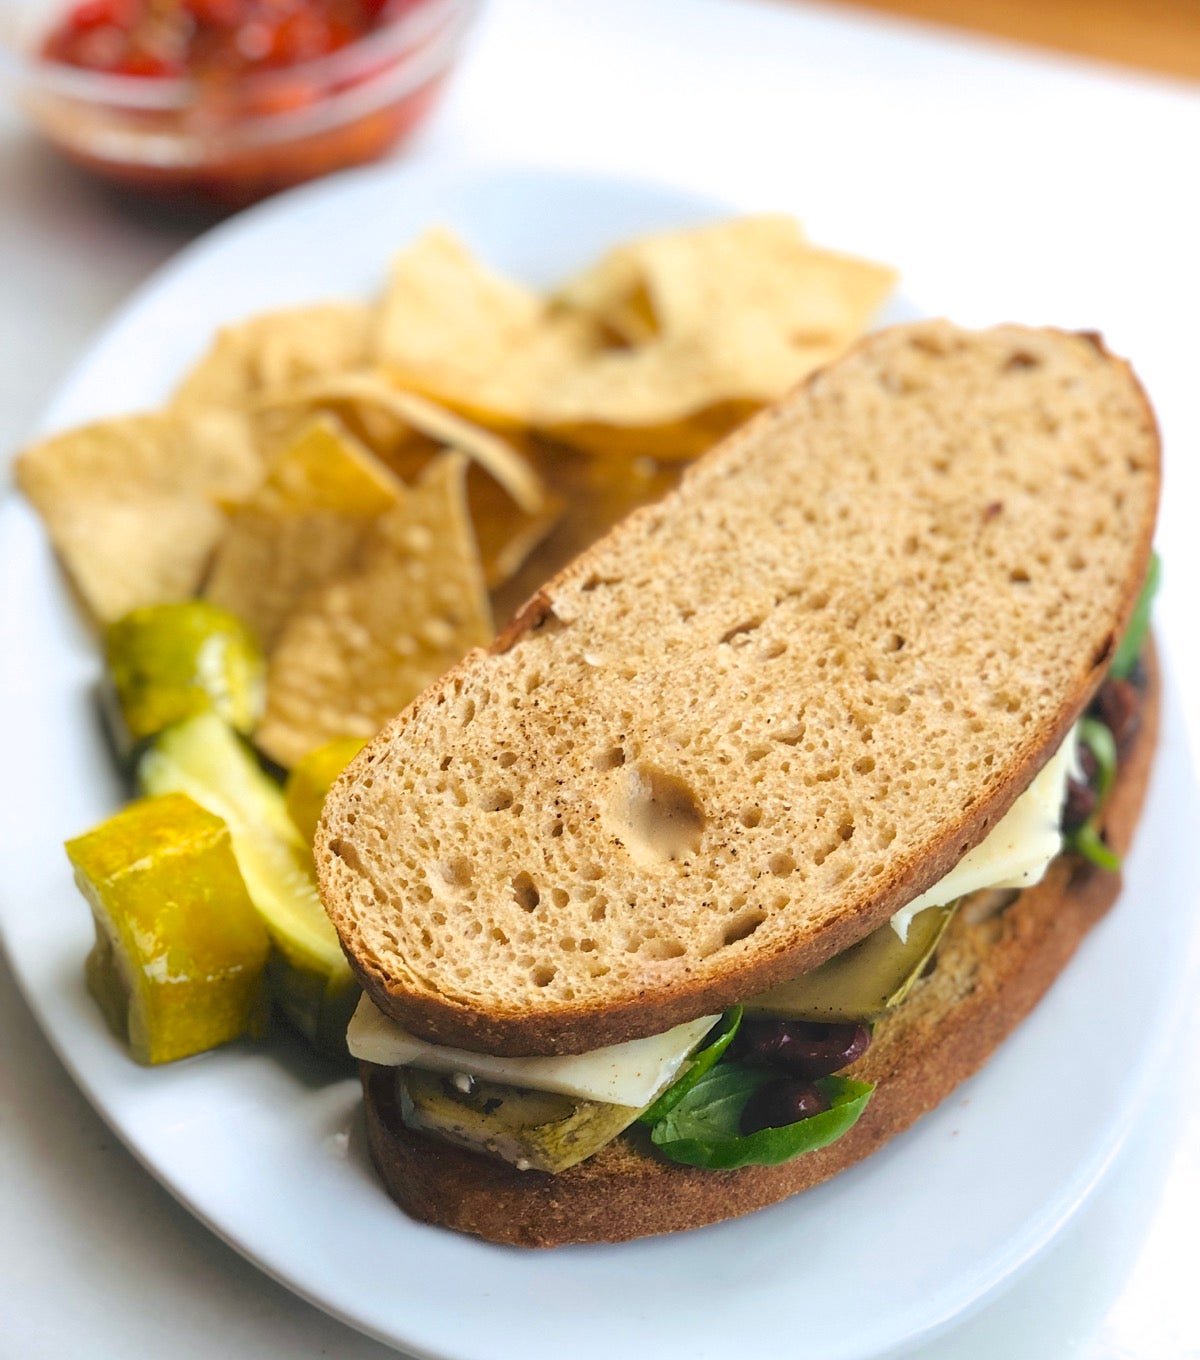
However, I wasn’t satisfied with the bread’s height: at just about 2” at its high point, this wide, flattish round with its open crumb is wonderful for topping with cheese or smoked meat in a smørrebrød-type setting — but kind of useless for sandwiches. So I decided to retool the bread to my own desired outcome: a loaf ideal for sandwiches.
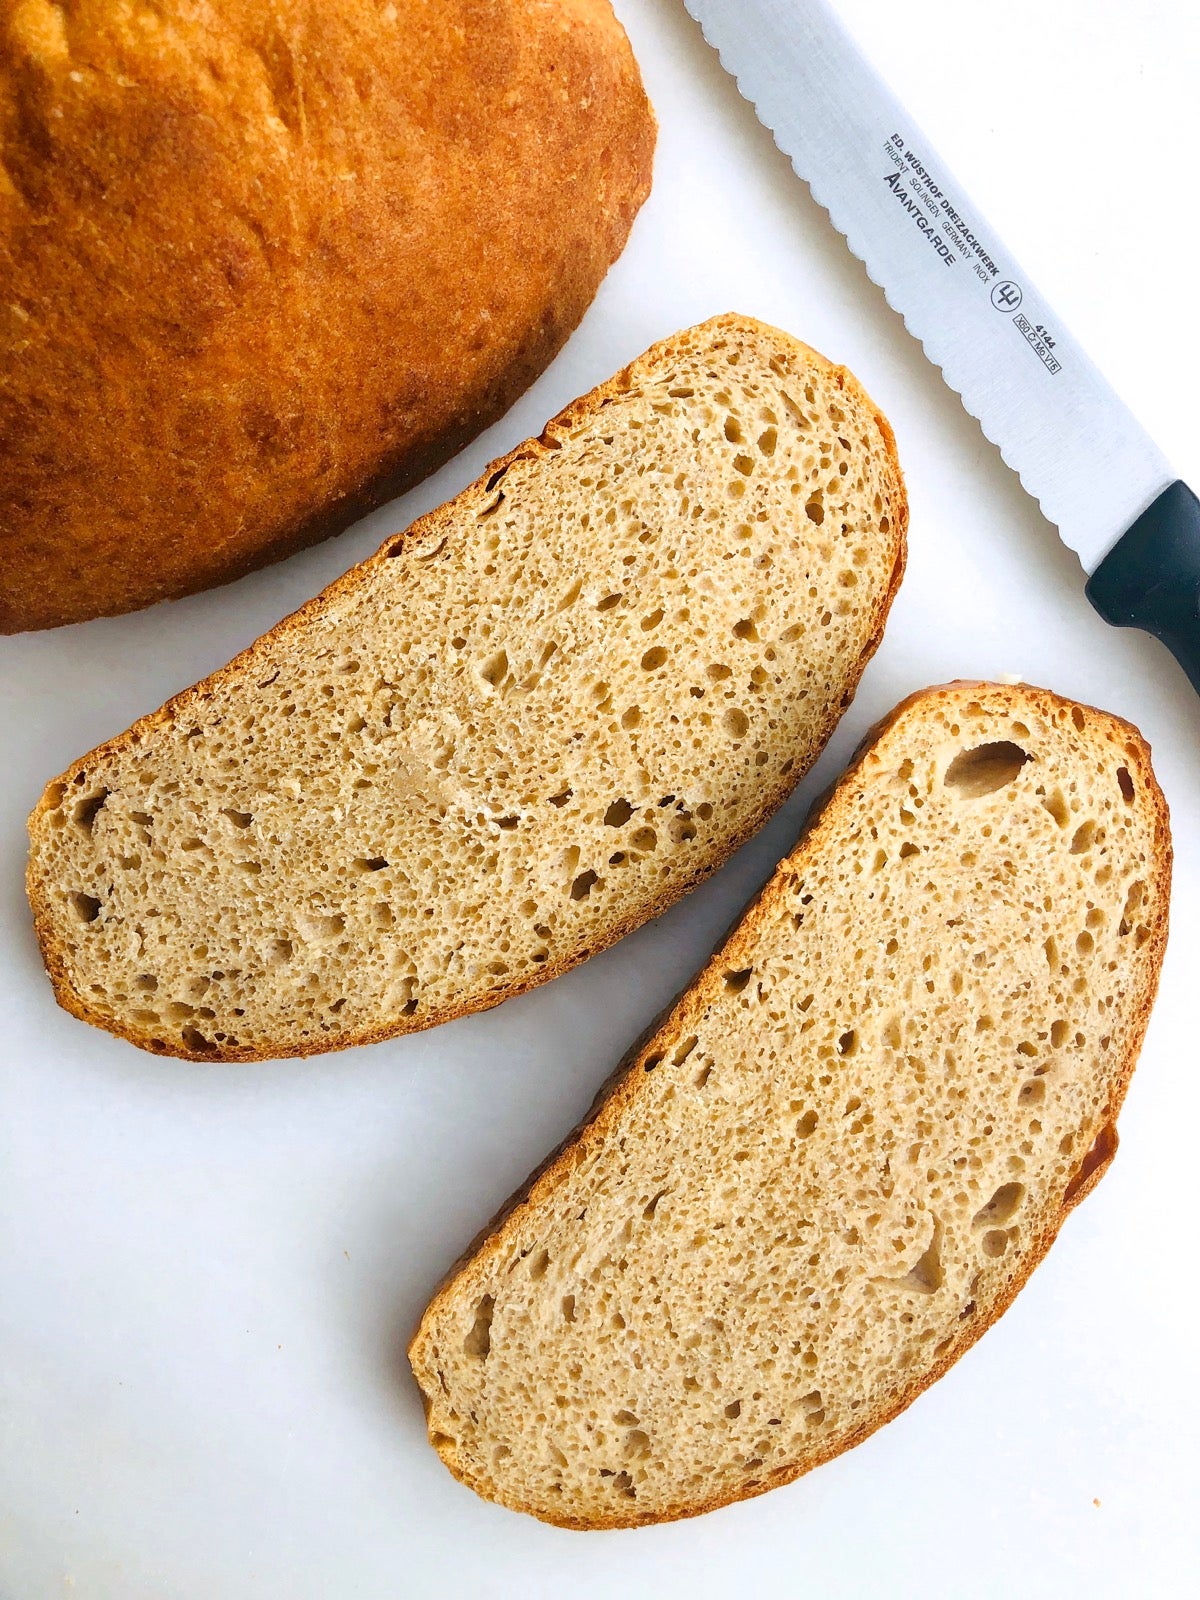
Thankfully, my changes were immediately successful: Despite veering from the recipe directions, the resulting bread retains all the flavor of the original, and it's tall enough for a decent sandwich.
If you want to bake Do-Nothing Sourdough Bread the way the recipe says — the way it’s intended to be baked — I’m about to show you how.
But if you want to go rogue and skip a few steps, stick with me: the path of least resistance can sometimes lead exactly where you want to go!
Please read this recipe through before starting in order to plan your timeline. No-knead bread, including this one, requires a long rest period in order to develop both structure and flavor, and you’ll want to build that extended rest into your schedule.
Gather the following ingredients:
Confession: Due to current supply issues I have neither Premium 100% Whole Wheat Flour nor diastatic malt powder in my pantry; so I’ll substitute White Whole Wheat Flour for the darker, more assertive Premium, and simply leave out the diastatic malt. Like I said, sourdough can be flexible!
Notice that you'll use a mere tablespoon of sourdough starter and no commercial yeast in this bread. Plus the starter doesn't even need to be fed! How can that possibly work?
What you're actually doing is feeding that little bit of starter with a whole bunch of flour, both whole wheat (which it loves) and all-purpose. Over time (lots of time), the small amount of wild yeast in that tablespoon of starter propagates enough to raise your bread.
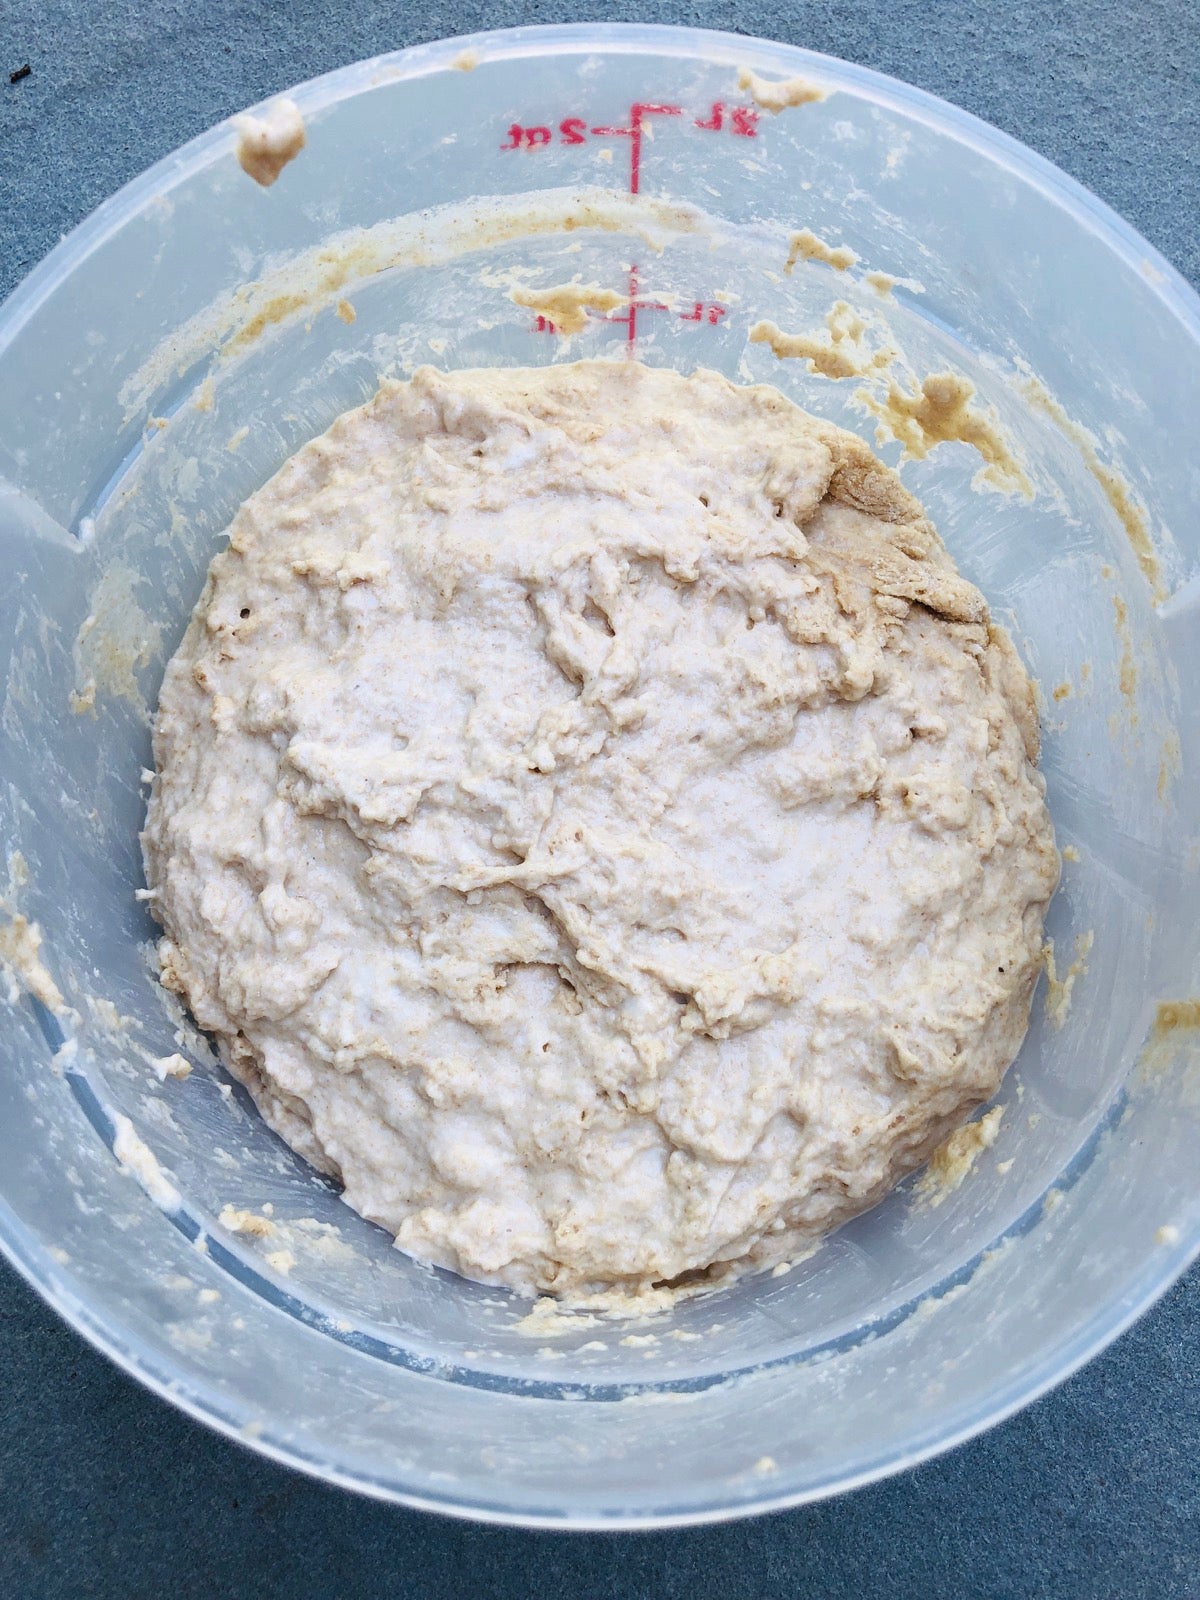
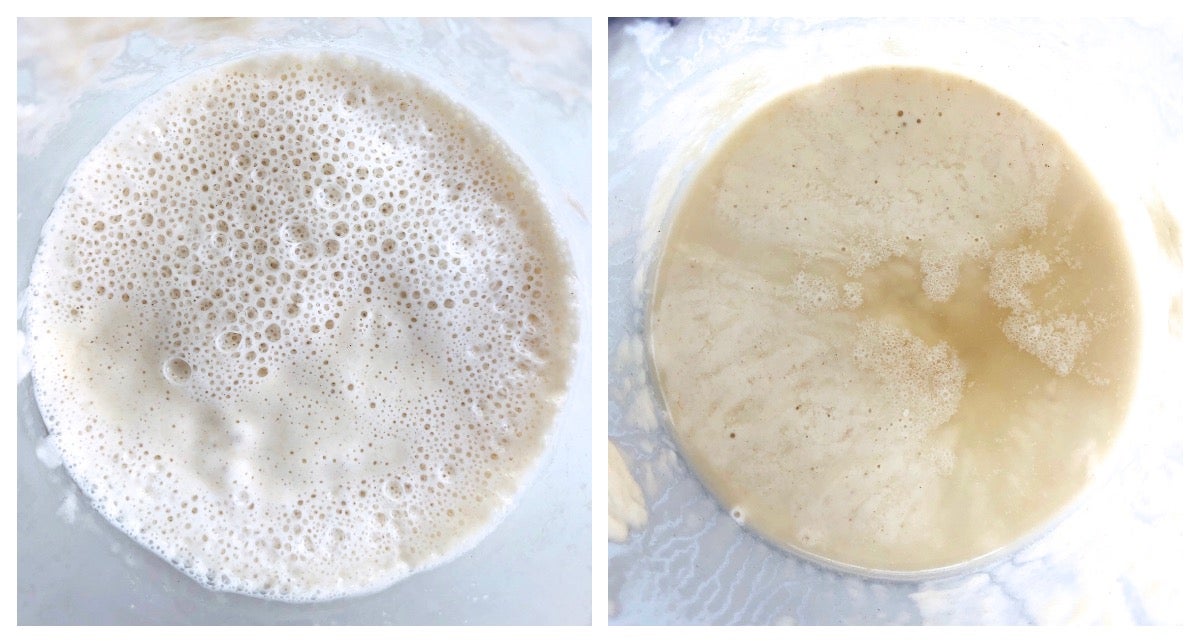
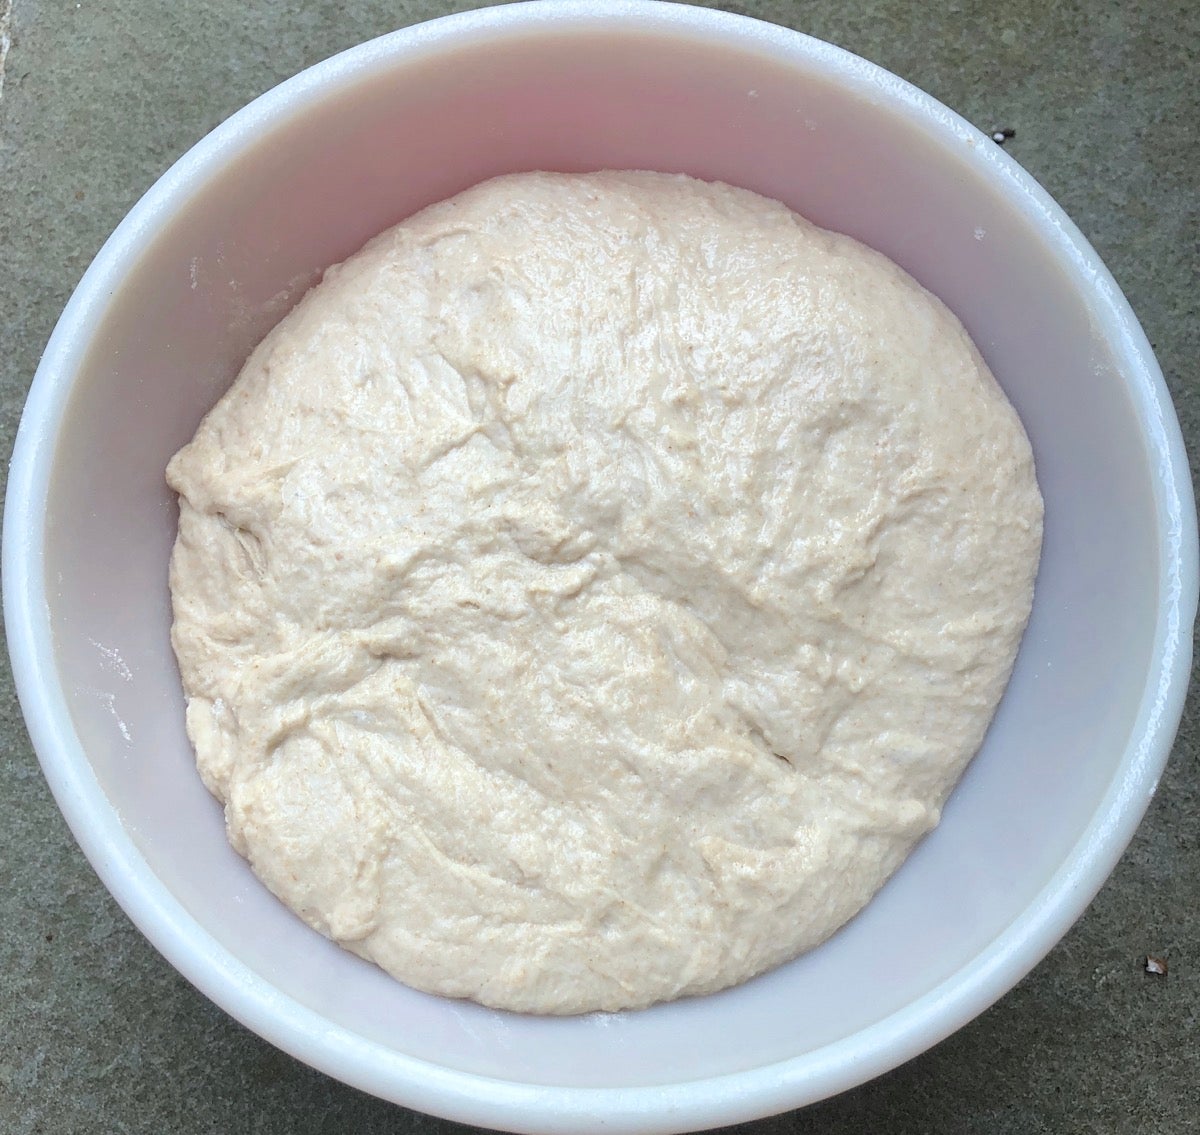
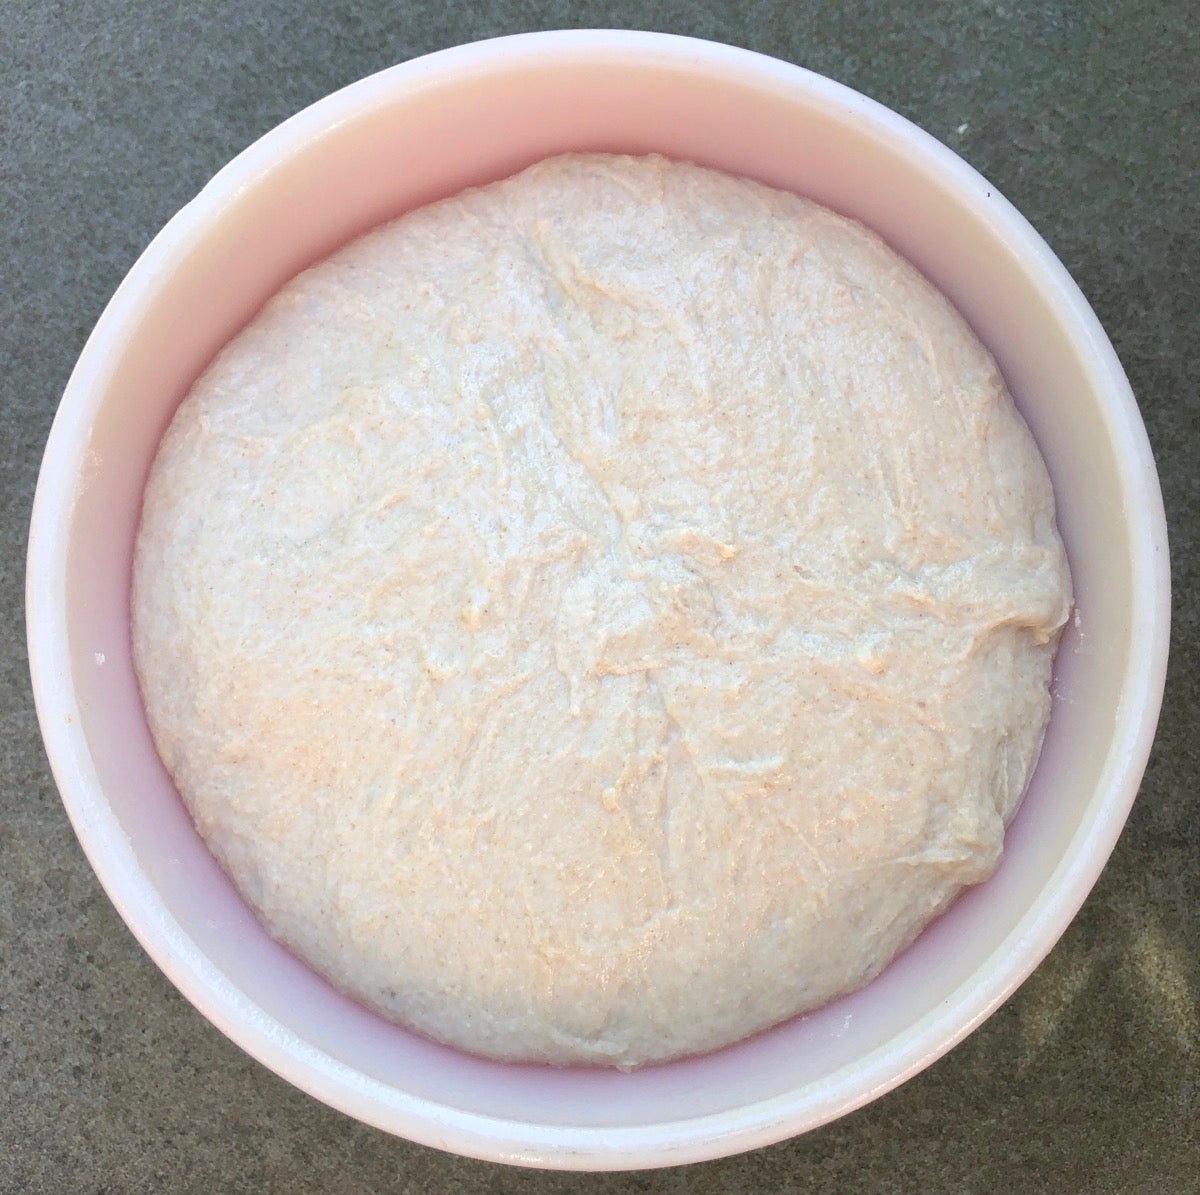
Mix the ingredients in a large bowl or bucket (at least 2 quarts), just enough to make a very sticky dough. Cover the dough and set it aside in a cool place (68°F to 70°F is ideal) for 14 to 24 hours, until the dough has doubled in size and the top surface is bubbly and just slightly domed.
Notice the huge flexibility you have in this first rising time. By choosing a warmer or cooler environment, you can fit the recipe to your schedule.
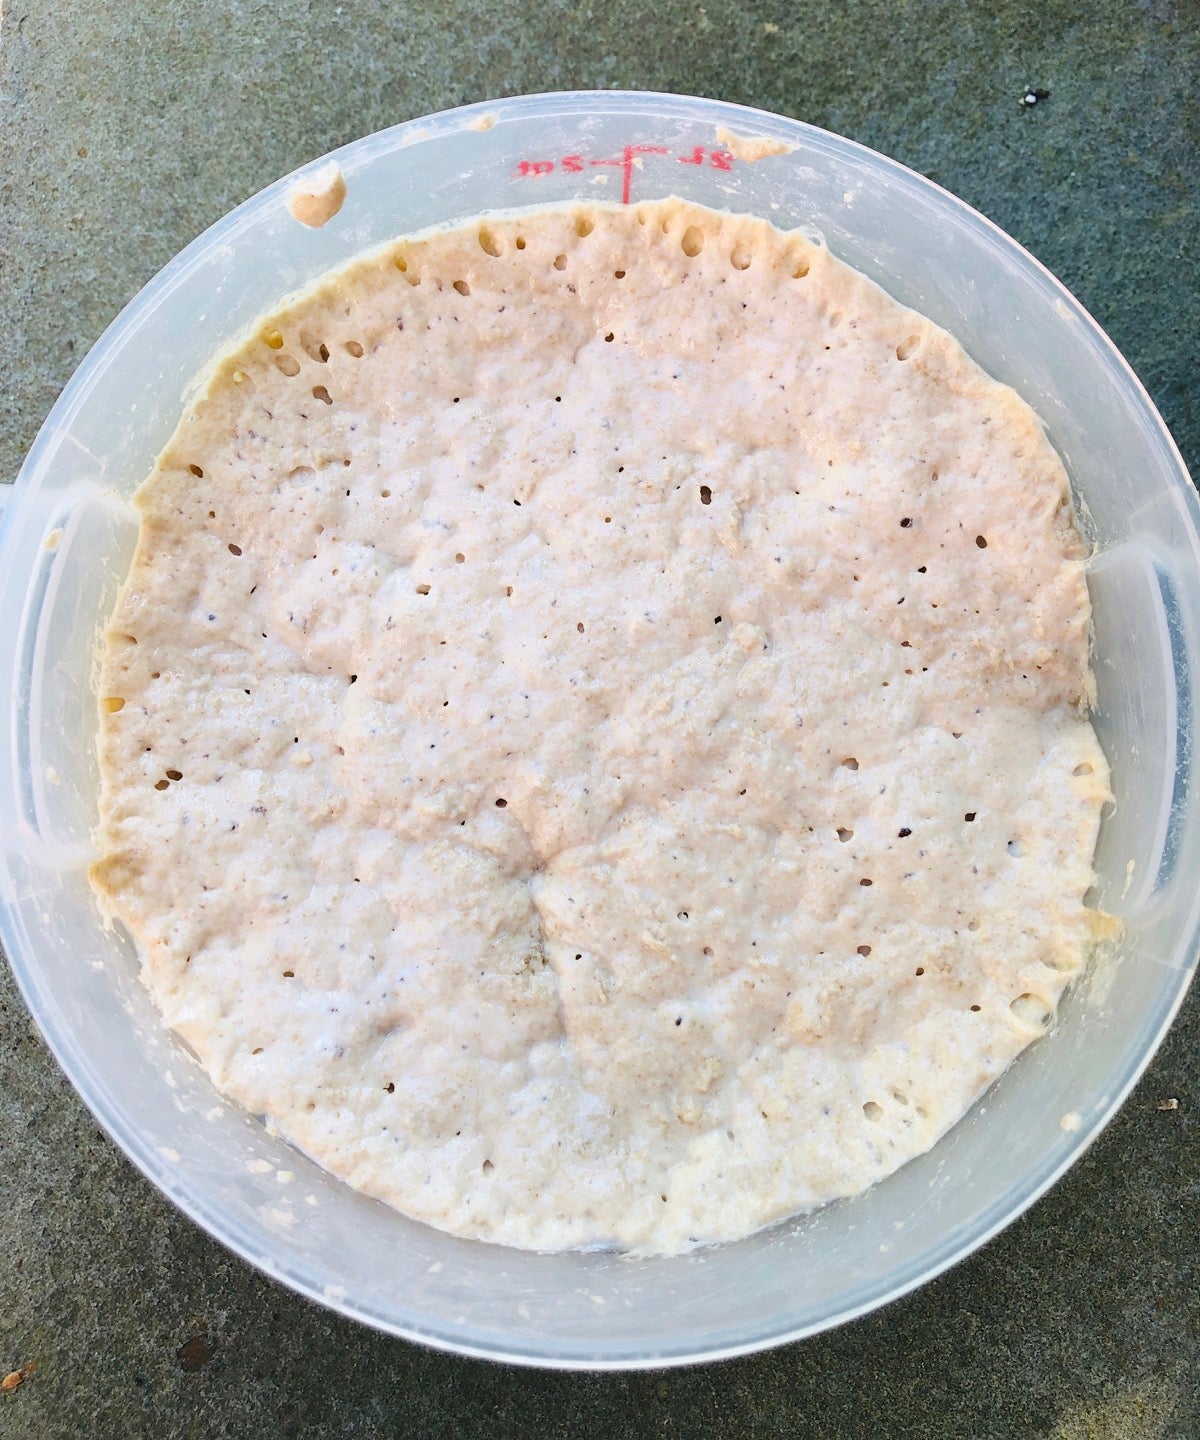
The rise time will vary depending on how cool or warm your kitchen is. At 70°F, the dough should double in about 16 hours.
Once the dough has risen, place a baking stone in the middle of the oven and a shallow (but rimmed) oven-safe pan (or cast iron skillet) in the bottom. It's perfectly OK if you don't have a baking stone; you can bake the bread on a baking sheet.
Preheat the oven to 475°F.
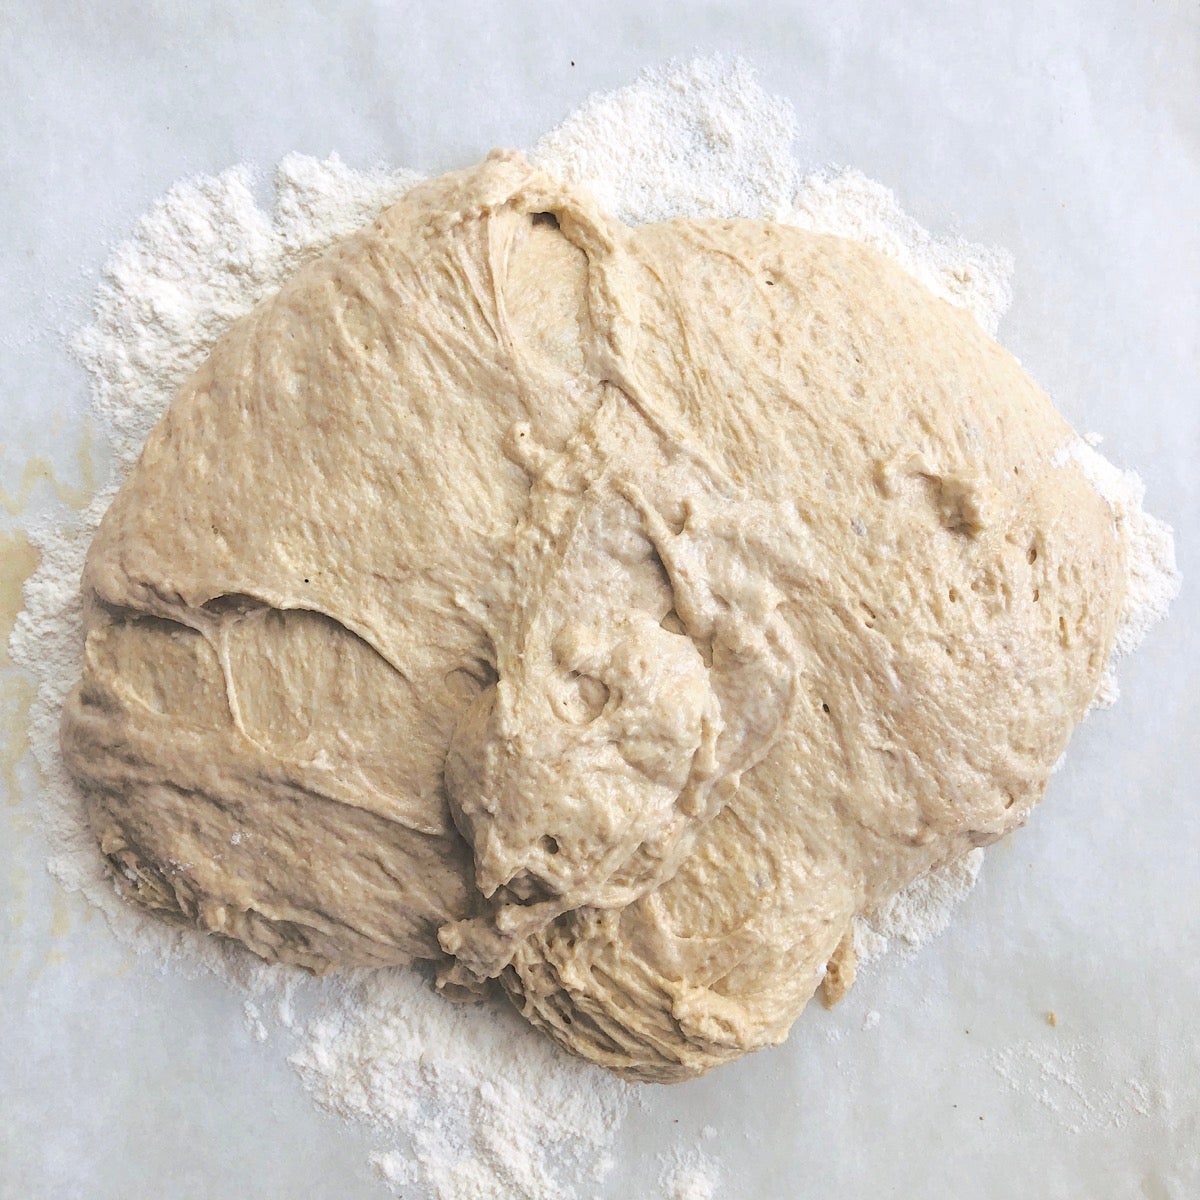
Turn the soft dough out onto a floured work surface.
Using your well-floured hands or, even better, a bowl scraper, lift up the quarter of the dough farthest away from you and fold it into the center. Repeat this stretching and folding with the quarter of dough nearest you, then the left and right sides.
Form the dough into a soft ball.
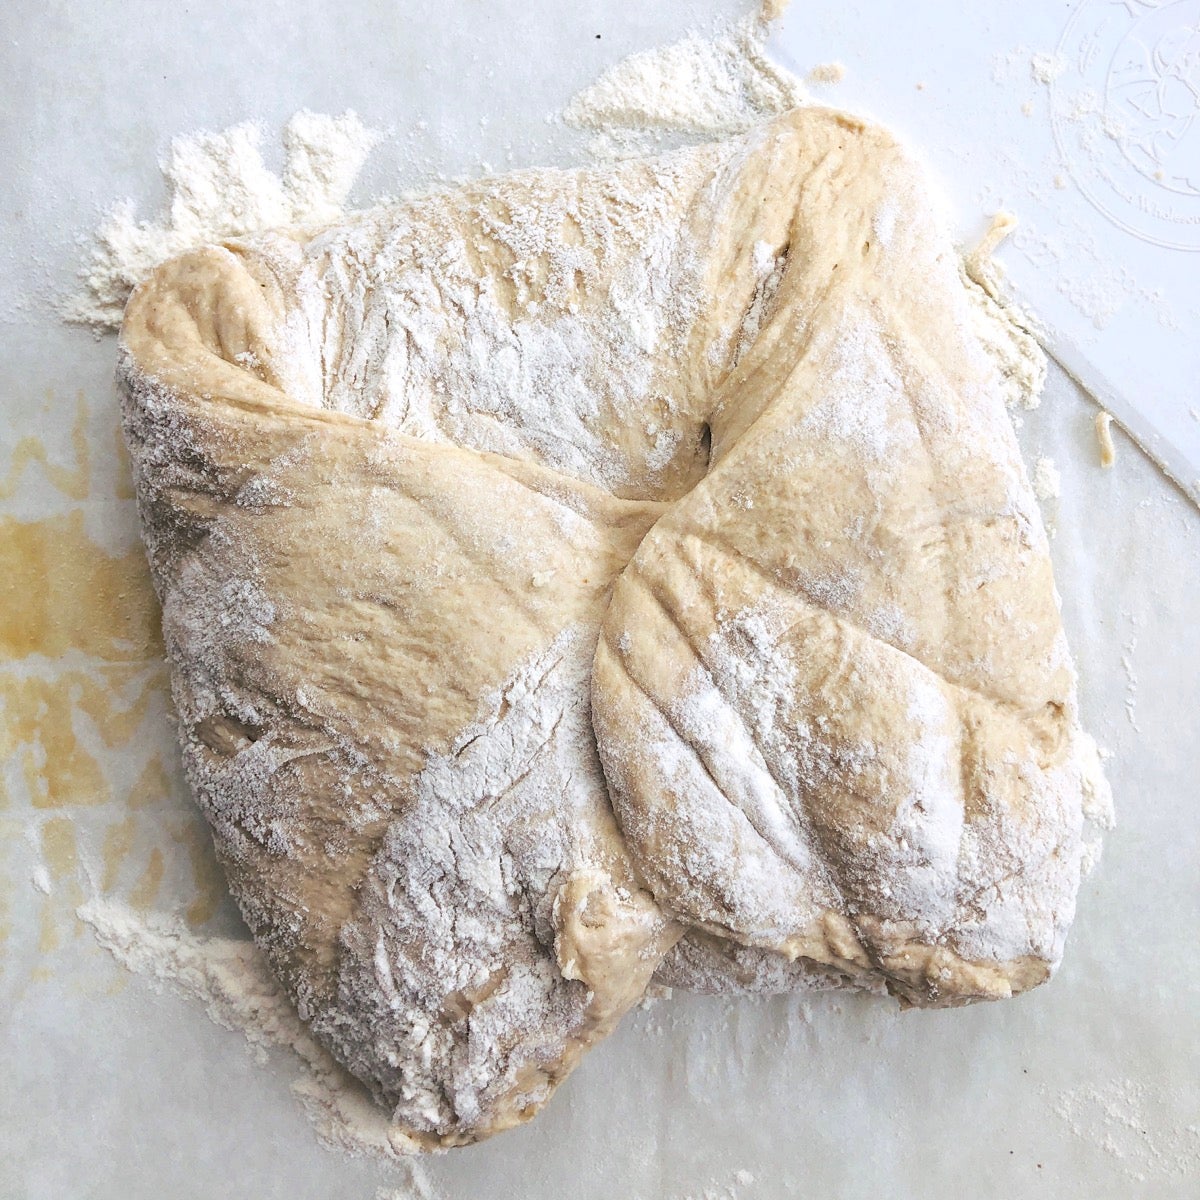
Let the dough rest, seam side up, for 10 minutes on the floured surface. You don’t need to cover it.
Take a small handful of flour and generously dust a brotform (lined for best release). Or heavily flour a plain cotton tea towel and use it to line a bowl large enough to hold the dough and then some — it's going to rise.
This is where I veer from the path; me and a brotform (or a brotform stand-in, the dreaded towel-lined bowl) have never gotten along. No matter how much I flour the towel, the dough still sticks. So rather than subject myself yet again to the heartbreak of a deflating, sticky mess of dough dangling from a sodden, flour-caked dish towel, I'm opting to let the dough rise in a heavily greased bowl. Yes, my bread will miss that artisan floury crust look, as well as a bit of extra "chew," but I'm willing to make that sacrifice for an easier baking experience.
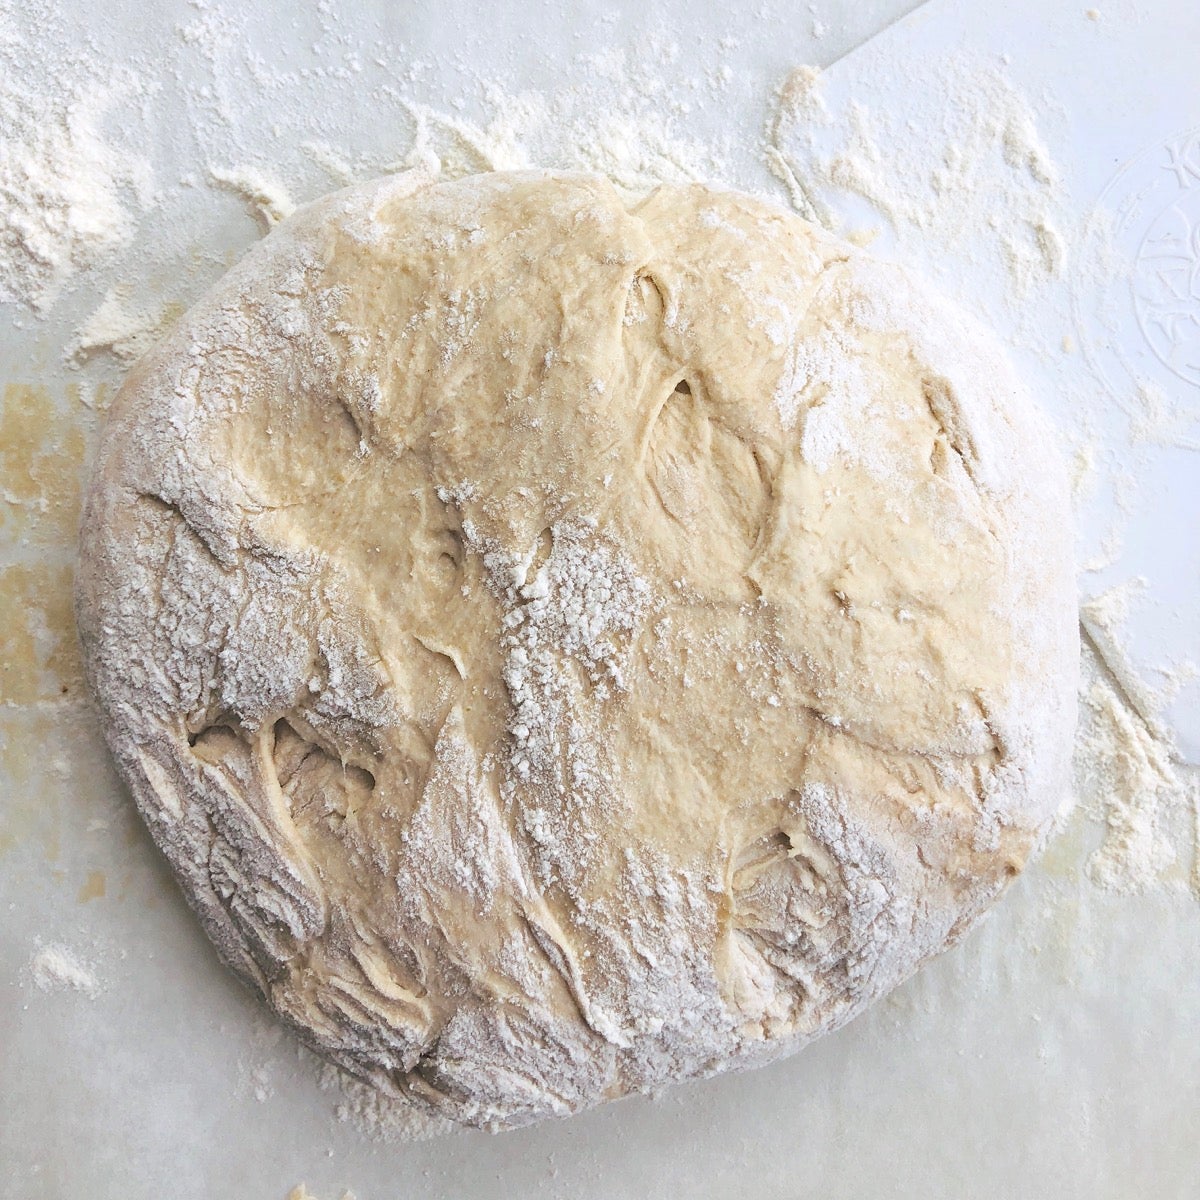
To prepare your dough for rising, form the dough into a slightly tighter ball by stretching and folding the four quarters into the center again, then turning the dough over and gently patting/rolling it into a round.
Place the dough seam side up into the prepared brotform (or towel-lined/floured bowl, or greased bowl); leave it uncovered.
Let the dough rest until it rises a bit; you may see tiny bubbles on the surface. This should happen within 30 to 60 minutes, depending on how warm or cool your kitchen is.
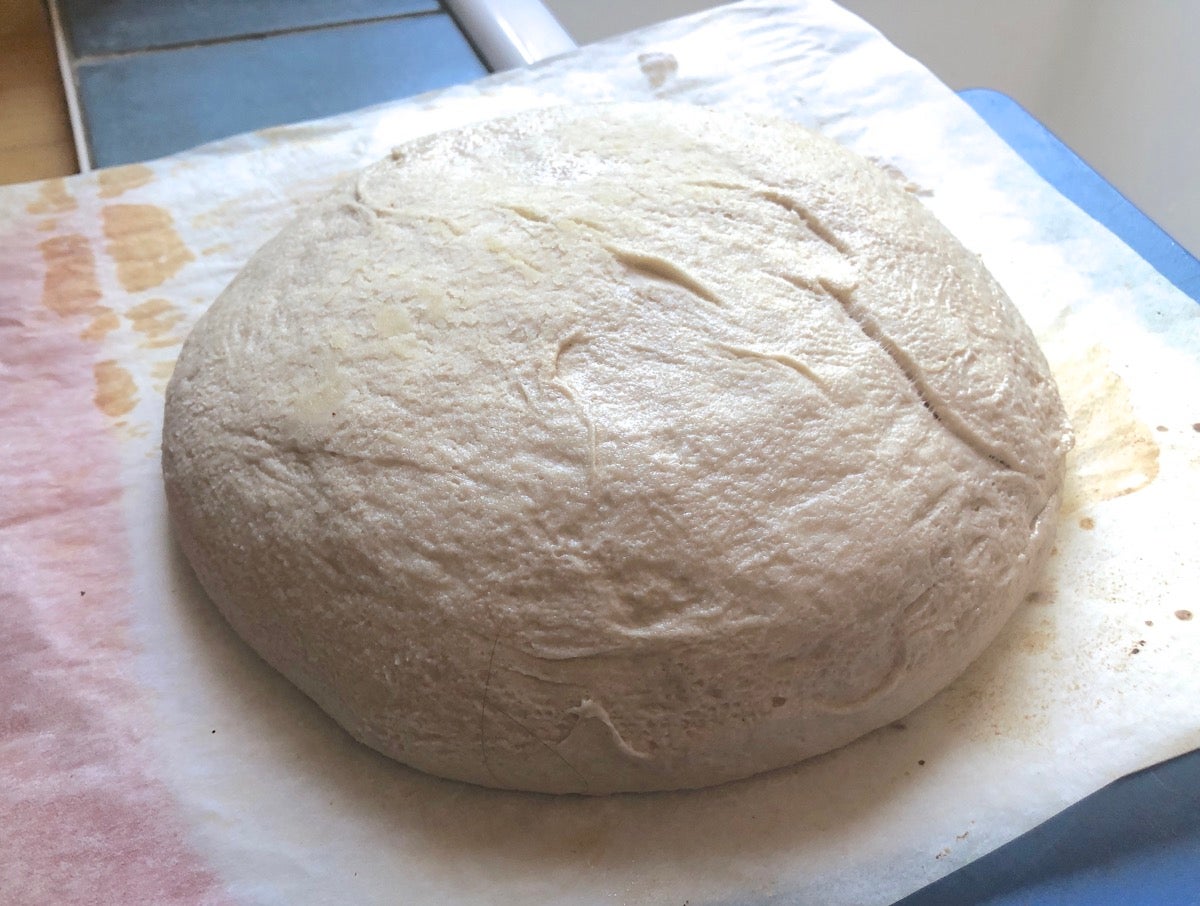
Turn the dough out onto a piece of floured parchment.
Have a cup of water at the ready.
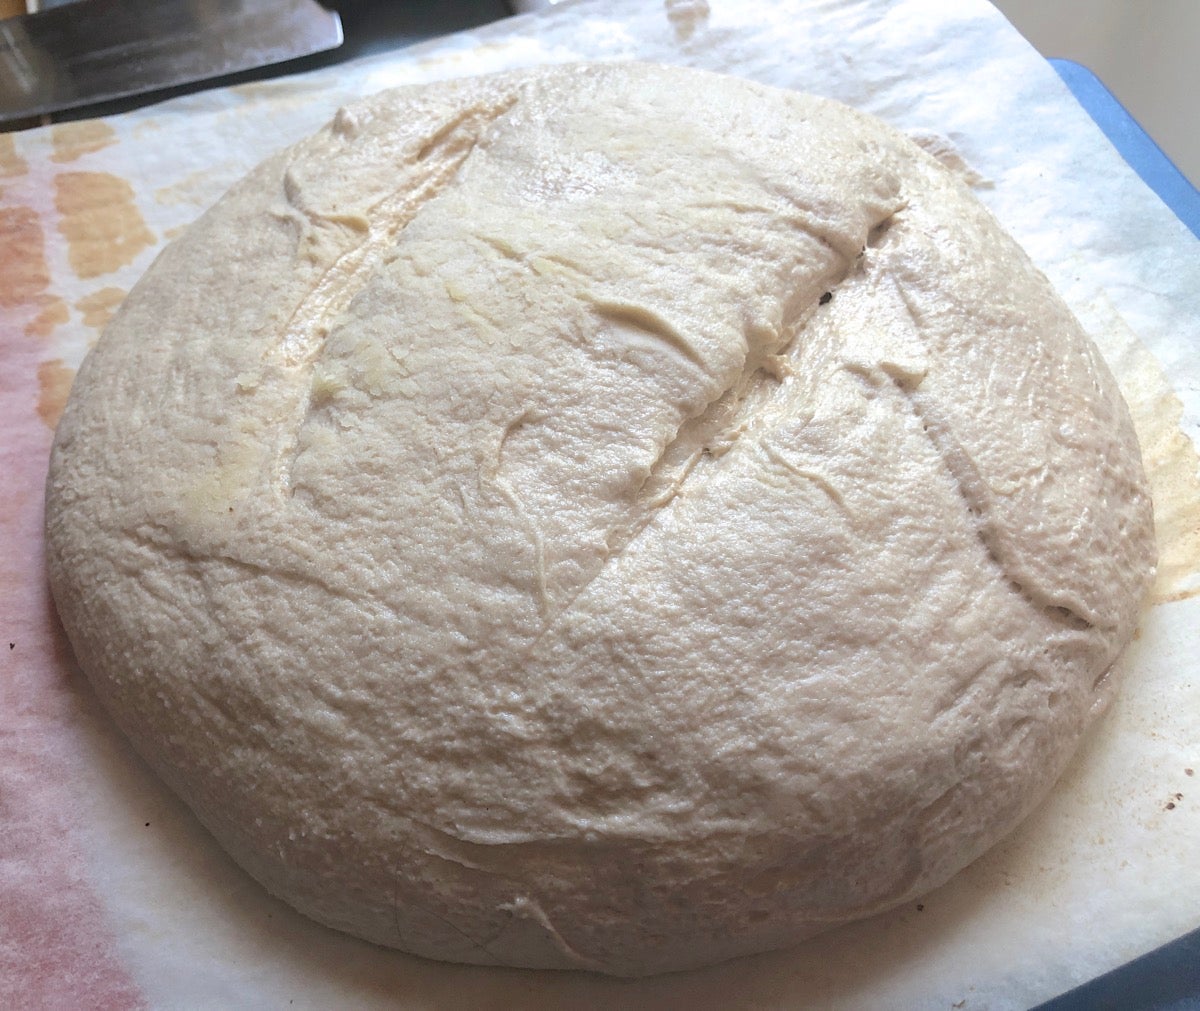
Slash the loaf several times, then transfer the bread (with its parchment) to the hot stone. If you're not using a stone, place bread and parchment on a baking sheet and put into the oven.
Wearing oven mitts, pour the cup of water into the hot pan on the lower rack and immediately close the oven door. The water will turn into steam, which helps baking bread rise as high as possible by keeping its crust soft and flexible for a time.
Bake the bread for 30 to 35 minutes, until it’s dark brown. If you have a digital thermometer the center of the loaf will register 207°F; if you don't have a thermometer, it's fine to just eyeball it.
Remove the bread from the oven and transfer it to a rack to cool completely.
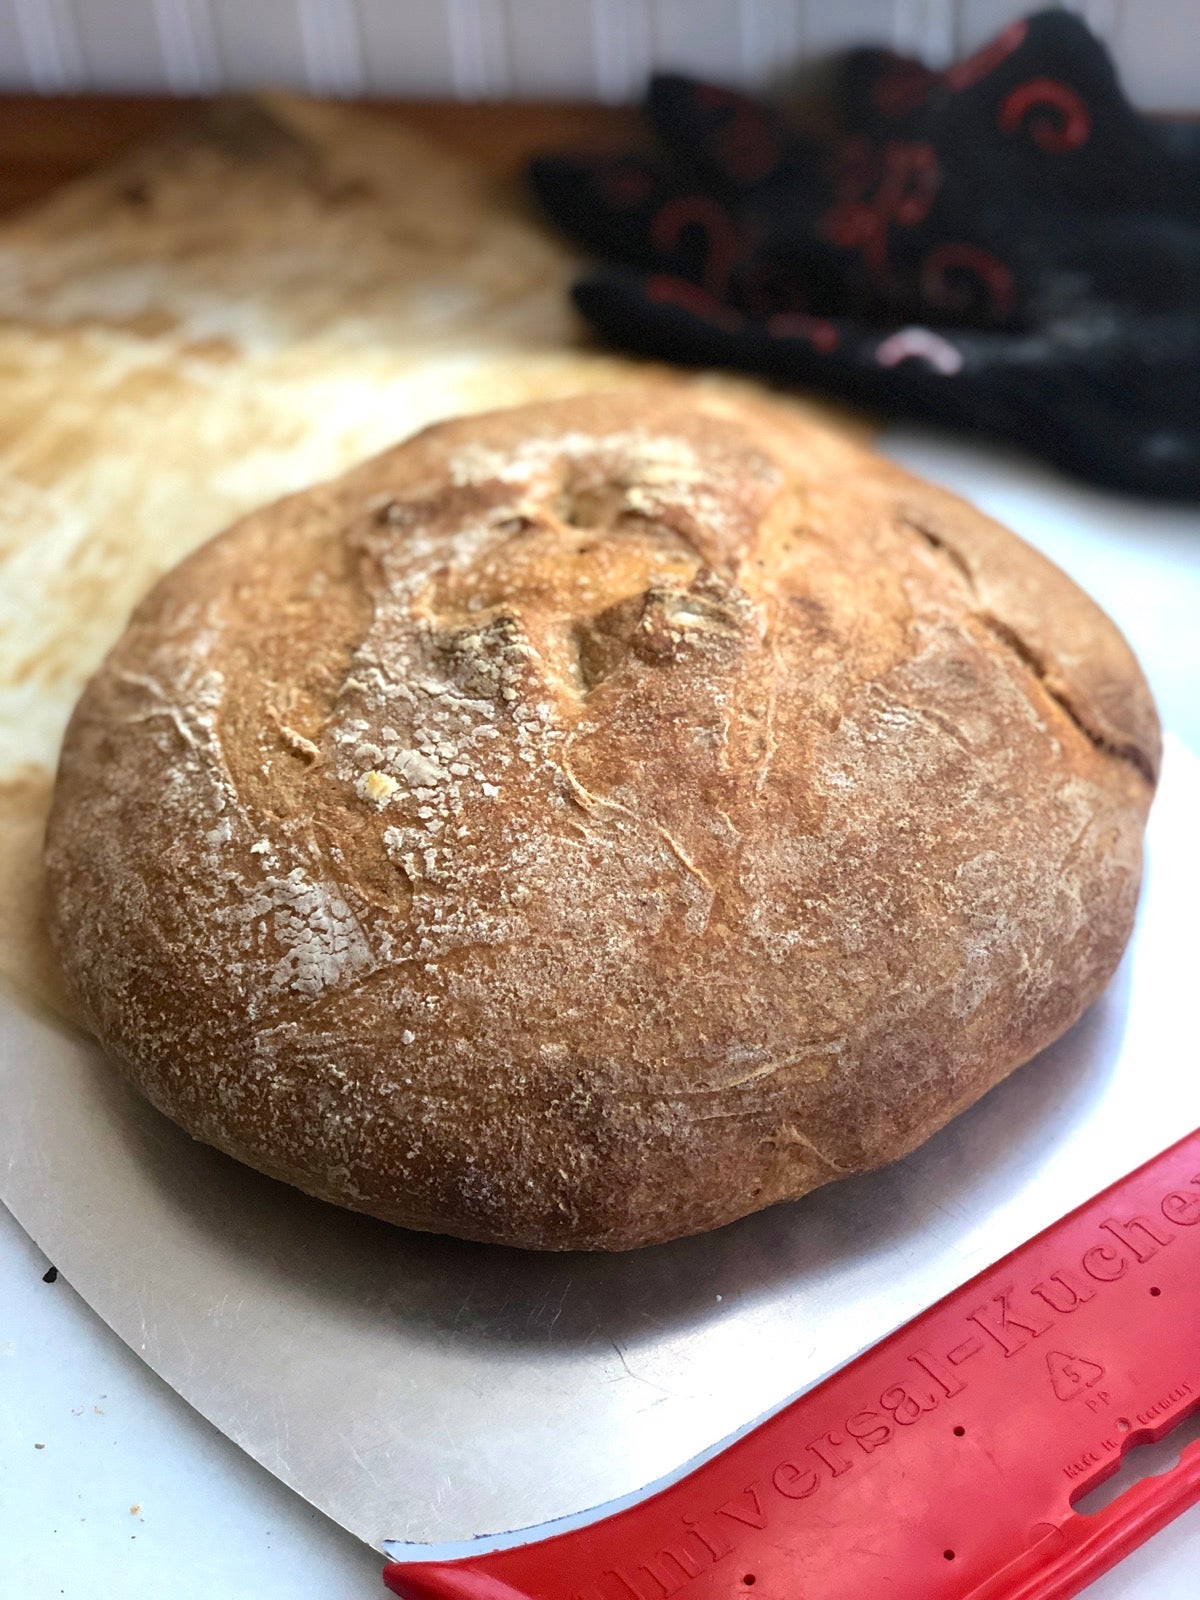
So OK, it looks pretty good (if you can ignore my slashing): crusty, with a dusting of flour contrasting nicely with the deep-brown crust.

Great open crumb. But that shape — really? I can't make a decent sandwich from that.
What if ... instead of baking the bread freeform, where the slack dough just spreads flat, I deviate and bake it in something to contain its spread?
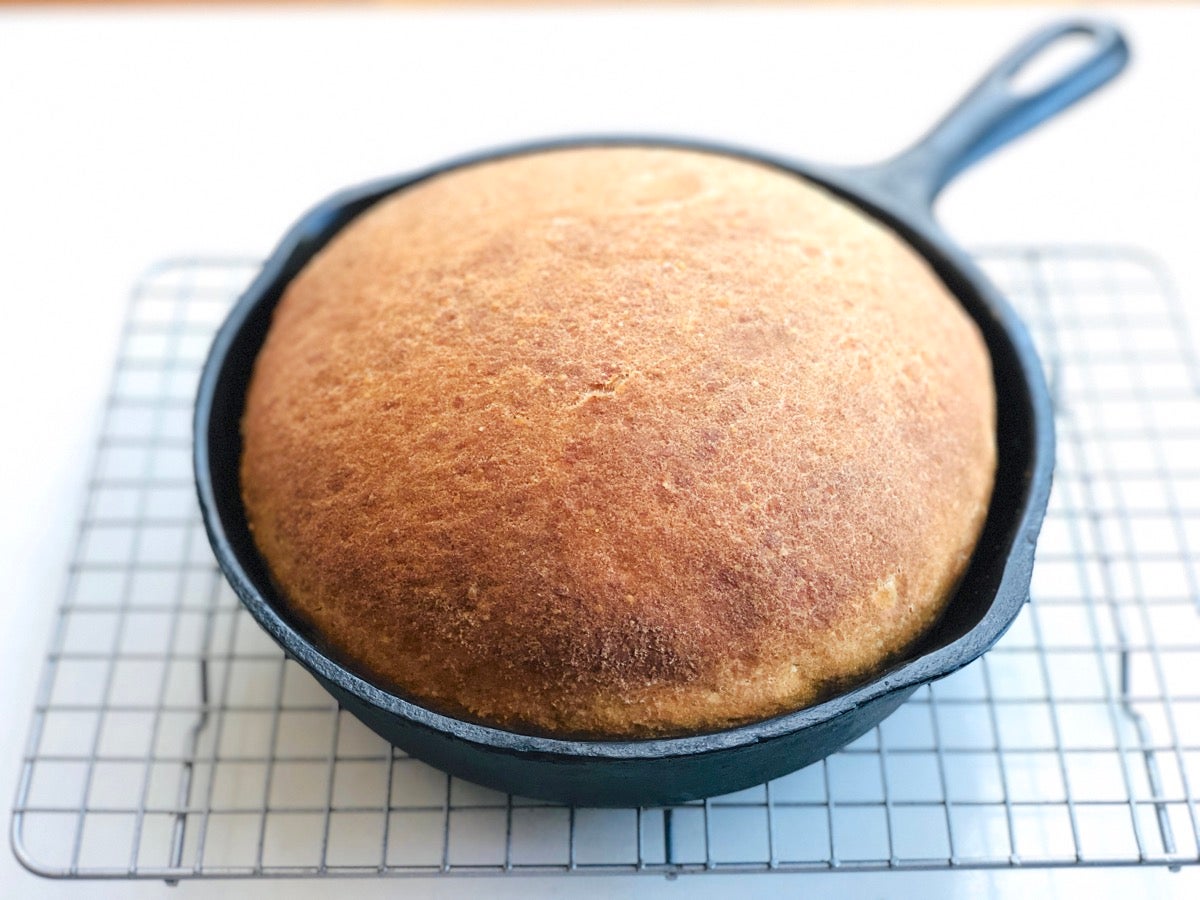
Like this cast iron skillet. At 8" across the top and 6 1/2" across the bottom, it turns out this skillet's the perfect size to make a higher-rising loaf of Do-Nothing Sourdough Bread.
Here's what I do: I preheat the skillet on the stone in the oven, while the oven is preheating. When my dough in the bowl is ready, I center an 8" parchment round into the bottom of the skillet and carefully tilt the bread from the bowl into the blistering hot pan. Since the bowl is heavily greased, the loaf slides right out. I don't bother to slash it; there don't seem to be issues with this bread tearing in odd places as it bakes.
What if you don't have an 8" cast iron skillet? Then I suggest baking in an 8" round cake pan. Preheat the cake pan in the oven and line with parchment before turning the risen loaf into it, just as you would a skillet.
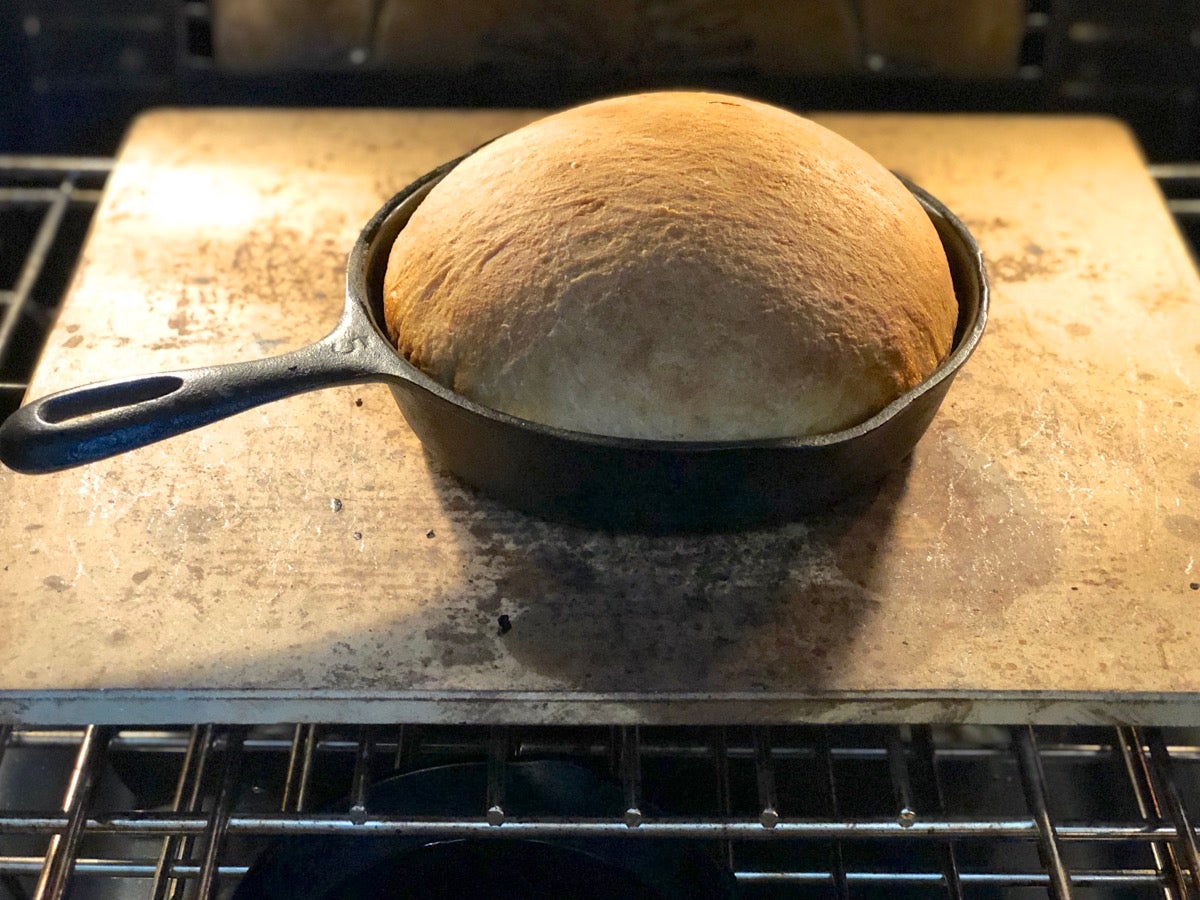
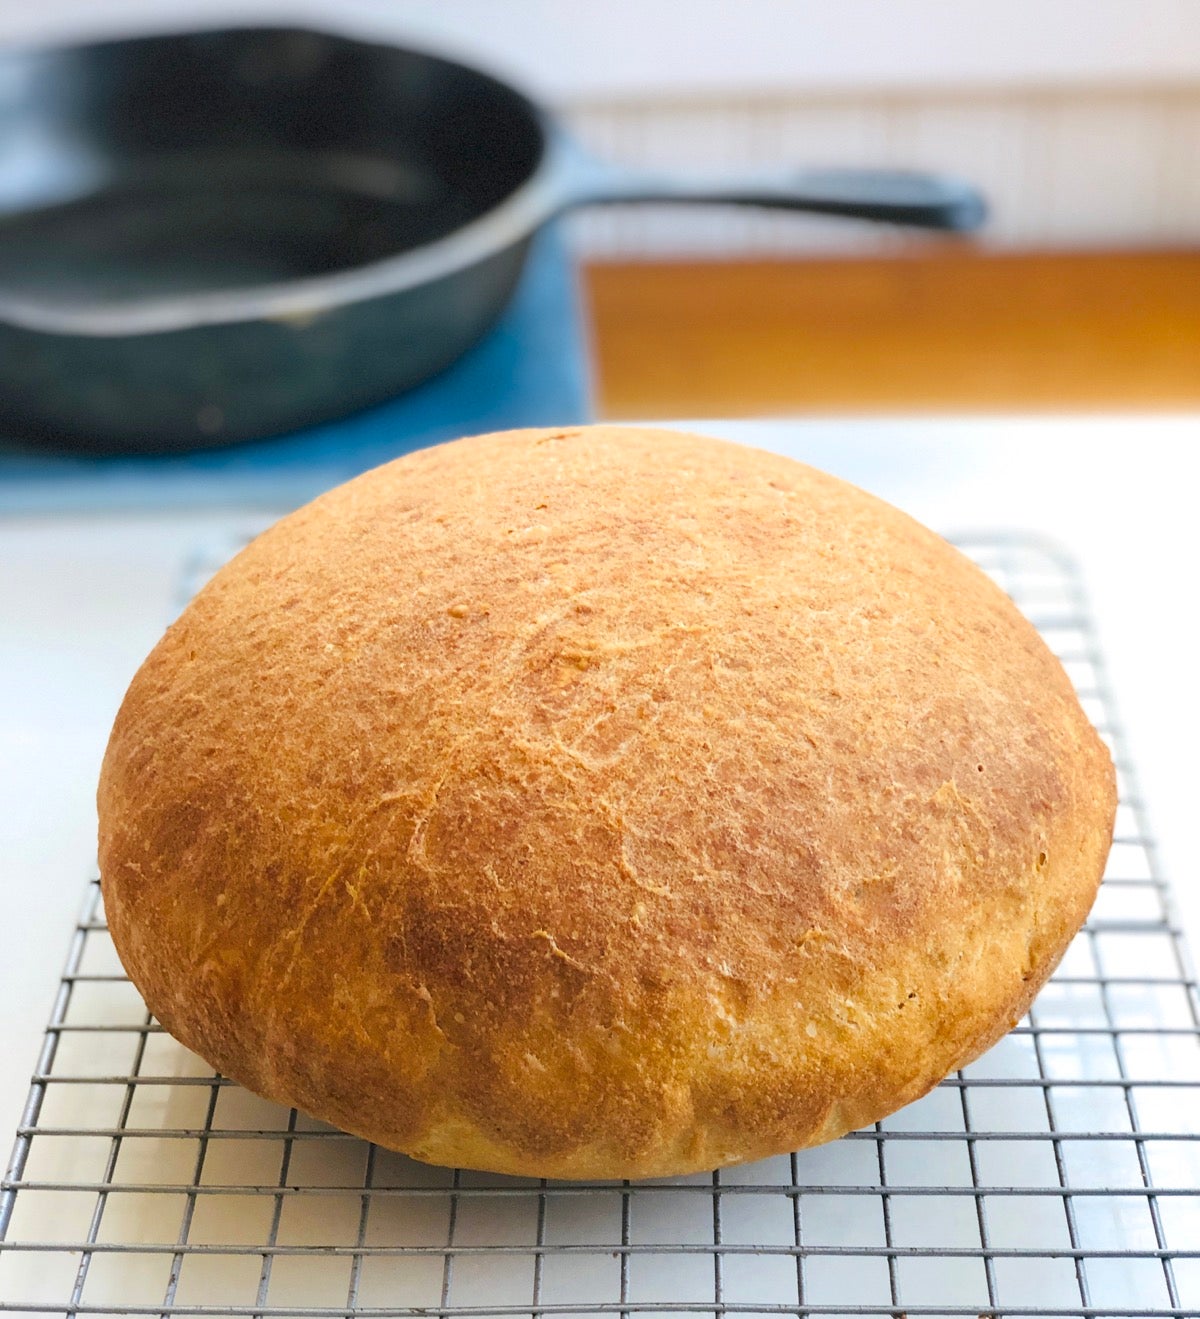
I return the hot pan with its dough to the baking stone, and add the water to the pan below to create steam. The loaf bakes up tall and beautiful — success! Crusty-chewy sourdough sandwich bread.
Here's a road map of the changes you can make to the recipe:
Don't be afraid to experiment with changing sourdough recipes to fit your wants and needs. You won't always get what you'd hoped for, but as they say in hockey: if you don't take the shot, you'll never score the goal. After all, what's the worst that can happen? Croutons — or something to feed the ducks.
And remember what I said about the path of least resistance?
Sometimes it takes you exactly where you want to go!
Looking for some simple sourdough recipes, ones that don't require a fed and healthy starter — like cinnamon crumb cake, soft pretzels, or blueberry muffins? Explore our collection of sourdough discard recipes.
