


Brioche. Fussy.
I’ve always believed the two words go together like bacon and eggs, or bread and butter. “Brioche is hard to make, hard to work with, and, well… fussy.”
Or so I thought. Till my Web teammates forced me to make brioche. And now I’m kicking myself for having avoided this simple, lush bread, lo these many years.
Here’s how a blog post often starts:
“PJ, we like this picture of brioche on p. 54 of the catalogue. We’re going to use it as the main image in one of the February emails. So that’ll be your recipe, OK?”
Brioche? I felt a chill creep down my spine. Pain de mie? No problem. Onion buns? Love ’em. I’ve even gotten past my Fear of Sourdough, and now make that regularly. Especially sourdough waffles—oh, my…
But brioche? A soft, soft dough, full of butter that has to be added bit by bit, and eggs that make everything slippery, and chilling and icky-sticky shaping… no thanks. Not for me.
But, ever the loyal soldier, I sighed and carried on. “Aye, aye, Capt. Silver. Brioche. Not a problem.”
I knew we had several brioche recipes online, so I clicked to what sounded like a good place to start: Classic Brioche. Butter, eggs, chilling… yup, just as I suspected.
However, if there’s one simple thing life has taught me, it’s this: put one foot in front of the other, and you’ll get there.
And that’s just what I did. The instructions were simple. Right foot forward… They worked exactly as written. Left foot… The soft dough came together, rose, and chilled into a soft, clay-like dough that was a dream to shape. Right foot… It rose again, right on schedule. Another step… And baked up light, tender, golden brown, aromatic, and RICH. The journey completed.
Why was I EVER reluctant to make brioche?
Now I see that it’s the dough of 1,000 uses. Brioche cinnamon rolls and sticky buns. Brioche dessert pizza. Heck, a brioche savory pizza, the tender bread cradling a runny Gorgonzola, toasted walnut, and roasted pear filling—why not? A giant round of brioche, split horizontally and filled with pastry cream to make a classic French pastry whose name, unfortunately, escapes me at the moment.
Brioche is my new best friend. And it’ll be yours, too, with one caveat.
Use a mixer or bread machine to make the dough. Go ahead, turn your nose up at modern appliances and make this dough by hand, if you’re determined to do so. But don’t hesitate to take the easy way out, and let a machine do the tricky kneading for you. Trust me, you’ll have lots of hand-time with your dough while you’re shaping it.
Read our Brioche recipe as you follow along with these pictures.
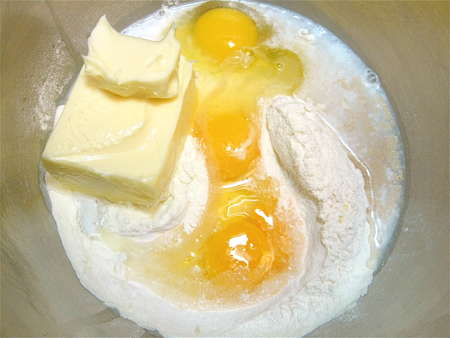
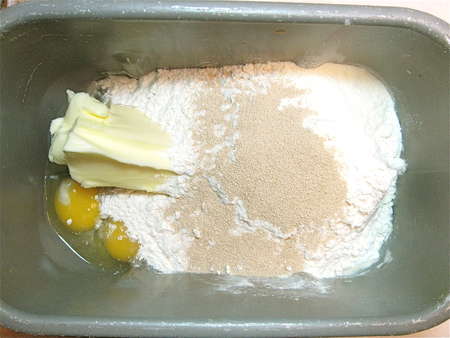
OK, everything into the bowl. Flour, sugar, dry milk, salt, yeast, water. Lots of room-temperature butter. Three large eggs, plus an extra yolk.
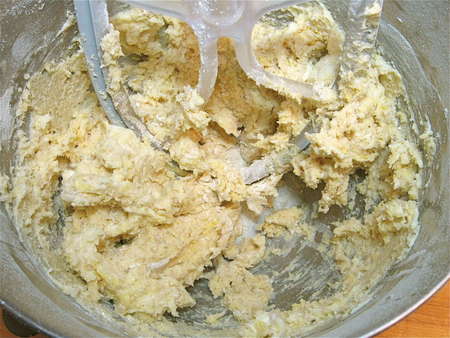
Mix till everything is combined…
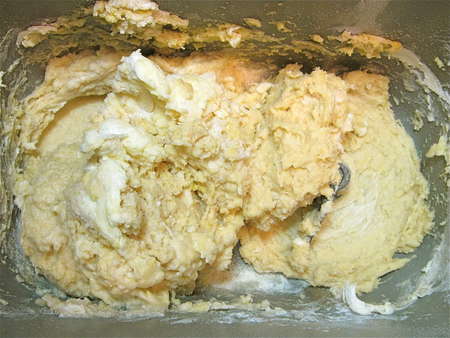
…then beat with the flat beater at medium-high speed for 5 minutes. See the dough starting to smooth out?
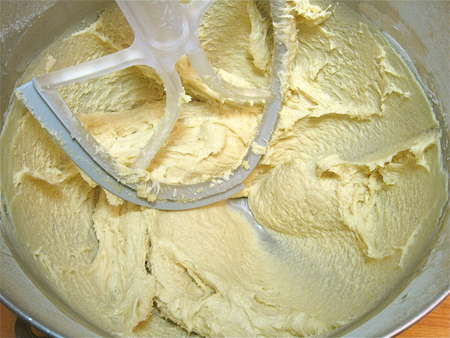
Beat for another 5 minutes…

…then scrape the dough away from the sides of the bowl.
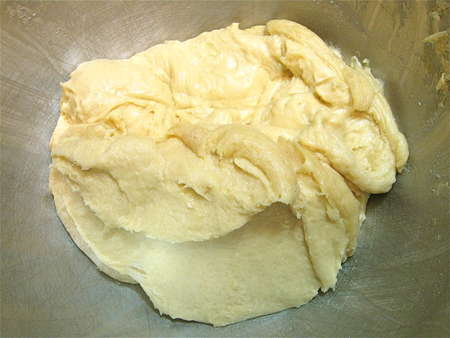
Bring it into the center, like this.
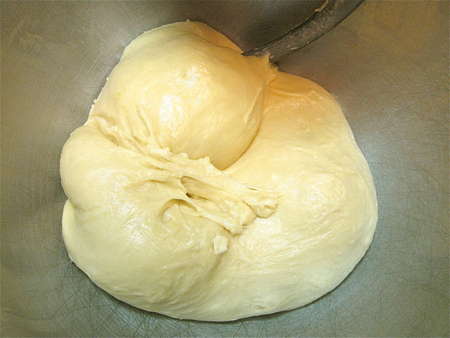
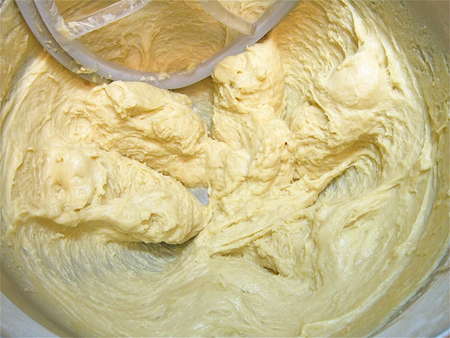
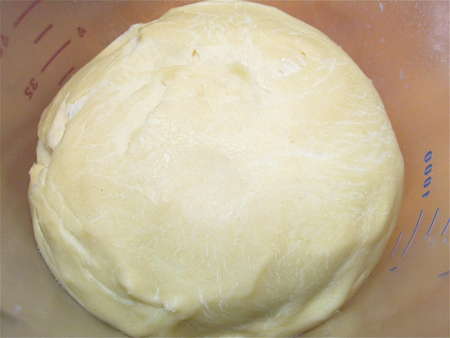
Switch to the dough hook, and knead for 5 minutes. Yes, that’s a total of 15 minutes working the dough. See how lovely and smooth it is?
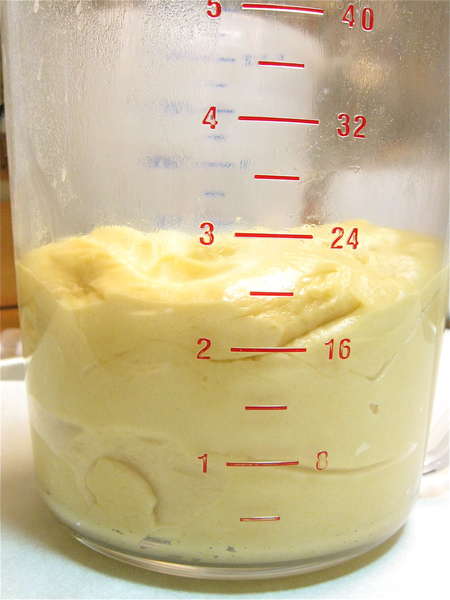
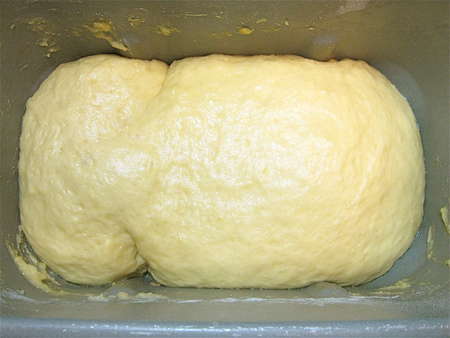
Put the dough in a rising container. I’m using an 8-cup measure here. The container really doesn’t need to be greased; this dough is rich enough.
Let it rise, covered, for 60 minutes. It won’t rise much; that’s OK. It’s preparing itself for more rising in the refrigerator. Put the covered dough in the fridge…
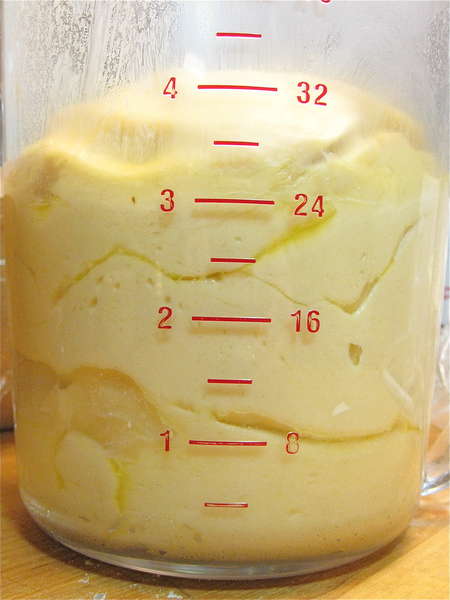
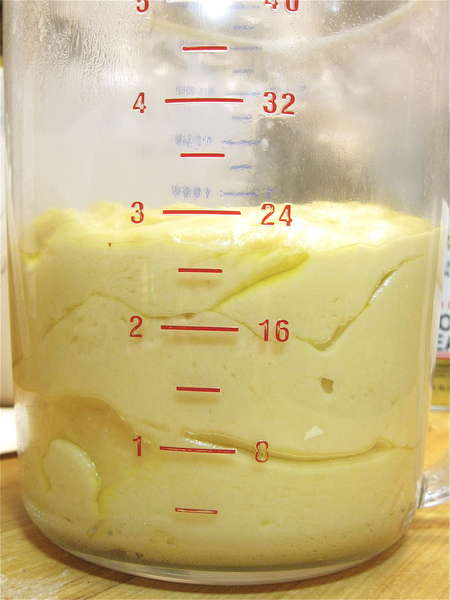
…and let it rise and chill for a minimum of 2 hours. You can let it go as long as overnight. See how it’s risen?
Despite its cover, the top of the dough may look a bit dried out; that’s OK.
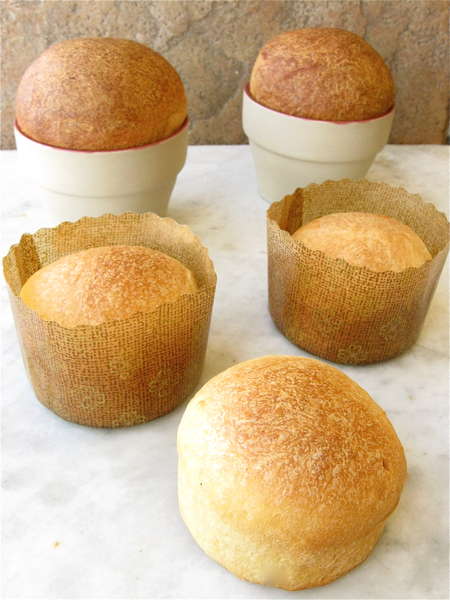
Remove it from the rising vessel, and divide it into as many brioche as you want to make. This recipe makes two nice loaves; six “flower pot” brioche; or a dozen little rounds, in our bake and give mini round paper pans. You may also choose to make a traditional large loaf in a brioche pan; I didn’t have a brioche pan, so didn’t try it.
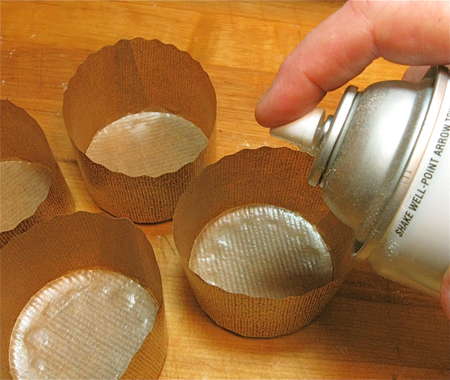
Lightly grease the pans of your choice.
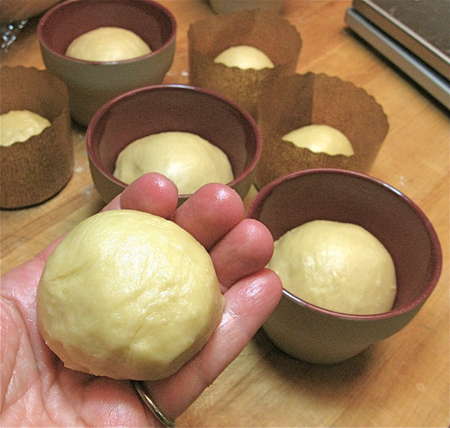
Round the pieces of dough into smooth balls, and set them in the pans, filling the pans anywhere from about 1/3 to a generous 1/2 full.

This recipe will fill six mini flower pots, or 12 mini round paper bakers. It'll also make two loaves, as you'll see below.

Set the pans on a baking sheet, cover, and let rise till puffy, about 90 minutes to 3 hours.
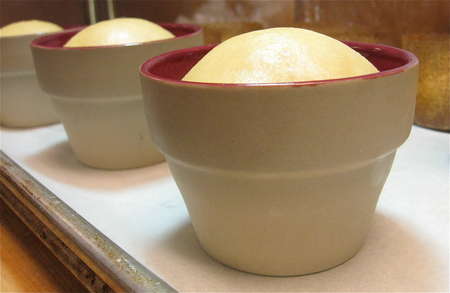
Notice how nicely the dough has crowned over the rims of the flower pots.
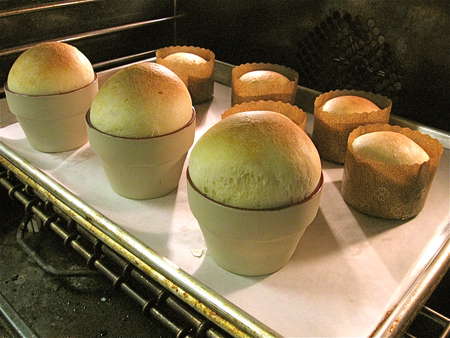
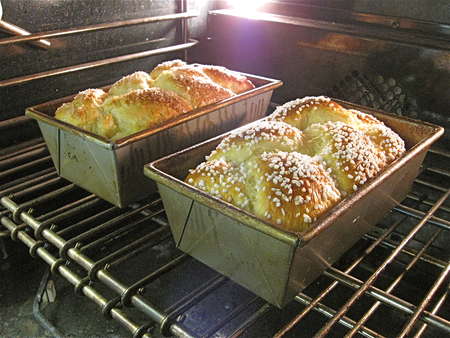
Nestle the pan of loaves into another pan; this insulating technique is called “double panning,” and will ensure the bottoms of the loaves don’t burn.
Bake the loaves on a lower rack of the oven till they’re a VERY light golden brown, anywhere from 10 to 20 minutes depending on what pans you’ve used.
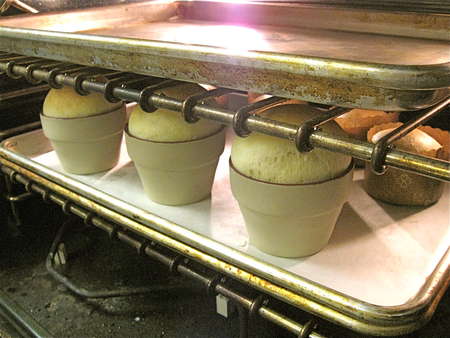
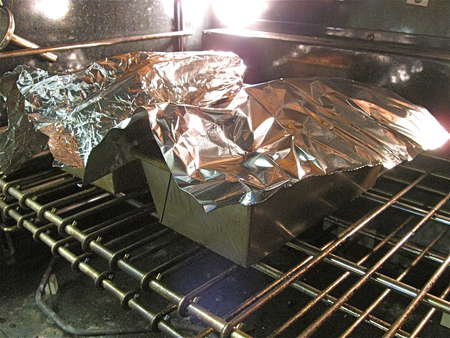
Place a rack above them, and put a pan on the rack to shield the tops of the loaves. (You may also choose to imply tent them very lightly with aluminum foil.) They’ll continue to brown, but more slowly.
Remove the loaves from the oven when they’re a medium-to-deep golden brown, and their interior temperature reads about 205°F on an instant-read thermometer.
Note: Baking times and temperatures will vary according to what size/shape pan you use. Please read the recipe for specific instructions.
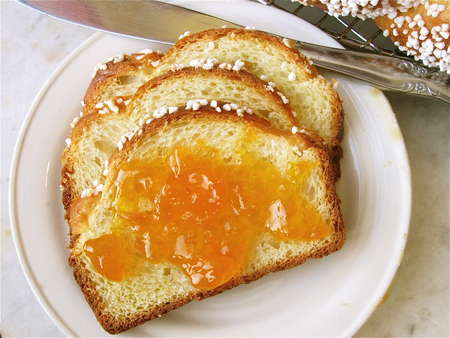
Here’s my favorite way to enjoy brioche: made into a loaf, sliced, and served with jam. Apricot is my favorite.
Let’s begin again. Everything into the bucket of your bread machine, set on the dough cycle.
After 5 minutes – ewww, mess!
But at the end of the dough cycle—lovely. Since it rose as part of the cycle, it’s ready to be covered and put into the fridge.
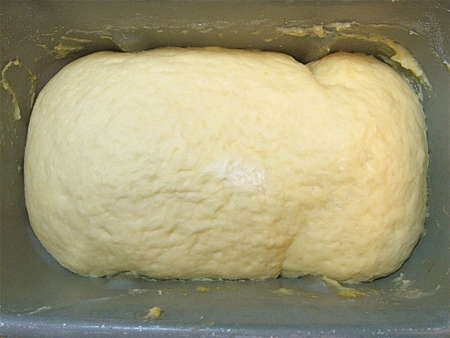
Next day, here it is. As you can see, it didn’t really do much overnight.
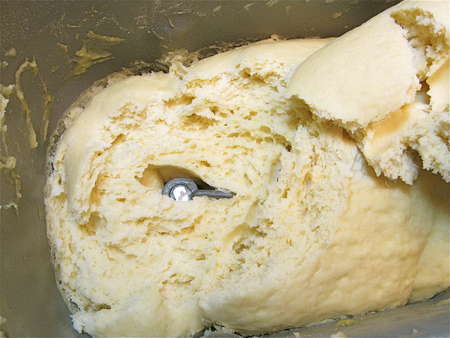
And when you try to scoop it out of the pan, it acts like clay; it breaks off in chunks. But notice the airy texture under the skin; it hasn’t just been sitting around doing nothing all night. The yeast has indeed been busy.
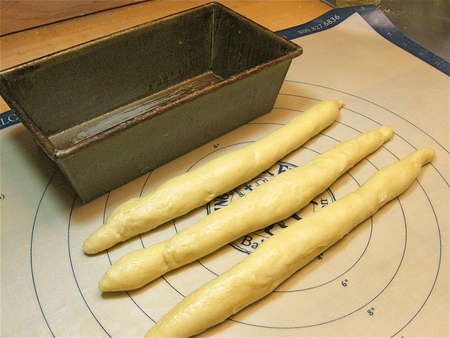
Scrape the dough out of the bucket, and divide it in half. You’ll be making two loaves. Divide each half into three pieces, and roll them into ropes about 11” to 12” long. Ready two 8 ½” x 4 ½” loaf pans by spraying with non-stick vegetable oil spray.
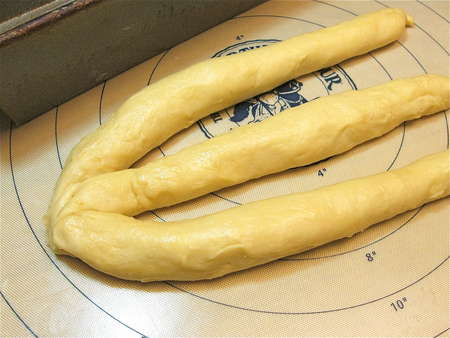
You’re going to braid the ropes. First, squeeze the ends of the ropes together. (If you already know how to make a simple three-strand braid, skip these next few pictures.)
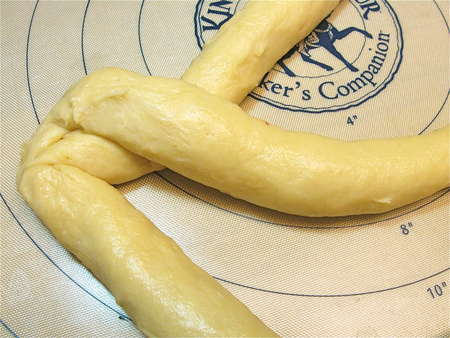
Bring one outside rope over the center rope. That outside rope now becomes the center.
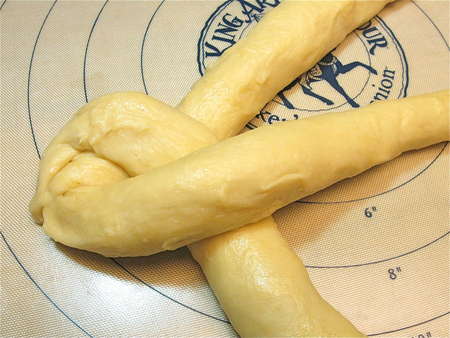
Bring the outside rope from the other end over the center…
…and repeat.
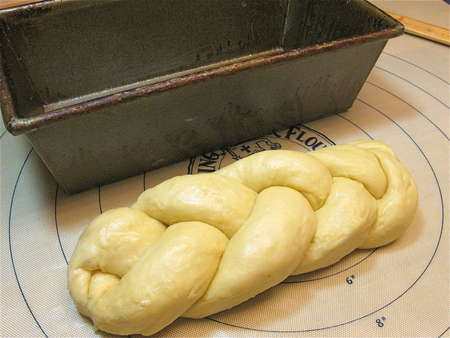
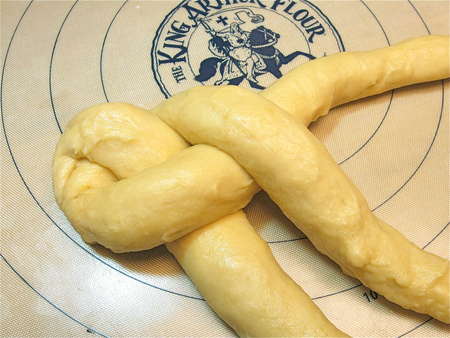
Continue until you’ve made a braid. Tuck the ends underneath. Repeat with the other half of the dough.
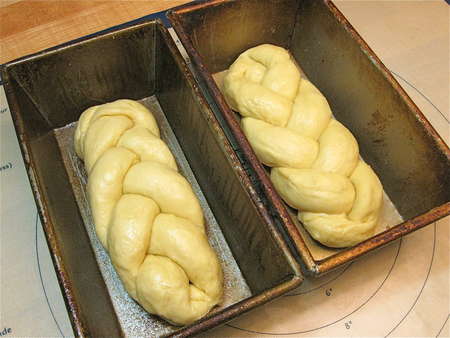
Nestle the two loaves in the pans. They’ll seem pretty skimpy; that’s OK. Warning: If you use a 9” x 5” pan, they’ll seem REALLY skimpy, and won’t fill the pan when they rise and bake. Please try to use 8 ½” x 4 ½” pans.
But, can you put the entire batch of dough into one 9” x 5” pan? I think so (she said hesitantly, not having tried it).
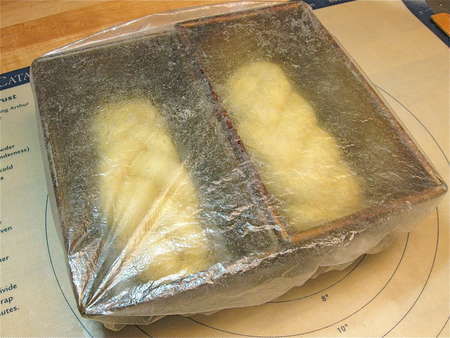
Cover the pans. Never, and I mean never, fail to grab the throwaway shower caps they sometimes leave for you when you stay at a hotel. These elasticized caps are perfect dough-rising covers.
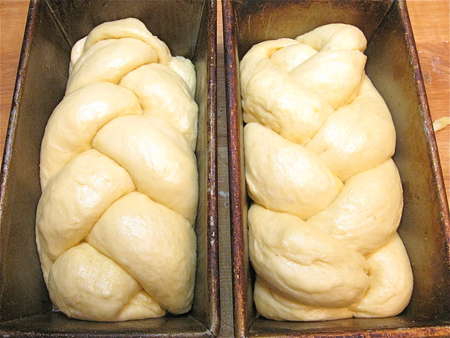
Since the dough has been in the fridge overnight, it takes awhile to warm up and get going. Give it a good 2 ½ to 3 hours to rise, till it’s noticeably puffy.

Brush the dough with an egg white mixed with 1 tablespoon of milk. A silicone pastry brush does a nice, gentle job.
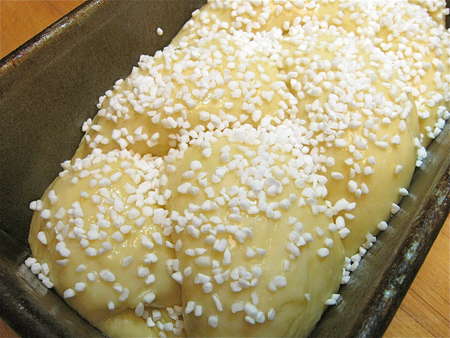
Sprinkle with sugar, if you like. I’m using Swedish pearl sugar here; I find it very pretty against the deep mahogany brown color of the baked brioche.
Bake till light gold…
…then tent with foil, and continue to bake till the center feels set when you insert a cake tester or toothpick. It won’t feel sticky inside, and the tester will side out easily.
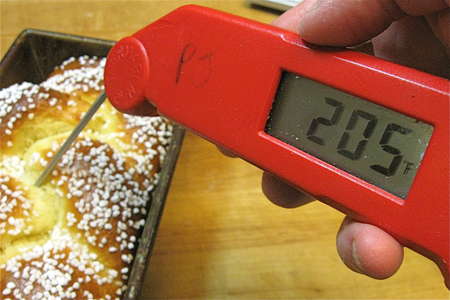
An instant-read thermometer probe, inserted into the center, will read at least 205°F.

Remove from the oven, and after about 5 minutes, turn out of the pan onto a rack to cool.
Now that wasn’t hard, was it? One foot in front of the other…
Read, rate, and review (please!) our recipe for Brioche.
