Listen, I get this time of year is all about cookies. We even took a whole week to celebrate them! They’re great for gifting and shipping and infusing with seasonal flavors.
But you know what else is great for all of those things? Marshmallows.
So this season, I humbly beseech you to try making a batch of homemade marshmallows. They’re one of those recipes that seem harder to make than they actually are, but once you give them a whirl, you’ll discover that not only are they fun to whip up, but they're also so worth it — a million times better than anything you can buy from the store.
Even if you think you don’t like marshmallows, give the homemade version a try and you just might change your mind.
I’ll admit I’m a little biased, as marshmallows are one of my favorite foods. I can’t get enough of their creamy, pillowy texture, like eating candy-flavored clouds. But that’s why I’m so determined to get you to try them! It’s an enjoyable process with a delightful end product that you can’t simply buy. Isn’t that the whole point of baking?
Here’s what you’ll need:
*If you prefer not to use corn syrup, you can substitute with another inverted sugar, such as honey or golden syrup. Just note these will add some flavor.
Start by greasing a 9” x 13” pan. This step is key — if the pan isn’t well greased, your marshmallows will stick horribly and be a pain to remove from the pan. So spray thoroughly! You can also line your pan with a parchment paper sling, but even if you use parchment paper, you'll still need to grease it.
Next, prepare your gelatin. Add 1/2 cup (113g) cool water to the bowl of a stand mixer fitted with a whisk attachment, then mix in the gelatin. Let it sit while you prepare the simple syrup. You can also make these with a mixing bowl and handheld mixer — they’ll just take longer to whip up.
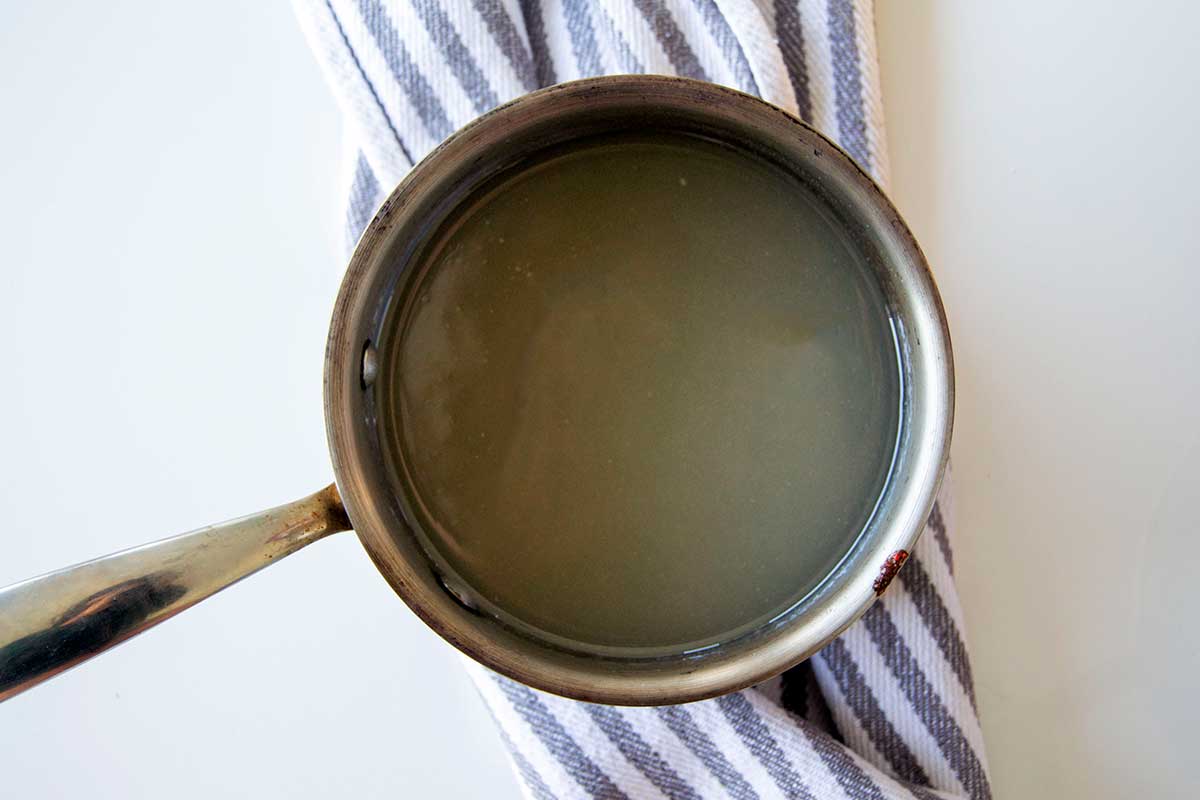
In a medium saucepan, combine the remaining 1/2 cup (113g) water, sugar, corn syrup, and salt. Cook over medium heat, stirring, until the sugar dissolves. This should take a minute or two; the mixture will turn slightly translucent without any grittiness from the sugar crystals.
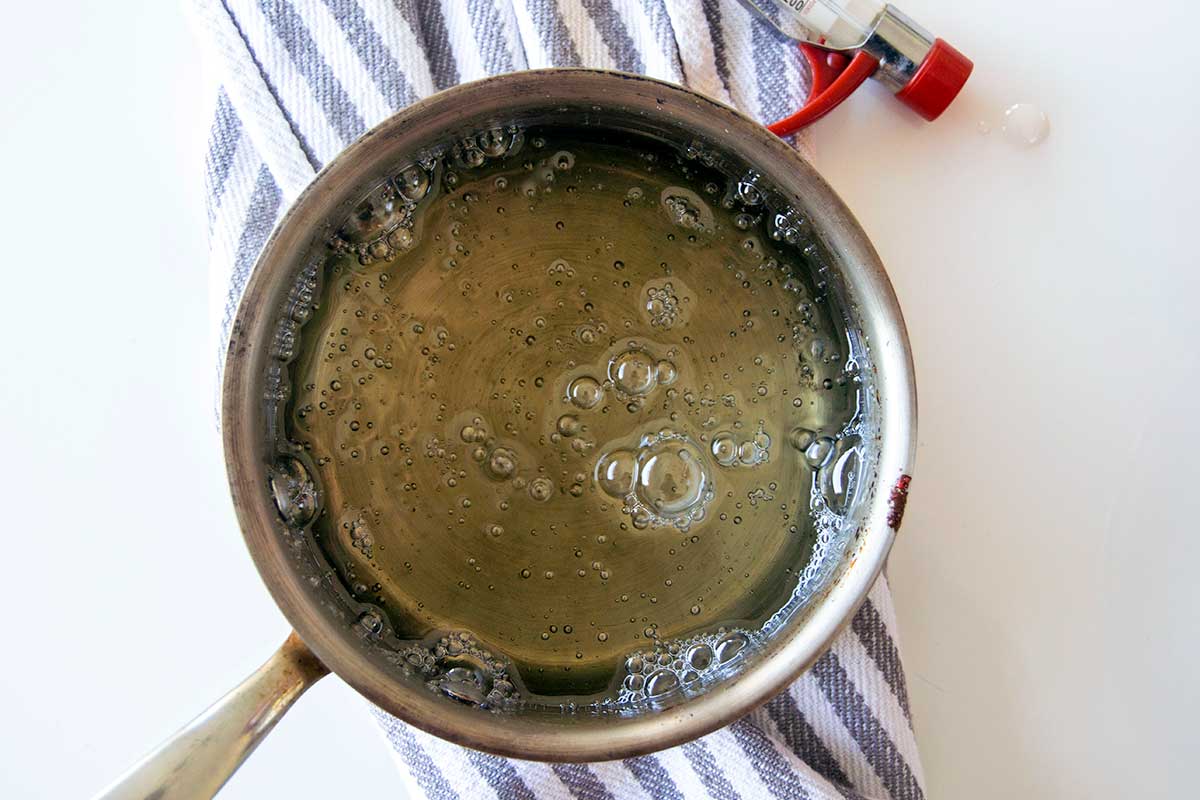
Once the sugar has dissolved, increase the heat to high and let cook, untouched, until the mixture reaches 240°F on a candy thermometer. (Make sure your thermometer just touches the sugar mixture, and not the bottom of the pot, for an accurate temperature reading.)
The syrup will start bubbling vigorously as it heats, and it should take about 5 to 10 minutes to reach 240°F. Keep a close eye on it — you want to remove it from the heat as soon as it reaches the desired temperature. And don’t stir! Agitating the mixture can cause sugar crystals to form, preventing a smooth syrup.
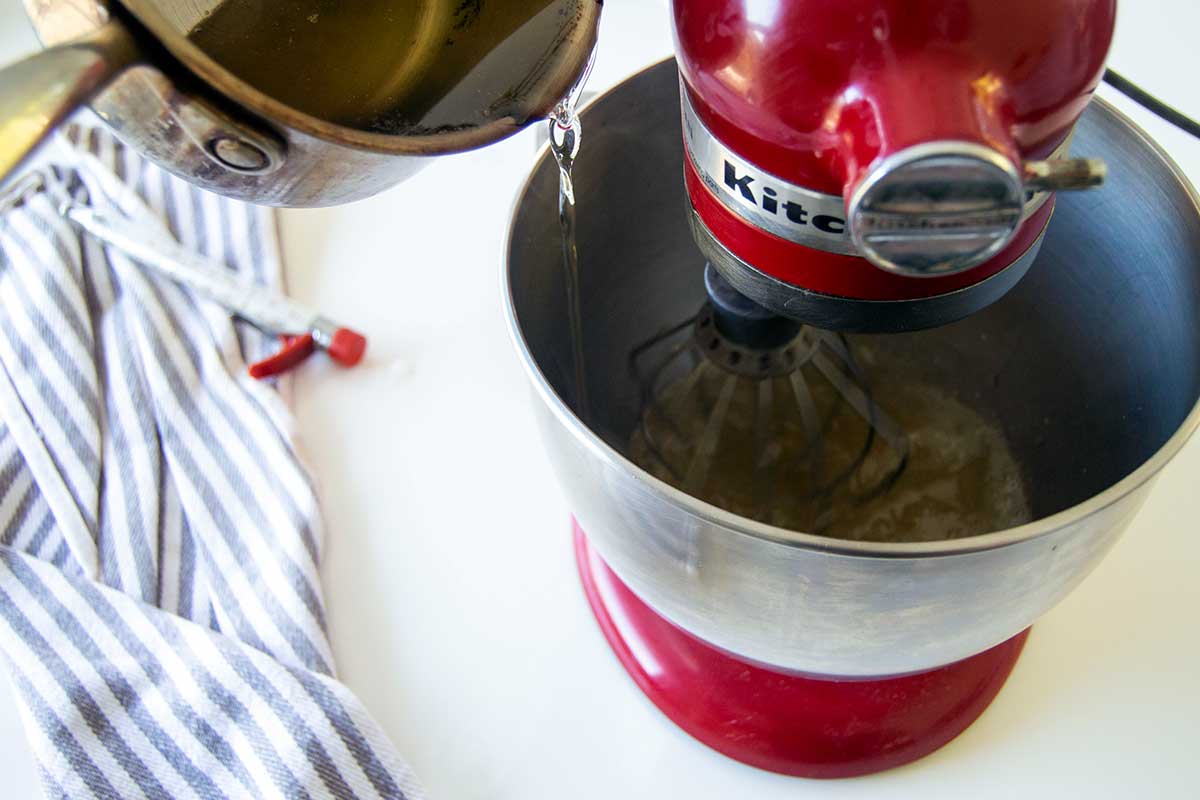
Taking care not to spill or splash the very hot syrup, remove from the heat. Set your mixer to low speed, then slowly pour the syrup into the gelatin as it whisks. Try to aim for where the gelatin meets the side of the bowl, as this will help prevent splatters.
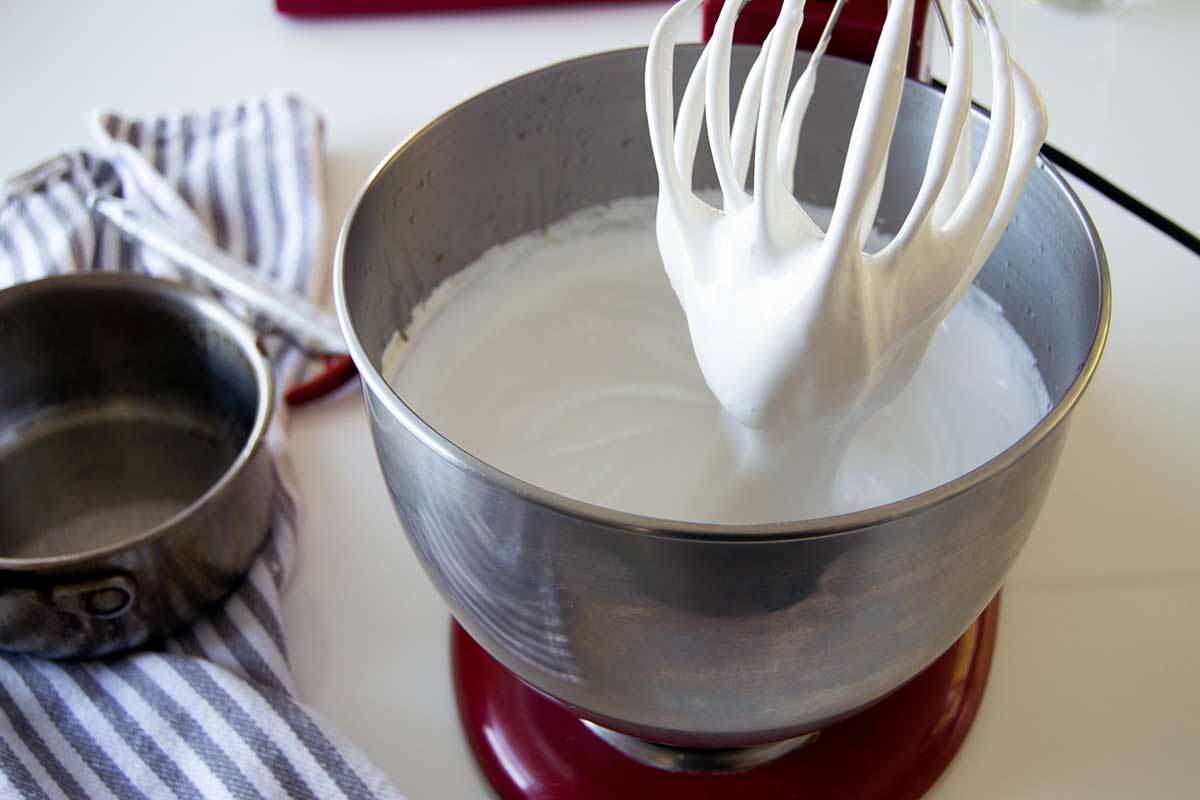
Once the mixture has fully combined, increase the speed to high and watch the magic happen.
As the mixture whips, it'll become white and billowy, expanding in the bowl like meringue. Continue to beat until the mixture is very stiff and has cooled to lukewarm — if you place your hand on the mixer bowl, it shouldn’t be hot to the touch. This should take anywhere from 3 to 10 minutes.
At the end of mixing, beat in the vanilla extract (if you’re making vanilla-flavored marshmallows).
You’ll want to get the marshmallow mixture from the bowl and into the prepared pan without too much delay — the longer you wait the more the gelatin starts to set up, making the mixture stiffer and more difficult to work with.
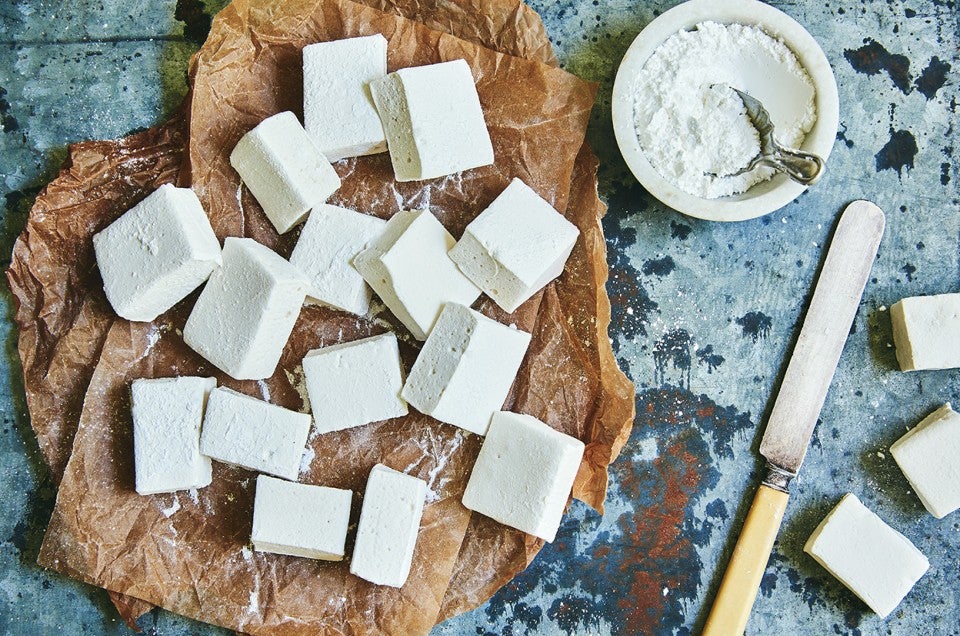
Scrape the marshmallow mixture into the prepared pan, then use your hands to gently flatten. Be warned! It will be incredibly sticky. I find it’s easier to work with wet hands here. Use an offset spatula to smooth the top.
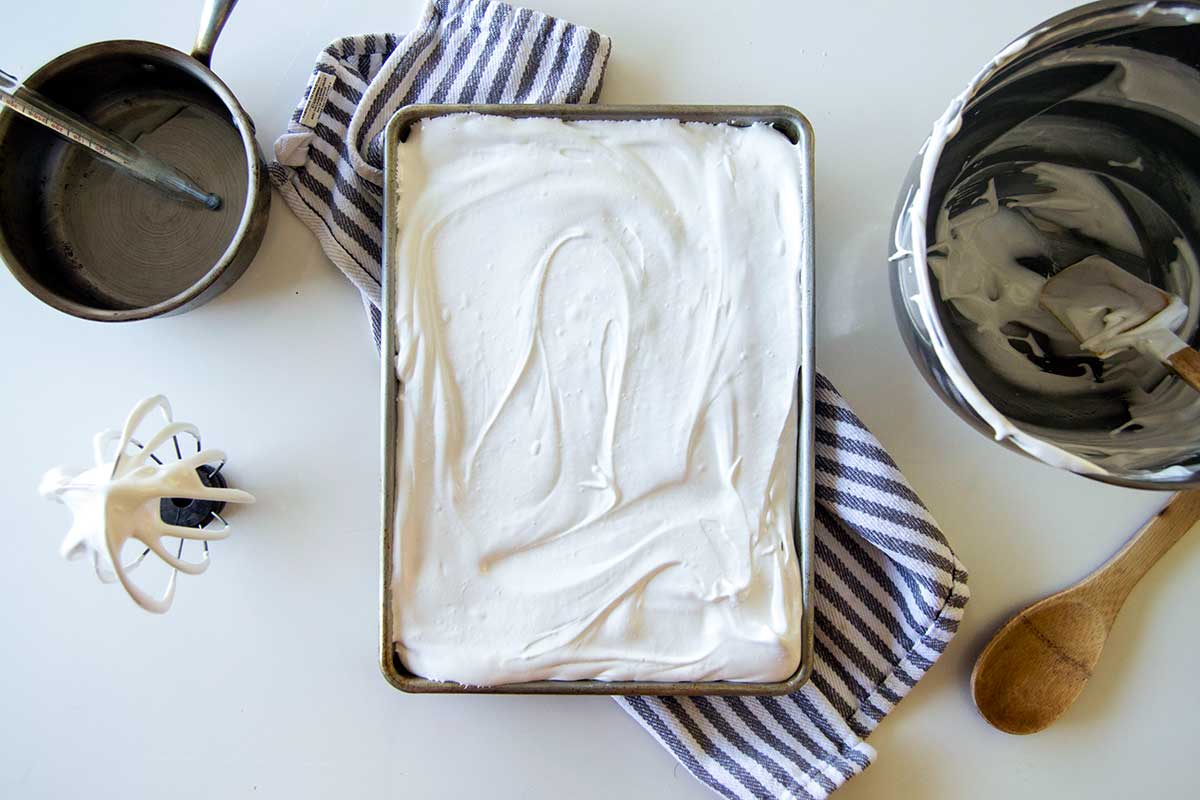
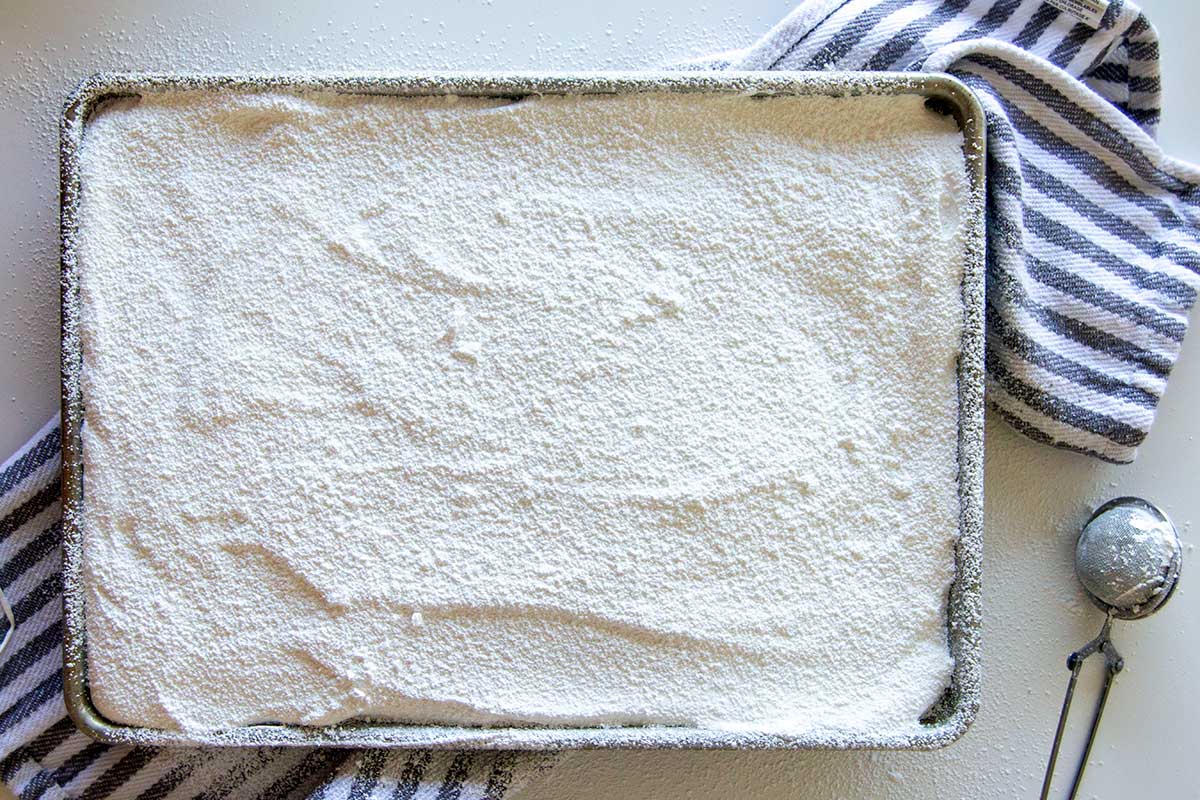
Sprinkle confectioners’ sugar over the top of the marshmallows so the entire surface is covered. Then let the pan sit, uncovered, for several hours or even overnight to set.
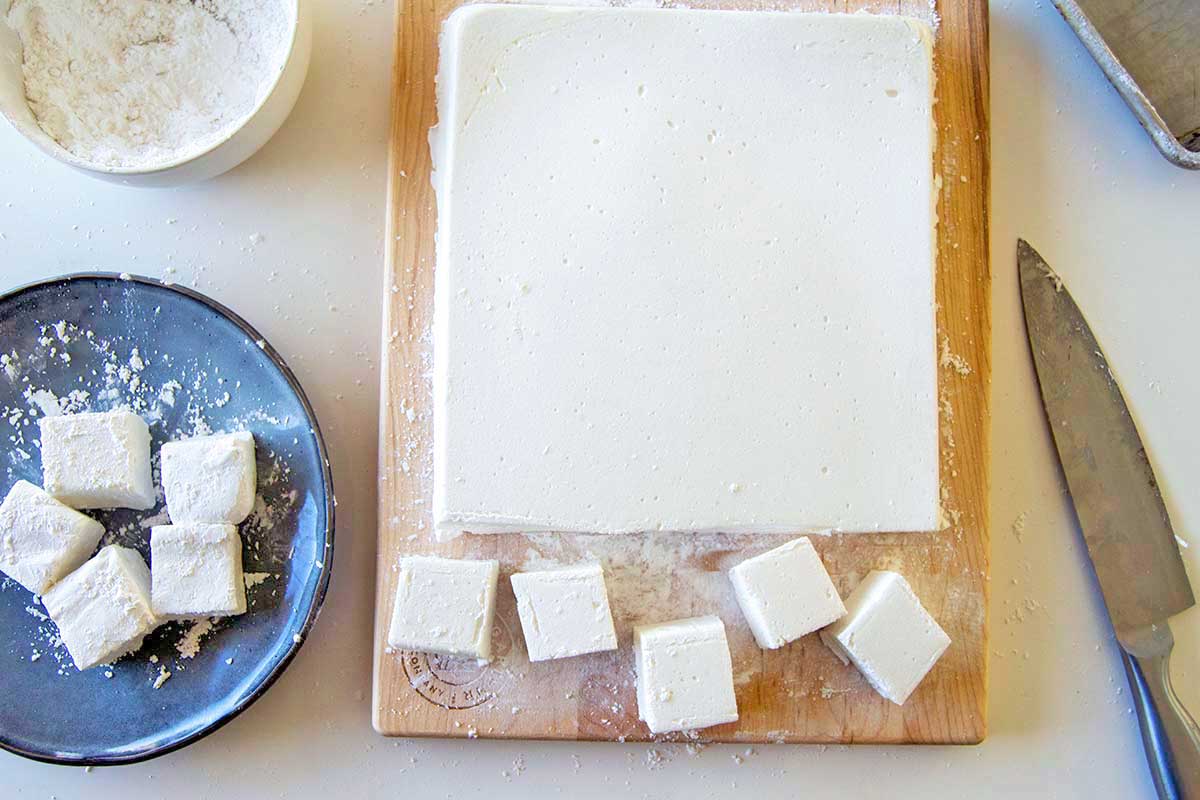
Once firm, it’s time to cut into squares! It’s best to use a very sharp, lightly greased knife (or even kitchen scissors) to cut, in order to prevent the marshmallows from sticking too much. If you’d like to make fun shapes, use greased cookie cutters to stamp out marshmallows. To help prevent sticking even more, dip your utensils in cold water in between cuts.
I like to toss my cut marshmallows in a mixture of equal parts confectioners’ sugar and cornstarch before storing them, as it helps prevent them from sticking together.
One of the best parts about marshmallows — besides their pure, sweet taste and fluffy texture — is how long they last. Kept in an airtight container, they can be stored for up to a month. (Between you and me, I’ve had success storing them even longer — I once had a batch of marshmallows I forgot about in the pantry that was still good after several months.)
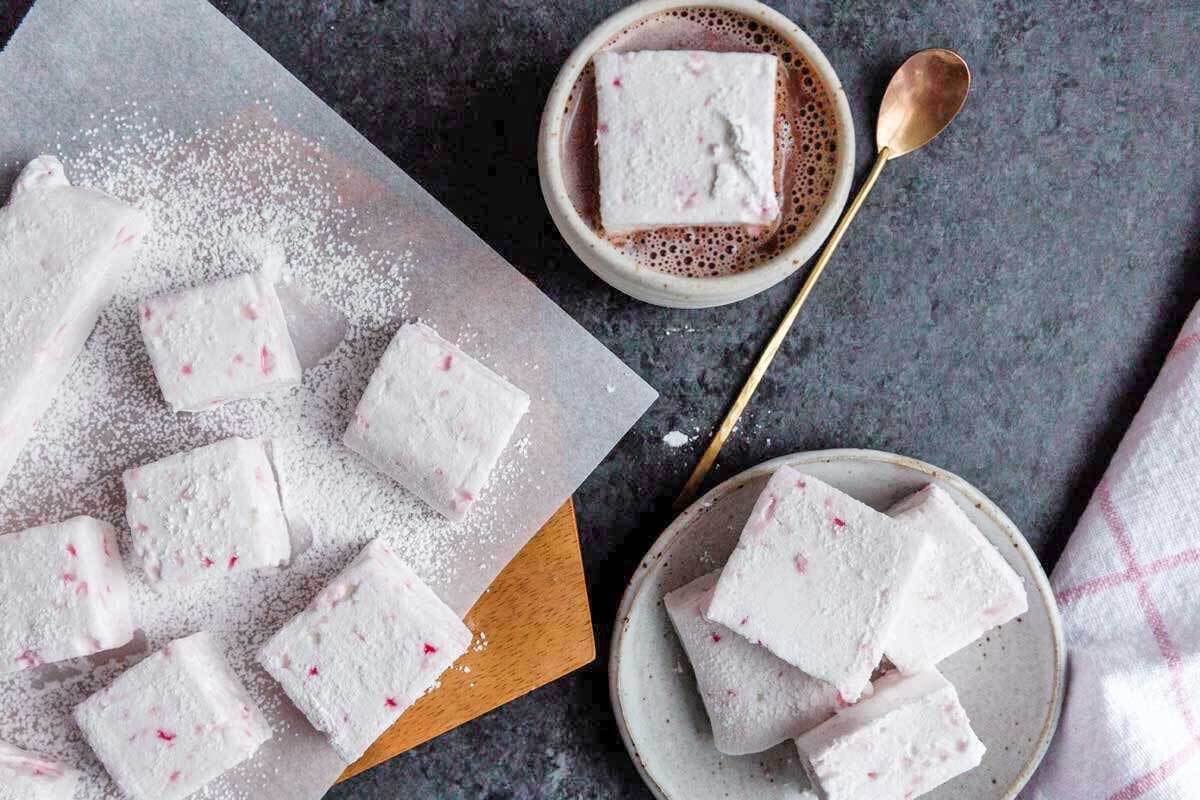
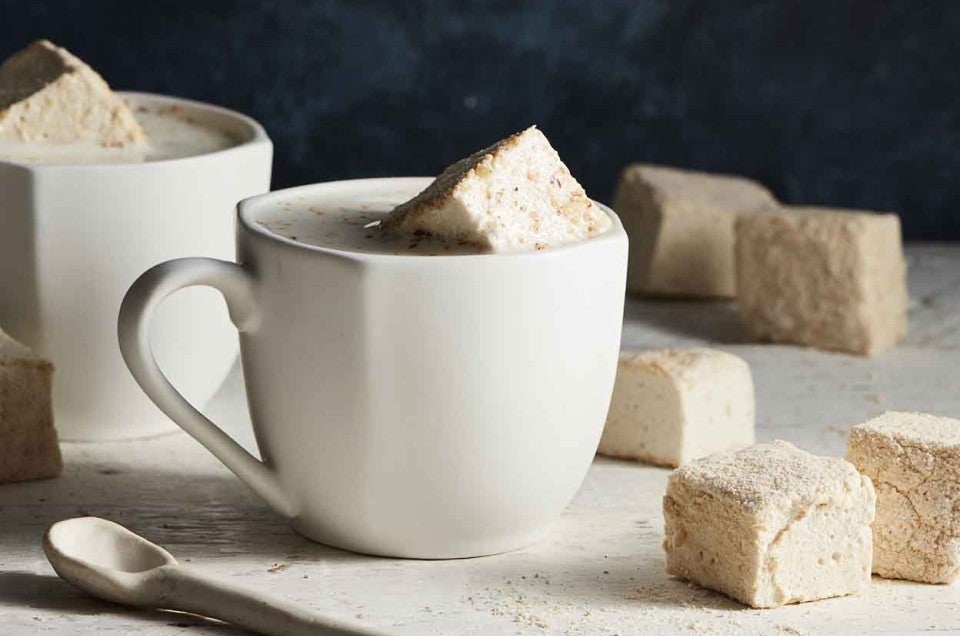
Use homemade marshmallows the same way you would their store-bought counterparts: melted into hot chocolate, toasted over a fire, or eaten straight. Of course, you don’t have to stick with plain vanilla, either. Experiment with different flavorings, like rose water or Fiori di Sicilia.
I love to make holiday versions every winter as a special treat for friends and family. Here are some of my favorite marshmallow variations.
For a minty, pink-hued treat, follow our recipe for Peppermint Crunch Marshmallows, which calls for the addition of both peppermint oil and peppermint crunch (or crushed peppermint candies). They’re equal parts stunning and delicious!
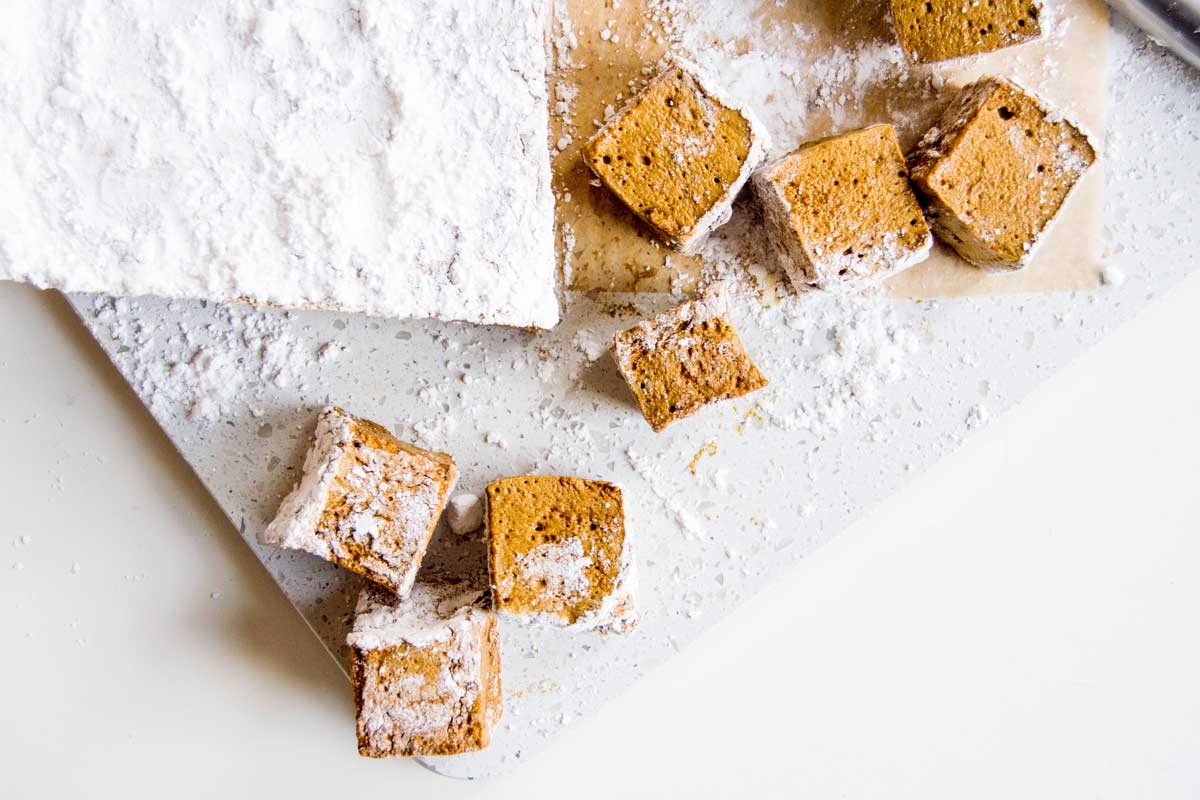
Turn your favorite holiday cookie into marshmallows with just a few simple tweaks to this basic recipe. Instead of light corn syrup use dark corn syrup, which provides a more nuanced, caramel flavor closer to molasses. If you really love the rich, dark taste of molasses, you can replace half or even all of the corn syrup with molasses by volume.
In addition, omit the vanilla and add 2 teaspoons ginger, 1 1/2 teaspoons cinnamon, and 1/2 teaspoon cloves (or 1 to 2 tablespoons Gingerbread Spice) to the stovetop syrup before cooking for a dose of wintry spice.
Spiked with nutmeg and vanilla, these marshmallows evoke the creamy, dreamy drink of the season. Follow the recipe as written, adding 1 teaspoon nutmeg to the syrup mixture before cooking. If you can use freshly grated nutmeg instead of ground, I highly recommend it. The flavor is much brighter, fresher, and more vibrant. You can also add 1/2 teaspoon rum extract in addition to the vanilla.
Ditch the corn syrup for maple syrup, and your marshmallows will take on a whole new flavor profile. To make, follow our recipe for Maple Marshmallows, which amps up the taste with the addition of maple flavor and a dusting of maple sugar and confectioners' sugar.
If you’re gifting your homemade marshmallows, an extra dip in chocolate makes for an even more impressive treat. Once your marshmallows are cooled and cut, dip them in a bowl of melted chocolate and let dry for a few minutes to set. You can also sprinkle peppermint crunch, toasted nuts, or cacao nibs on the dipped chocolate section before it sets for some added flair.
See our post on dipping chocolate tips for details on how to prepare.
If you haven't ventured into candy making before, this is the perfect place to start. Marshmallows are fairly forgiving, and though you'll need to be careful with the hot syrup, they're quite simple to pull together. And I promise, if you've never experienced the joy of biting into a homemade marshmallow — no matter the flavor — you'll have your whole world changed.
Do you enjoy making marshmallows? Have any favorite flavors you want to share? Let us know in the comments below — we can all share some additional recipe inspiration!
Cover photo by Liz Neily