I’ve mentioned it before, but I’m not the world’s best baking decorator. I’m in complete awe of bakers like Brook, who can craft elaborate decorations for holiday-themed baked goods. While it’s certainly something I aspire to, for now I’ll content myself with admiring from afar while I turn to deceptively simple techniques like the one used to make this spider web cheesecake for Halloween.
All that to say, if I can pull this one off, you can too!
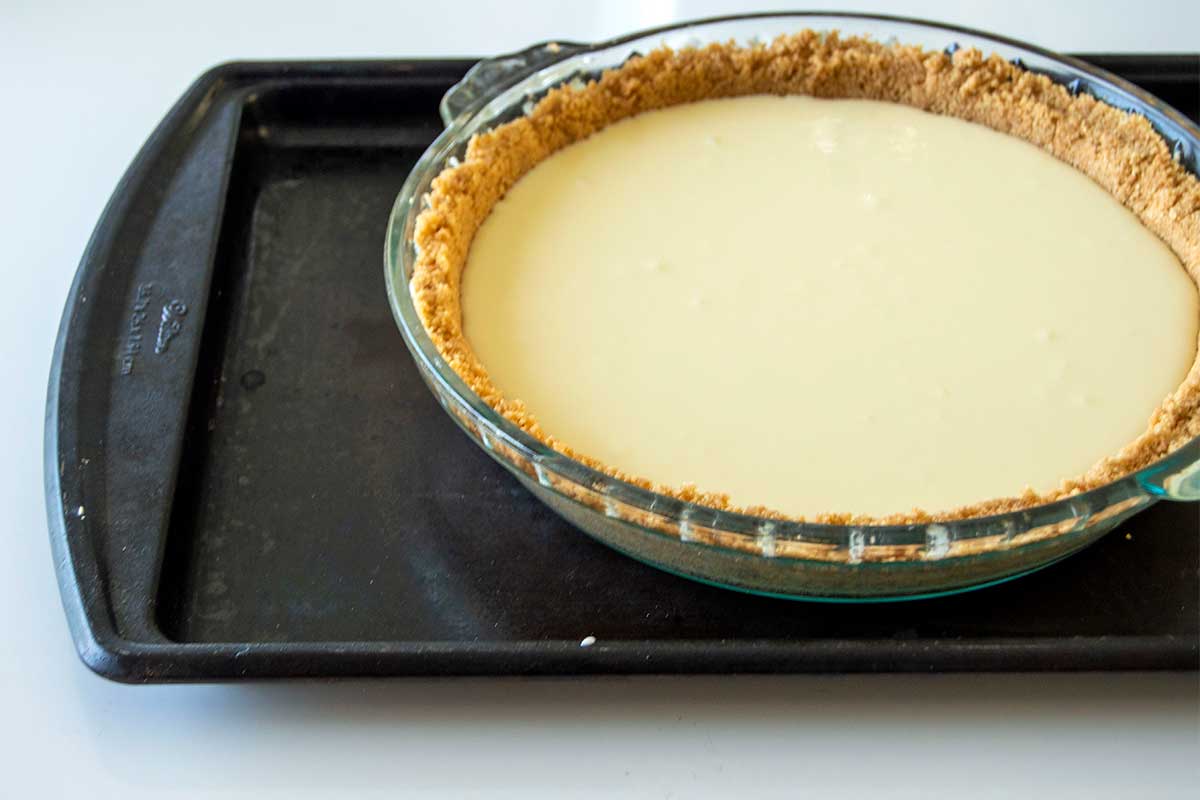
Everything starts with one of the most popular recipes on our recipe site — Easy Cheesecake. Have you made this yet? It eschews the need for any unusual ingredients or elaborate preparation methods — no water bath here! Just four simple filling ingredients — cream cheese, eggs, sugar, and vanilla extract — and a quick 30-minute bake in the oven.
I find that starting with a super-simple recipe as the base makes any dessert decorating project even more approachable.
You also can bake your favorite cheesecake recipe instead as the base for this spider web design. Maybe Pumpkin Cheesecake for an extra dose of fall flavors?
Easy Cheesecake really does live up to its name, but there are a few points you’ll want to keep in mind as you make it. Most importantly, the cream cheese should be room temperature. This helps the batter mix up smooth and creamy, without any unsightly lumps. And if you’re using an electric mixer to beat the filling, make sure to keep your mixer set to low speed so you don’t incorporate too much air.
Finally, you’ll want to add a crust shield (or a make-do one crafted from aluminum foil) to the edge of the cheesecake for the final 10 minutes of baking in order to keep the graham cracker crust from burning.
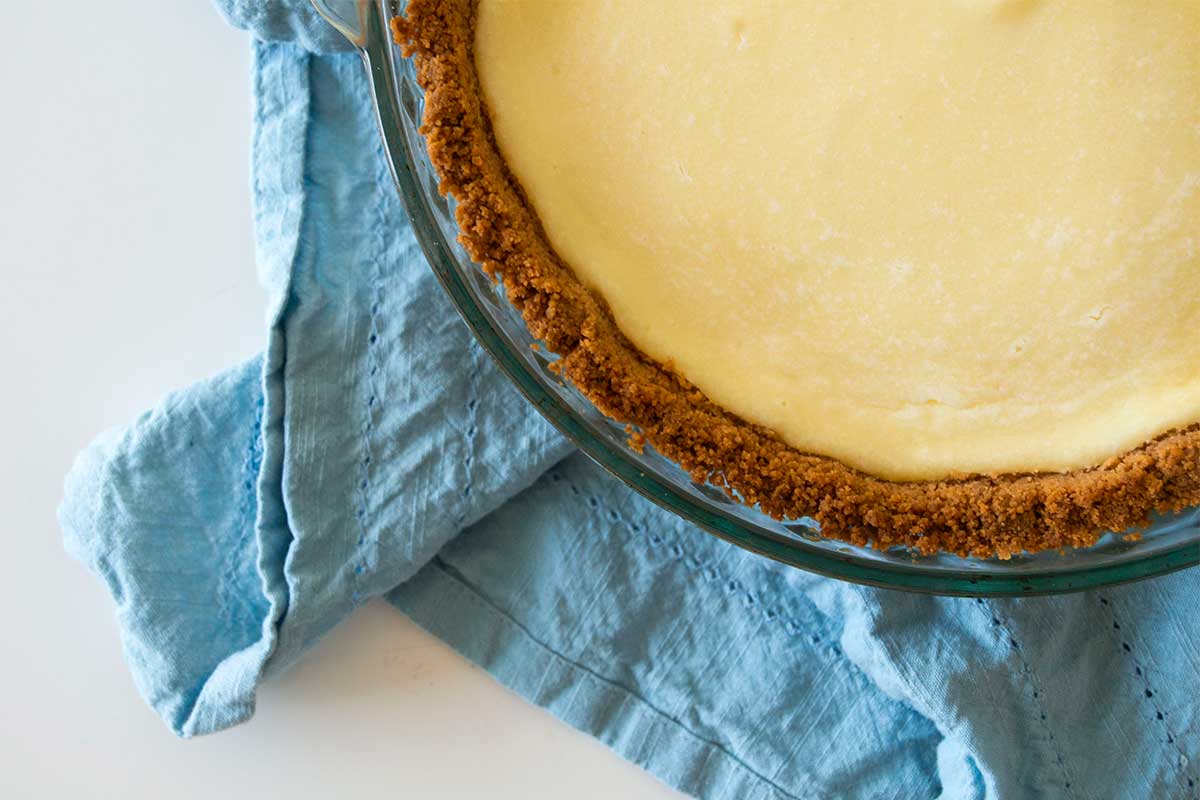
Pop the baked cheesecake in the refrigerator to chill as you ready your toppings. It doesn't have to get super cold, but it should no longer be warm to the touch.
Once the cheesecake is baked and cooling, prepare the two components that make up the decorative topping: whipped cream and chocolate ganache. Both are very straightforward — I told you this was an easy one to pull together.
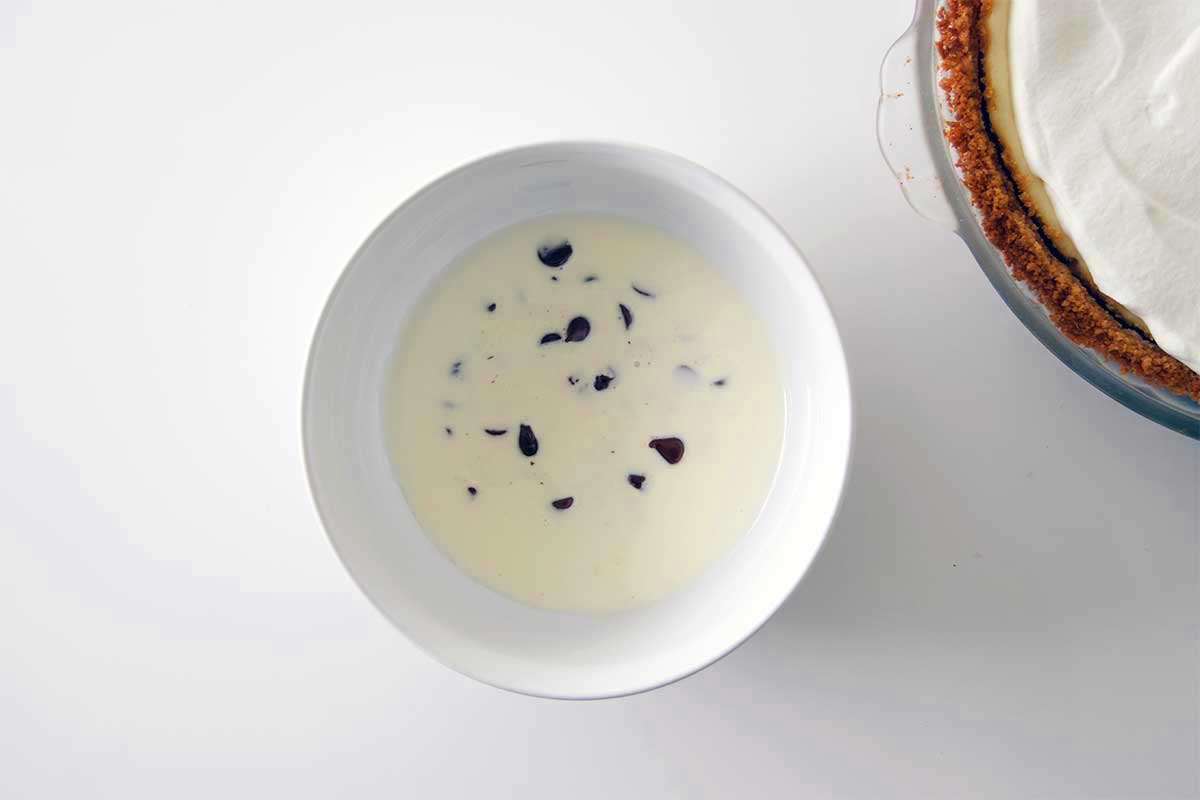
First, the whipped cream topping. Whip 2/3 cup (151g) heavy cream with 2 tablespoons confectioners' sugar just until soft peaks form. If you overbeat your cream (like I accidentally did while making this!), here’s a reminder on how to fix whipped cream.
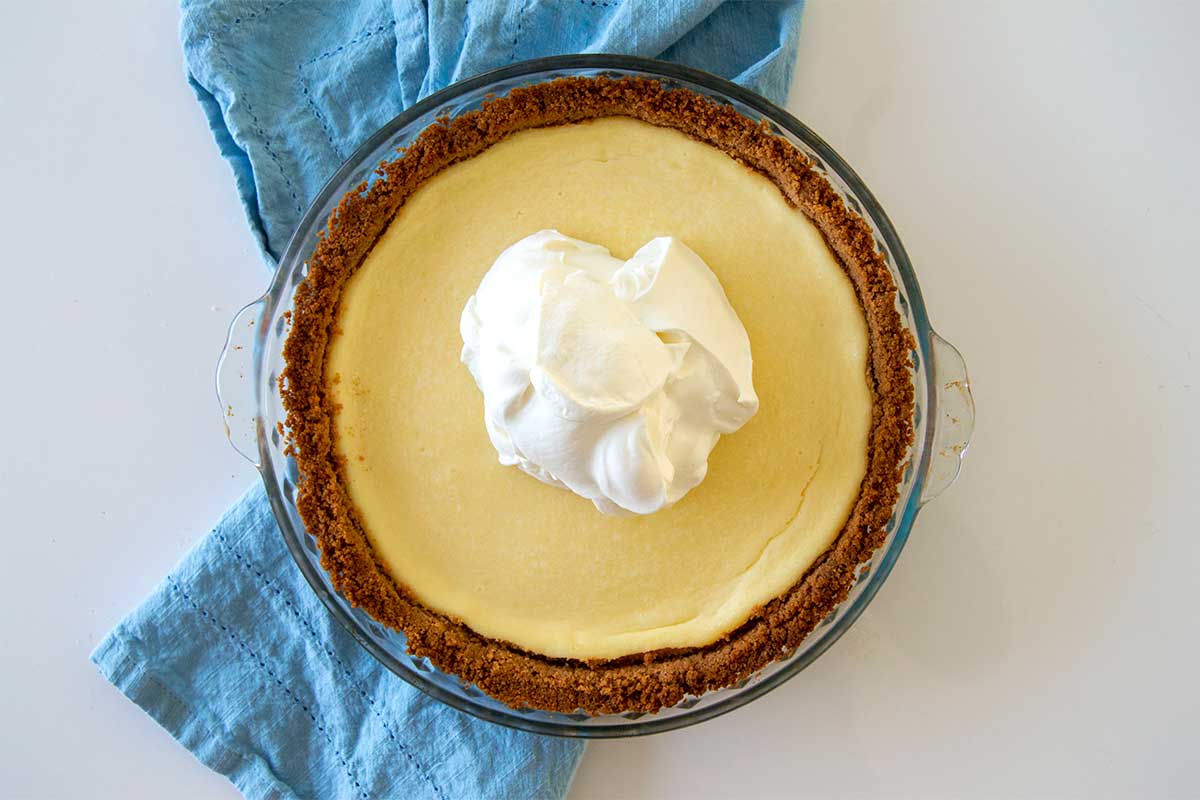
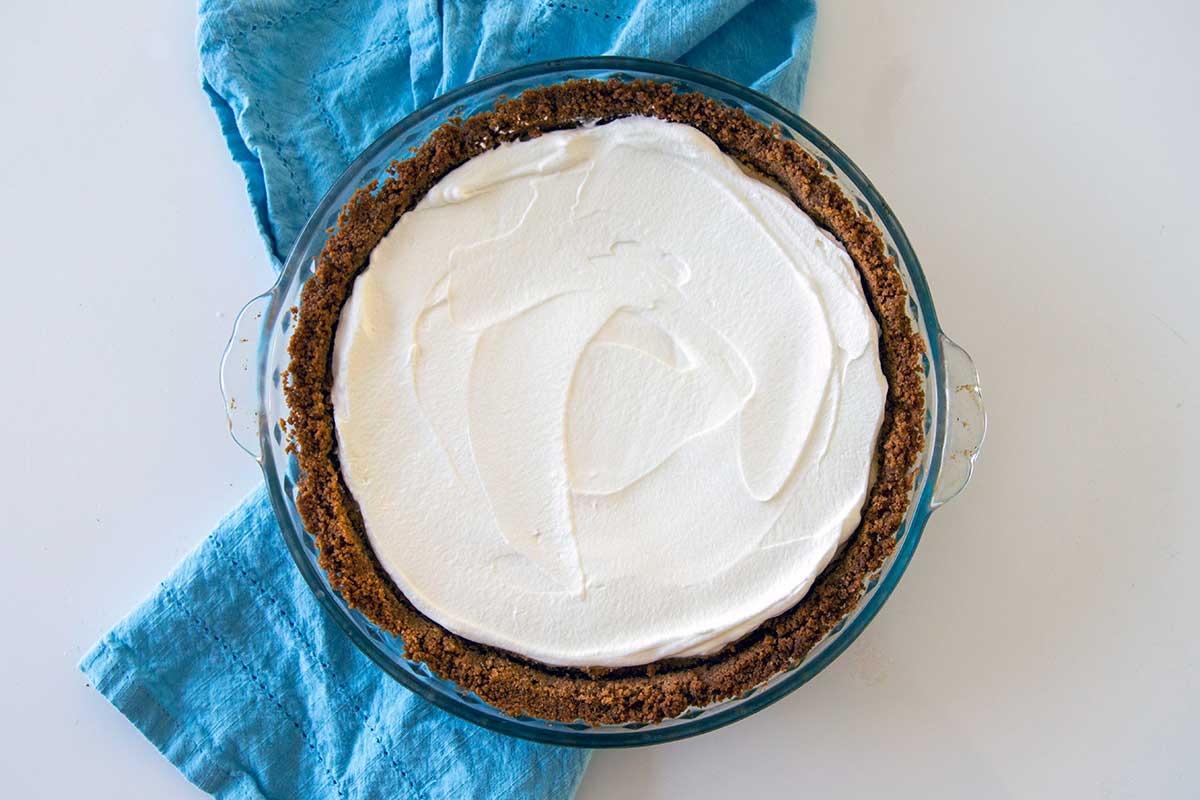
Spread this topping over the cooled cheesecake (an offset spatula works beautifully here) then set in the fridge while you make the chocolate ganache.
The final component: two-ingredient chocolate ganache. I think ganache can sometimes be intimidating because it’s easy to conflate it with tempering chocolate, which can be much trickier. But ganache is very forgiving and rather hard to mess up. If you’d like some more guidance, you can reference our previous blog post on how to make ganache.
To make chocolate ganache, place 1/3 cup (57g) semisweet chocolate chunks or chips in a heatproof bowl. Heat 1/4 cup (57g) heavy cream in a small saucepan over medium heat until it begins to simmer. Pour the hot cream over the chocolate and let it sit for a few minutes to soften the chocolate.
Then gently stir. The chocolate will begin to melt, first forming a rough mass before turning into a smooth, cohesive, silky spread. You’ll know it’s ready when you have to make a conscious effort not to dunk your entire face into the bowl.
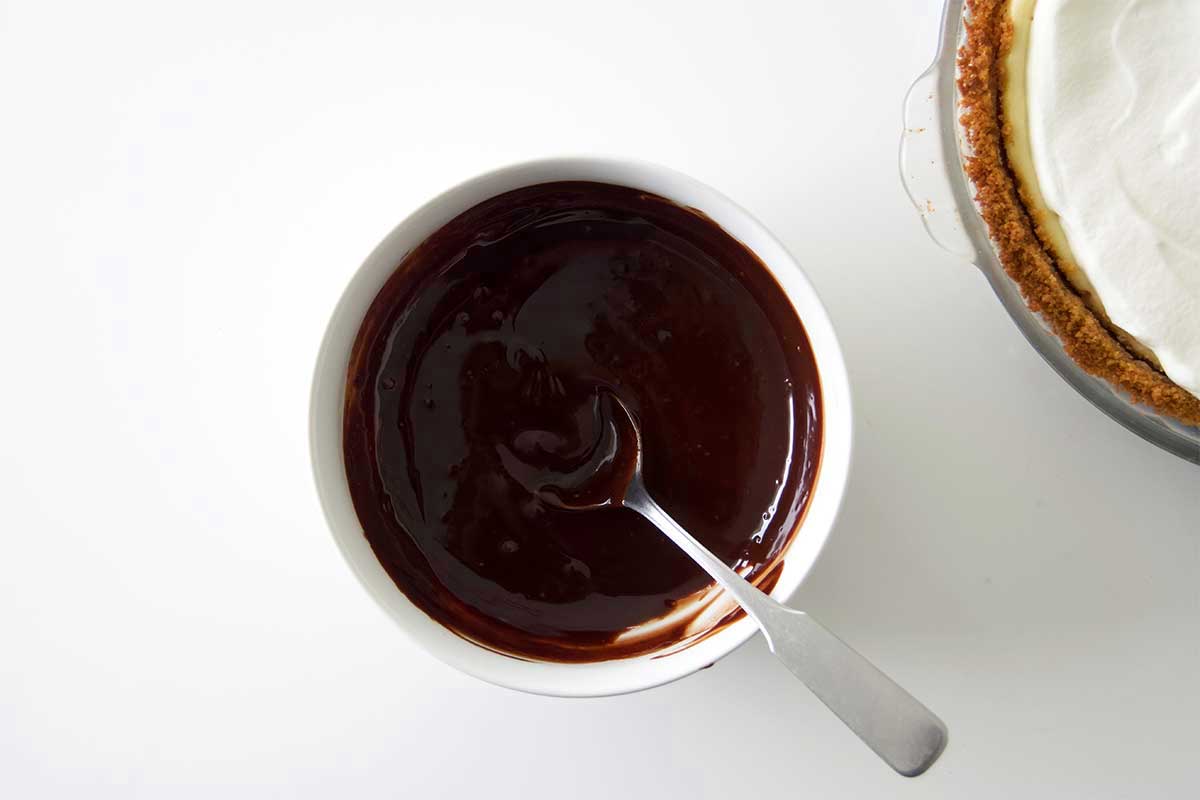
If not all the chocolate melts, you can briefly reheat the mixture in the microwave, then stir until no lumps remain and the mixture is completely smooth. It’s important there aren’t any lumps — not even tiny ones! — as this can make your piped spider web lines turn out wonky.
Time to get spooky. Transfer the melted chocolate to a piping bag fitted with a small tip. If you don’t have a piping bag, you can use a zip-top bag with one corner cut to form a 1/8" opening. A squeeze top bottle, like what you’d use to squirt ketchup, also works well.
I’m not great at piping, but thankfully that’s OK here — all we’re doing is making circles.
Remove the cheesecake from the fridge, then begin by piping one dot in the middle of the cream topping.
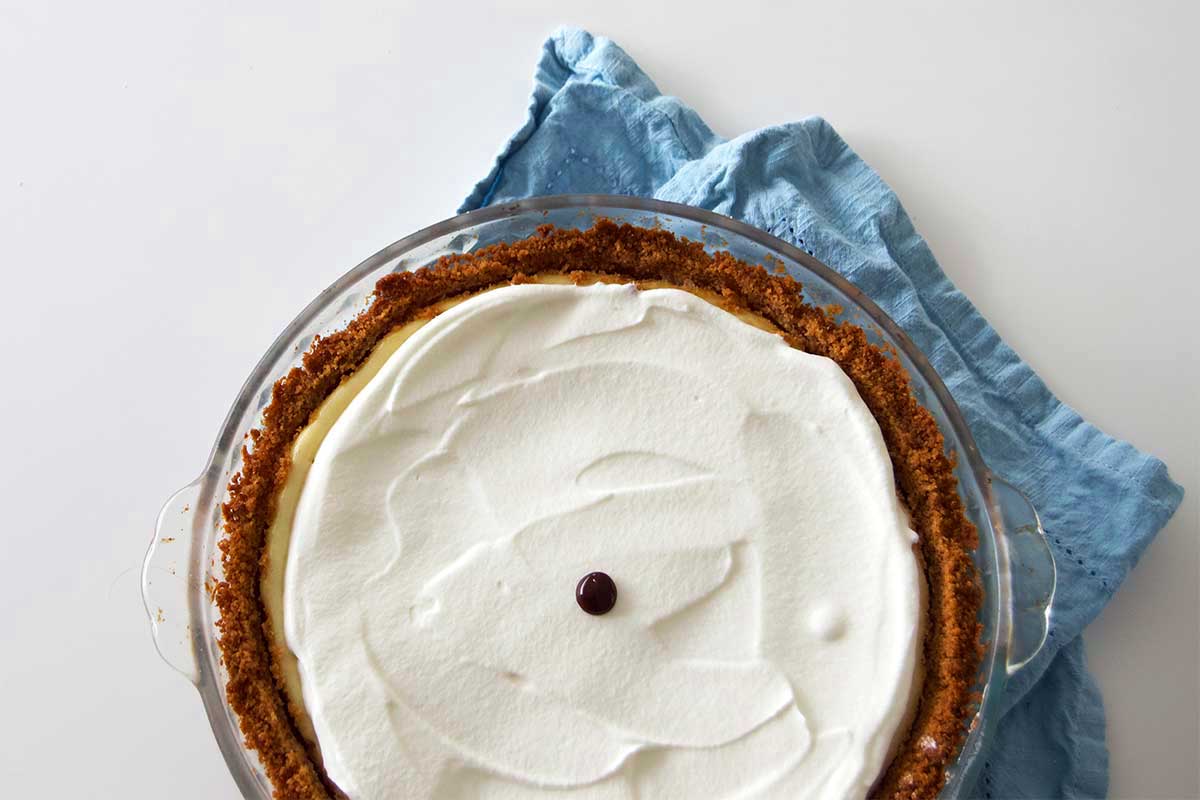
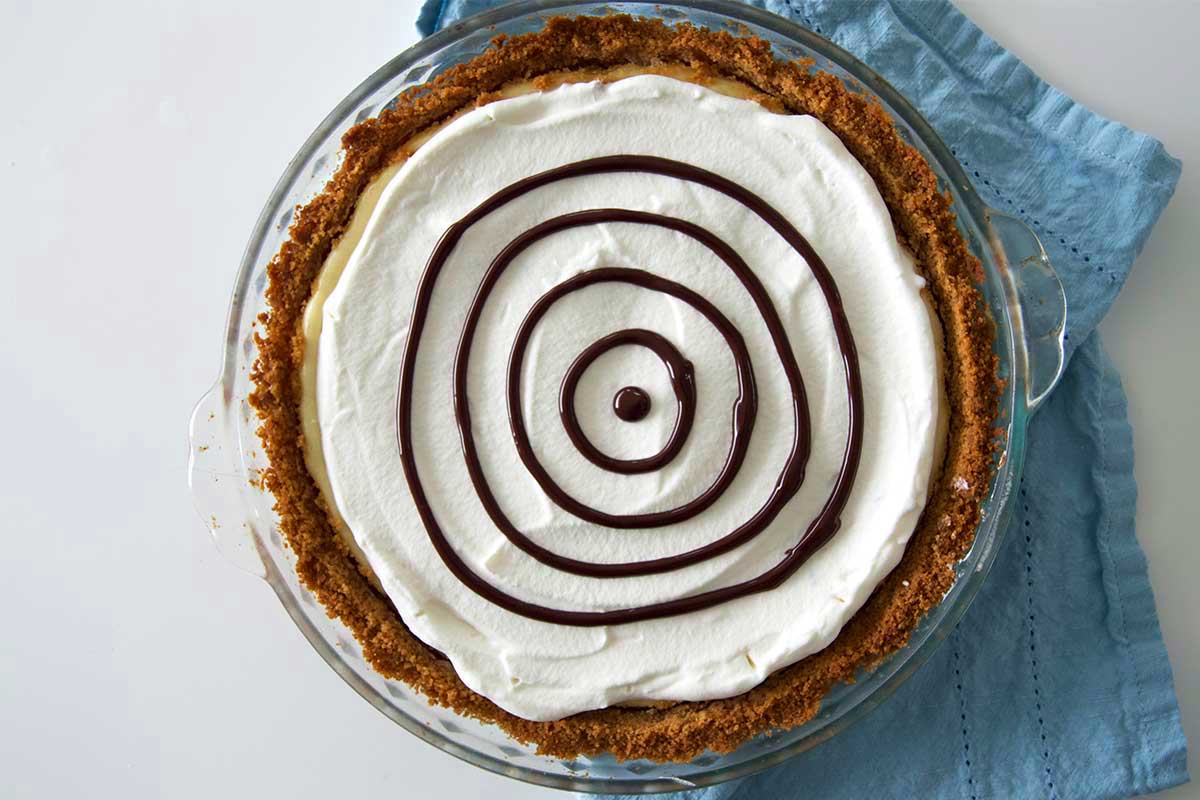
Continue by piping circles around the center dot, spaced about 1/2" apart. Move carefully but steadily — keeping an even pace as you pipe the chocolate circles helps the lines come out smoother and more uniform.
And that’s it for the piping — the hardest part is officially over.
If your circles are a little crooked, don't worry; creating the spider web pattern will make any unevenness much less noticeable.
Next, pull out the super fancy tool that will (quite literally) pull it all together: a toothpick.
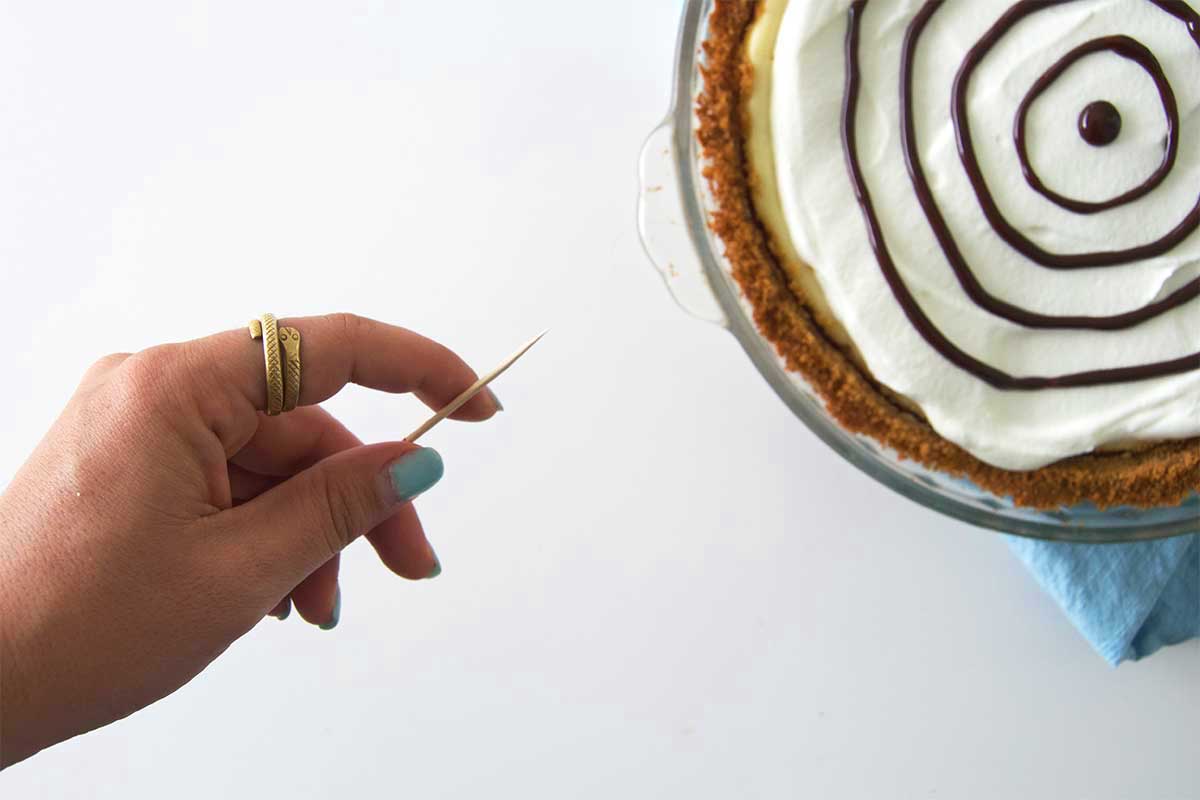
You'll want to work quickly here so that you can make the design before the ganache has hardened and set.
Beginning with the center circle, gently pull the toothpick through all the circles in a straight line toward the outer edge. You’ll do this seven more times for a total of eight lines to complete the spider web pattern. If you want to get super intricate, you can also add extra lines for a total of sixteen.
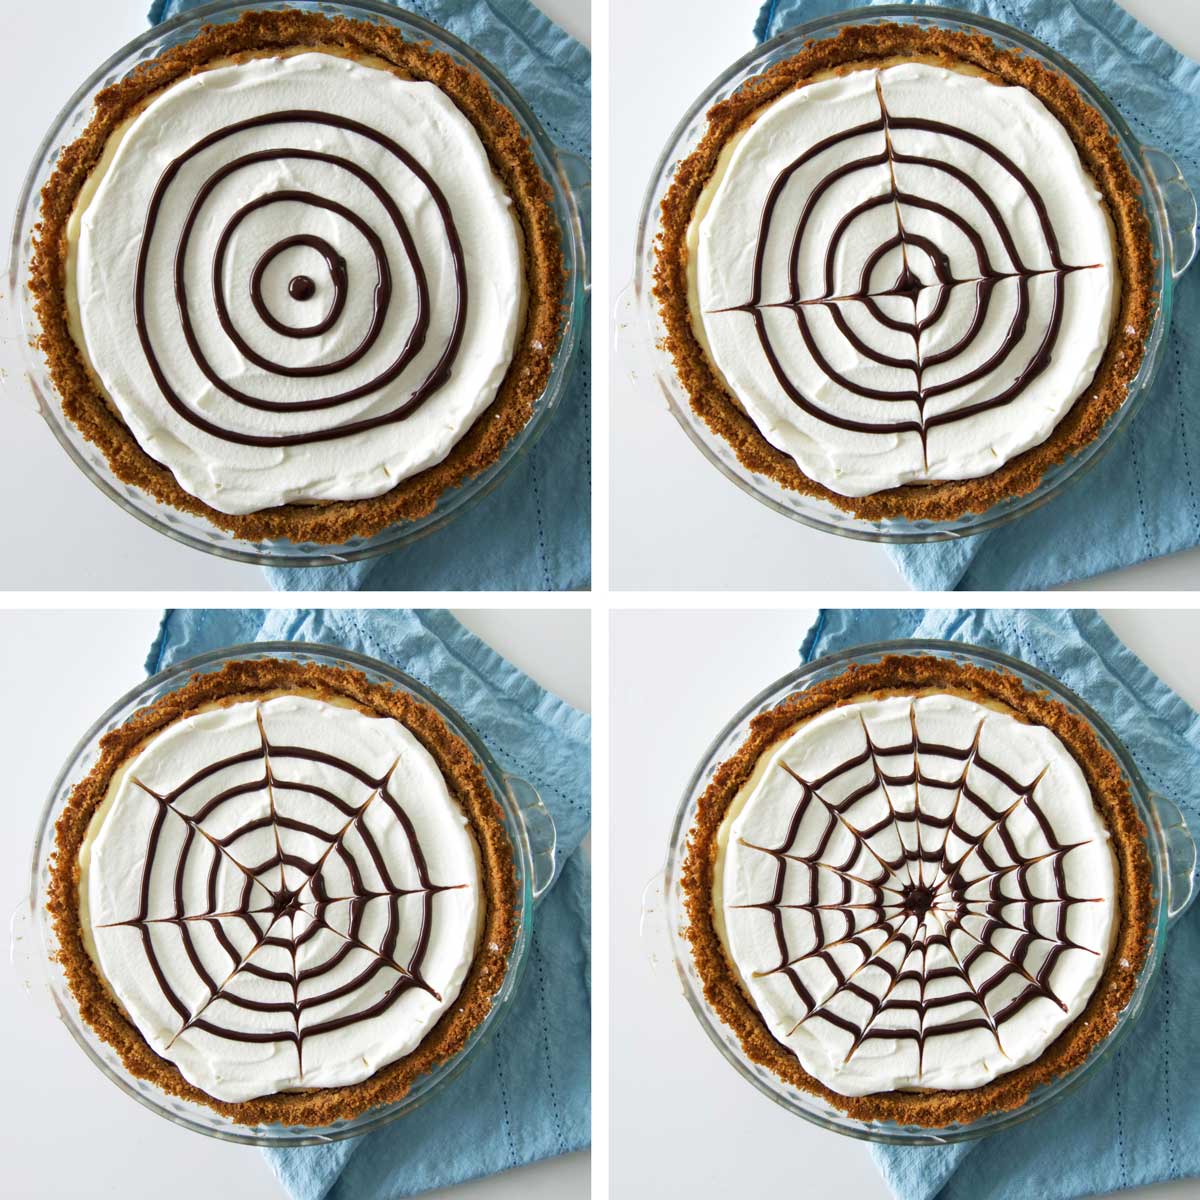
One last thing: Make sure to wipe the toothpick clean in between drawing each line so it can pull neatly through the topping.
And there you have it: a deceptively simple dessert with festive decoration. After all, who needs candy when you can have cheesecake?
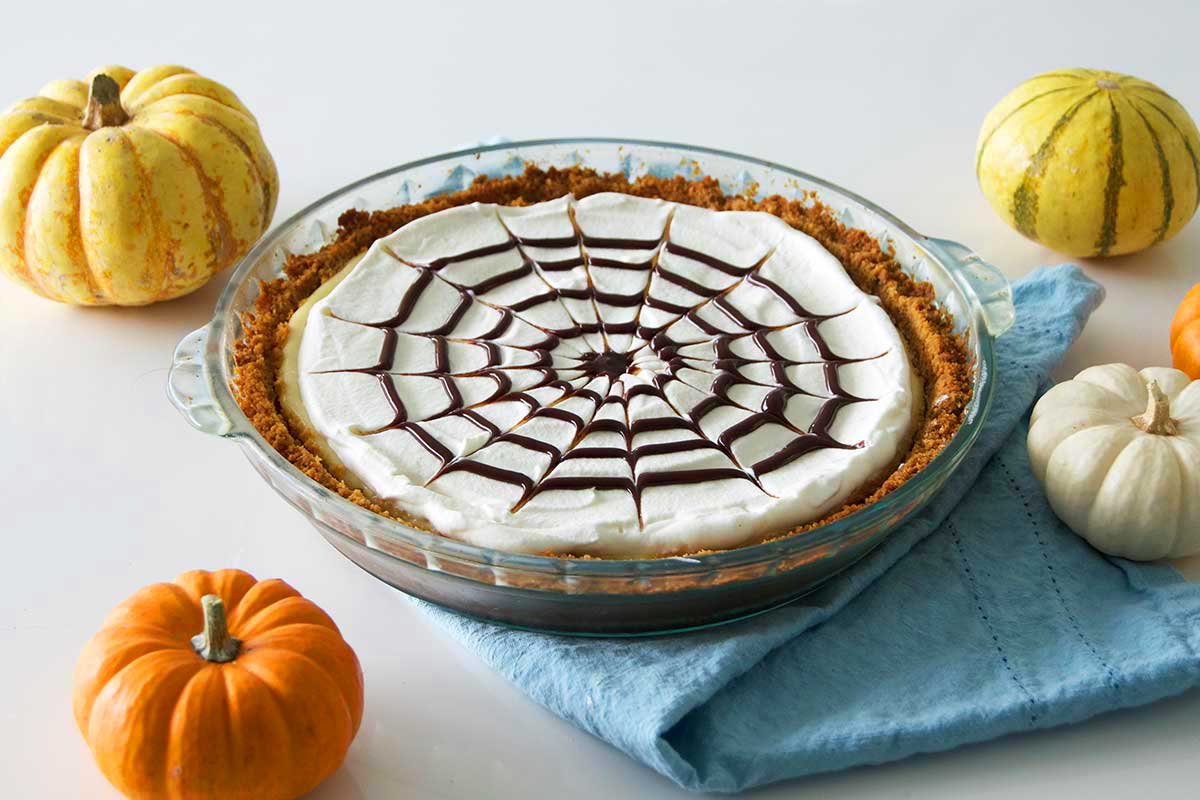
This best thing about this spider web cheesecake? It tastes just as good, if not better, than it looks. Because pretty things are great, but eating them is the really fun part. And this decadent cheesecake, airy topping, and rich ganache all meld beautifully for a treat so good, it just might scare you.
In the mood for some more Halloween-themed baking projects? We’ve got you covered. Try Halloween Mummy Hand Pies, Halloween Spider Bundt Cake, and extra-creepy Halloween Skull Cakes.