


Salted caramel.
It's all the rage, isn't it? Salted caramel sauce. Salted caramel whoopie pies. Salted caramel éclairs.
Sweet Corn Ice Cream with Salted Caramel Swirl and Chocolate Covered Potato Chips (I kid you not – go ahead, Google it.)
And then there's "plain old" salted caramels. Which are neither plain (they're devastatingly good), nor old (as far as caramel candies go, the salted version is a babe in the woods. Just ask Kraft).
Our Baker's Store in Norwich, VT sells Red Kite Sea Salt Caramels which are (and I reserve this approbation for very few foods), TO DIE FOR.
Salted caramel, where have you been all my life?
Until now, I'd never considered making caramels at home. Why? No good reason. I thought they were fussy. I thought I'd mess them up. I thought only seasoned candy-makers would tackle something as "simple" as caramels – since, as those of us who've made baguettes know, "simple" doesn't necessarily translate to "easy."

But there's this Apple Cider Caramels recipe on our site, and the photo is gorgeous, and the caramels sound awesome, and readers who've made and commented on them are enthusiastic – so I thought, "What could go wrong?"
As it turned out – not much. (You thought this was going to be a disaster confession, right? Fooled you!)
Simmer ingredients. Pour into pan. Cool. Cut. YUM.
Now, truth be told, I did have a bit of trouble settling on just how long to simmer the yummy cream/butter/sugar/cider mixture. Could I just go ahead and follow the recipe as written? OH, NO, of course not. I had to try a few tweaks.
But in the end, the caramels came out GREAT. I mean, beyond great. They're irresistible. Wonderful flavors of caramel and butter, with an overlay of apple and cinnamon... As one reader said, they're "refreshing," rather than just being one-note sweet.

Join me now as I show you just how easy – how simple, really and truly – it is to make caramels. Apple Cider Caramels. With a sprinkle of sea salt on top, natch.
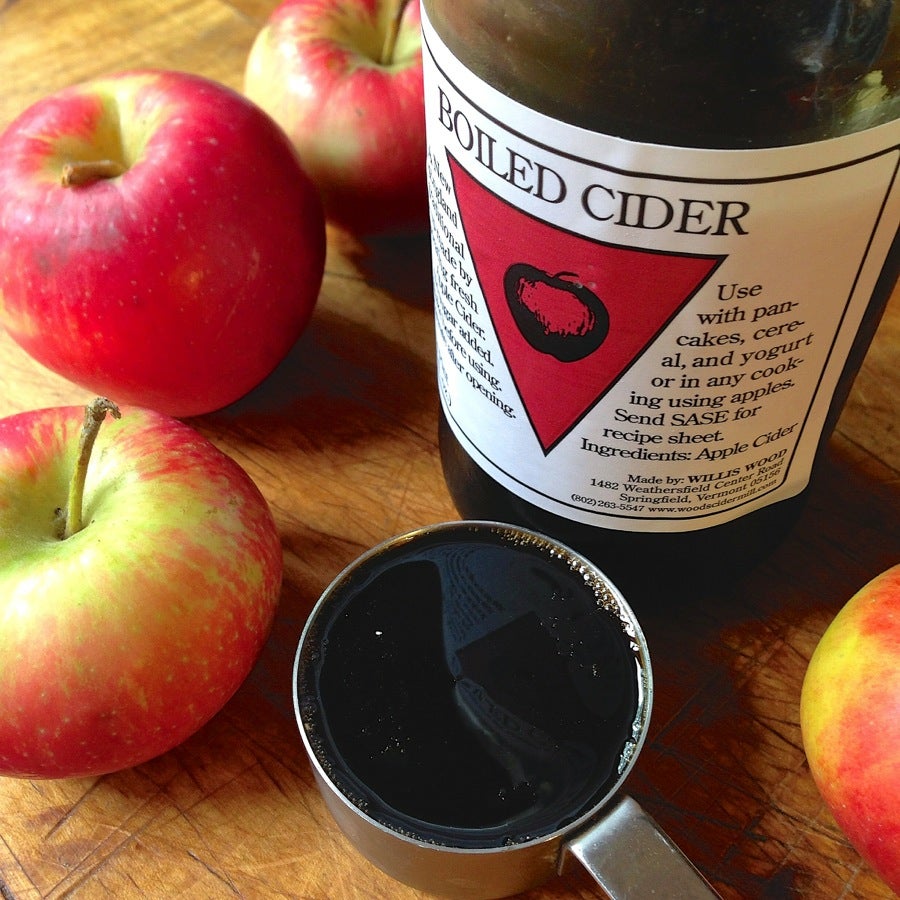
First, I highly recommend using boiled cider in these caramels. Without it, they'll just be... well, caramels, not Apple Cider Caramels.
And it's not as though you have to buy boiled cider just for this recipe, and never use it again. I keep a bottle in my fridge year-round (it stays good indefinitely, like most syrups). It's wonderful in all kinds of apple dishes (of course), but can also be drizzled into yogurt or over ice cream or oatmeal.
Traveling further afield, it's a perfect match for ham and pork, as well. I confess to having dunked crisp bacon in a tiny bowl of boiled cider... wow.
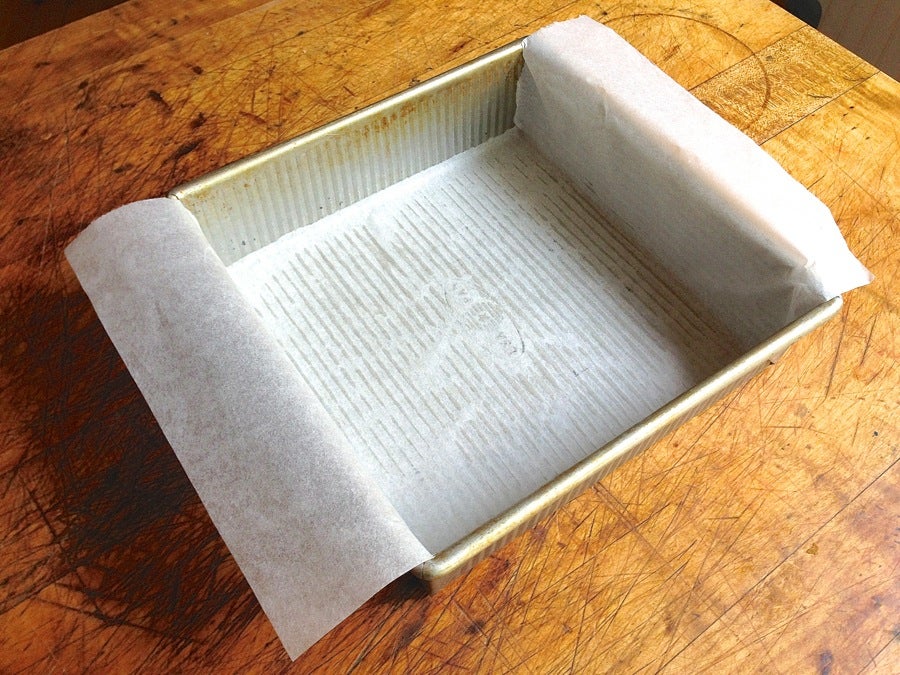
OK, first things first. Lightly grease an 8" x 8" baking pan and line it with parchment paper, leaving an overhang on opposite sides.
If you don't have an 8" x 8" pan, use a 9" round pan. If you don't have parchment, use foil (non-stick foil, if possible); plastic wrap or waxed paper won't stand up to the heat.
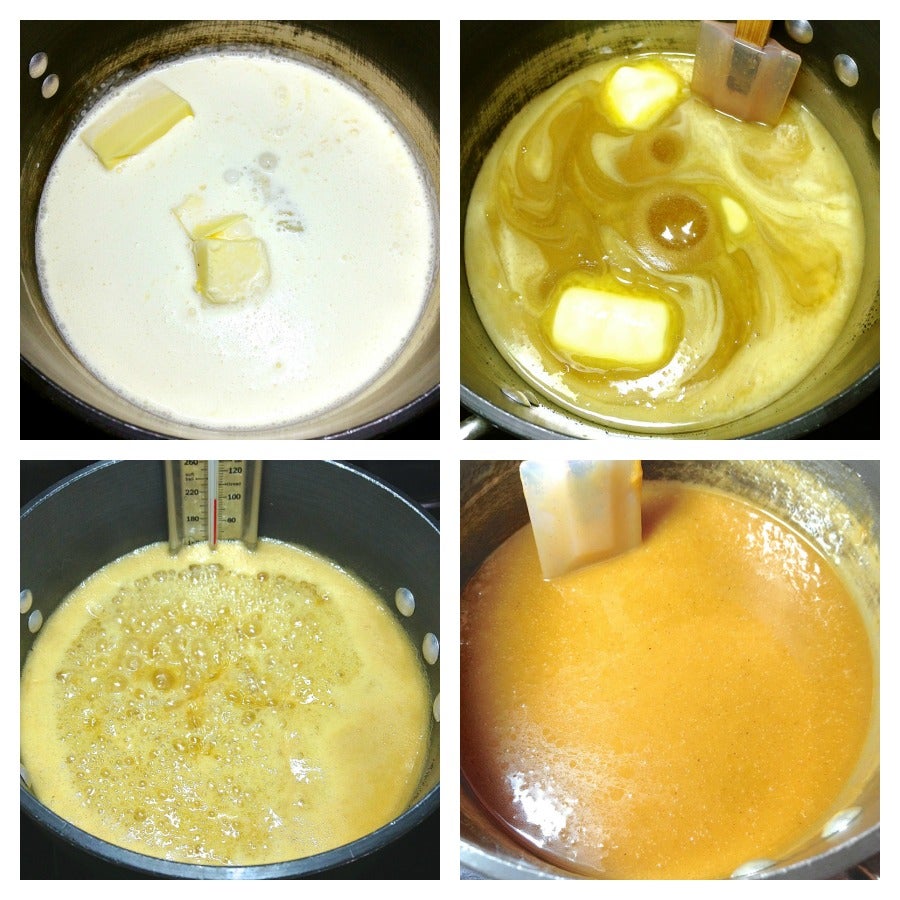
Place the following in a DEEP, heavy-bottomed saucepan:
2 cups (1 pint) heavy cream or whipping cream
1 cup light corn syrup
2 cups sugar
6 tablespoons butter, salted or unsalted
1/2 cup boiled cider
Yes, a DEEP saucepan; it's going to bubble up. Prior to turning on the heat, the contents shouldn't come more than about 1/3 up the sides of the pan, to be on the safe side.
And, for those of you who eschew corn syrup, one reader noted they successfully used brown rice syrup instead.
Bring the mixture to a boil over high heat, stirring to dissolve the sugar. Reduce to medium-high heat and cook, without stirring, until the mixture reaches 242°F (softer caramels) to 248°F (harder caramels) on a candy thermometer. This will take 20 to 30 minutes, depending on your particular stove. Watch closely towards the end; the temperature starts to rise quickly.
This was the point where I just wasn't sure how long to boil the sugar mixture. I prefer softer caramels; but how soft is TOO soft? The softer they are, the trickier they are to cut and wrap and keep... I compromised, and took the caramel off the stove at 245°F.
Once the pan's off the heat, stir in 1/2 teaspoon table salt, and 1 teaspoon apple pie spice.
Don't have apple pie spice? More's the pity! But feel free to substitute ground cinnamon, or a heaping 1/2 teaspoon ground cinnamon + 1/8 teaspoon each ground ginger and ground nutmeg.
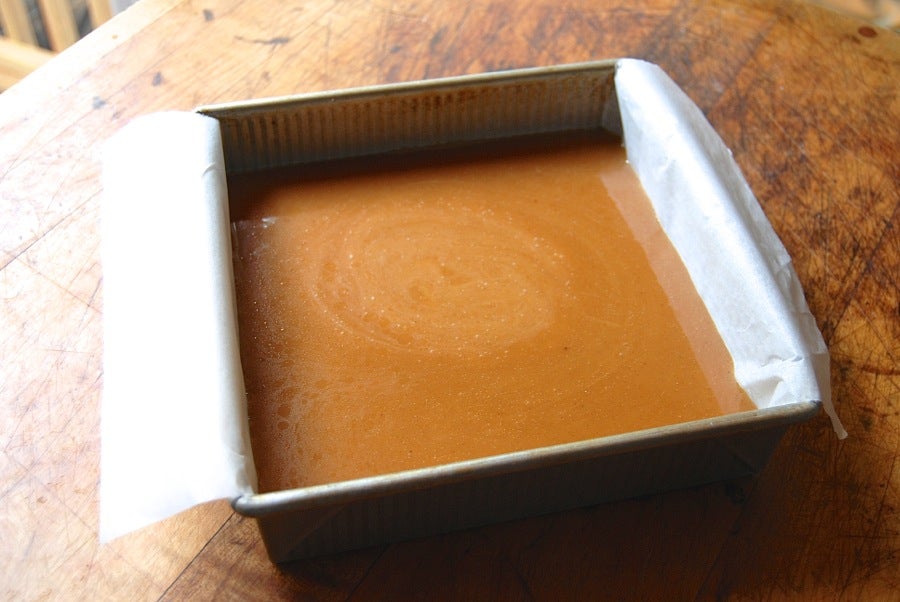
Quickly pour the caramel into the prepared pan.
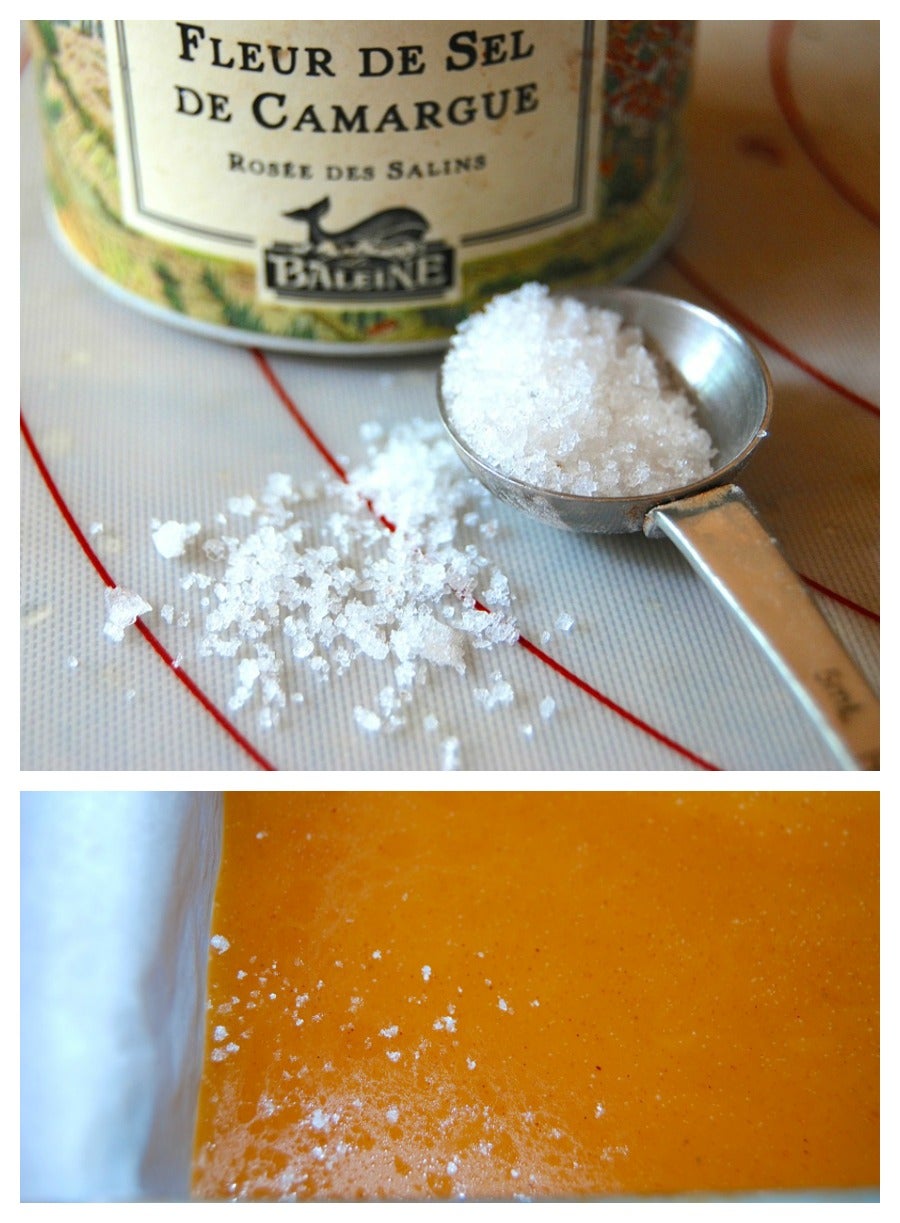
Want to go the salted caramel route? I did. Sprinkle coarse sea salt over the warm caramel. Be generous without going overboard.
The salt will sink into the caramel and disappear. But when the candies are cool, you'll taste the salt, and even discern a tiny bit of crunch.
Let the caramel stand for 12 to 18 hours at room temperature before cutting.
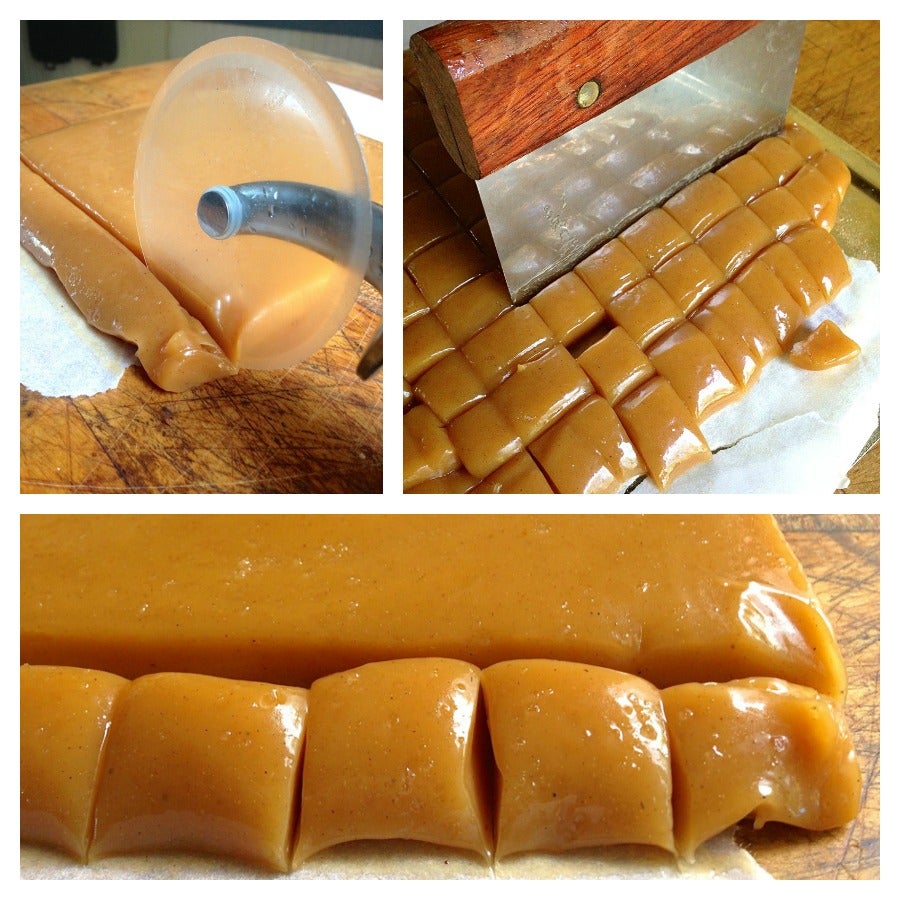
This was the trickiest part for me. I let the caramels set overnight before cutting. A pizza wheel or bench knife both worked fine for the cutting part.
But it was the moving them around part that was a pain. It was a warm day, and as I struggled to separate the caramels, they very slowly oozed back into one another.
Strike one. Into the fridge they went.
After an hour or so, they were thoroughly chilled.
Strike 2. Too hard to cut. Sigh...
But that was easy to fix. I simply left them on the counter for about 20 minutes, and they cut easily. They retained their chill long enough for me to start to separate them... but as they warmed they became stickier and stickier, and harder to separate.
Back into the fridge. I let them chill just enough for them to lose their stickiness, then QUICKLY separated them, putting them all onto a parchment-lined baking sheet. By the time I was done, they'd warmed up again.
Once more, into the fridge!
After 20 minutes, I was able to wrap the individual caramels pretty easily. The fact that it was a cooler day didn't hurt. I'd cut my caramels fairly small (about 1"-square), and chose to wrap them in 3 1/2" squares of waxed paper.
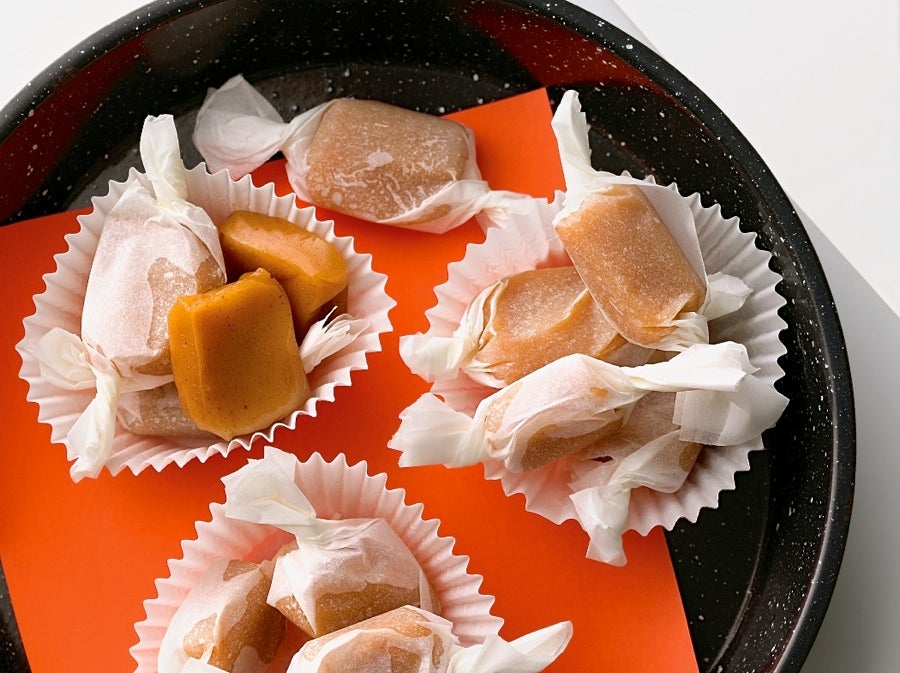
While prepping them for photos in our test kitchen, however, my fellow baker Charlotte (who came up with this great recipe) cut them a bit larger, and wrapped them in 6" parchment squares.
Either way, just remember – any potential angst around cutting and wrapping soon disappears. Stick to it (pun intended); the result is well worth the effort!
Read, make, and review (please) our recipe for Apple Cider Caramels.
But wait, there's more! What if you simmer the caramel to a lower final temperature – will it be apple cider caramel sauce?
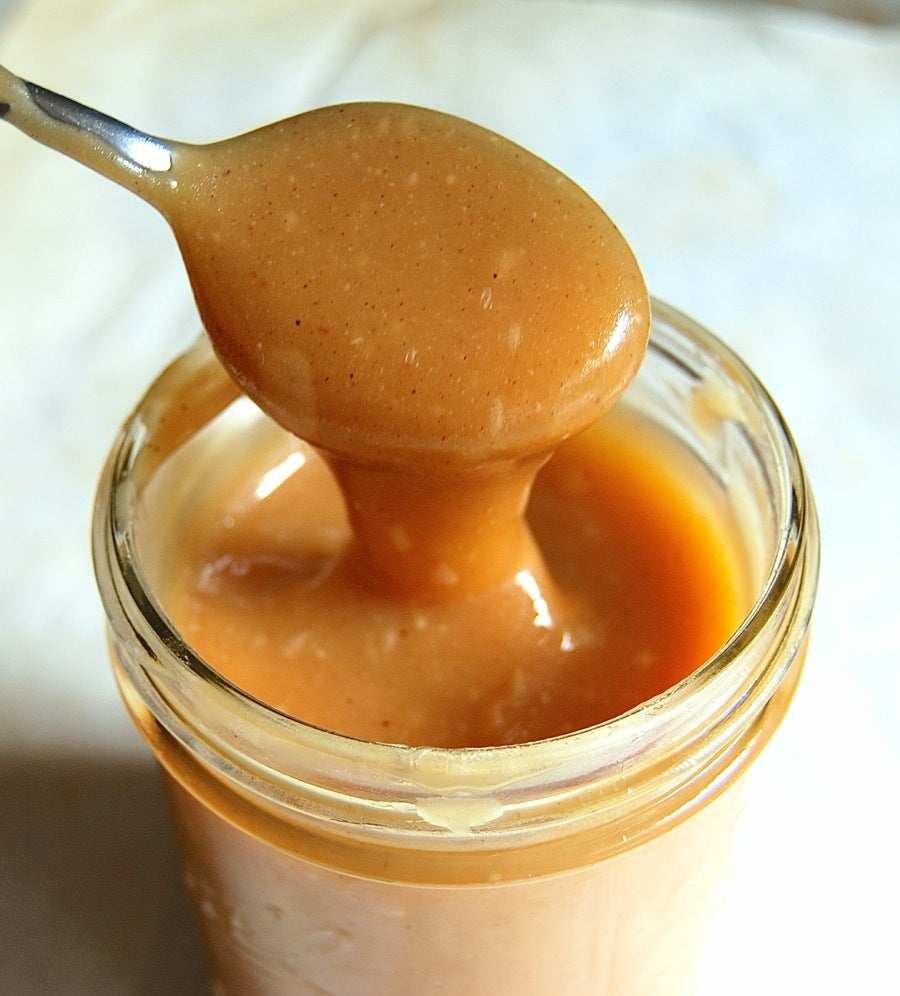
You bet. I experimented, bringing the caramel's temperature just to 230°F. When completely cooled, it was slightly softer than peanut butter at room temperature, and quite firm (though "spoonable") when refrigerated. Either way, a short burst in the microwave made it unctuously pourable.
