


With the approximately 697 varieties of crackers on supermarket shelves, why would you ever, EVER choose to make your own crackers?
Because you can.
Because it's fun. And because you like spending time in your kitchen surrounded by cookbooks and bowls and timers and butter and flour and your kids, who hang out to lick the bowl and get some face-time with Mom.
And also because, believe it or not – with ALL of those aforementioned 697 varieties of crackers available at the grocery store – your homemade crackers actually taste different: fresh, flavorful, and made with love.
The following crackers have a depth of flavor way beyond most anything you could buy. The secret?
Yeast. And time. An overnight rise in the fridge allows yeast to grow slowly in a cool environment, where it releases organic acids and alcohol that ramp up flavor wonderfully. Not only in crackers, but in pizza crust, rolls, bread... anything yeasty.
So get out your rolling pin, and be prepared to acquire a new skill here: cracker-making.
Store-bought, meet homemade – and may the tastiest cracker win!
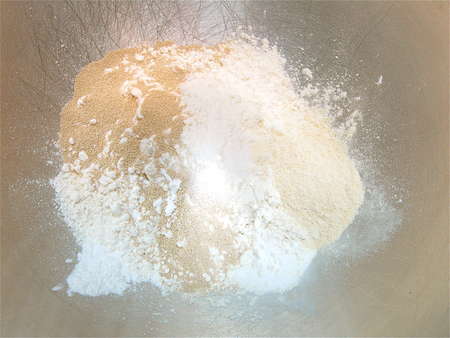
Put the following in a mixing bowl:
1 1/2 cups (163g) Italian-Style Flour
2 teaspoons instant yeast
1/4 teaspoon salt
1/4 teaspoon baking soda
1/4 teaspoon cream of tartar
1 tablespoon King Arthur Easy-Roll Dough Improver, optional but helpful
1 teaspoon sugar
Mix till thoroughly combined.
Put 6 tablespoons (85g) water, 2 tablespoons (28g) butter, and 2 tablespoons (25g) vegetable oil in a microwave-safe cup, or in a saucepan. Heat gently just to melt the butter. Remove from the heat, and cool to 120°F-130°F. If you don't have a thermometer, this will feel hotter than lukewarm, but not at all uncomfortably hot; it'll be cooler than your hottest tap water.
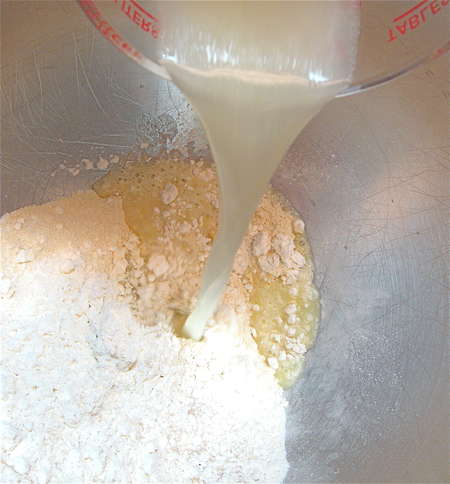
Add the liquid ingredients to the dry ingredients.
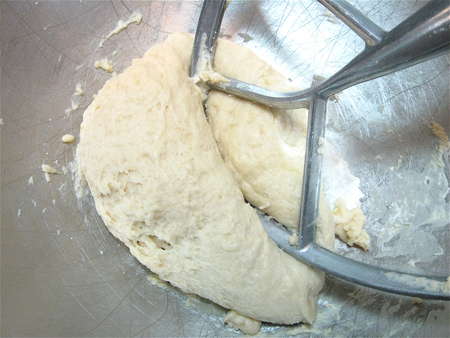
Beat first at medium speed, to combine; then at high speed, for a total of about 90 seconds, to make a soft dough.
Notice how rough this is, compared to well-kneaded yeast dough; that's OK.
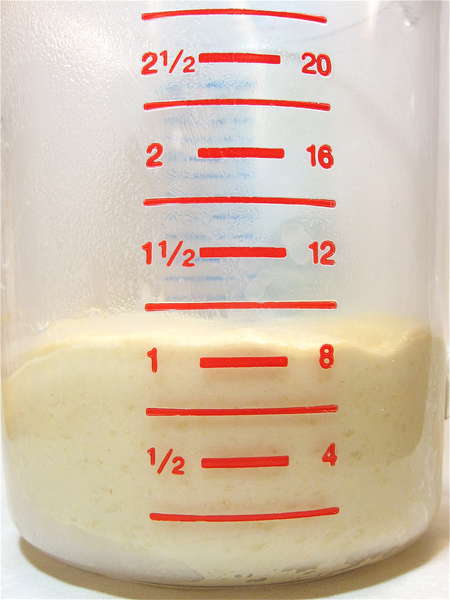
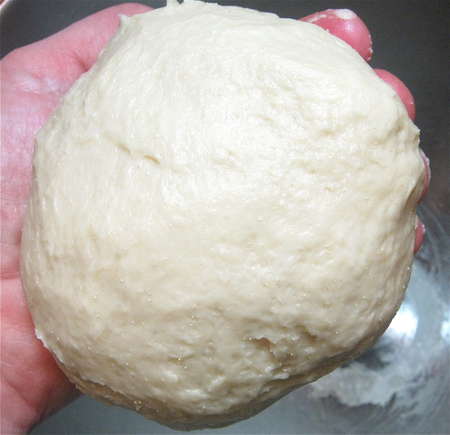
Place the dough in a lightly greased bowl (or measuring cup), cover it, and refrigerate overnight, or for up to 18 hours. It won't rise much; the bowl or cup can be small.
See? Not much rise.
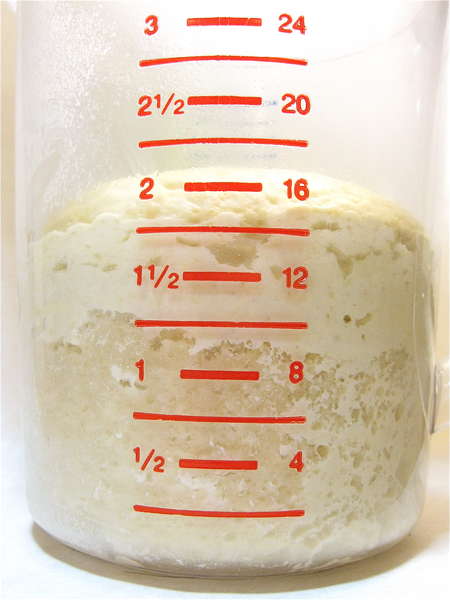
Remove the dough from the refrigerator, and allow it to rest for about 15 minutes. Preheat the oven to 425°F. Lightly grease (or line with parchment) two baking sheets.
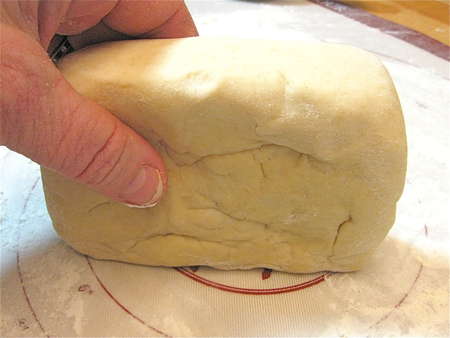
Lightly flour a work surface (a silicone rolling mat works well here), and remove the dough from its rising bowl. It won't feel like normal yeast dough; it'll be more clay-like. Shape the dough into a 3” x 5” rectangular block.
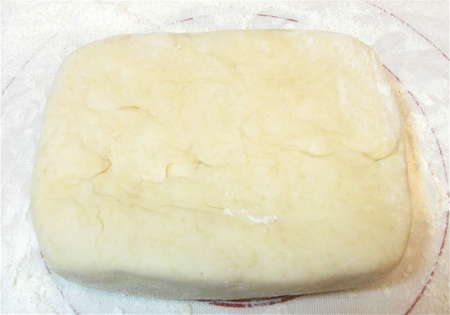
Pre-shaping it like this will help you roll it out evenly.
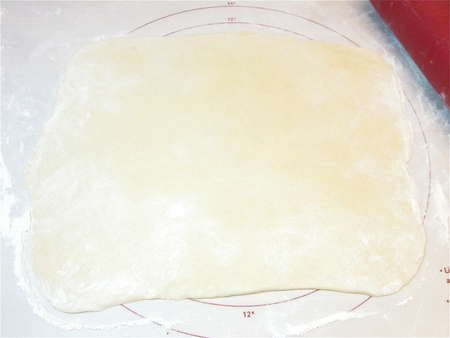
Roll it into a rough 13” x 15” rectangle; it'll be quite thin. Be sure to keep the rolling surface well-floured, to avoid sticking.
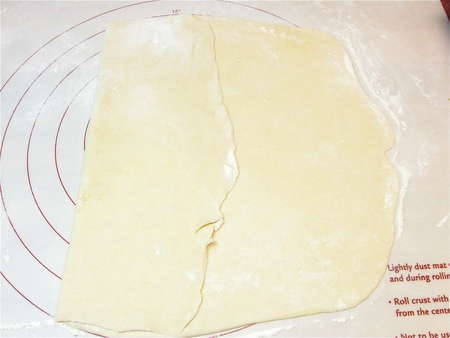
Starting with a shorter side, fold the dough in three...
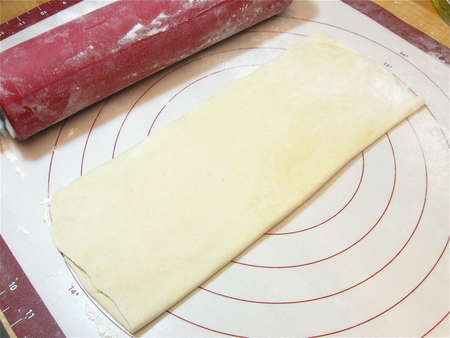
...like a business letter.
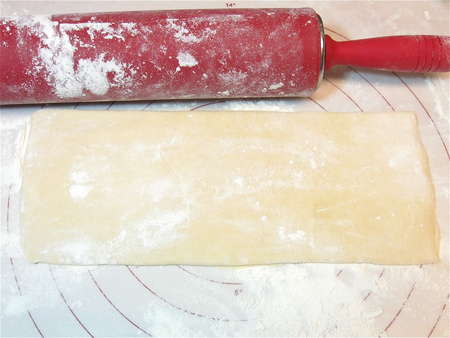
Turn it 90°, and roll it out again, this time to an 11” x 19” rectangle, or thereabouts. The dough will shrink when you stop rolling it; your goal is to end up with a rectangle that's about 10” x 18”.
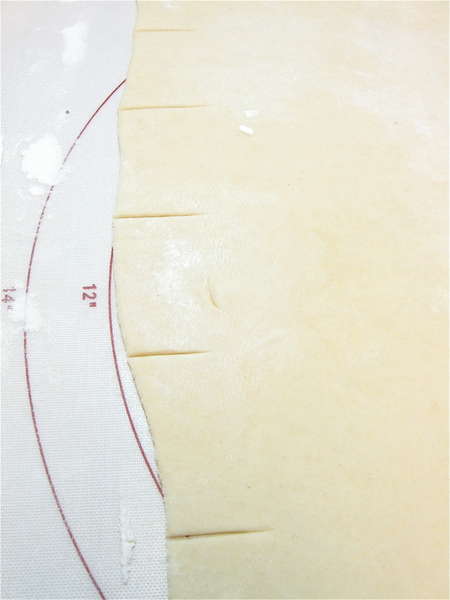
Notch the edges of the dough at 2” intervals; this will help you cut nice, straight 2” crackers.
Next, select your topping: either pizza seasoning or another salt of your choice can be used here.
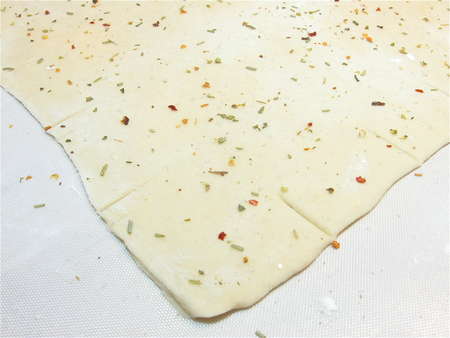
Sprinkle the dough with your choice of topping, and gently press it in with the rolling pin.
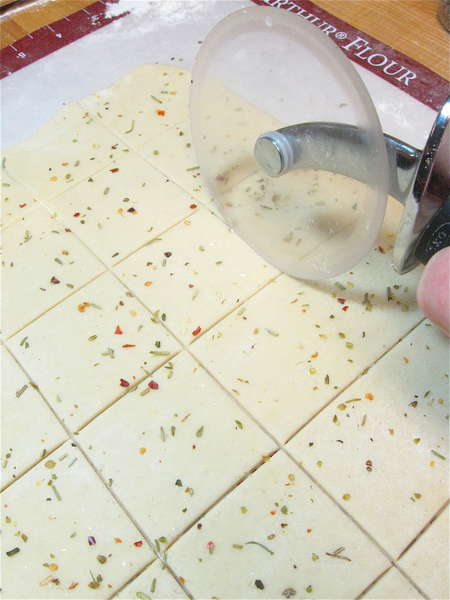
Using a rolling pizza wheel (easiest) or a baker's bench knife, cut the dough into 2” squares. Note: If you're using a silicone mat, cut very carefully - you don't want to damage the mat. We like to use an acrylic-blade pizza wheel.

The crackers on the edges will be a bit misshapen. If you like, trim them straight. I just don't care about appearances that much to take this extra step; but go for it, if you're into perfection.
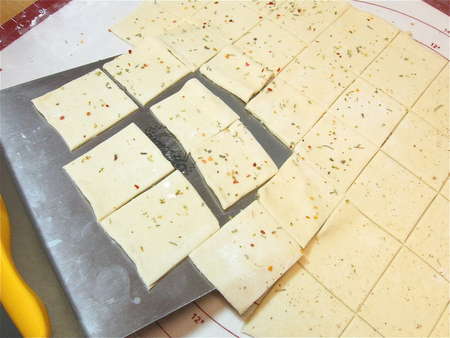
Transfer the crackers to two lightly greased or parchment-lined baking sheets; I'm using one of my favorite tools here, a giant spatula.

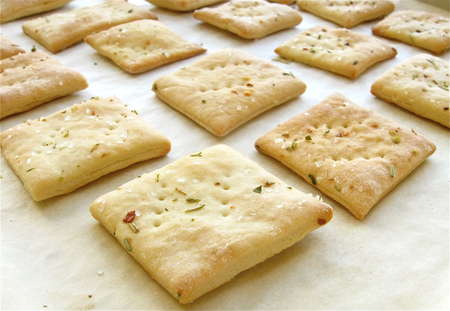
Put the crackers fairly close together, as they'll shrink as they bake, rather than spread. Prick each one once or twice with the tines of a fork.
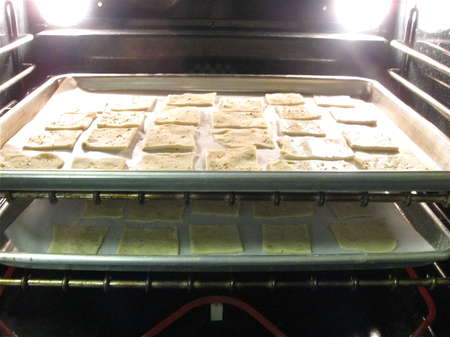
Put the crackers in the oven.

Bake them for about 10 minutes, till they're a very light golden brown. Watch them carefully towards the end of the baking time; they can darken very quickly. Notice how nicely they puff up.
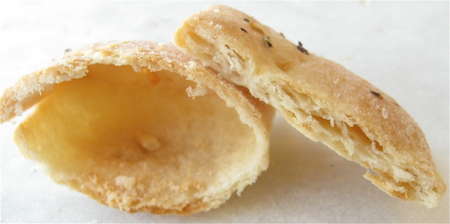
On the left, a cracker I forgot to poke with a fork, prior to baking – a perfect little balloon! On the right, one that was poked; light, flaky layers.
Turn off the oven, and open the door completely. Yes, completely; this isn't one of those “crack the oven door” times.
Leave the pans of crackers on the oven rack; they're going to cool down right in the cooling oven, in order to preserve their crispness. Keep your eye on them for the first couple of minutes; if for some reason your oven isn't cooling off quickly, and the crackers are continuing to brown, pull the rack out partway.
When the crackers are completely cool, remove them from the oven.
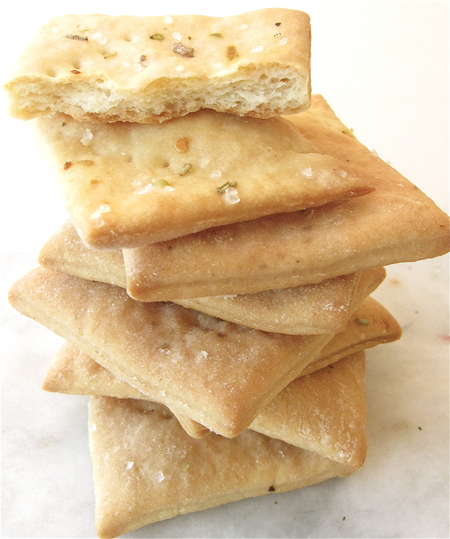
Stack o’ crackers. Now, don't you feel a sense of accomplishment?
Wrap any leftovers airtight, to preserve their crispness. I stored some in a plastic zip-top bag for a couple of weeks, to see how they'd keep; fine.
Then I threw them in my glass cracker jar at home. Several weeks after that – at least 3 weeks, I'd reckon – I found a few strays at the bottom of the jar. Just as tasty as ever. These crackers remain fresh-tasting and crisp for a LONG time. Good to the last crumb!
Read, rate, and review (please) our recipe for Gourmet Soda Crackers.
