When you step into a kitchen and get ready to bake, there's a feeling of limitless possibilities at your fingertips. Well, except for those of you eating gluten-free. You've likely come to know the lonely feeling of going without.
It's time to change that!
Let's bust the myth that if you can't have gluten, you can't have it all. The truth is when it comes to baking, you most definitely can have it all. You can easily make gluten-free versions of many of your favorite baked treats, including chewy chocolate chip cookies, tender birthday cake, buttery biscuits, and even our current obsession: pan pizza.
We'll show you how to make Gluten-Free Pan Pizza, a recipe that proves gluten-free folks can indeed have it all.
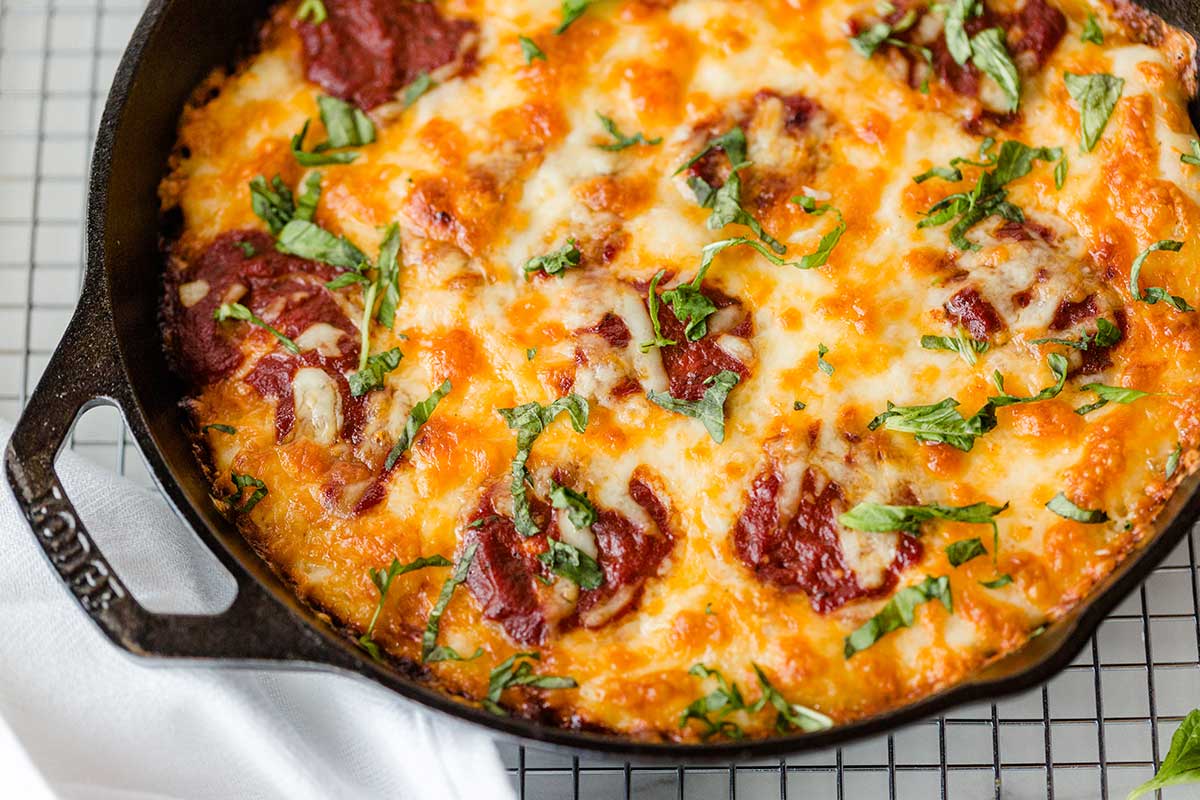
Fantastic gluten-free pizza has eluded bakers for years. It’s quite a challenge to make — but to ensure everyone can experience the joy of pan pizza (and our Recipe of the Year), our test kitchen came up with a new, approachable recipe to rival its wheat-based counterpart: Gluten-Free Pan Pizza.
It's delicate. It's lofty. It's cheesy AND it's easy to make. This recipe captures everything there is to love about pan pizza while also being special-diet friendly.
Let's bake!
Before you start baking, make sure you have a suitable pan to bake your pizza in. The pan is critical to the final product.
The good news? You have lots of options. Ideally, this pizza is baked in a 10” cast iron skillet. The dark color of cast iron (and its heat-retaining mass) gives the pizza a fantastic crust.
If you don’t have a cast iron skillet, use a 10” round cake pan or a 9” square pan. Don’t have those either? Consider adding them to your wish list, and root around your pantry for another oven-safe, similar-sized, heavy-bottomed skillet in the meantime. The pan must be able to withstand temperatures of at least 375°F.
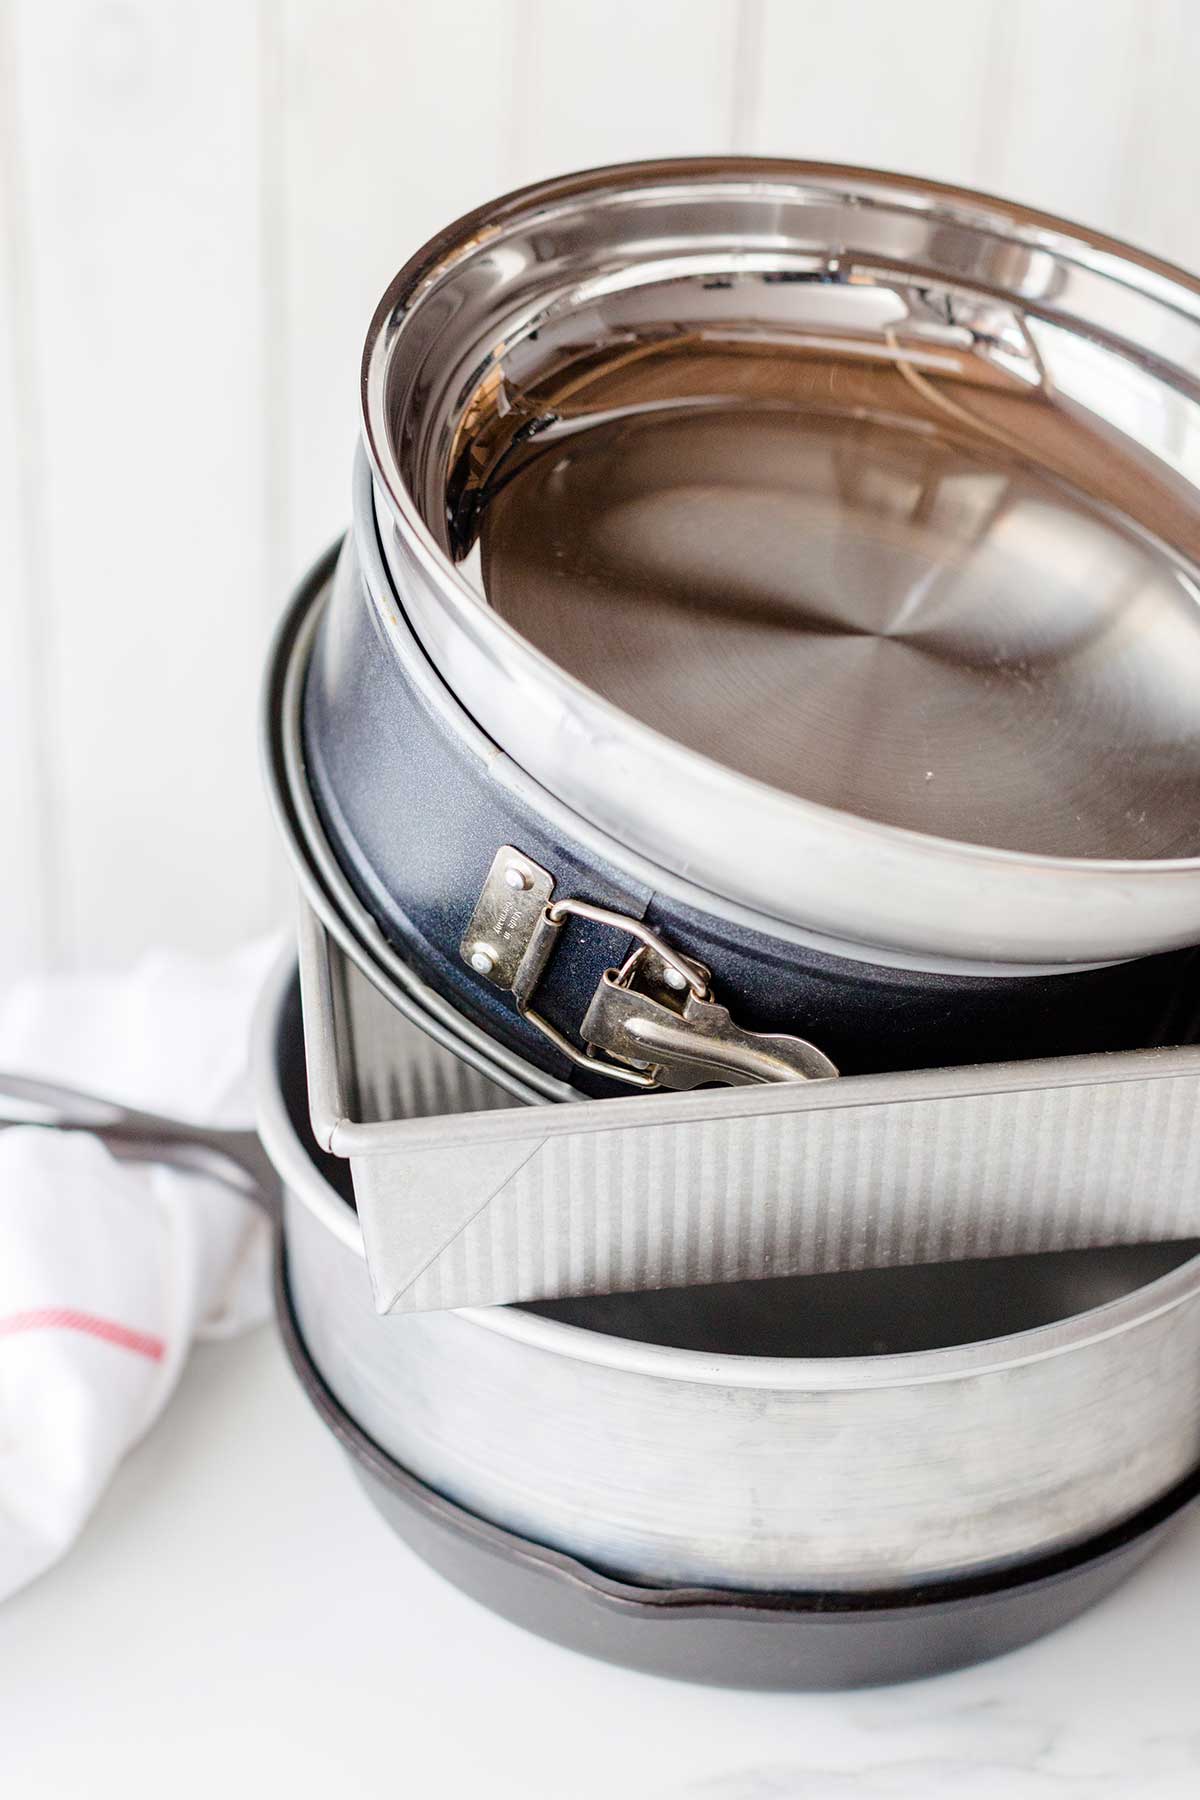
You can get creative, as long as you end up with a pan that’s relatively the right size.
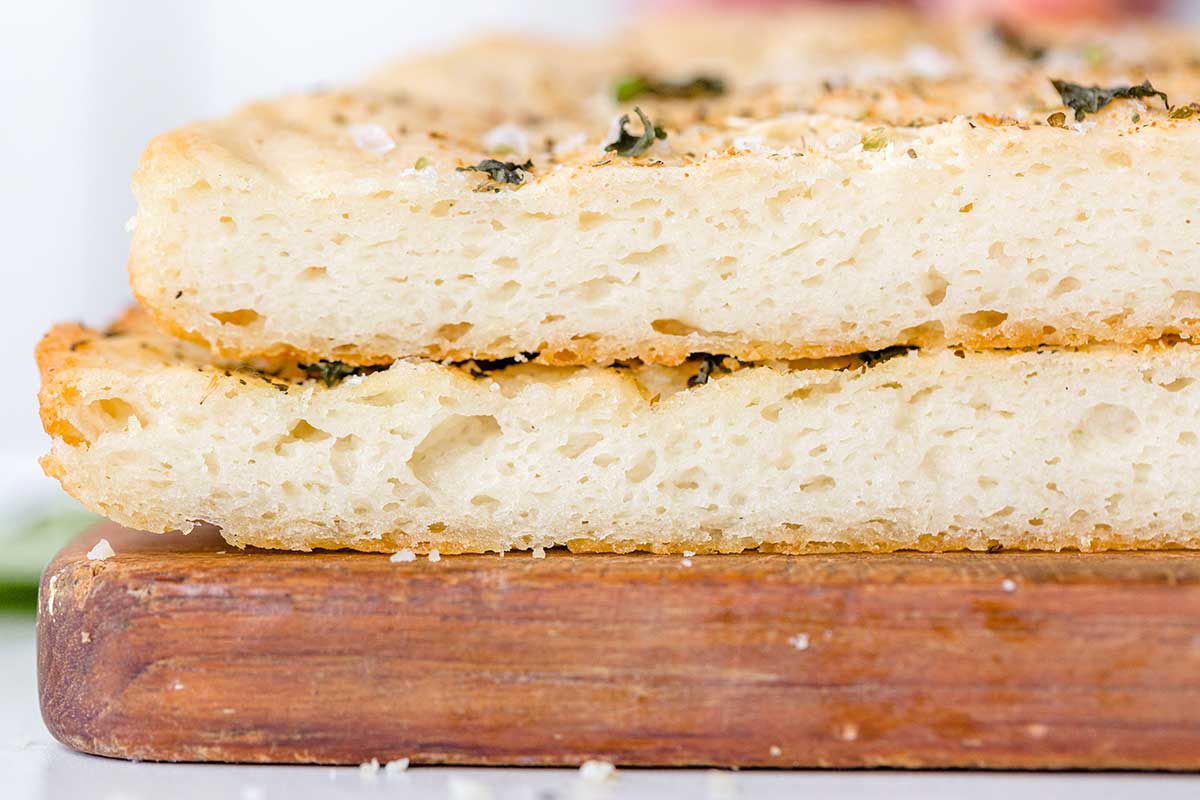
Pizza is all about the crust, so our test kitchen team made sure the gluten-free version was just as light and chewy as the original.
Given the right amount of time to rise and bake, this gluten-free crust will steal the show, whether it’s served to gluten-free eaters or not.
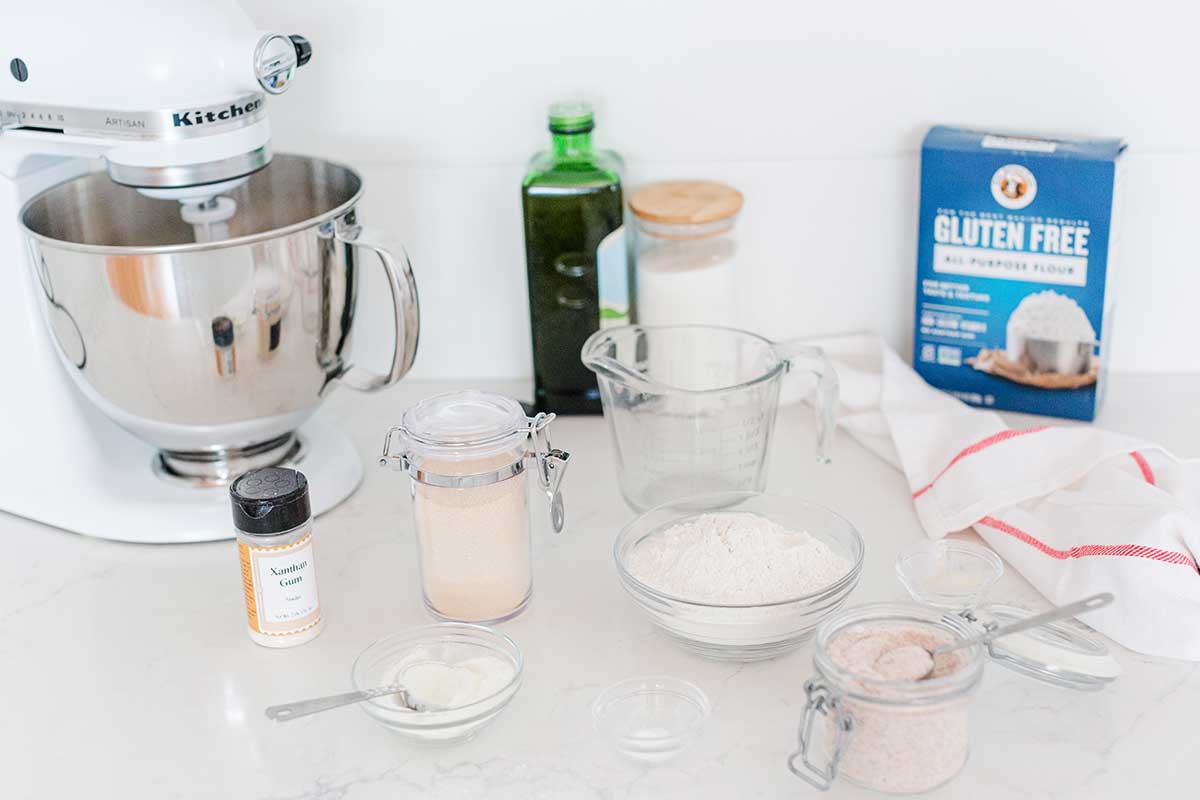
About 2 1/2 hours before you want to serve your pizza, gather these dry ingredients to make the crust:
Start by weighing the flour using a scale, or by gently spooning it into a cup, then sweeping off any excess. Then combine the dry ingredients into the bowl of a stand mixer or a large mixing bowl and set it aside.
Then combine the following ingredients in a separate small bowl:
Add about 1 cup of the dry ingredients to the water/oil/yeast mixture, then stir to combine. It will look slightly lumpy at this point; that’s OK.
Set the bowl aside for about 30 minutes until it looks bubbly and smells yeasty. The aroma of pizza-baking is in the air!
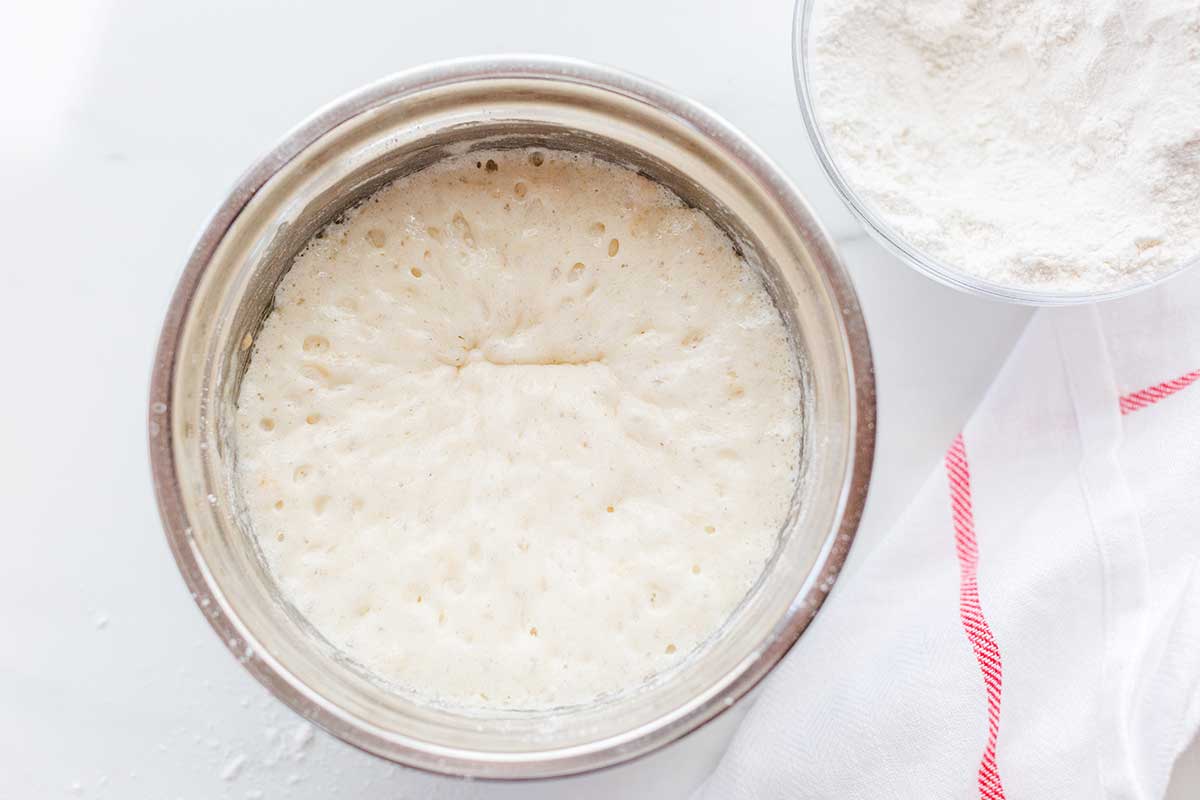
To finish the dough, add the bubbly mixture to the remaining dry ingredients and beat on medium-high speed for 4 minutes.
Don’t skimp on the mixing time here — gluten-free dough needs to be well-mixed and aerated in order to build structure. Set a timer so that your dough gets the full mixing time it needs. (4 minutes can feel like forever if you’re just guessing.)
When the dough is fully mixed, it'll be thick and sticky. It won’t resemble traditional pizza dough but instead, it’ll look like thick cake batter. This is normal for gluten-free yeast baking.

Set the dough aside to rise for about 30 minutes in a warm place, about 70° to 75°F is ideal. While the dough rests, prepare your pan with 1 1/2 tablespoons (18g) of olive oil. Tilt the pan to coat the bottom evenly. If you’re using a new cast iron pan, consider greasing the sides as well.
After about 30 minutes, the dough should look slightly puffy with a few small holes in the surface. Use a spatula or bowl scraper to transfer the dough to the prepared pan.
Use your wet fingers to press the dough evenly across the bottom. It’s helpful to start in the center and work your way towards the edges.
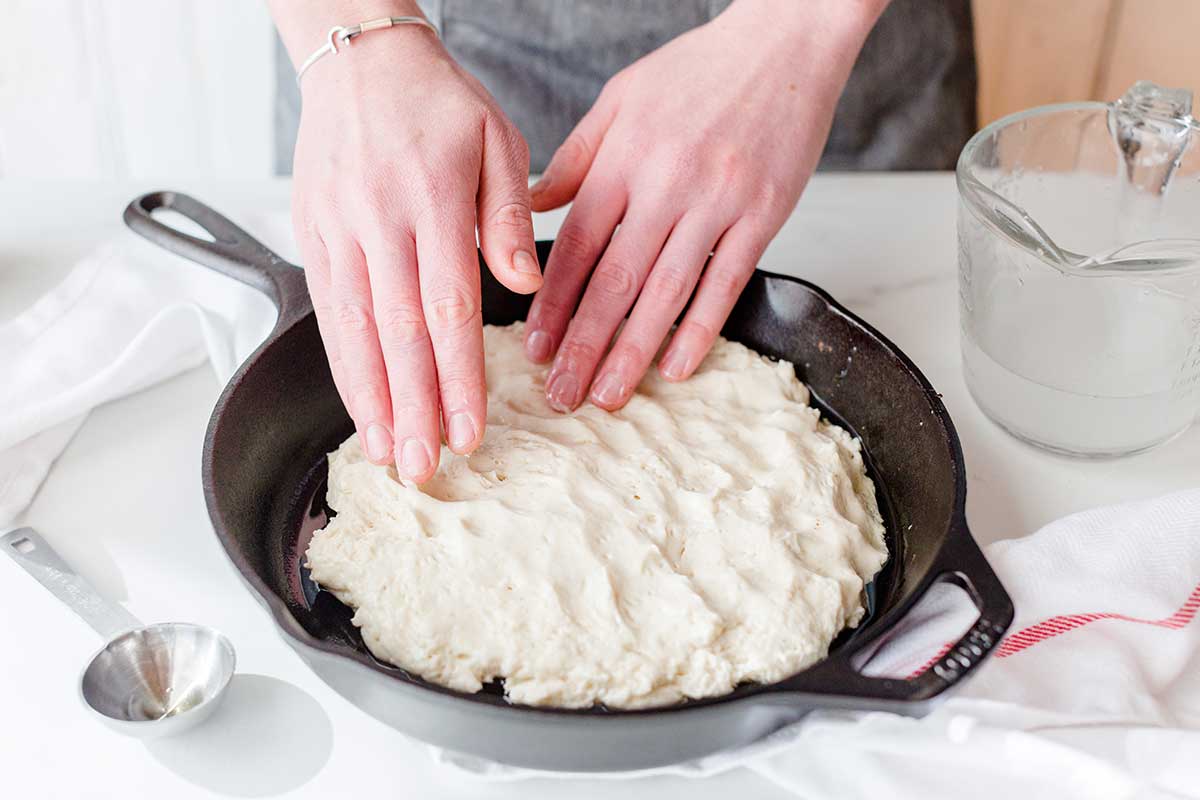
It’s OK if the dough looks slightly bumpy when you’re done pressing it out. It will become more even as it rises — plus, you’ll eventually cover the whole thing with cheese, sauce, and maybe even toppings too!
Let the dough rest for another 30 minutes. It can be left uncovered at this point — gluten-free dough doesn’t dry out as quickly as wheat-based dough does. Give it some room to breathe while you fire up the oven.
Before turning on the oven, adjust the racks so one is at the bottom of the oven and another is towards the top (about 4” to 5” from the top heating element). This placement is key — cooking the pizza on the bottom rack ensures a golden brown bottom crust. Moving the pizza to the top rack for the final portion of the bake melts the cheese and makes the edges crispy.
Once your racks are in place, preheat the oven to 375°F. Be sure to let the oven fully preheat before you start baking.
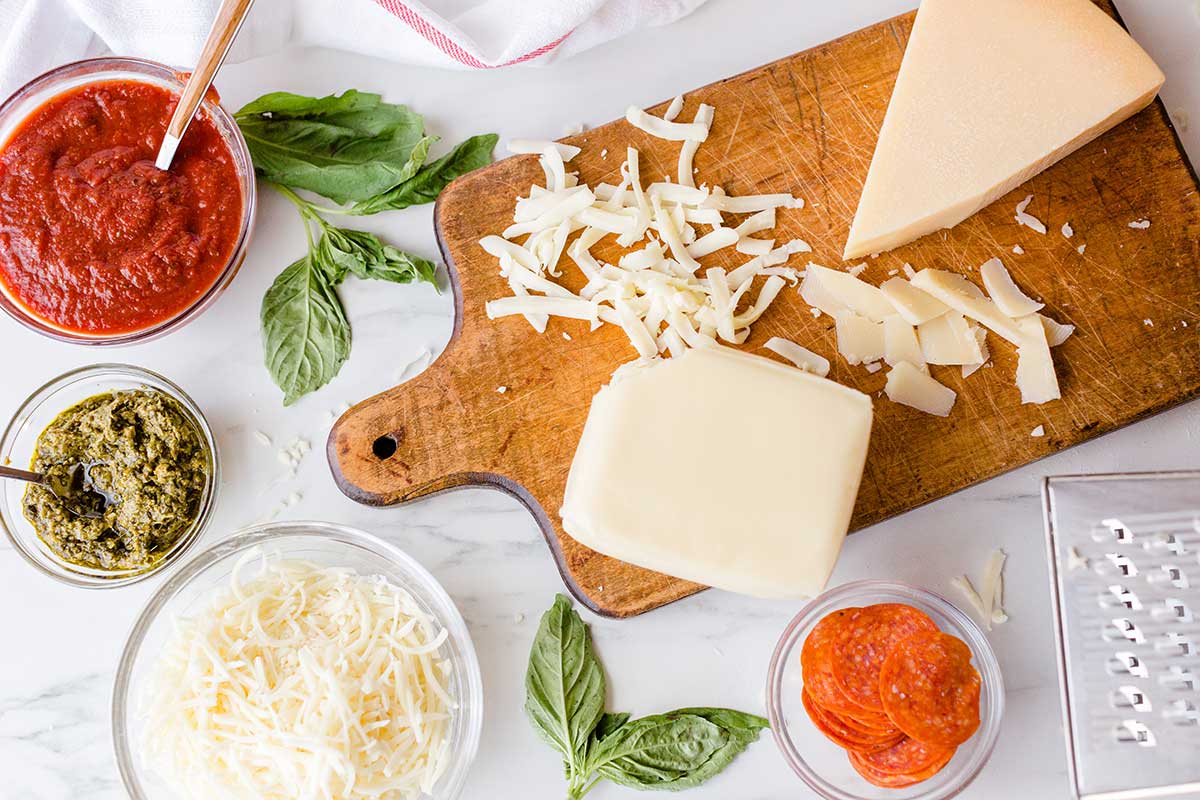
While the oven preheats, gather your ingredients for topping the pizza. To make a classic tomato and cheese topped pizza, you'll need:
When it comes to cheese, you’re not relegated to using only mozzarella; it’s just a traditional pizza-cheese that melts well. Feel free to use whatever you have on hand, or experiment with other cheeses. (Use our blog post, The best cheese for pizza as inspiration.)
One of the unexpected tricks that makes this Gluten-Free Pan Pizza (and the Crispy Cheesy Pan Pizza) more interesting than other pizza recipes you might have tried is the order in which the toppings are placed on the dough.
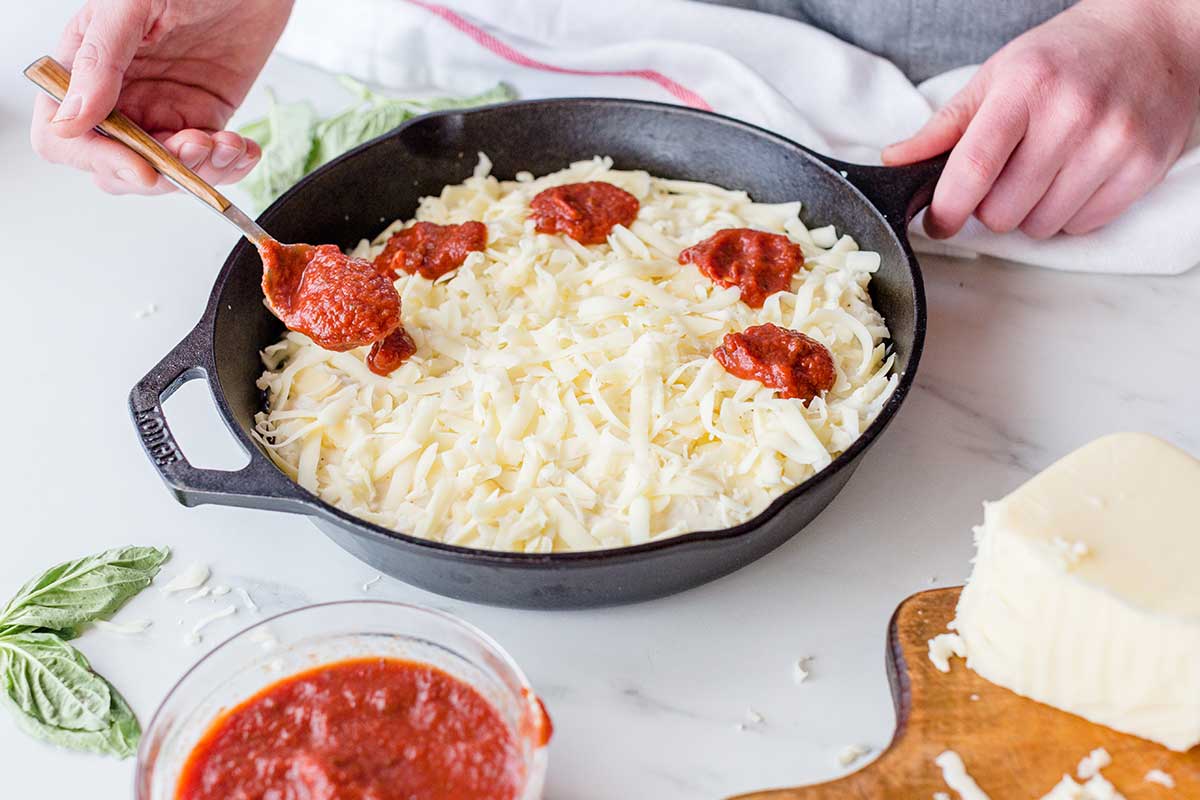
Ready for this? Cheese first. Yes, really — scatter about three-quarters of the cheese (about a scant 1 cup) evenly over the dough. Cover it right up to the edges so that the cheese touches the sides of the pan. This is where magic happens — the cheese will become caramelized (but not burnt if you watch it closely) and it'll prevent the crust from becoming even the slightest bit soggy.
After the cheese layer comes sauce, and just a modest amount at that. Too much sauce and you’ll overwhelm the flavor of the crust and weigh it down with excess weight and moisture. All you need are small dollops of sauce over the cheese.
If you want to add toppings other than sauce or cheese, now is your time. Choose vegetables or meats that sound tempting to your taste buds, or look to what's in season for inspiration.
When your pizza is sufficiently topped, sprinkle on the remaining 1/4 cup of cheese to seal in the goodness. It’s ready for the oven!
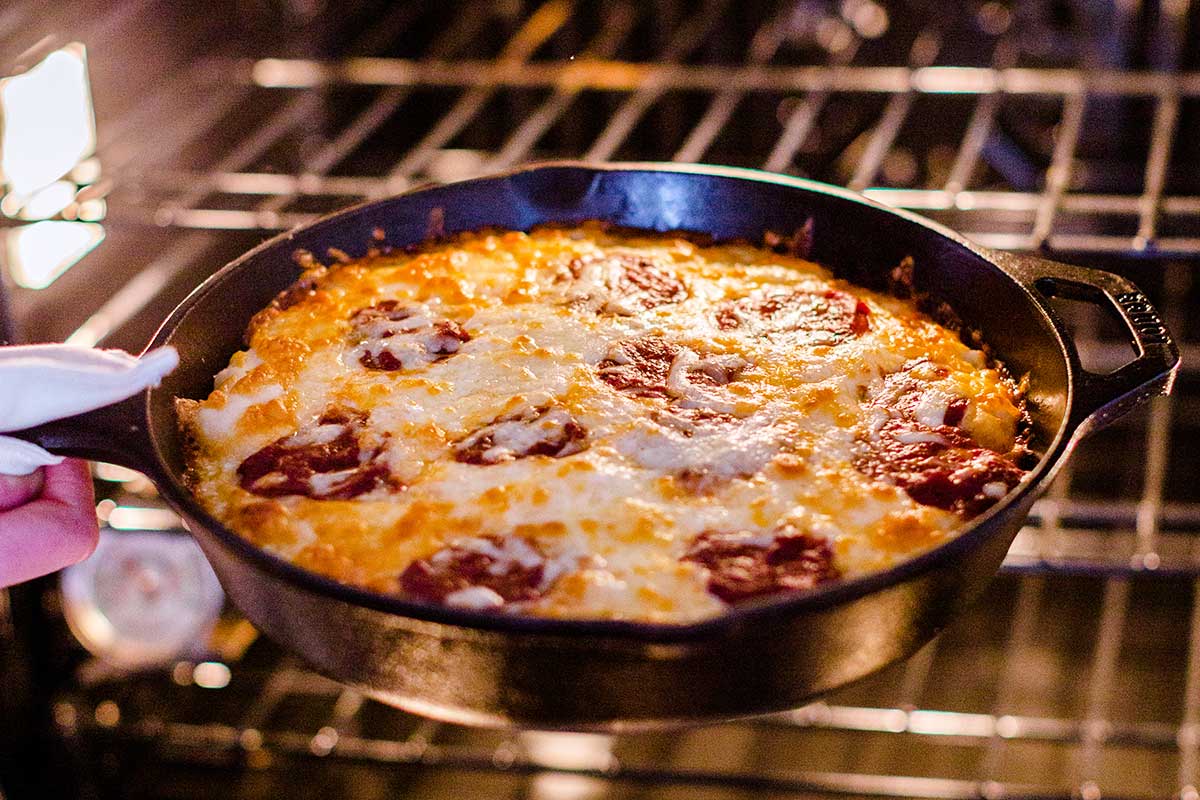
Bake the pizza on the bottom rack of the oven for about 20 to 22 minutes. The cheese will start to bubble, and the edges of the crust will turn golden brown. When you see these signs, remove the pizza from the oven and use a spatula to lift up the crust and peek at the bottom.
If the bottom is brown but the top still needs to get crispy, move the pizza to the top rack and bake it for another 3 to 5 minutes. (Don’t walk away at this point — you’ll risk burning the top of your pizza.)
If the bottom crust is still pale but the cheese on top is nicely browned, leave the pizza on the bottom rack for another 2 to 4 minutes.
While it’s tempting to simply set a timer and assume the pizza is done when it rings, home ovens can vary a lot based on their age, where the heating element is, and how often it’s used. The timer can act as a guide but use visual cues to tell you when your pizza is done.
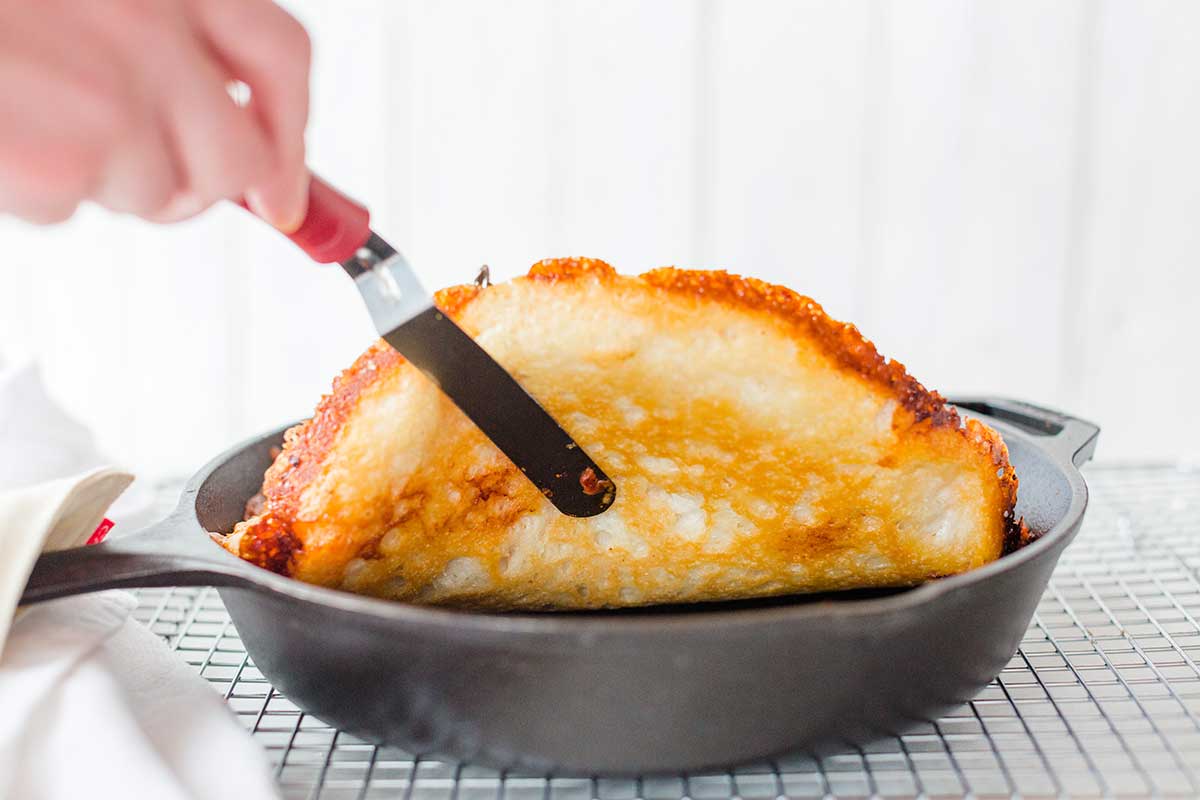
Remove the pizza from the oven and place it on a cooling rack. Immediately use a spatula or dull knife (like a butter knife) to separate the edge of the pizza from the side of the pan to prevent the cheese from sticking as it cools.
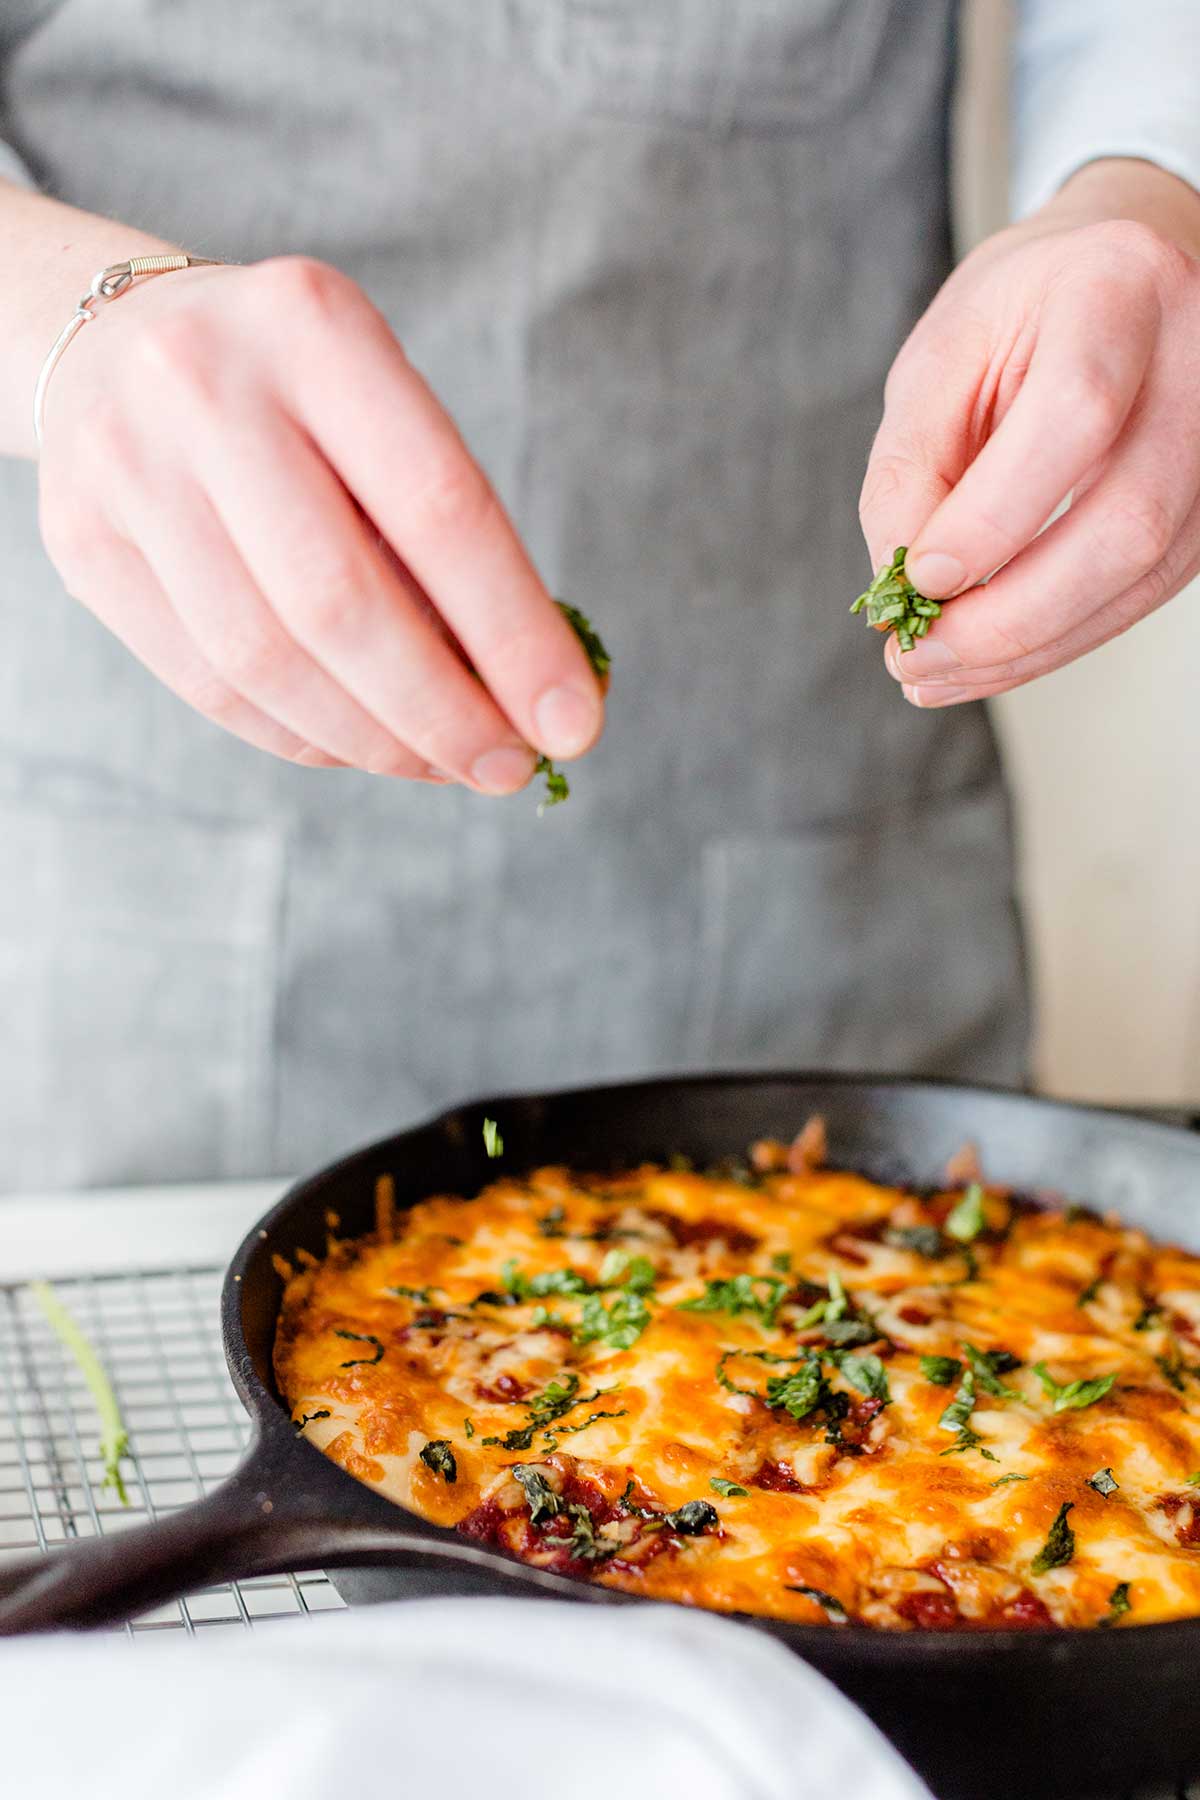
This is the moment to add freshly grated hard cheese (hello, Parmesan!) or fresh herbs over the hot pizza. Oregano or torn basil are especially nice complements to this crispy, cheesy, gluten-free pan pizza. They’ll add a pop of color and freshness that will make your pizza Instagram-worthy.
Serve the pizza while it’s still warm but not too hot; beware molten cheese!
If you’re feeding a larger crowd, simply double all the ingredients and use an extra pan to bake two pizzas at once.
If you have any leftovers, we’ll be surprised. But if you do, keep them in the refrigerator, well wrapped for a day or so (gluten-free baked goods tend to get stale faster than conventional versions). You can also freeze extra slices for longer storage. Just be sure to reheat thoroughly before enjoying. Reheating in a cast iron pan on the stove is our preferred method.
There’s so much to love about pan pizza, and now everyone can appreciate the goodness of this unique dish. Bake our Crispy Cheesy Pan Pizza if gluten is acceptable for your diet. If not, make our Gluten-Free Pan Pizza — it’ll be delightfully crispy and cheesy too.
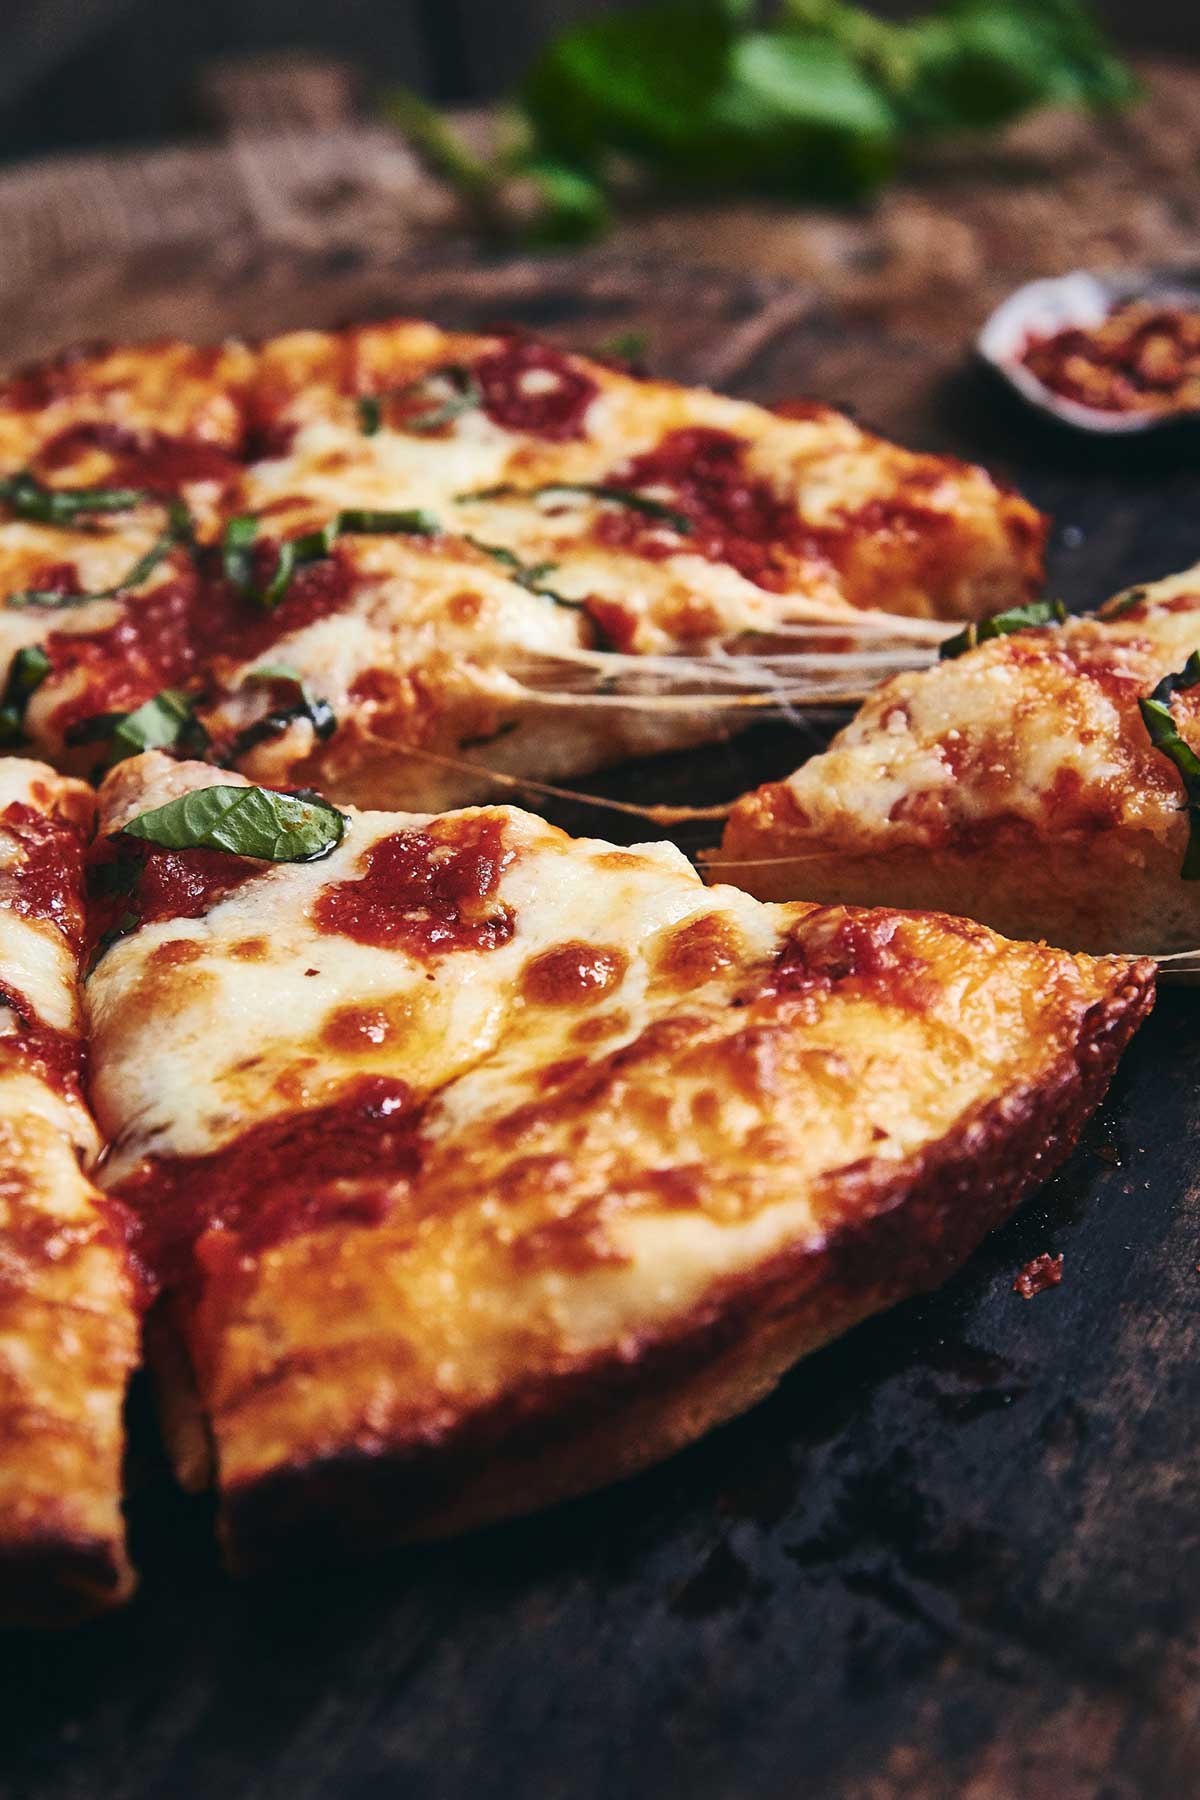
Make pizza that's just right for you!
Thanks to Anne Mientka for taking the photographs for this post; cover photo by Liz Neily.