


One of the most frequently asked sourdough questions we get on our Baker's Hotline is, “How do I make my sourdough bread taste more sour?”
Another common question: “How do I get those nice holes in my bread?”
This first in a series of three posts is about taking you a bit further down the road with your sourdough bread baking. It’s about working on the flavor and texture of your bread, aiming for something truly amazing.
Are you new to sourdough baking? Scroll to the end of this post for the resources you need to get started. If you're familiar with sourdough, already have an active starter, and are comfortable using it – read on.
Over the next few days we'll be working on a sourdough recipe using a variation on your liquid starter; and learning some new skills along the way: well-known techniques used by professional bakers to both simplify their work, and produce exceptional results.
So first, let’s talk about flavor.
Your sourdough starter is made up of bacteria and wild yeast that dwell together in productive harmony. Flavor development comes primarily from bacterial activity, while yeast contributes to rise.
While bakers often wonder how to change the flavor of their sourdough starter, at King Arthur we've learned that the focus should be on maintaining a healthy, active starter that nurtures both bacteria and yeast development.
Debra Wink, an accomplished microbiologist and sourdough baker, frequently shares her knowledge as a guest instructor in our baking school. This is her scientific perspective: "For the mother culture, the objective is to build and balance healthy populations of yeast and bacteria with enough collective power to do what you want them to do later."
It's during the dough phase that the baker can hone in on flavor development. In part 2 of this series we'll show you effective ways to develop more sour flavor in your bread.
For now, let's talk about what a stiff starter is, and why it might be worth your while to add one to your sourdough repertoire.
If you've dipped even a toe into the vast ocean of sourdough resources and recipes out there, you've no doubt come across references to all different types of starters—liquid starters, stiff starters, rye starters—just to name a few.
While it's certainly not necessary or advisable to maintain every type of starter imaginable, it can be helpful to know how to convert your starter to the type of starter called for in a recipe. It can also be useful to experience what maintaining a different type of starter involves.
Learning about different starters and how to use them is a way of expanding your sourdough world. Think of it as learning a new (really easy) sourdough language.
So what is a "stiff" starter?
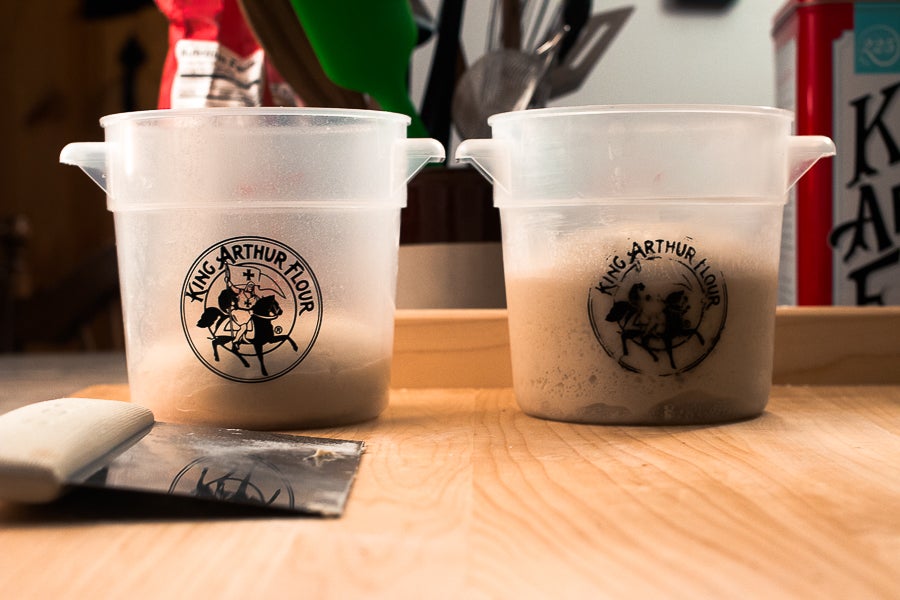
The starter we generally call for in our recipes is considered a "liquid" starter and is composed of equal parts flour and water by weight. When talking about the hydration percentage (the weight of the water as compared to the weight of the flour, with flour always being considered 100%), liquid starters are generally in the 100-125% range. This means the weight of the water is equal to, or a little more than the weight of the flour. This makes for a starter that you can stir together.
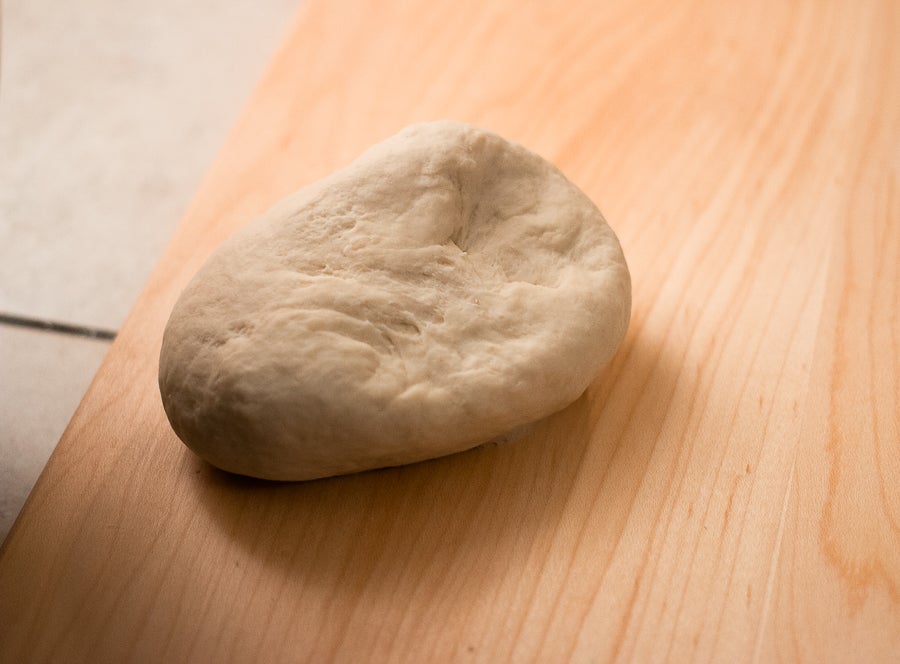
The hydration for stiff starters is generally 50-65%. The stiff starter we're introducing here has twice as much flour as water by weight, or a hydration percentage of 50%. This stiff starter has the consistency of a very stiff dough.
When I first learned to bake sourdough bread it was with a stiff starter, and it's still my favorite type of starter to work with.
I enjoy manipulating the dough with my hands, and find it easier to gauge when my stiff starter is ripe, as opposed to judging the ups and downs of a liquid starter.
I also have many favorite recipes that call for a stiff starter and love the flavor and rise of these breads. I really wanted to share one of these favorite recipes with my King Arthur community, and that means learning about stiff starters!
How do you know when your stiff starter is ripe?
The optimal time to add “fed” liquid starter to a recipe is when it’s at its peak of rising and fermentation, or just as it's beginning to fall. This ephemeral moment can be difficult to determine, then plan into your mixing and baking day.
While the goal is the same with a fed stiff starter, the optimal moment is more easily recognized.
How do you know when your stiff starter has reached ultimate maturity – its peak of perfection?
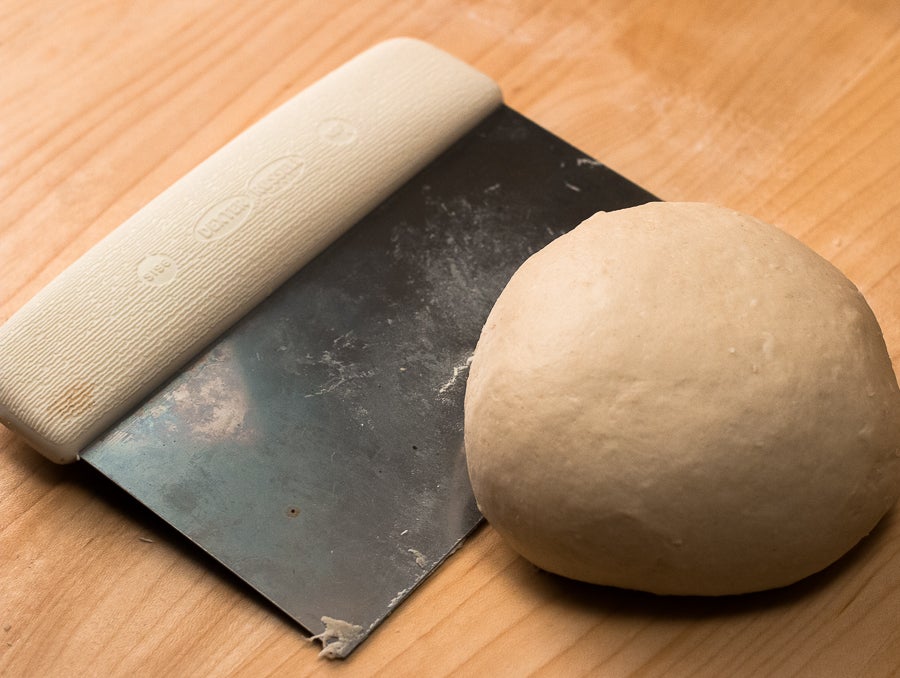
A mature stiff starter will have doubled in size, domed on the top, and just be starting to sink in the middle.
A brief note about starters that are stored in the refrigerator:
Both a liquid starter and a stiff starter will benefit from a revival period after being refrigerated. Leaving the starter at room temperature, feed it once in the morning and once at night until it's good and bubbly. This extra attention will awaken your starter from its dormant state in the refrigerator and restore the balance of its ecosystem, giving you the best shot at great flavor and rise when you use it in your bread.
Are you ready to try a stiff starter? You can easily do so using the "discard" from feeding your liquid starter, rather than throwing it away.
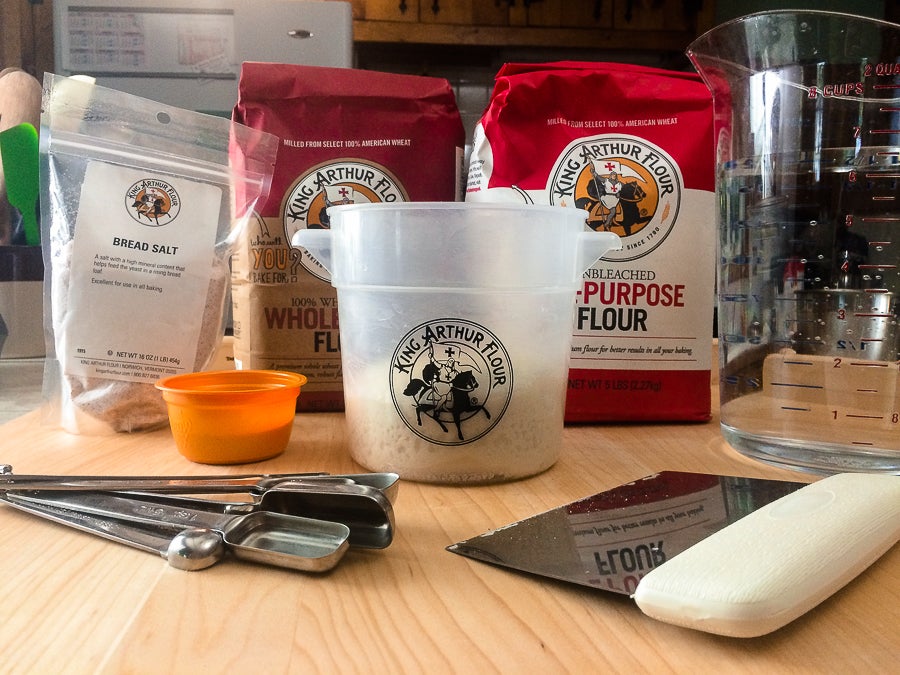
First, a note about measuring ingredients: a scale will make this process and your entire baking life much easier. You can avoid errors due to the natural variability of volume measurements, and reducing or expanding your recipe becomes much more straightforward when you're dealing with numbers (especially metric weights) rather than measuring cups and tablespoons.
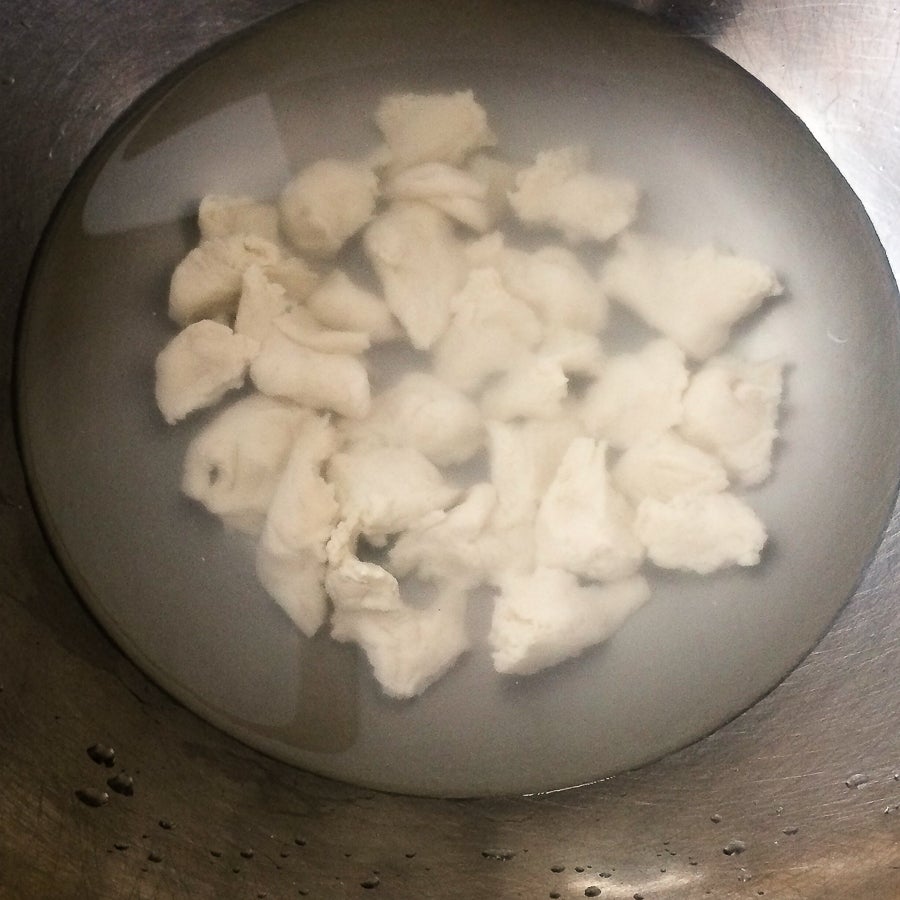
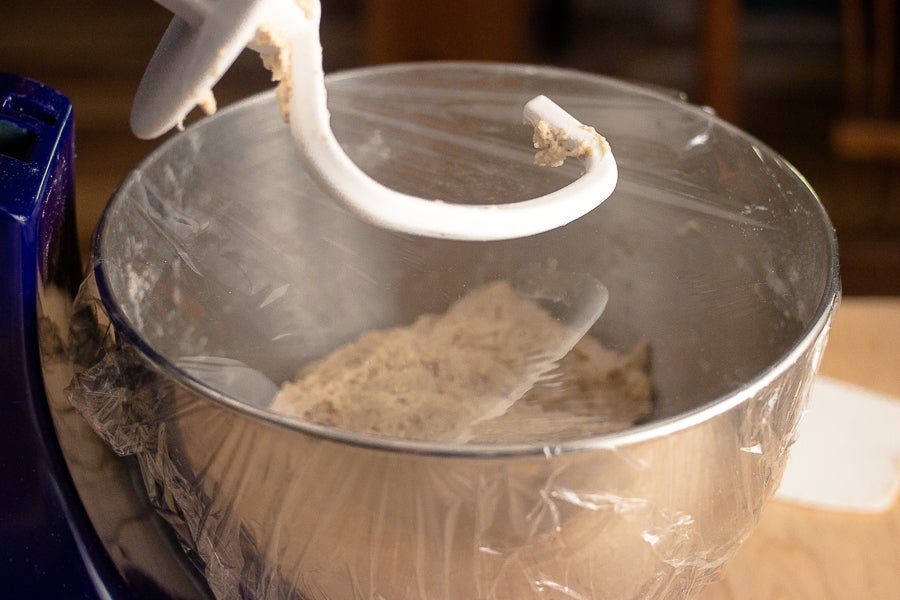
Here's how to make a stiff starter: Next time you pull your liquid starter out of the refrigerator to feed it, take 1 cup (8 ounces) of the starter (the part you'd ordinarily discard), and feed it a scant cup (4 ounces) of unbleached all-purpose flour – no water, just flour. What this will do is convert a starter that is equal parts water and flour to a starter that has twice the amount of flour as water, by weight.
Knead everything together until it feels smooth; you may need to add an extra tablespoon or two of flour, since liquid starters can vary in consistency.
This is easily done by hand, but if you prefer your stand mixer, set it on the lowest speed and use the paddle attachment.
Place your starter in an oiled container, with room for the dough to double in size (a small dough bucket works well for this).
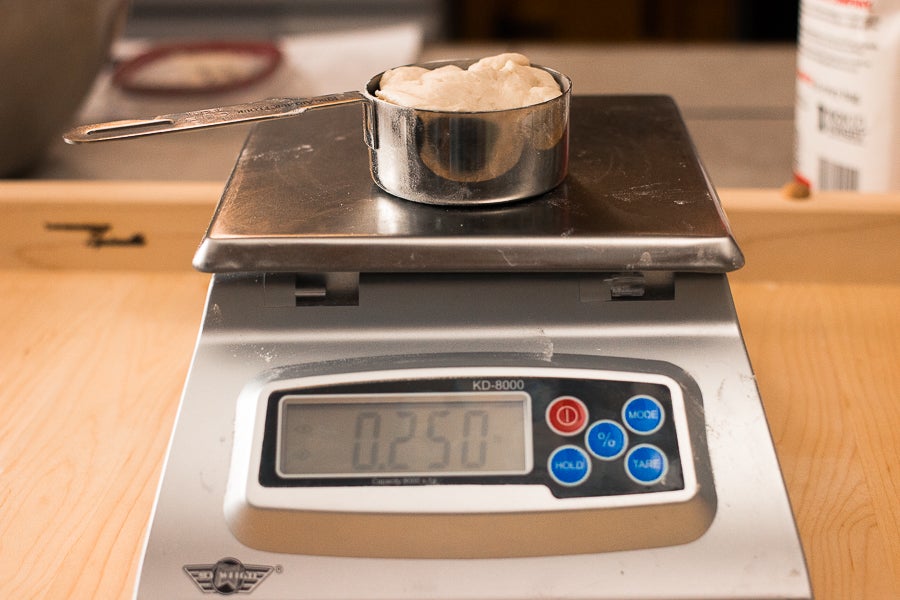
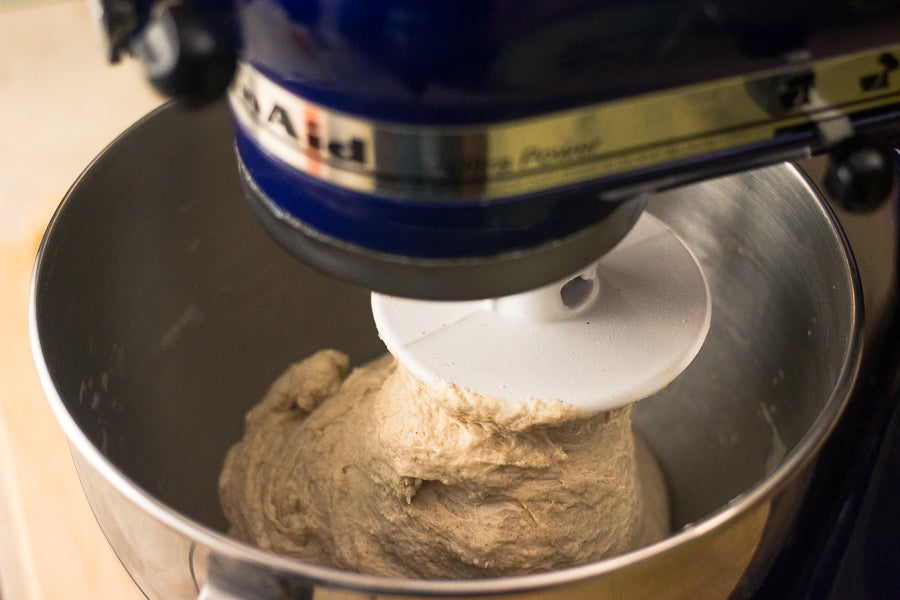
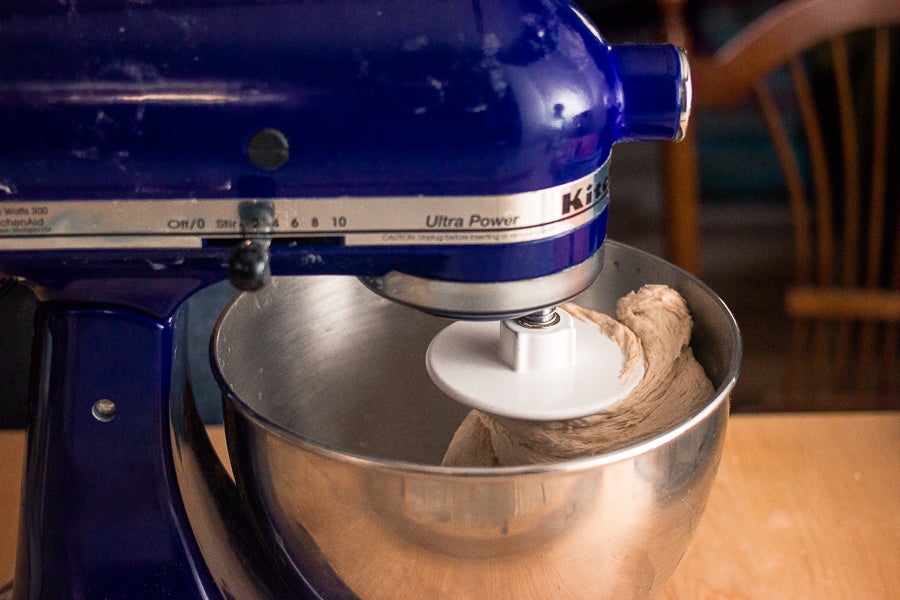
Now that you've transformed your liquid starter into a stiff starter, the next feeding should take place about 8 hours later, when your starter has domed and just begun to sink in the middle. Take 2 ounces of your starter (1/4 cup lightly packed), tear it into pieces, and feed it 2 ounces (1/4 cup) room-temperature water and 4 ounces (a scant cup) of unbleached all-purpose flour. Mix and knead everything together to form a fairly smooth dough.
Remember this ratio: 1 part starter : 1 part water : 2 parts flour. It will be your regular feeding routine for your stiff starter.
For this first feeding after transitioning from a liquid starter to a stiff starter, you'll have 10 ounces of discarded stiff starter. For those of you who can't bear to waste starter, check out our Stiff Sourdough Starter recipe, which offers instructions on converting stiff starter discard back to liquid "unfed" starter, suitable for use in all our recipes calling for "unfed" starter.
The point here is not to develop a strong dough, but to get an even consistency, with no dry spots. This shouldn’t take more than a few minutes.
Place the starter in an oiled container with a lid and allow it to ferment for 8 hours or until it's domed, doubled in size, and just beginning to sink in the middle.
This is not only the normal feeding routine for your stiff starter, but also the first part of our bread recipe, since, just like recipes calling for fed liquid starter, we're going to want to add this starter to our recipe when it's mature and at its peak of fermentation.
I've found that if I feed my starter right before I go to bed it will be ready to add to my recipe the following morning, so this is how I've written the recipe.
The timing of this overnight rise can vary, depending on how warm your house is, but don't worry if your starter has passed its peak, and is a bit more deflated than you expected when you get up in the morning – it will still work. Just pop it in the refrigerator until you're ready to mix your dough.
There are a few tricks you can try in case you find your starter is fermenting too quickly overnight. I feed my starter with cool water and occasionally add a pinch of salt to slow down the fermentation so that it will be ready to make bread with when I get up in the morning. Sometimes I mix up the starter the day before baking, and then pop it in the refrigerator until I’m ready for bed, when I remove it from the refrigerator. This gets the starter off to a slower start, and helps it to last through a hot summer night better than a starter that has begun fermenting at room temperature.
Note that you'll only use half of the starter for this recipe. Unlike other sourdough recipes on our site, there's no need to feed and perpetuate the remaining part of your starter in the middle of making this recipe. We're going to save a hunk of bread dough just before shaping the loaf, which will keep in your refrigerator for up to a week and that can be fed and perpetuated as your stiff starter for future baking.
You can either discard the remaining 4 ounces of starter or convert it back to "unfed" liquid starter as described in the Stiff Sourdough Starter recipe.
Artisan Sourdough Bread with Stiff Starter
The night before you plan to mix your bread dough, feed your stiff starter by kneading together the following ingredients:
1/4 cup lightly packed (2 ounces) mature stiff starter
1/4 cup (2 ounces) cool water
1 scant cup (4 ounces) King Arthur Unbleached All-Purpose Flour
The next morning, to make the dough:
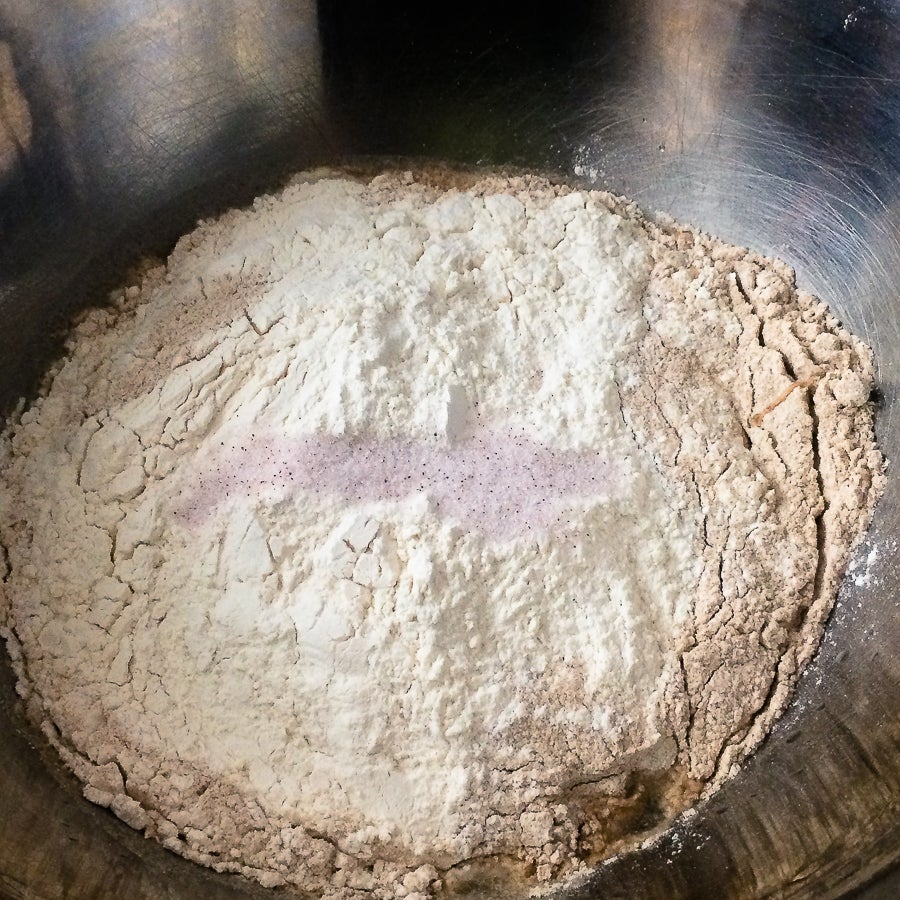
2 1/8 cups (17 ounces) room-temperature water
4 3/4 cups (20 ounces) King Arthur Unbleached All-Purpose Flour
1 cup (4 ounces) King Arthur Premium 100% Whole Wheat Flour
1/2 cup lightly packed (4 ounces) mature stiff starter (half of the amount from above)
2 1/2 teaspoons bread salt (or any finely ground salt)
Optional ingredients:
Artisan Bread Topping (or other seeds for sprinkling on top of the loaf)
Brown Rice Flour (mixed half and half with unbleached all-purpose flour to prevent the dough from sticking to cloth and baking vessels)
Now we're ready to mix and knead our dough!
Jim Lahey's “no knead” recipe that rocked the baking world about a decade ago may have benefited in part from an older technique, called “autolyse,” developed by bread expert Professor Raymond Calvel.
Prof. Calvel discovered that by first mixing the flour and water in a recipe and allowing it to sit for 20 to 60 minutes before adding the remaining salt and leavening, several desirable results occurred. The flour became fully hydrated; the gluten bonds developed on their own, and the dough relaxed in a way that allowed for better stretching and expansion later on (there’s a lot of chemistry involved here, so just trust me, it works!). The salt and leavening agents are traditionally left out of this phase because both have a tightening effect on gluten.
We're going to try a mixing and kneading method that's somewhere between these two methods. I call this method “Less is More Kneading,” since it’s not quite “no-knead,” nor is it a true autolyse.
We'll mix all the ingredients together briefly, just until the flour is fully moistened, and then cover the dough and let it rest for 30 minutes. After that we'll knead for only a minute or two. This method yields many of the same benefits as autolysing, but avoids the difficulty of incorporating the stiff starter later in the process.
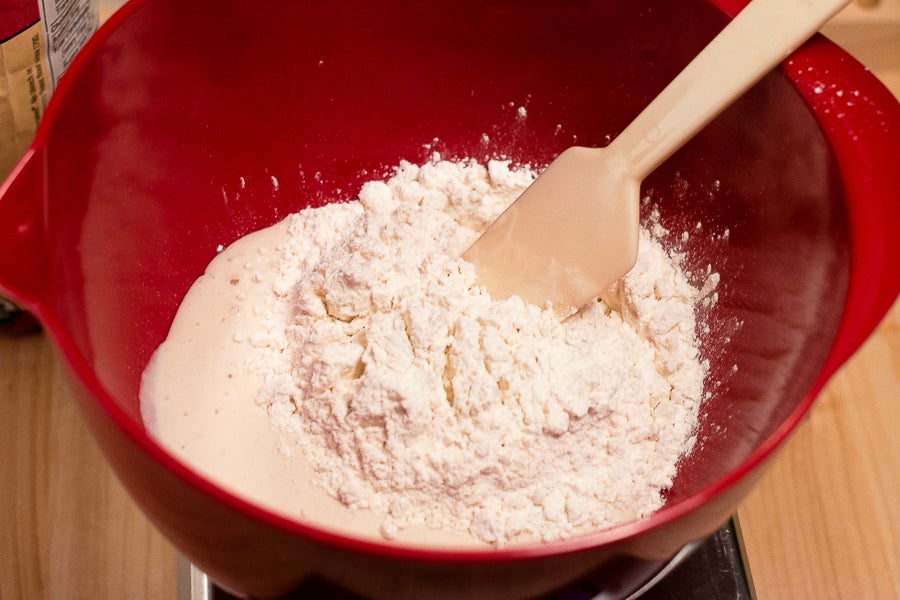
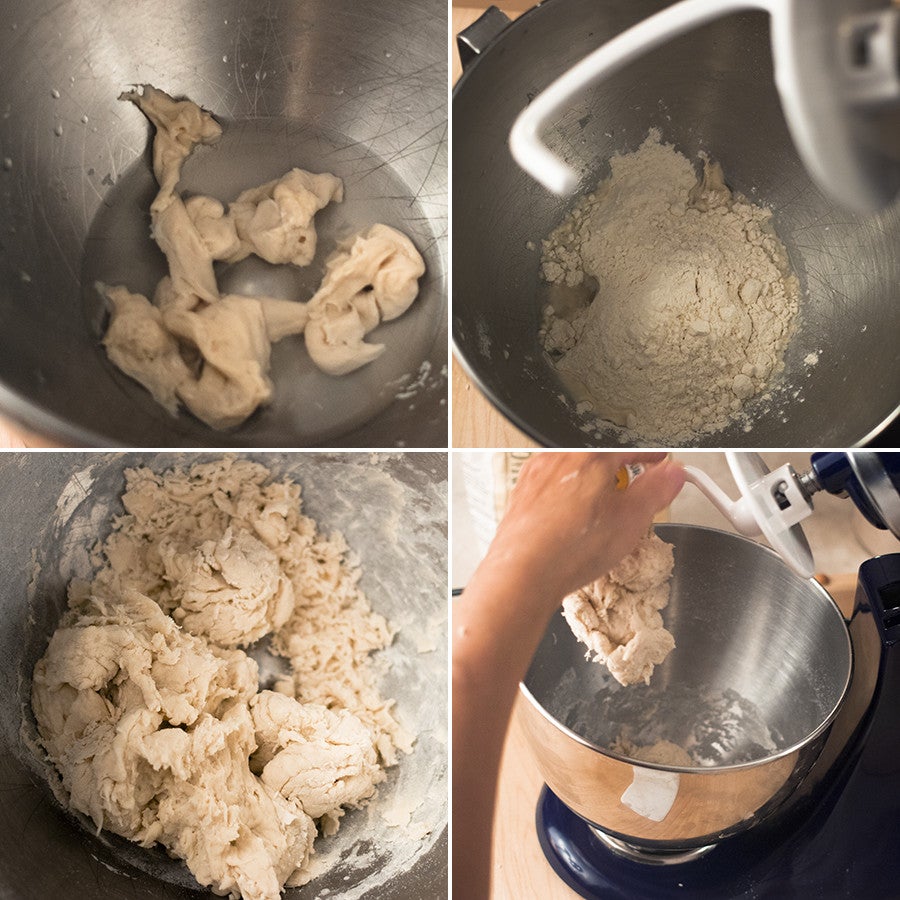
Pour the 17 ounces of water into a bowl. Rip the 4 ounces of starter into small pieces and add to the water.
Add the flour and salt and mix only until the flour is fully moistened.

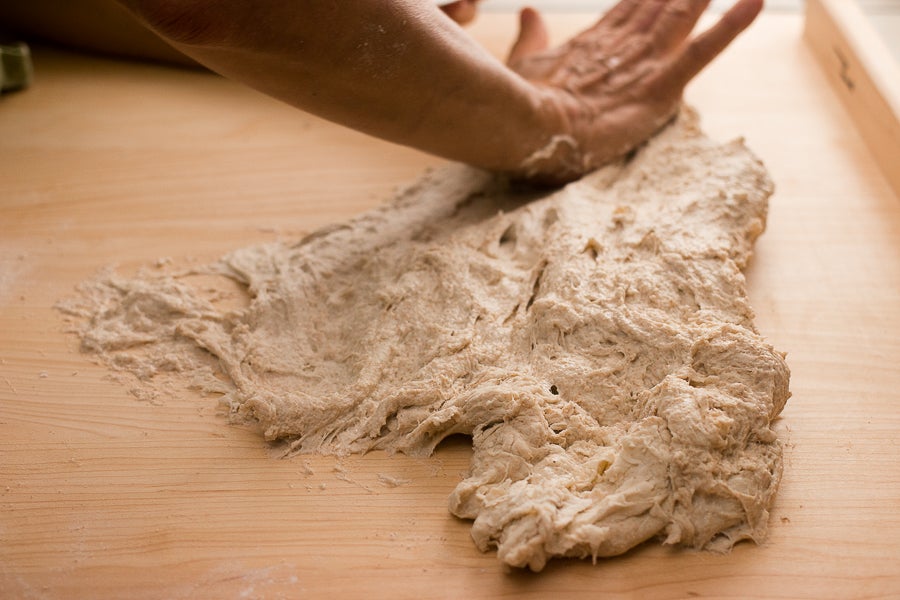
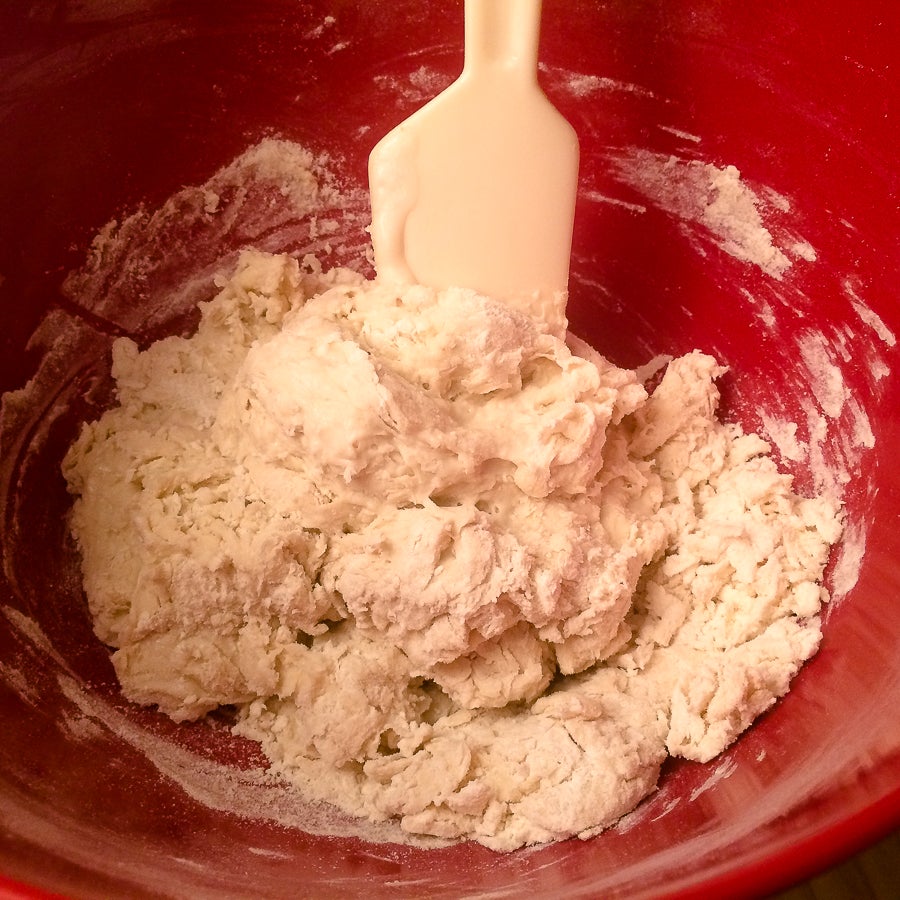
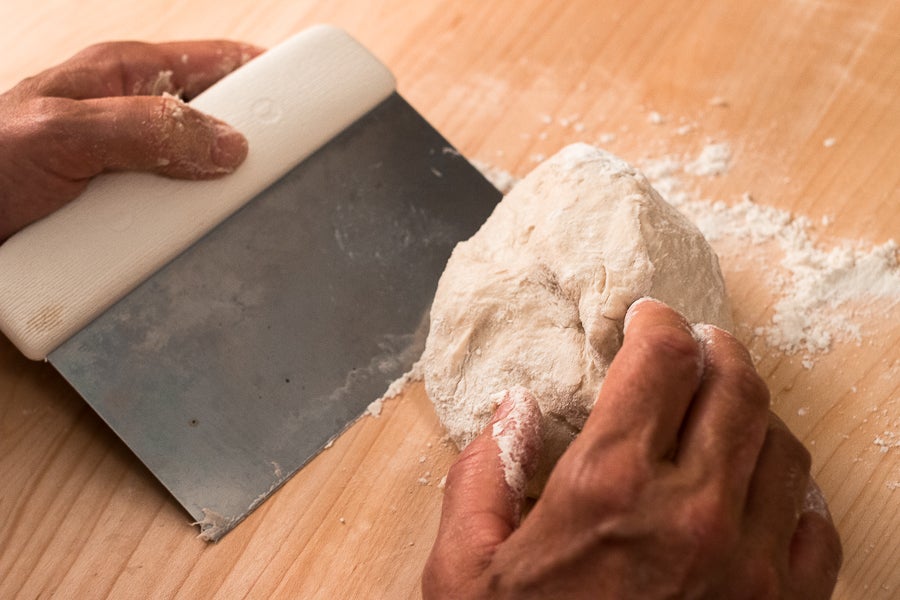
To mix by hand, stir the ingredients in the bowl with a dough scraper until the dough becomes a shaggy mass. Turn the dough out of the bowl onto your work surface (don't add additional flour) and smear the dough with the heel of your hand, so that you force all the flour to hydrate and blend the starter with the dough.
Scrape the dough off the board with your plastic scraper (or a bench knife) and turn the dough to be sure there are no remaining pockets of dry flour, which can translate to lumps in your dough. This whole process should only take a minute or two.
Return the dough to the bowl and cover with plastic wrap.
To use your stand mixer, mix on the lowest speed with the dough hook for about 1 minute. Scrape the sides of the bowl down as necessary to insure all the flour is moistened. Cover the bowl with plastic wrap and allow the dough to sit for 30 minutes.
Once the dough has rested, knead by hand for two minutes or mix on speed 2 in your stand mixer for 1 minute.
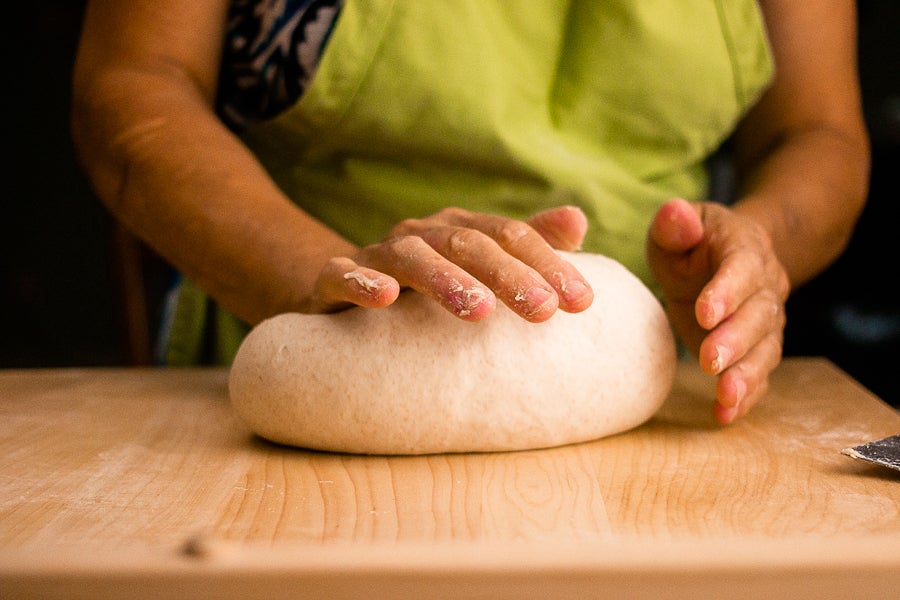
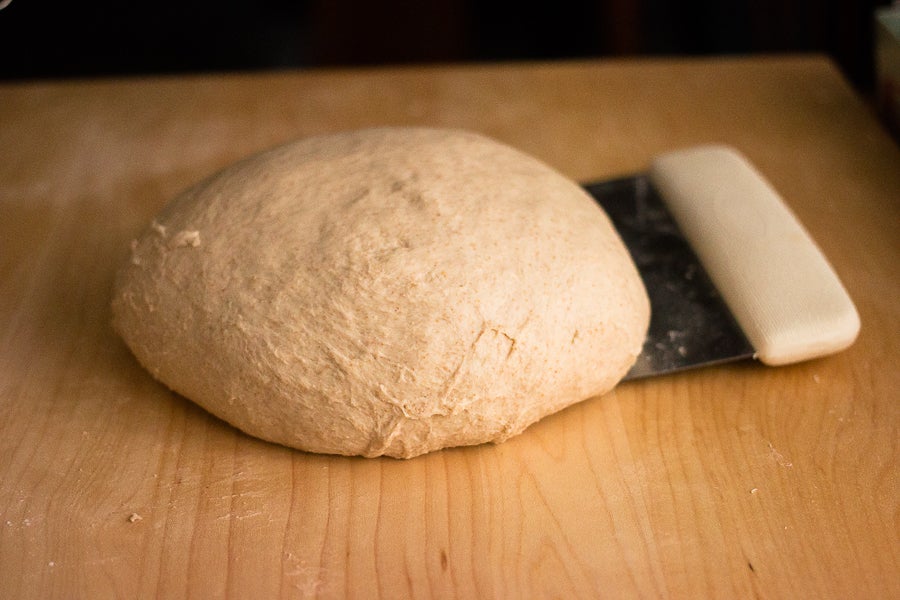
When kneading a wet dough by hand, resist the urge to add additional flour. Scoop the dough up with your scraper or bench knife, letting the dough hang briefly (this stretches it), then slap it down on your work surface. Fold the dough over on itself, and repeat. This slap and fold method replicates the stretching and folding of traditional kneading, but doesn't allow the dough to stay on the table long enough to stick very much. Frequently scraping the board will help keep the sticking to a minimum.
You'll notice the amount of time we spend kneading is minimal. Why is that?
Speaking of an open crumb (i.e., large holes in the finished loaf), how do you make that happen?
Generally the higher the hydration (amount of liquid in the dough compared to flour), the more open the crumb – think ciabatta. However, sourdough's acidity tightens the dough's gluten, making it more difficult for large holes to form. Thus, kneading it less will keep the dough relatively relaxed, encouraging that sought-for open crumb.
Another factor affecting the crumb is the protein content of the flour. In general, if you're looking for a more open crumb in your bread, our unbleached all-purpose flour is a better choice than our unbleached bread flour, since the higher protein content of the bread flour will tend to give you a stronger dough, which often leads to a tighter crumb structure.
Finally, the way you shape and handle the bread also has a big effect on crumb, as does the final rising of the shaped loaf and the baking method you use. We'll cover these two factors in our upcoming posts.
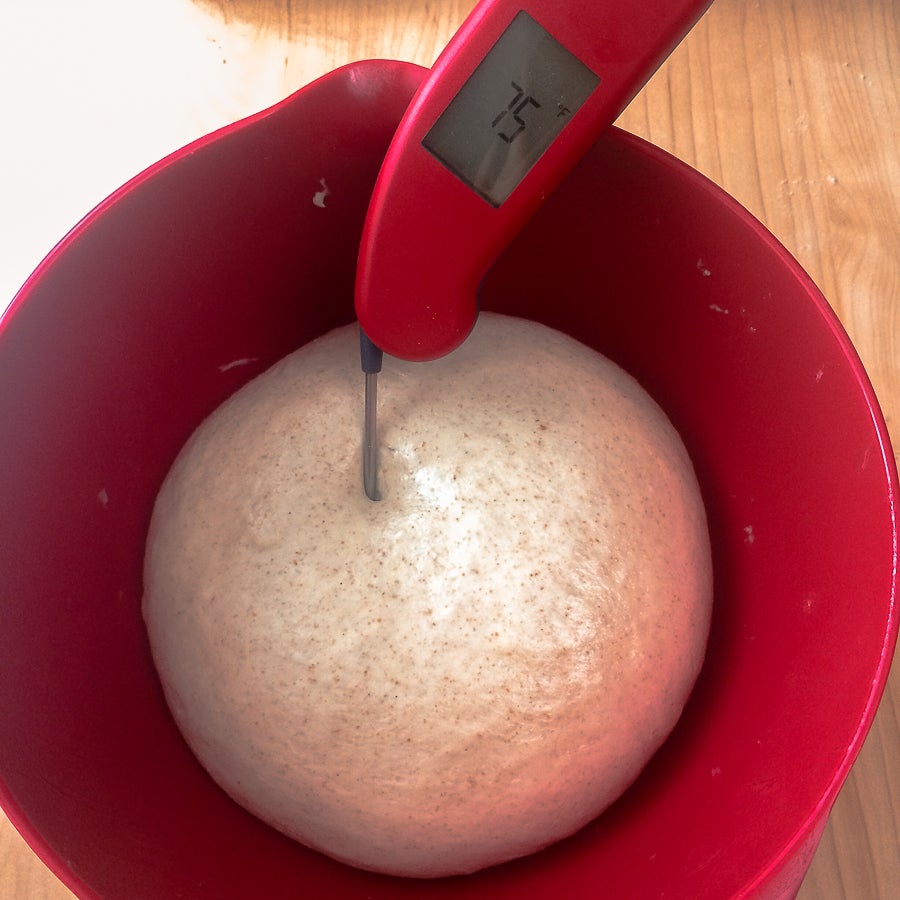
Place the dough in an oiled bowl covered with plastic wrap. Ideal dough temperature for sourdough is around 76°F, although a few degrees one way or the other won't hurt anything. If your house is cooler than that the dough will still rise, but it will take longer.
And that's where we'll leave things for now: with your bread dough happily rising.
A long time ago I worked for a whole-grain collective bakery called Wildflour. We published a book of recipes from similar bakeries all over the country called Uprisings: The Wholegrain Bakers' Book. Here's an illustration I drew for a sourdough recipe from a bakery in Wisconsin. It makes me laugh now to look at it, but I always think of this when I set my sourdough to rise.
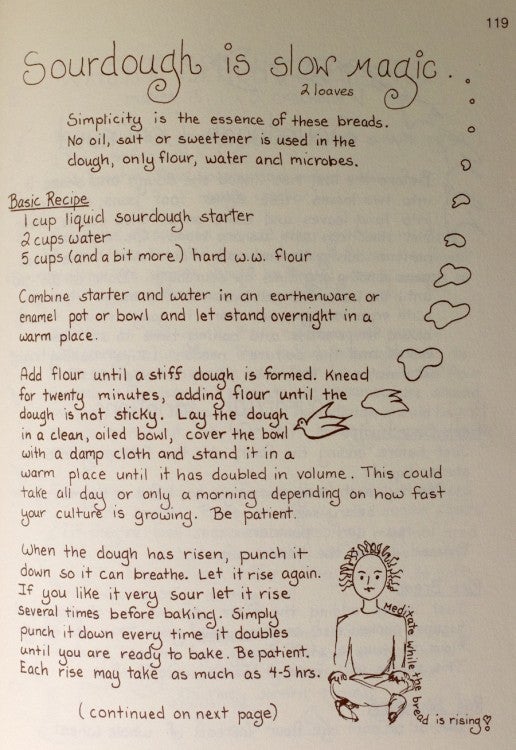
OK, so we were hippies, but we knew what we were talking about!
Stay tuned for tomorrow’s installment, where we take on dough temperature and folding!
If you're just beginning your sourdough journey, here's a sourdough post to help you create your own sourdough starter. Or you can purchase a starter from us, and we'll offer lots of help and guidance when it comes to feeding and maintaining your new pet.
We love sourdough baking and have lots of wonderful recipes to share, and a sourdough baking guide to help answer your questions and get you started on the right path.
Are you ready to take your sourdough baking to the next level? Don’t worry, we're here to coach you along the way. The bakers on our Baker's Hotline (855-371-BAKE) are part of your team, ready to offer immediate inspiration and assistance when necessary.
Throughout my baking life I've been guided by many great teachers and books, but the one book I continue to keep close for reference and inspiration is Jeffrey Hamelman’s “Bread.” Jeffrey is the director of our King Arthur Flour Bakery, a Certified Master Baker, and an instructor in our Baking Center. I've been lucky enough to roll baguettes across the table from him in the bakery and also take his Advanced Bread Baking class. In fact, the starter I use today was first created in his class. If the concepts I introduce here inspire you with questions about the science and history behind them – the “why” of it all – I wholeheartedly refer you to Mr. Hamelman’s book. He’s a gifted baker and teacher, and you won't go wrong under his guidance.
Ready for more? Read Artisan sourdough bread tips, part 2; and Artisan sourdough bread tips, part 3.
An earlier version of this blog post suggested that a stiff starter can promote more sour flavor in your sourdough bread, and that a stiff starter holds up better in the refrigerator. Just like you, we endeavor to continue to learn and grow as bakers here at King Arthur Flour. With the added insight of microbiologist Debra Wink, we have removed these claims and will delve further into sourdough flavor development in a future blog post.
