Apple pie has everything a satisfying dessert needs — it’s buttery, sweet, spiced, and incredibly comforting. While apple pie is quite fantastic in any form, there’s an easy trick you can use to elevate your pie to a new level. We’re talking a show-stopping, mouth-watering, the most-likes-you’ve-ever-gotten-on-Instagram level.
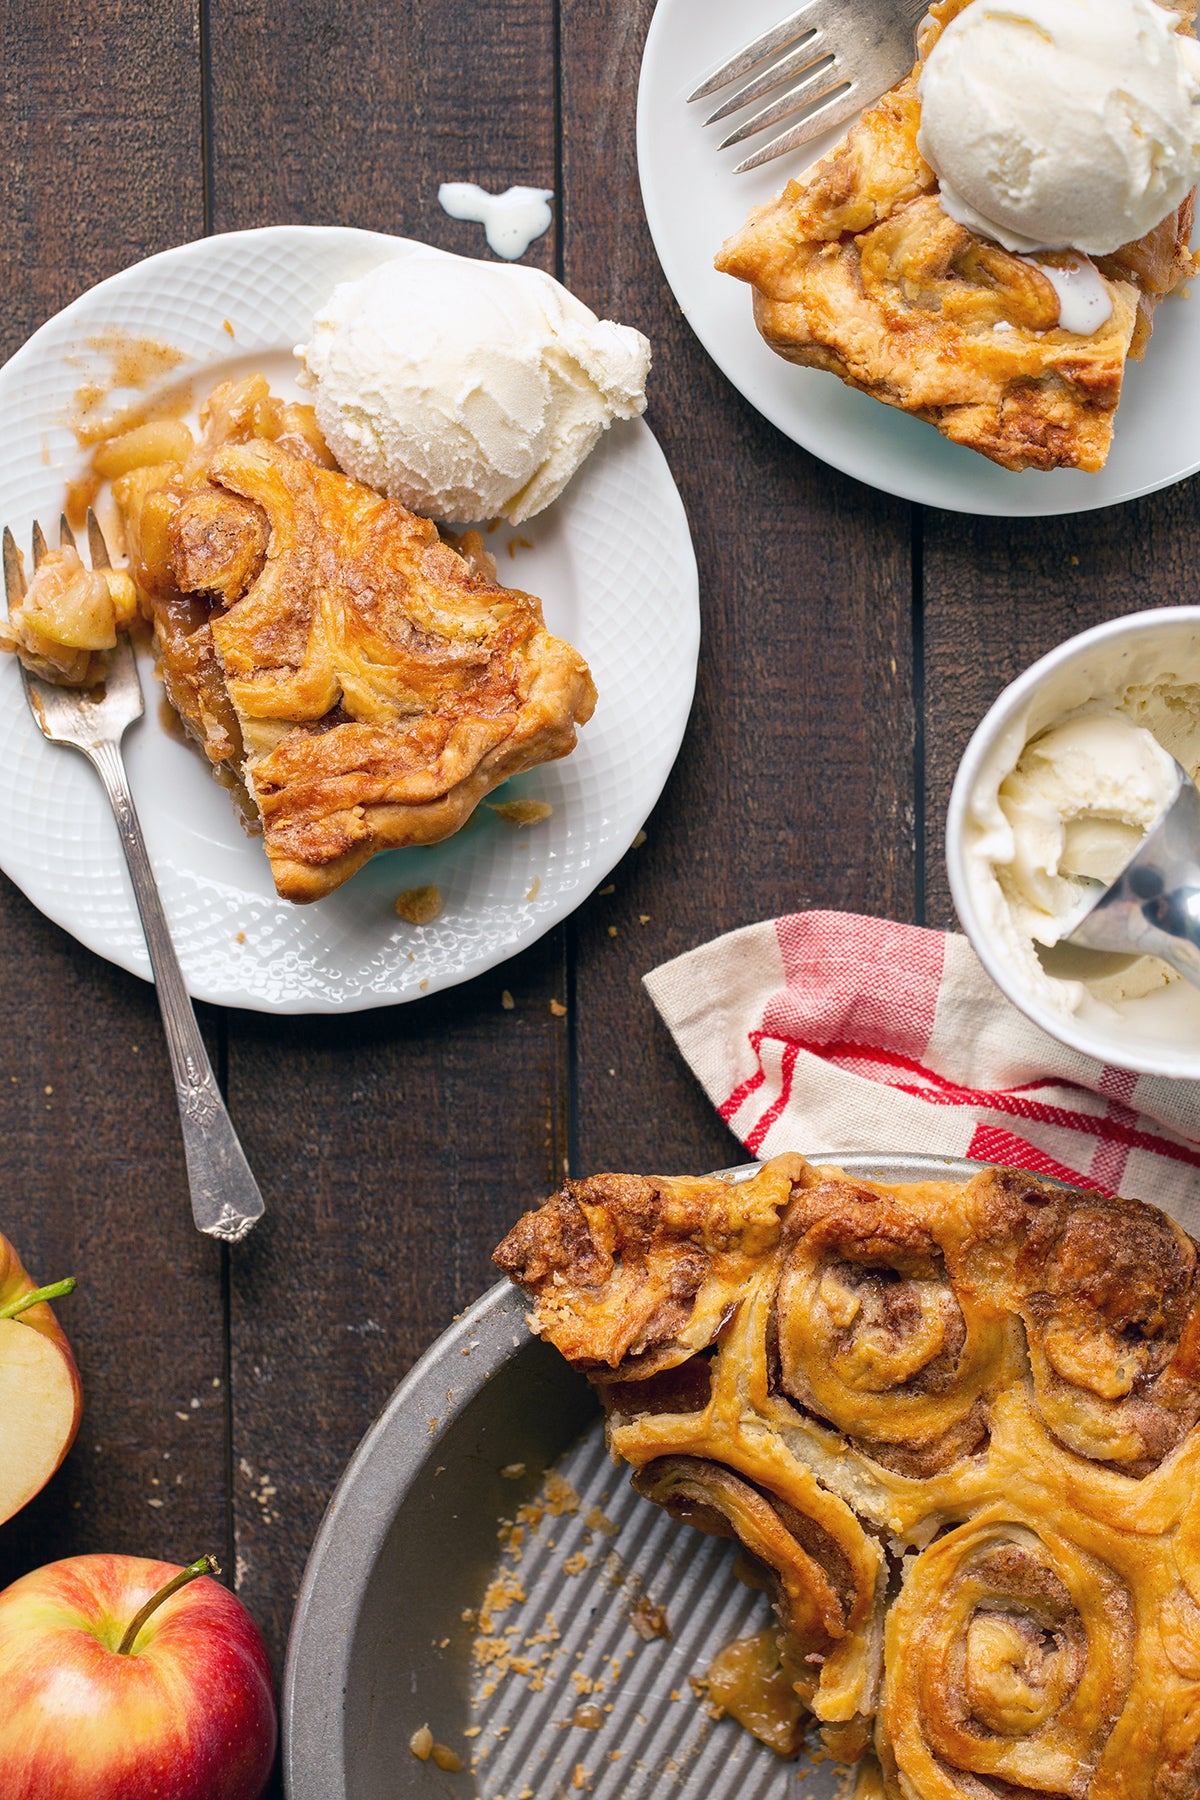
Prepare yourself for an apple pie with a cinnamon bun crust.
Think about it: these two baked goods — apple pie and cinnamon buns — are perfect complements. The visual appeal of cinnamon swirls plus the sweet-tart crunch of apples? They’re a match made in heaven.
This pie can be a showstopping centerpiece for a special meal or an incredible breakfast.
Here’s the good news: since these "buns" aren't made with yeast but rather pie crust, you don’t need much beyond what you’d normally use to make a regular apple pie. You’ll only need a few tablespoons of extra butter, about 1/3 cup (67g) of cinnamon-sugar, and roughly 15 additional minutes to devote to making your pie.
You also need a solid apple pie recipe.
The beauty of this cinnamon bun apple pie technique is that you can use practically any apple pie recipe. If you have a favorite recipe that you’ve been baking for years, you can give it this cinnamon bun treatment!
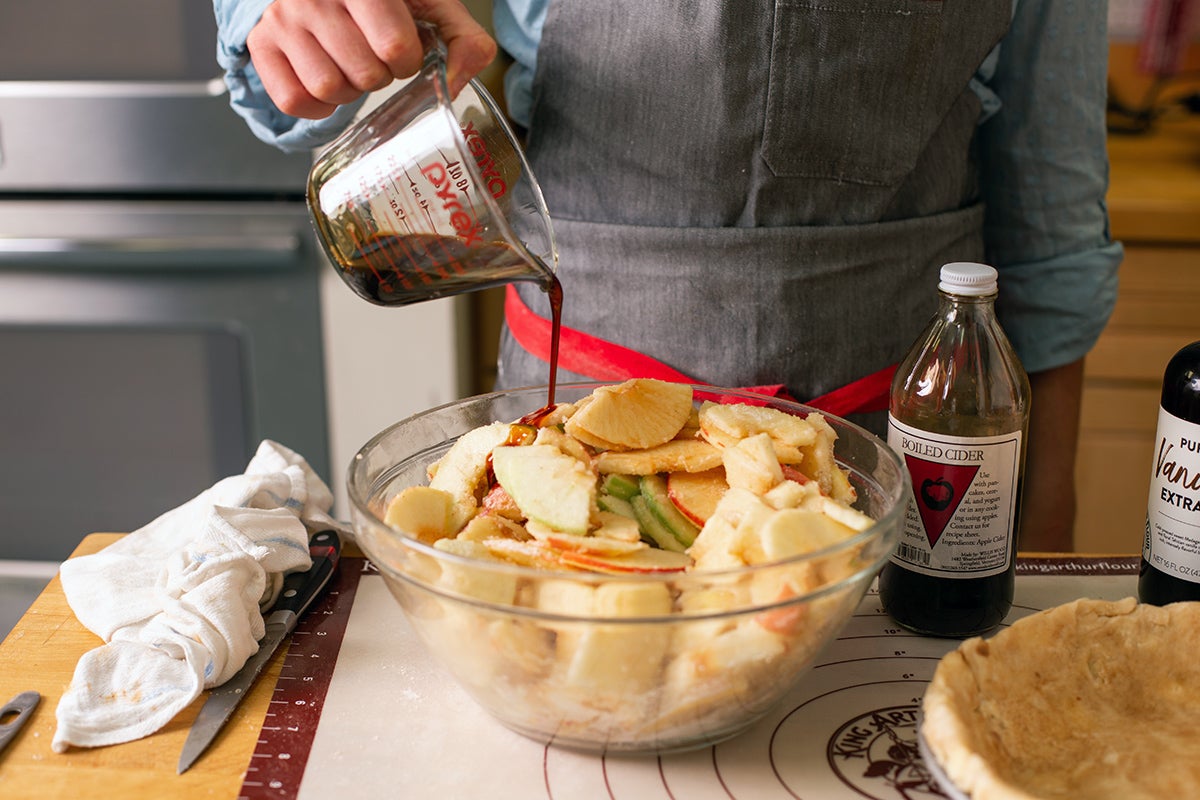
Or if you’re in the market for a standout apple pie recipe, use one of our favorites. Our Apple Pie recipe is classic and full of flavor, accented with boiled cider. It’s our go-to around the holidays.
The only requirement is that you choose a recipe that has both a bottom and top crust. If your pie recipe isn’t a double-crust pie but instead has a crumb or streusel topping, either swap in our Classic Double Pie Crust for the pastry part of your recipe, or make a pastry top crust using your own favorite recipe.
Ready to start making your cinnamon bun apple pie? Let’s dive in!
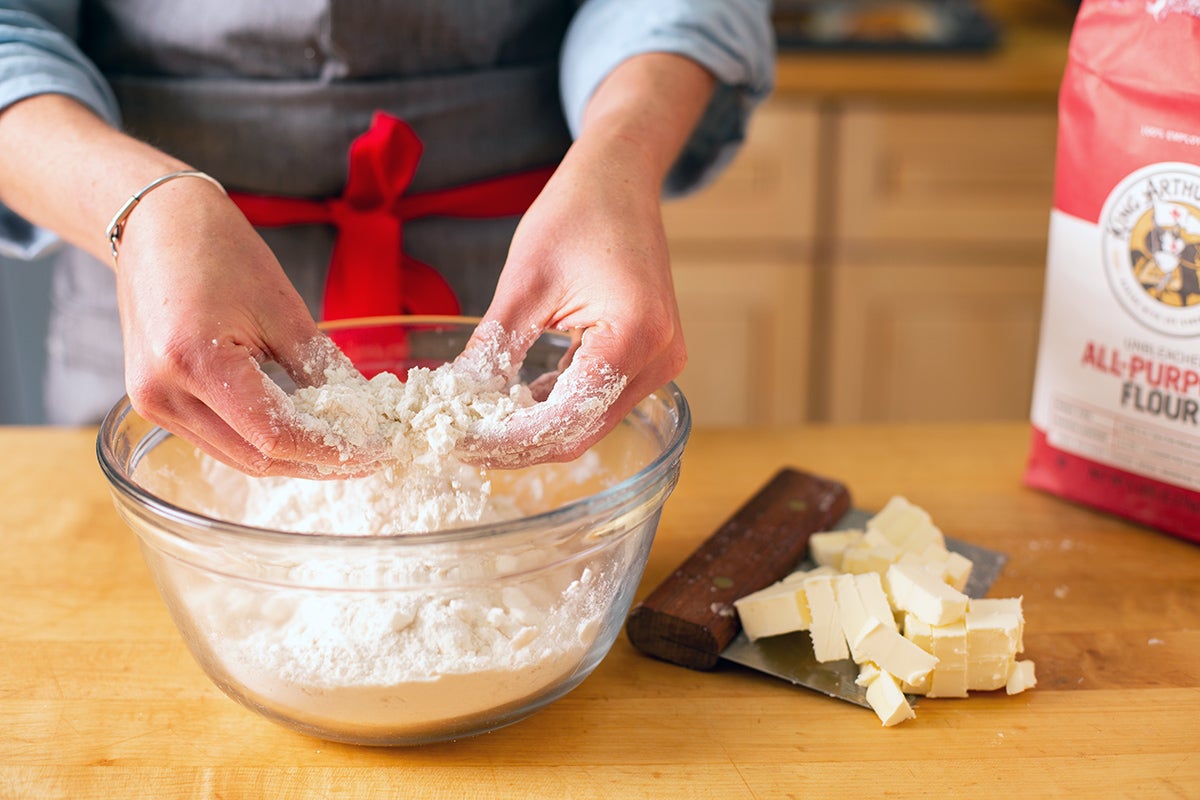
Prepare your double pie crust according to the recipe, whether it’s your own or our Classic Double Pie Crust.
If you’d like to see step-by-step instructions for how to make pie dough, complete with photos and video, check out our Pie Baking Guide.
Once you’re ready to divide the dough, divide it 40/60 (the larger piece will be the bottom crust) rather than in half. This will give you enough dough for the bottom crust to come up and over the sides of the pan. You’ll need less crust for the top, since it only needs to meet the edge of the bottom crust.
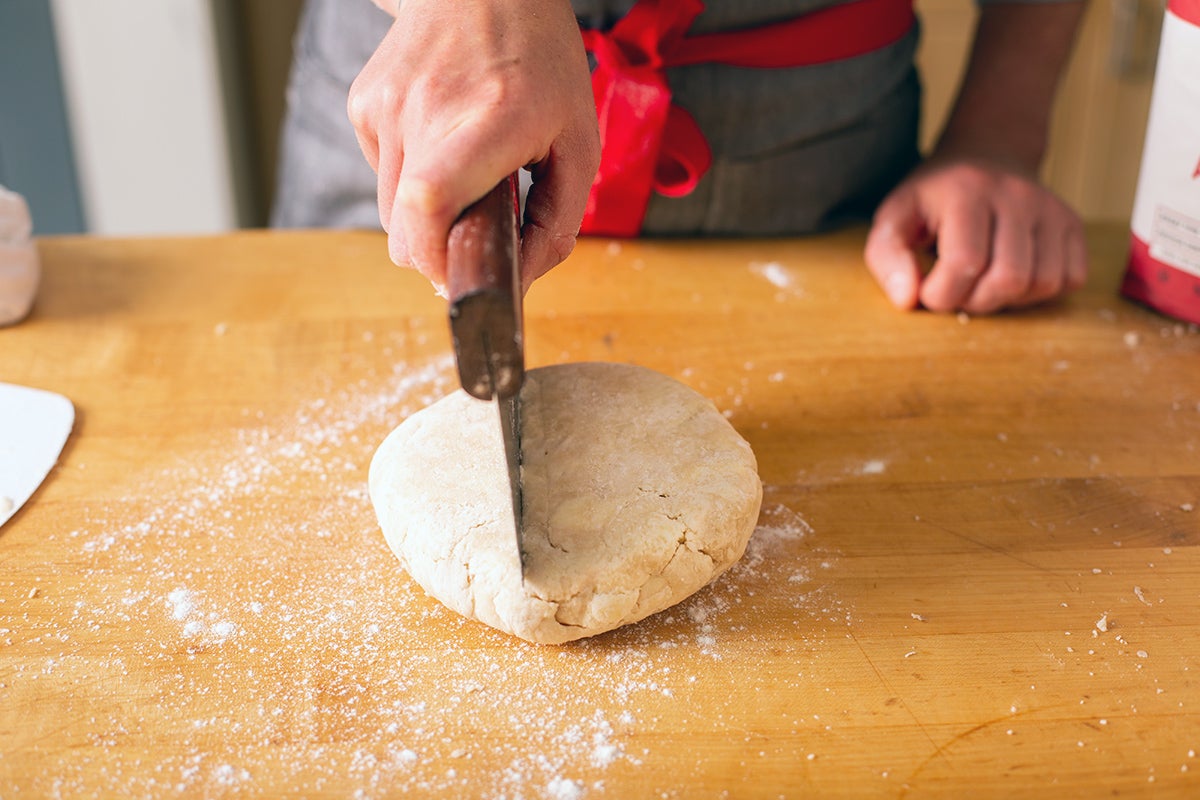
Try to shape the smaller piece of dough into a square or rectangle, if possible. (This will come in handy later — you’ll see!)
Wrap the discs of pie dough in plastic or your favorite reusable wrap, and chill for about 20 to 30 minutes or for up to three days. (If you’re going to keep your pie dough in the fridge for more than a few hours, read our post, Vinegar in pie dough, before making your crust.)
Once your crust has properly chilled and feels cold to the touch, you’re ready to roll. (If your crust has been chilling for more than 30 minutes, let it rest at room temperature for about 10 minutes so it softens slightly and becomes easier to work with.)
Start by working with the smaller piece of dough; this will be your top crust.
You can flour your work surface or roll out the dough between two pieces of parchment paper to keep it from sticking. I usually use just a whisper of flour on our rolling mat to ensure easy rolling.
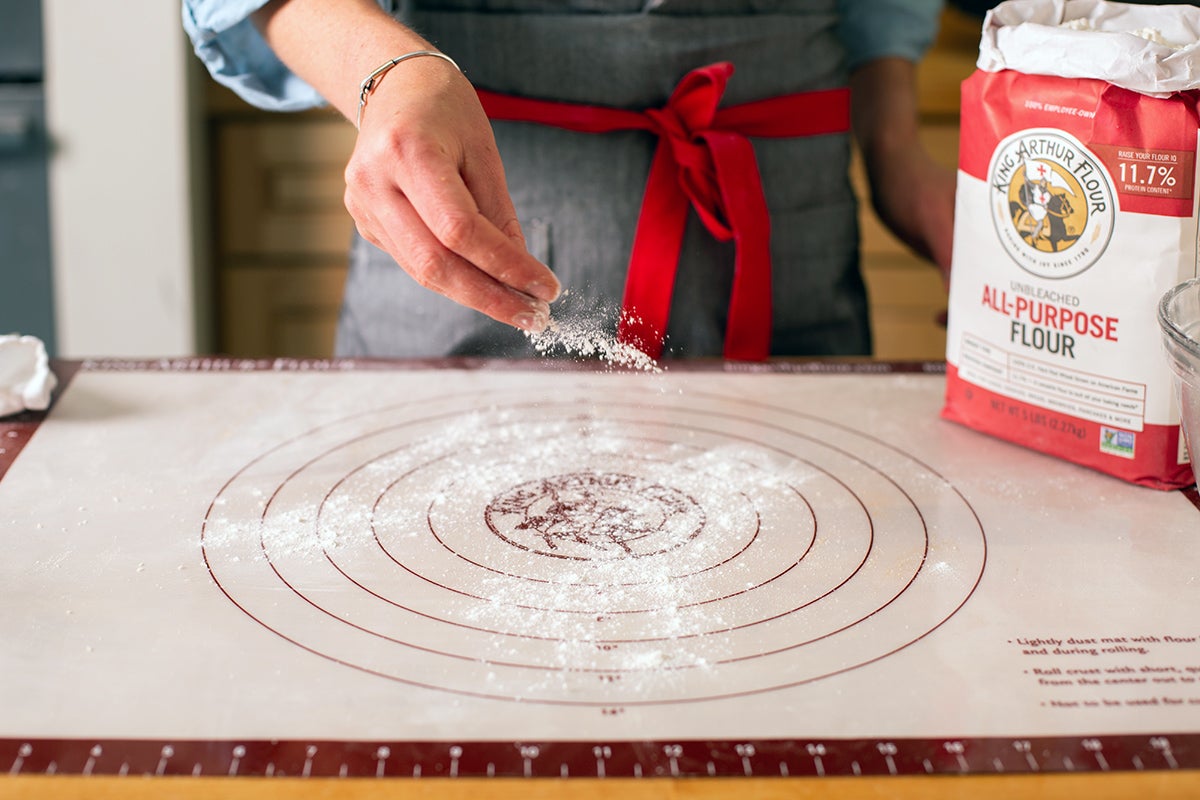
Roll out the top crust into a rectangle that’s about 1/8” thick, roughly 9” by 11”. If it ends up being more of a circle, that’s OK too. (You’re more likely to end up with a rectangle if the crust is in that shape while it chills.)
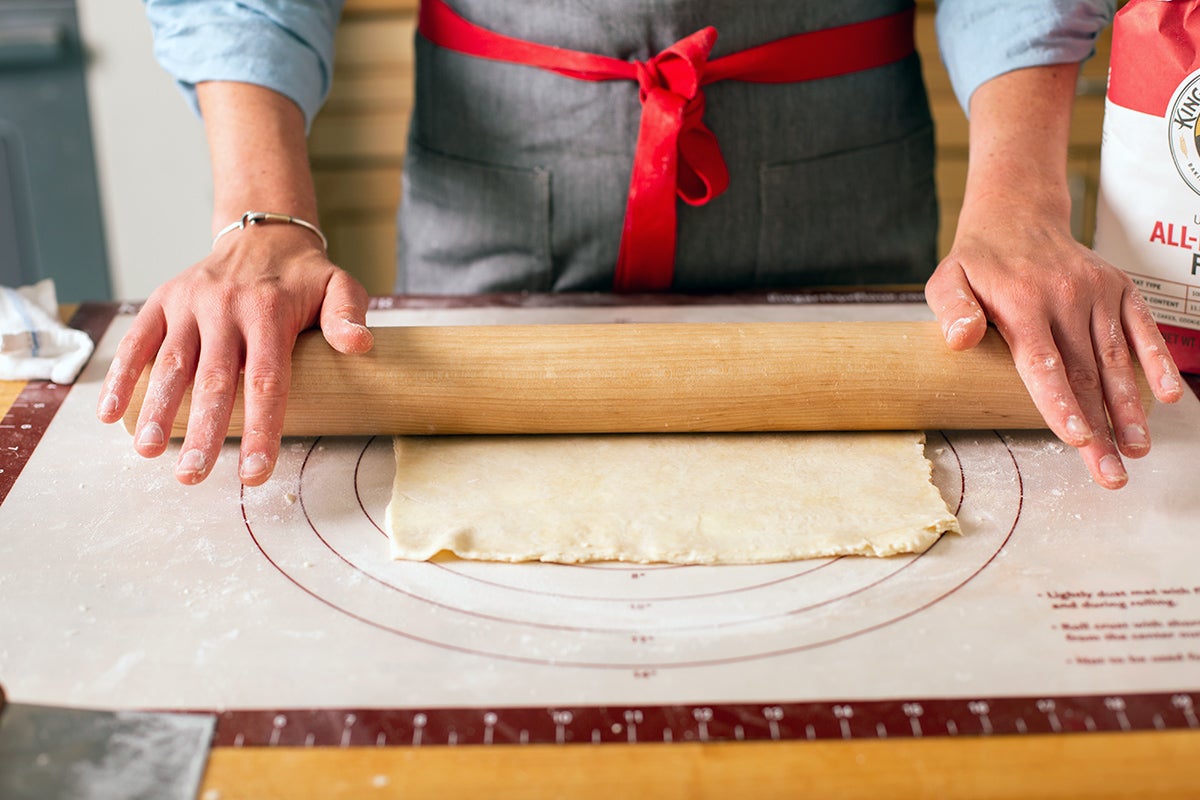
Next, spread about 2 tablespoons (28g) of room-temperature butter over the surface of the crust, leaving about 1/4” along one of the shorter edges bare.
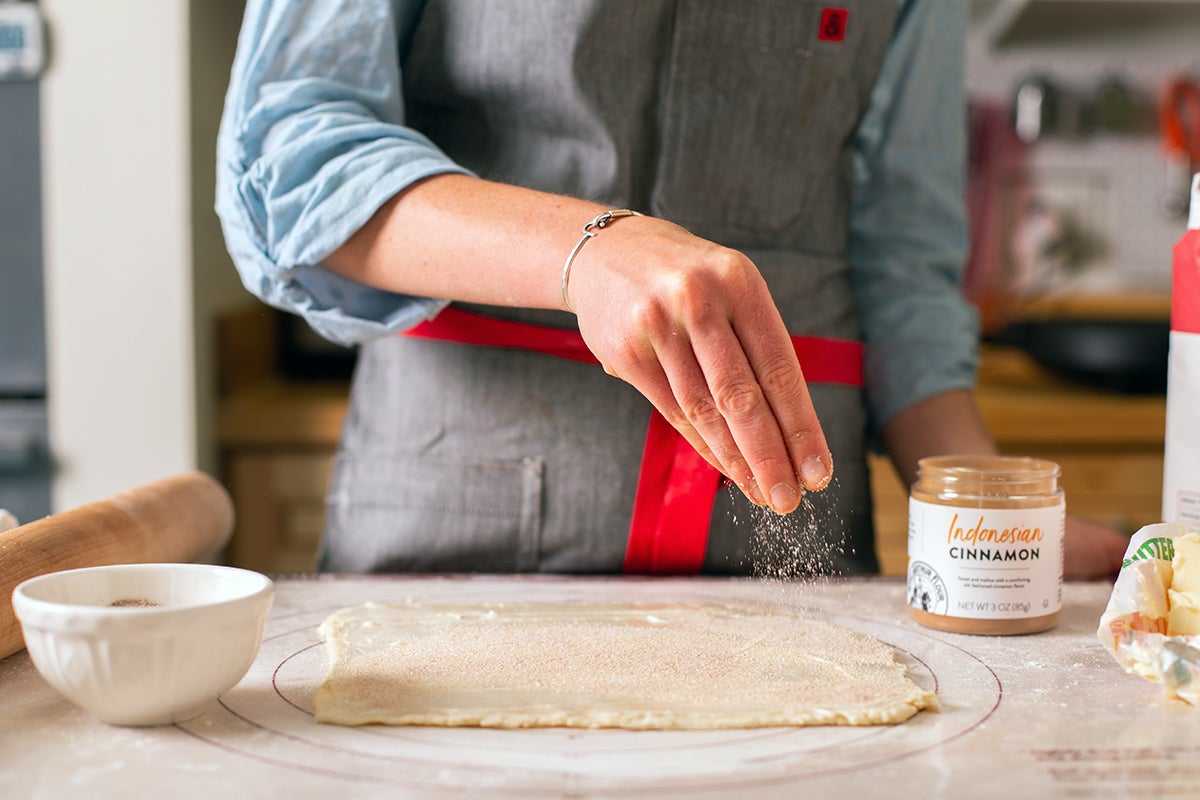
Mix up some cinnamon-sugar by combining 1/4 cup (49g) of sugar with 1 tablespoon of cinnamon. You can use brown sugar or granulated white sugar — your choice. You can also use 1/4 cup of Cinnamon-Sugar Plus if you're looking for a shortcut.
Sprinkle the cinnamon-sugar over the butter all the way to the edges, except for the side without butter. Leave that one bare — it’ll be easier to seal the seam if there’s nothing on this part of the pie dough.
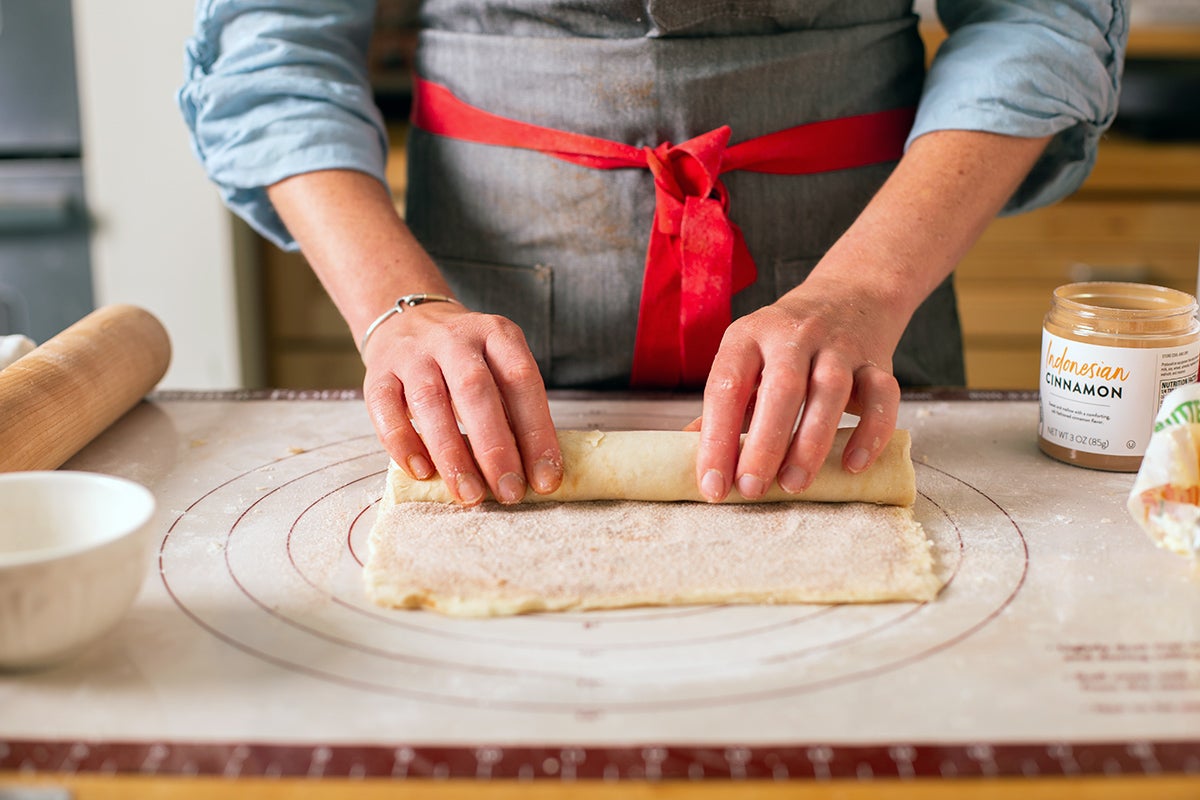
Roll the dough into a log (starting at the cinnamon-sugared short side) to encase the filling. When the dough is all rolled up, pinch the seam shut and turn the log so that the seam is down. Aim for a log that’s about 9” to 10” in length.
Wrap the log in plastic or your favorite reusable wrap and place it in the freezer to chill.
Pro tip: If you want your cinnamon swirls to be perfectly round, cut an empty paper towel round in half the long way. Open up the cardboard and place your wrapped log of pie dough inside. The cardboard will cradle the dough, helping it hold its shape while it firms up.
It’s time to work with the larger piece of dough, which will soon become your bottom crust.
Roll out the dough using a similar method as the top crust — either with a light dusting of flour, pieces of parchment paper, or a silicone rolling mat.
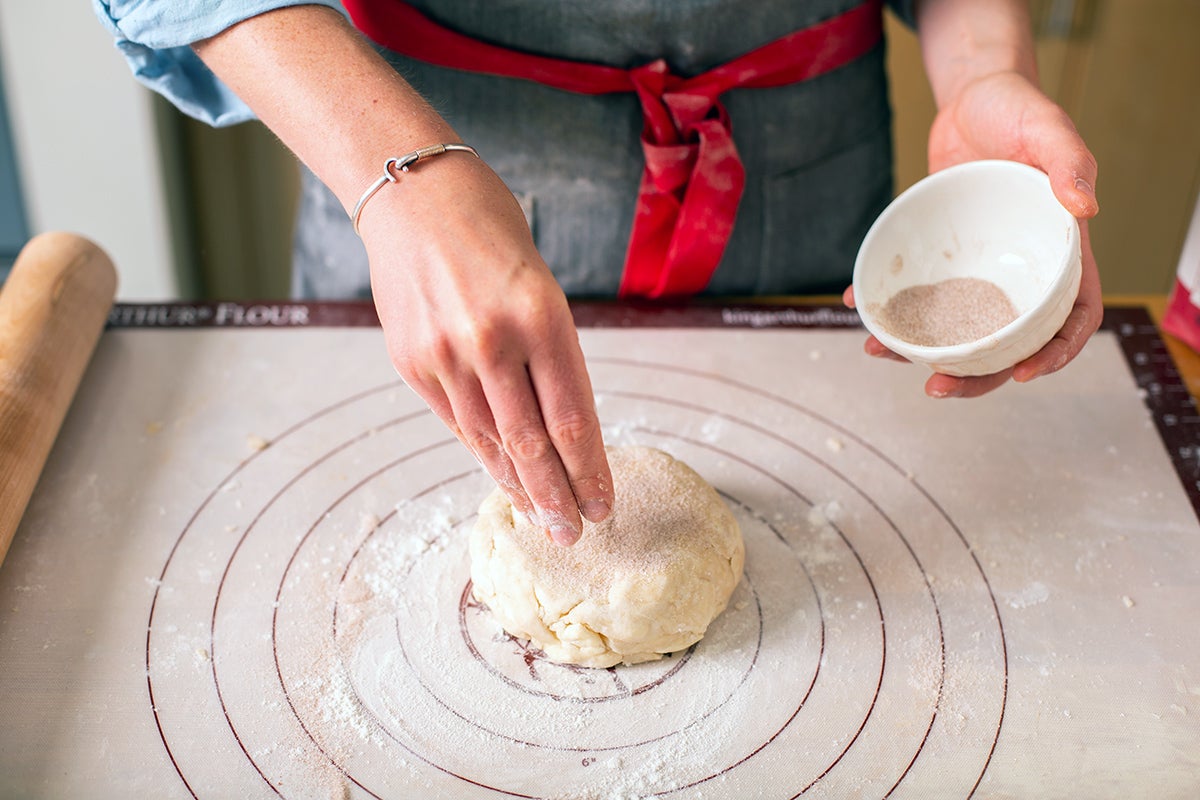
Pro tip: Use flour to coat the bottom of the pie dough, but use cinnamon-sugar for the top. It’ll infuse extra cinnamon bun goodness into each and every bite.
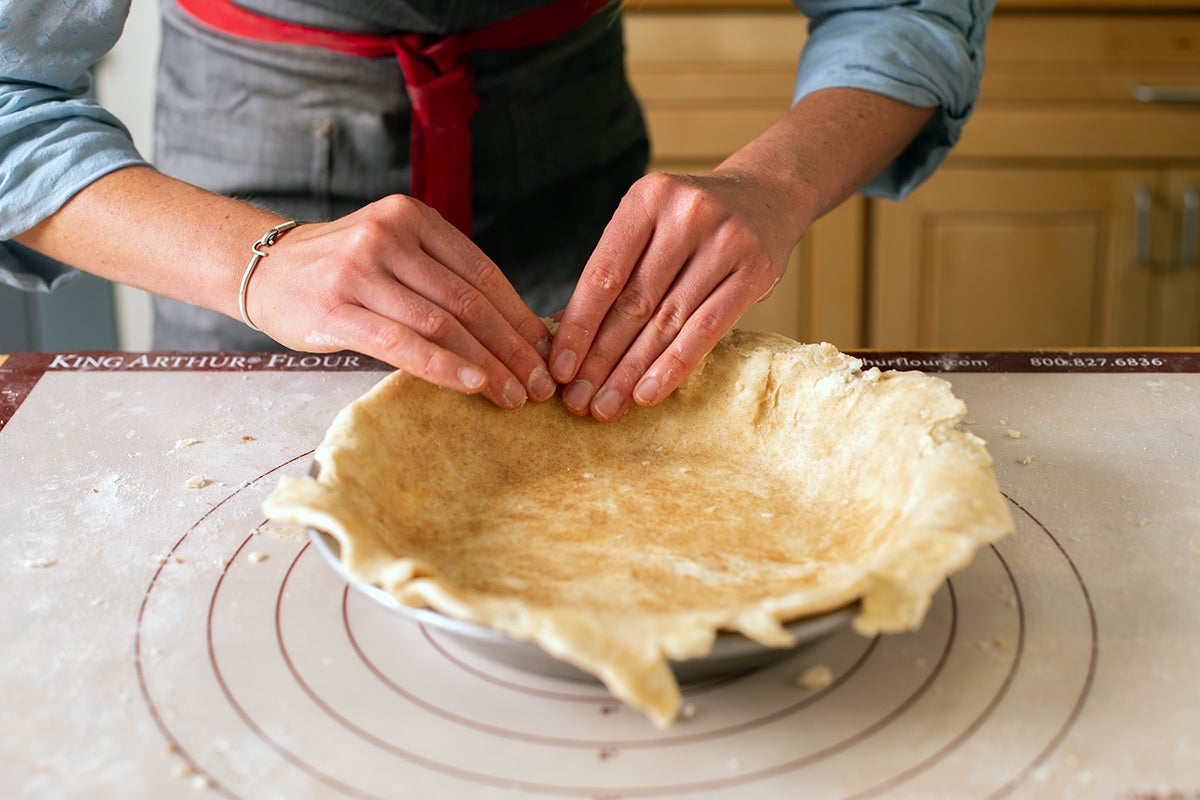
Once the crust is fully rolled out, it should be about 1/8” thick and about 14” round. This way you’ll have plenty of dough to cover the sides of the pan and create a tall edge.
To transfer the dough, fold it in quarters and move it to a metal pie pan. (Why metal? Find out in our post, The best pie pan you'll ever own.) Unfold the dough so it covers the entire pan. Tuck any excess dough that’s hanging over the side of the pan under itself to make tall sides.
Cover the pie crust (I like to slip the entire pan into one of our Double Bread Bags) and place it in the fridge to chill.
While the crust chills, you can prep the apples according to your recipe. Most call for peeling, coring, and slicing. (Our Apple Peeler, Corer, and Slicer makes this otherwise onerous task quite enjoyable.)

Toss your apple slices in a few teaspoons of lemon juice to keep them from turning brown while they rest at room temperature. Wait to add the rest of the filling ingredients (thickener, sugar, spices, etc.) — you’ll use that step to keep you busy while the rolled-out top crust chills.
For now, cover the apple slices (and lemon juice, if using) with a lid or plastic and set aside.
Remove your cinnamon-sugar log from the fridge and place it on a cutting surface.
Using a sharp knife, cut the log into 1/2" slices. Try not to use too much downward pressure to keep the log from flattening on the bottom. (There’s no need to use dental floss to slice the dough as you might for cinnamon buns — the dough should firm up as it chills and become easy to handle.)
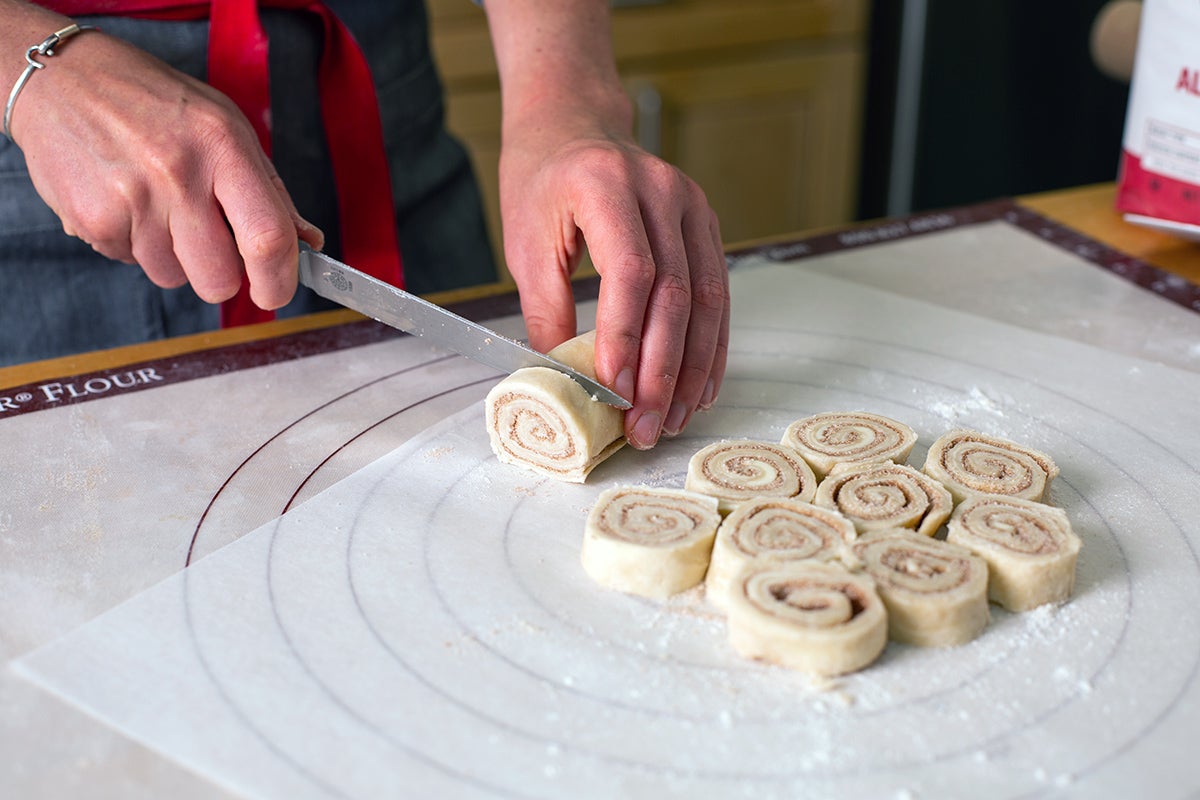
Try to end up with about 15 to 20 swirls; 18 is ideal.
Once you have all your swirls, place them on a piece of parchment paper. Arrange the swirls in a circle, using the prettiest swirls to fill in the center. Place them close enough so that the cinnamon swirls are gently touching each other; a few gaps between swirls is just fine.
Dust the top of the cinnamon swirls very lightly with flour. Don’t worry about covering up the beautiful design; the flour will roll into the dough and disappear. You can also brush off any excess flour at the end, which is much easier than working with sticky dough.
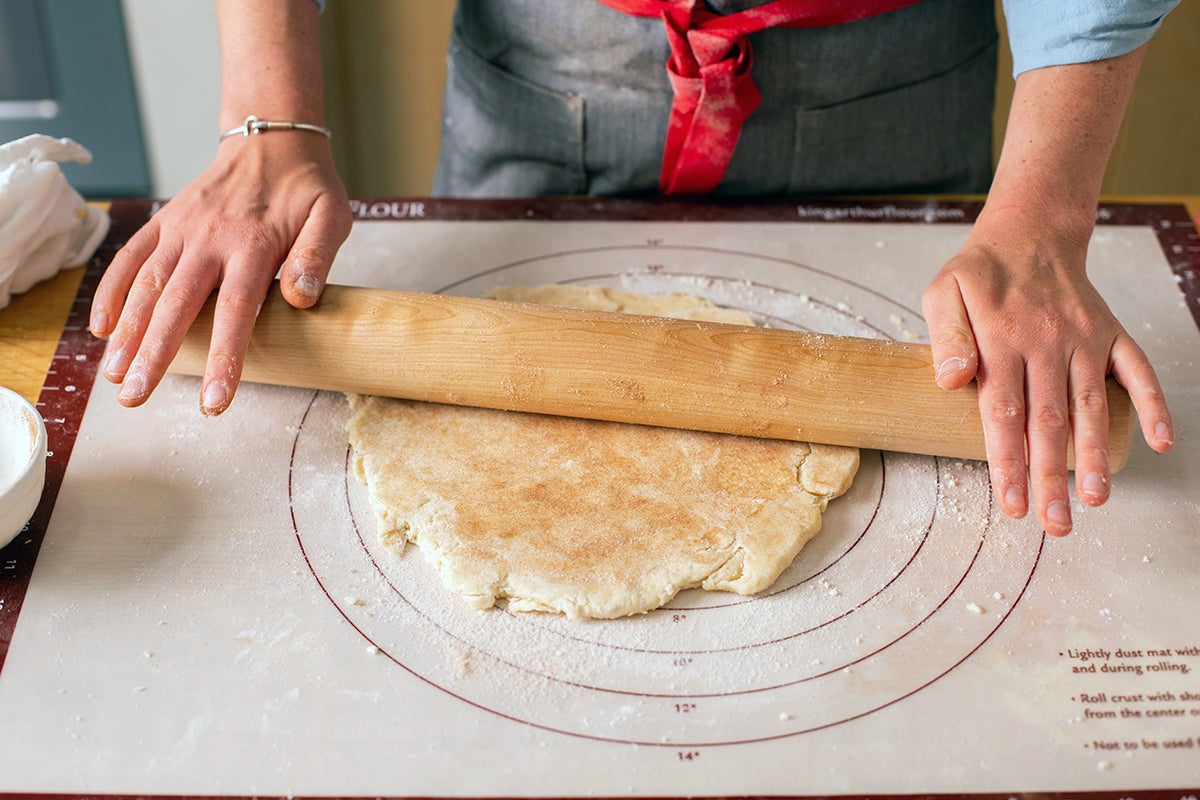
Hold onto the center of the rolling pin and gently press down a few times so the swirls start to expand into each other and flatten. Make sure the dough isn't sticking to your pin, then roll out the dough as you normally would.
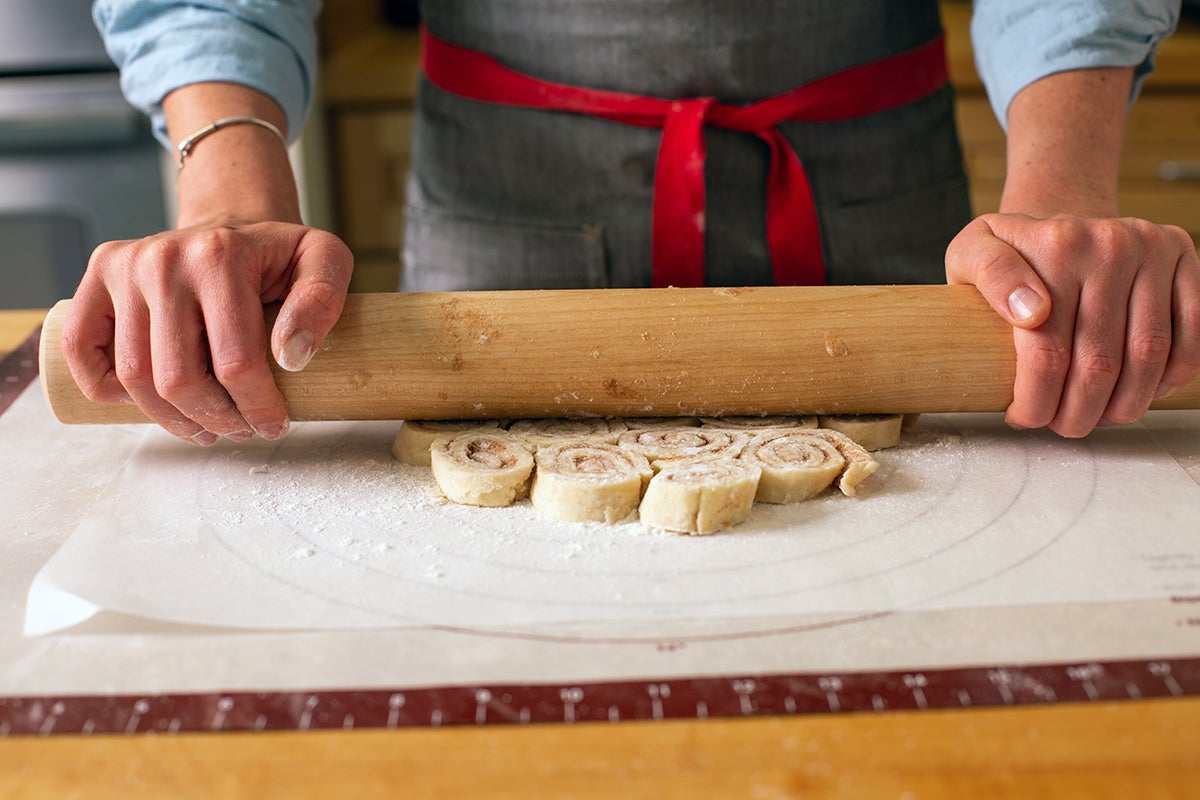
The swirls will merge into one beautiful sheet of dough. Roll until it’s about 1/8” thick, or you have roughly an 11” round.

Using the parchment paper as a sling, transfer the crust, parchment paper and all, to a baking sheet. Cover with plastic wrap or another piece of parchment to prevent the crust from drying out while it rests in the fridge.
Back to those apples you set aside (which are still looking perfectly pristine since you tossed them with lemon juice) — it’s time to use them in your filling.
Follow your recipe to complete the filling, adding the thickener, sweetener, and spices. By the time your filling is ready to use, the top crust will have chilled and become easier to work with.
Preheat your oven to the temperature called for in your recipe. That way it’ll be nice and hot when your pie is ready to be baked.
It’s time for one of the most exciting parts of pie baking: assembling the pie.
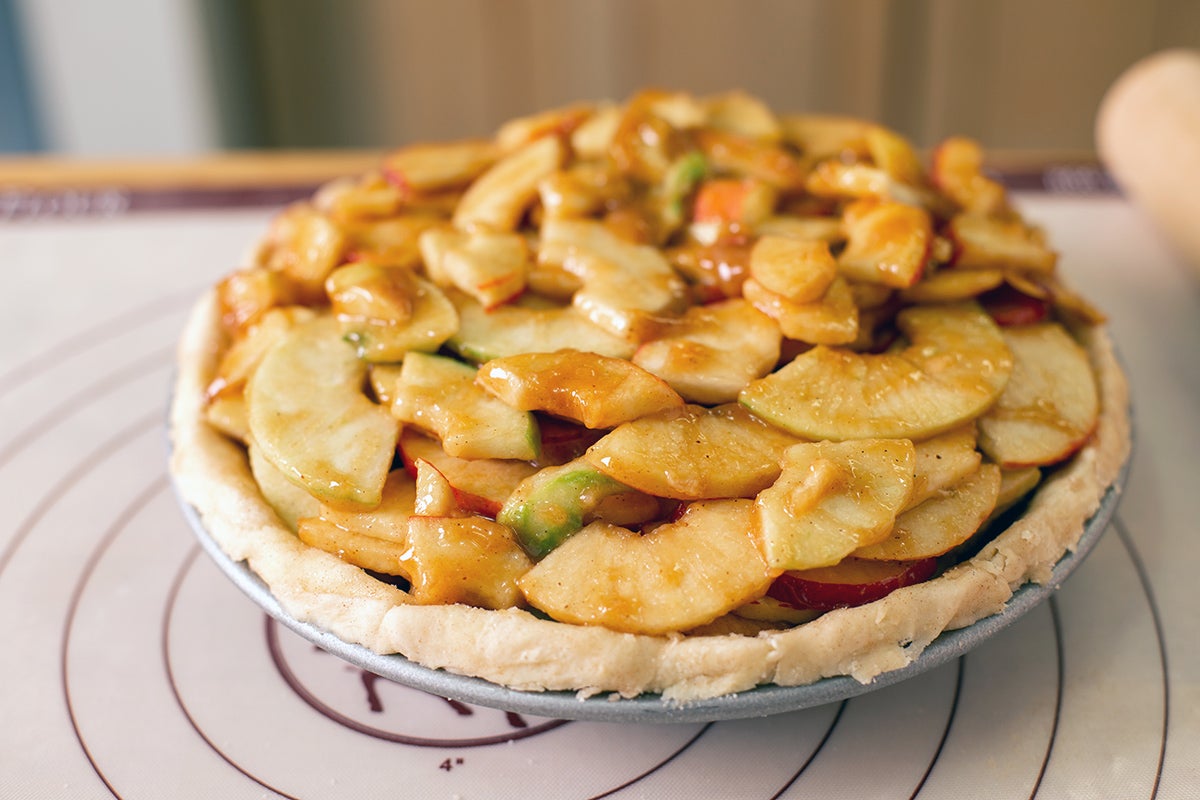
Remove the bottom crust from the fridge but leave the top crust to chill. Then spoon the apple filling into the bottom pie shell.
If you’re using our Apple Pie recipe, take the time to arrange the apples in single layers so that they all fit nicely — there’s a TON of apples in this recipe. Arranging the apples in this fashion will also give you a flat-topped pie, rather than one that’s domed and full of air pockets that sink during baking. (For more tips on how prevent the gap in pie crust, read my fellow blogger PJ’s post.)
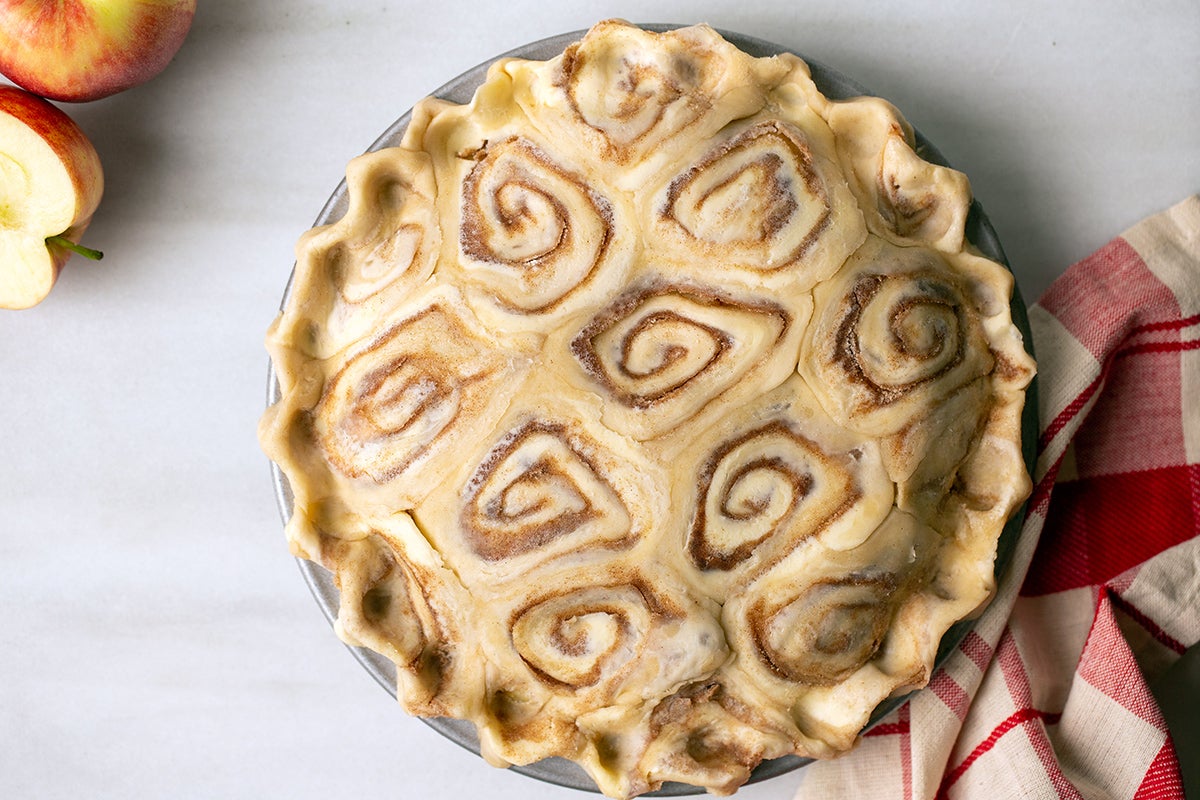
Once the apples are nice and snug in the bottom shell, it’s time to crown the pie with your glorious cinnamon bun top crust!
The top crust will be slightly fragile, though it’ll be easier to work with after having been chilled.
The gentlest, most foolproof way to move your cinnamon bun pie crust is using the “conveyor belt method.” Place the parchment paper with the rolled-out top crust on an upside-down baking sheet. A half-sheet pan, or one that’s about 18” x 13” is ideal here. You can also use a large cutting board to successfully perform this maneuver if you don’t have a baking sheet handy.
When you're ready to transfer the top crust, make sure it's not sticking to the parchment paper. It should be able to slide freely if you shake the pan slightly.
Place one hand on the underside of the pan and pull the overhanging edge of parchment down toward the table. As you pull gently on the edge of the parchment paper, the crust will move closer to the edge of the pan, like a conveyor belt.
Line up the edge of the baking sheet with the edge of the pie.
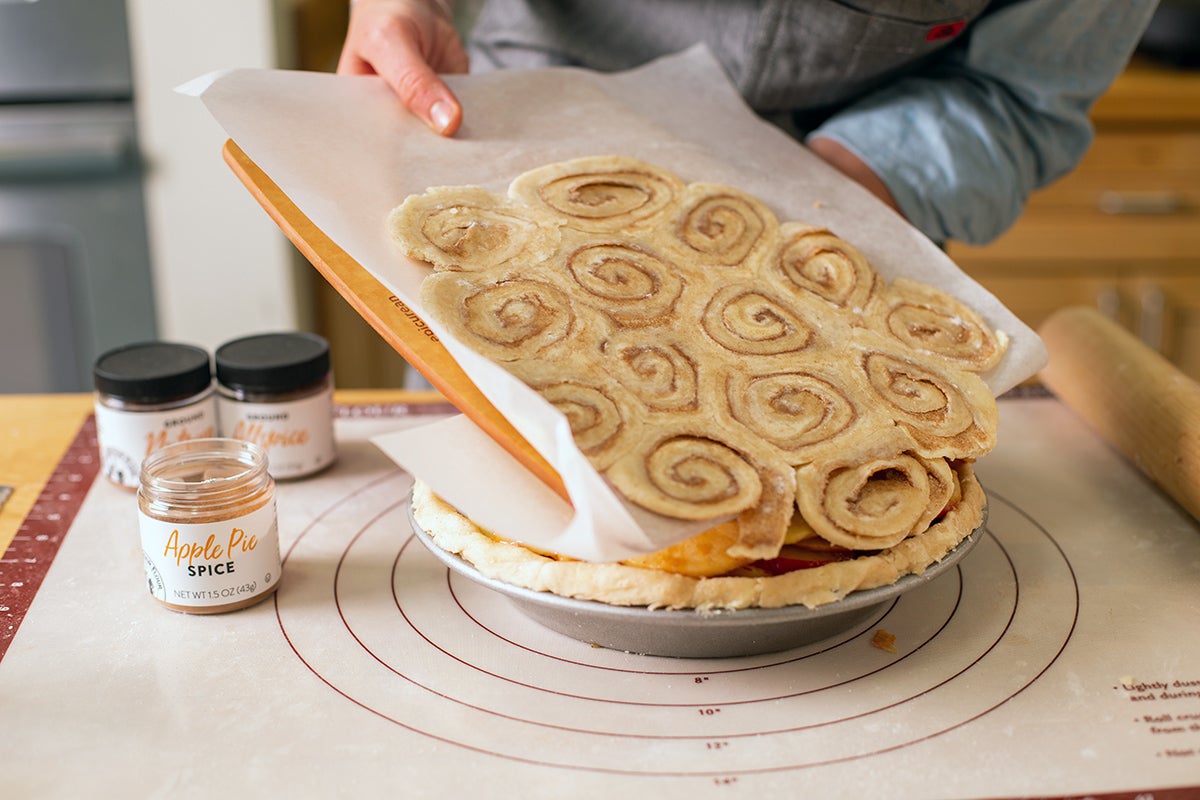
It should slide gracefully onto the top of the pie as you pull the edge of the parchment paper farther down.
Just remember to move slowly but confidently. You can do it!
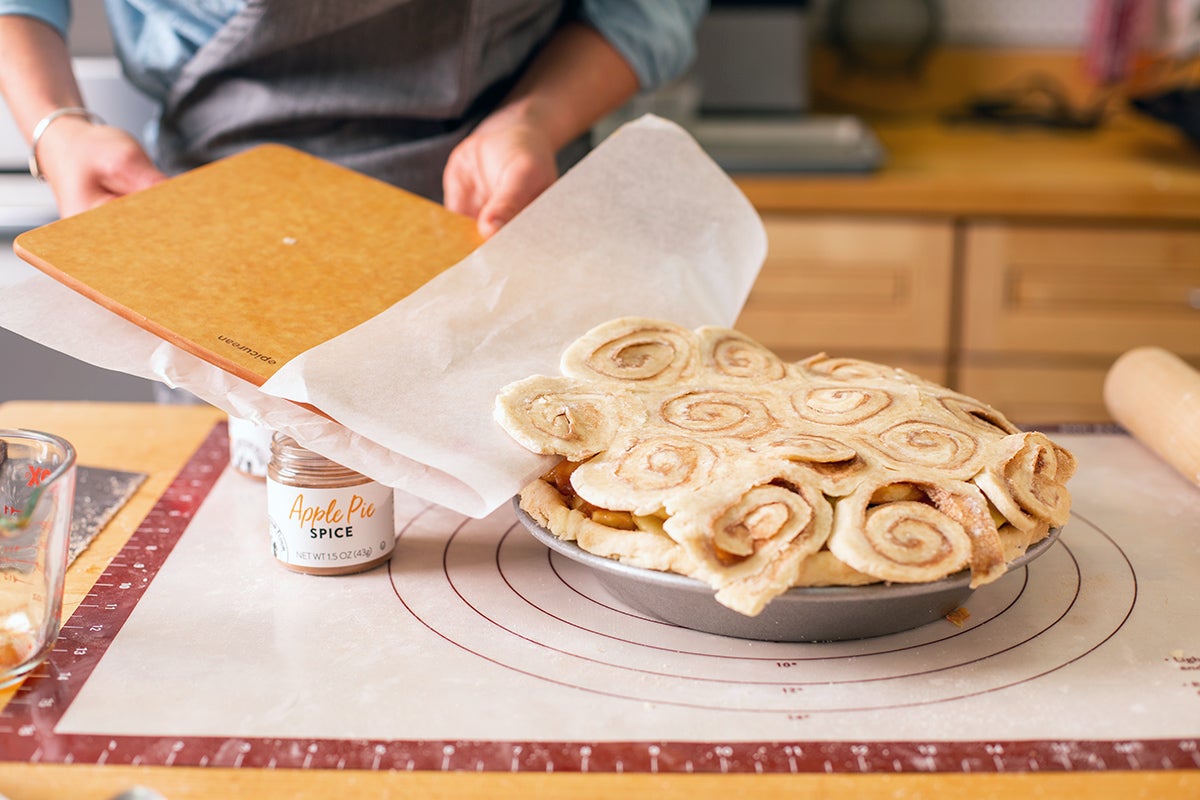
It's OK if the swirls start to fall apart slightly as you transfer them to the top of the pie. You'll be able to press them together and seal any gaps before baking.
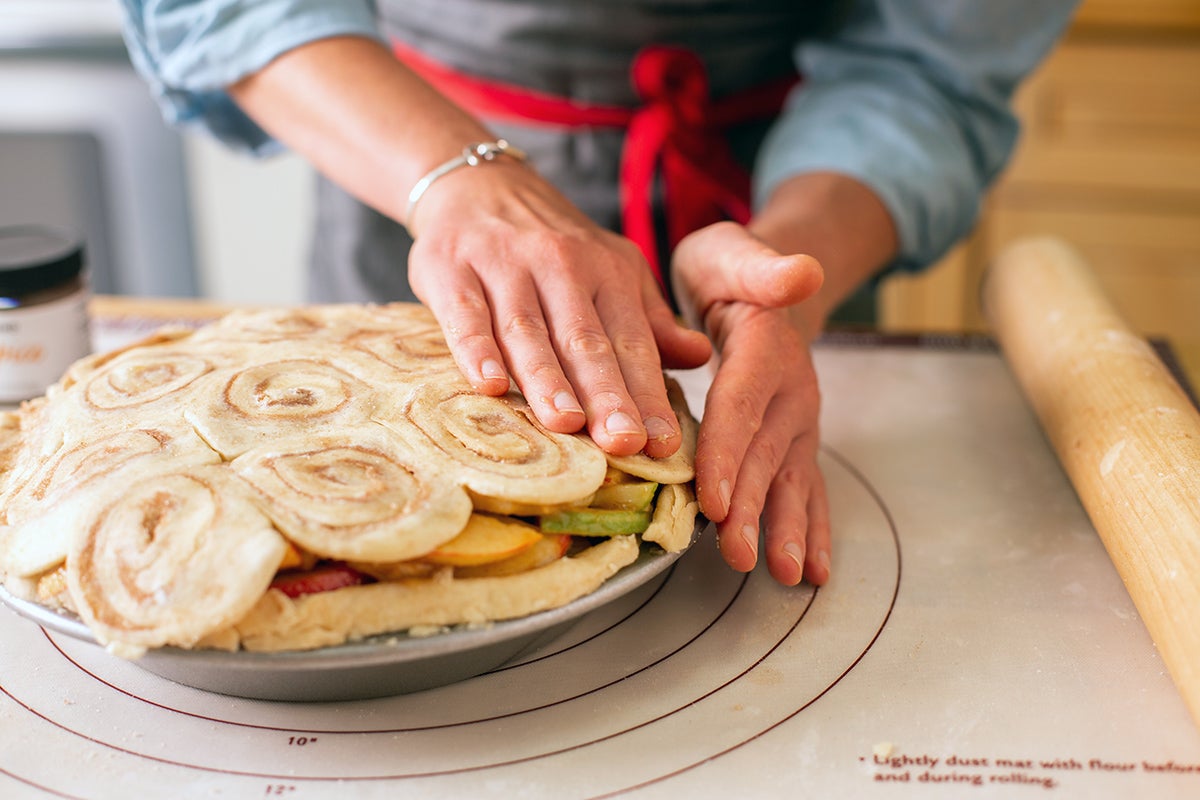
You’re almost ready to bake! Using scissors, trim any excess pie dough so that the top crust meets the rim of the bottom crust.
Seal the edges of the top and bottom crust together and crimp using any method you like. I recommend a basic finger crimp here — your pie is already at show-stopper status!

It’s time to put your gorgeous pie into the oven and watch it become a golden-brown beauty. Bake the pie according to your directions.
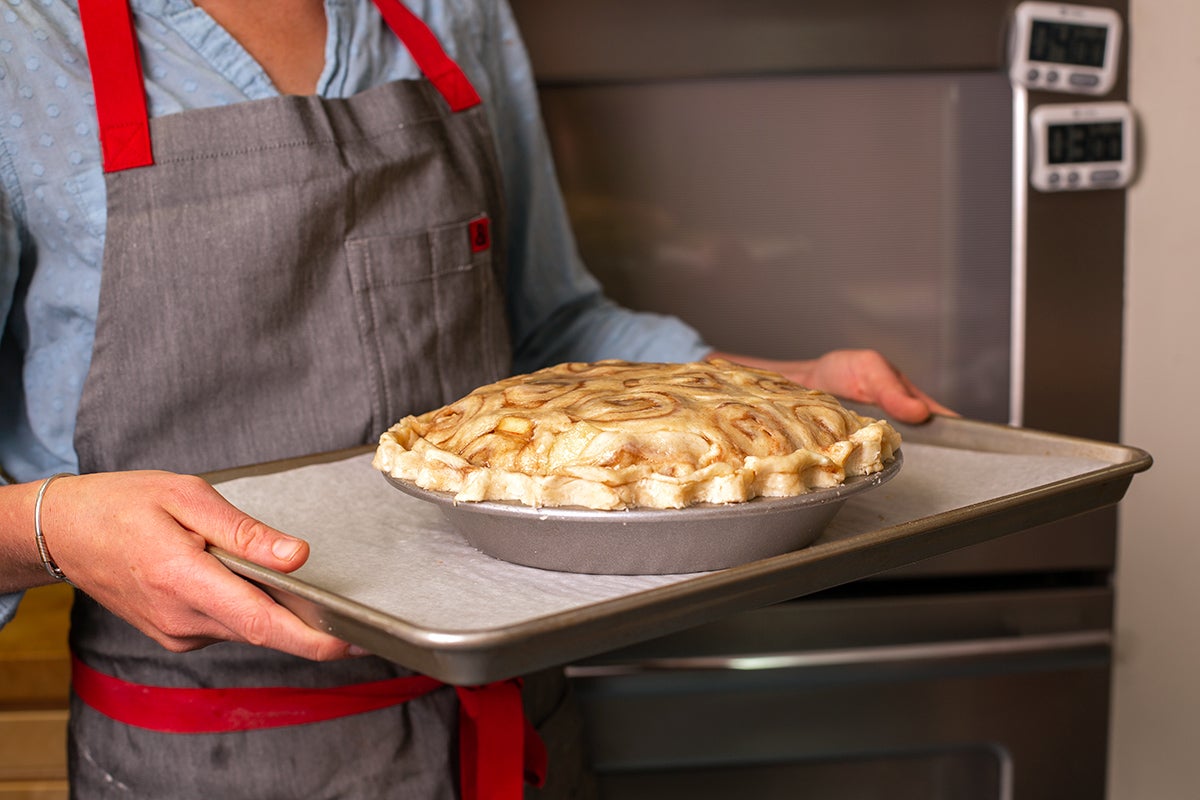
Pro tip: Place your pie on a baking sheet to catch any of the juices from the filling that may spill over the sides. It makes for much easier clean up.
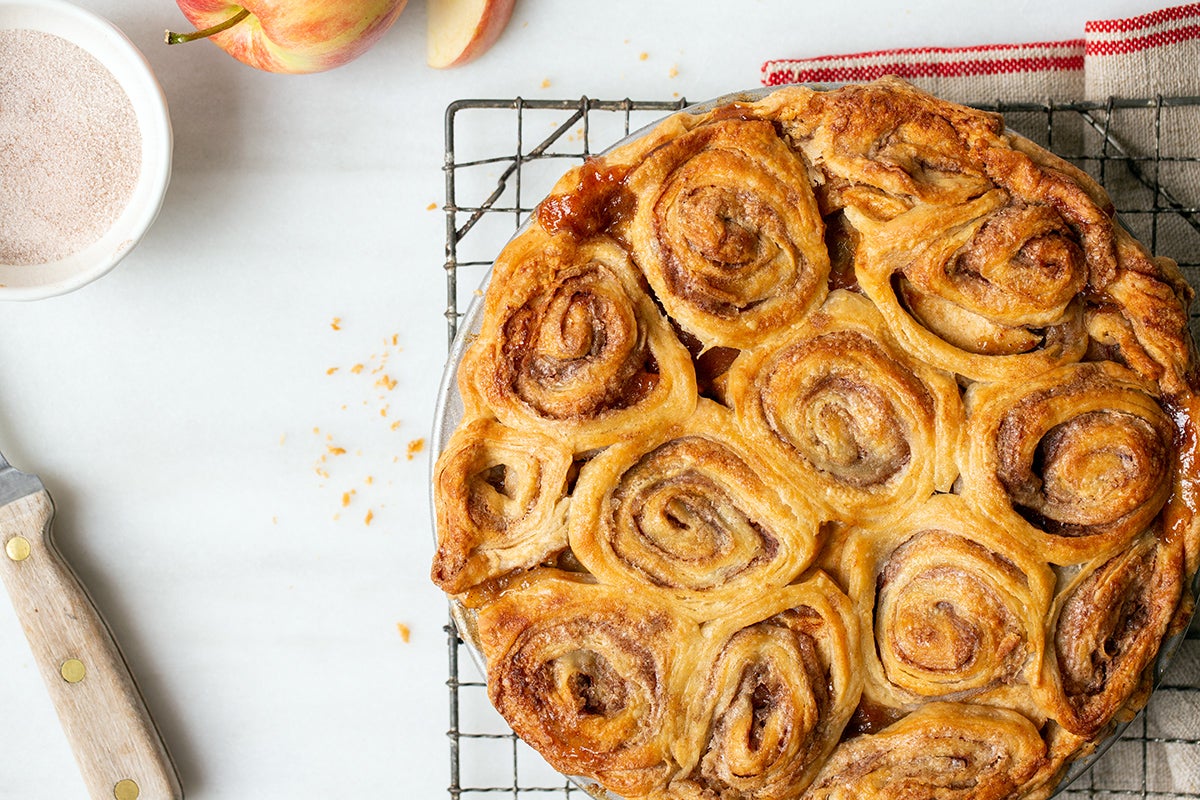
You should see the juices bubble around the edges of the pie for about 5 minutes, and the top should be deeply golden brown before removing.
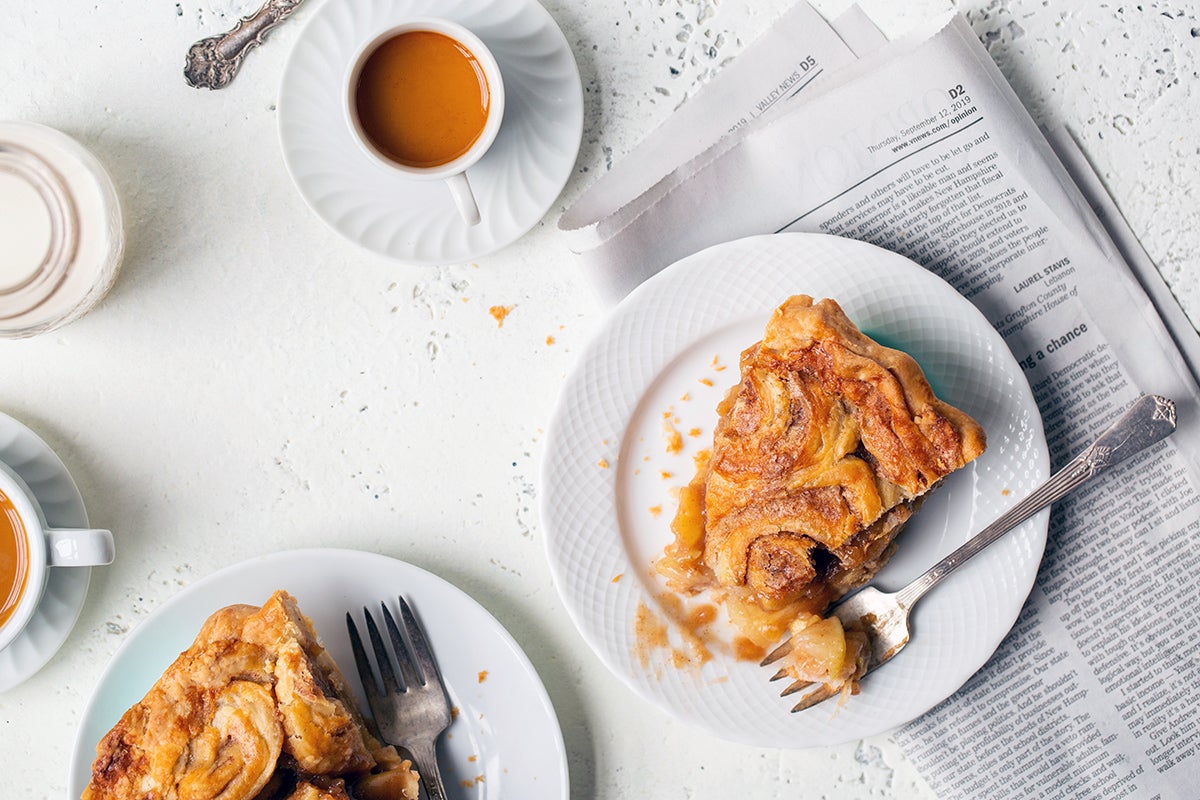
Apple pie can be quite messy if it’s served warm. If you have the time and the willpower, consider letting the pie cool completely before slicing. The apples will reabsorb some of the juice, soaking up all that deliciousness.
Then if you, like me, love to eat warm pie, you can cover the fully cooled pie with foil and reheat it in a 350°F oven for about 15 minutes until it’s warmed all the way through.
When slicing the pie, don't fret about messing up the beautiful top. Present the pie in its whole, flawless form and then grab a sharp knife. Try to make slices between the swirls, although it will inevitably fall apart slightly. That's OK — it'll still be delicious.
Serve your pie à la mode if that’s your preferred style, or just dive in with a fork and a smile.
You and your guests are going to love this cinnamon bun apple pie — I promise.
Next time there’s an occasion that calls for pie, transform your apple pie into a cinnamon bun pie crust-topped masterpiece.
Bake and share your cinnamon bun apple pie with us on Instagram using #kingarthurbaking. We can’t wait to see your pies!
Let us know how you make your apple pie extra-stunning in the comments, below. Happy baking!
Thanks to Jenn Bakos for taking the photographs for this post.