Are you ready to learn some new artisan baking techniques today?
If you haven't been following our sourdough baking adventure, yesterday we explored a new type of sourdough starter – a "stiff starter," one with double the normal amount of flour. We went over how to convert your liquid sourdough starter to a stiff starter, and began working on a sourdough recipe that calls for this starter and is entirely naturally leavened (no added commercial yeast).
Today, we're going to continue the trek by covering fermentation, folding dough, and preshaping and shaping.
Professional bakers focus on dough temperature, and have a special formula to determine what temperature water to use in the dough, based on the temperature of the room and the ingredients, as well as the amount of heat generated during mixing.
While home bakers need not be quite so precise, paying attention to the temperature of your ingredients and the environment your bread will rise in can help you achieve more consistent and predictable results.
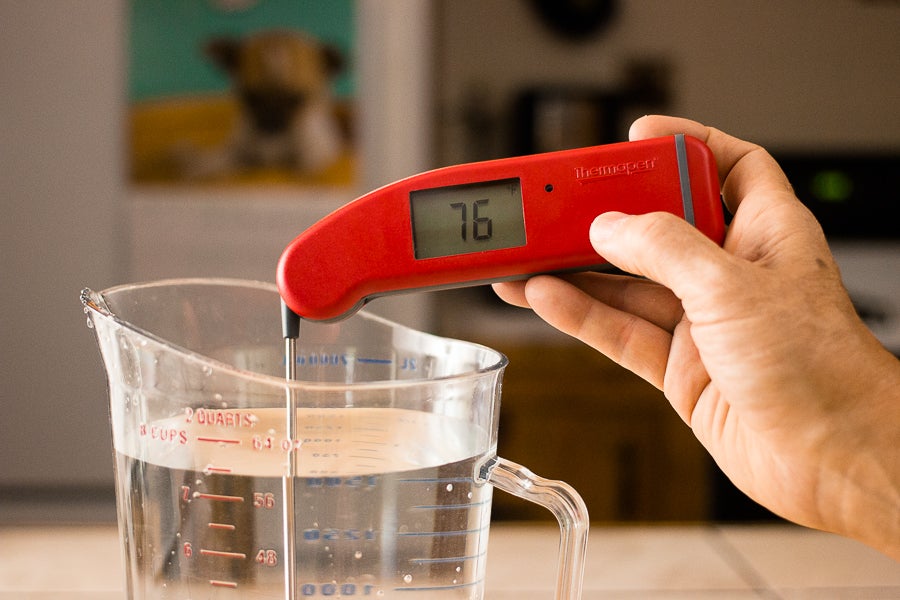
Keep in mind that sourdough ferments (rises) well at 76°F, so this is a good dough temperature to aim for, although a few degrees in either direction is also fine.
Use a digital thermometer to test the water temperature and aim for starting the mix with cooler water on a hot day and warmer water on a cool day. But keep in mind that we’re aiming for 76°F, so “warmer” doesn’t mean 110°F, but more like room temperature water or a tiny bit warmer.
When you think about it, our normal body temperature is 98.6°F, so anything less than this is going to feel cool to our hands; even lukewarm water is warmer than you need.
If you don’t have a digital thermometer you can simply leave an open container of water on the counter overnight; by the next day it will have come to room temperature. This method has the added advantage of dissipating the chlorine in your tap water that may inhibit the wild yeast.
With the bread we're making, if you start with 76°F water and room-temperature ingredients, the dough should come out at about 76°F because the mixing time is minimal.
Check the temperature of the dough before and after mixing; this will give you a sense of how much heat your mixer is adding to the equation. Understand, though, dough rising at room temperature will eventually become whatever that temperature is, be it 62°F or 88°F.
So how do you maintain the dough at 76°F when your thermostat is set at 68°F? If you're lucky enough to have a bread proofer, just set it for 76°F and you’re good to go.
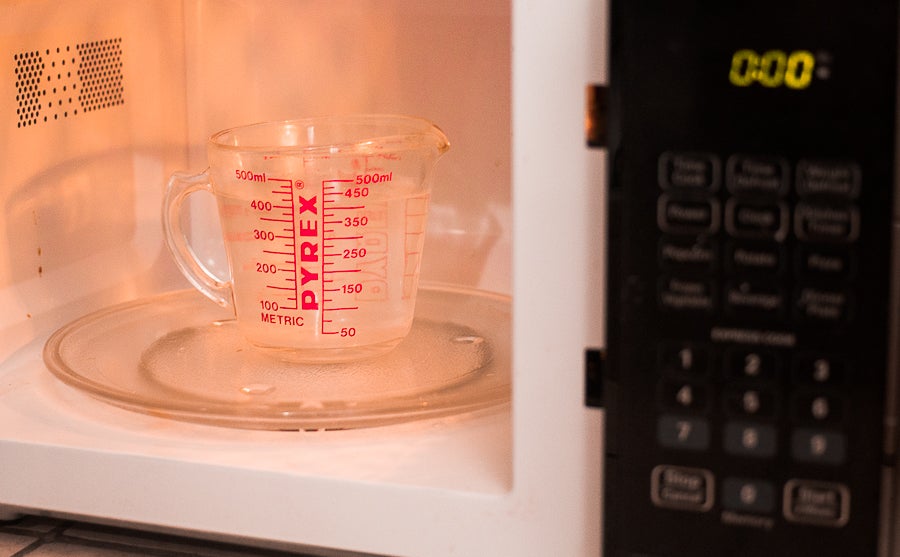
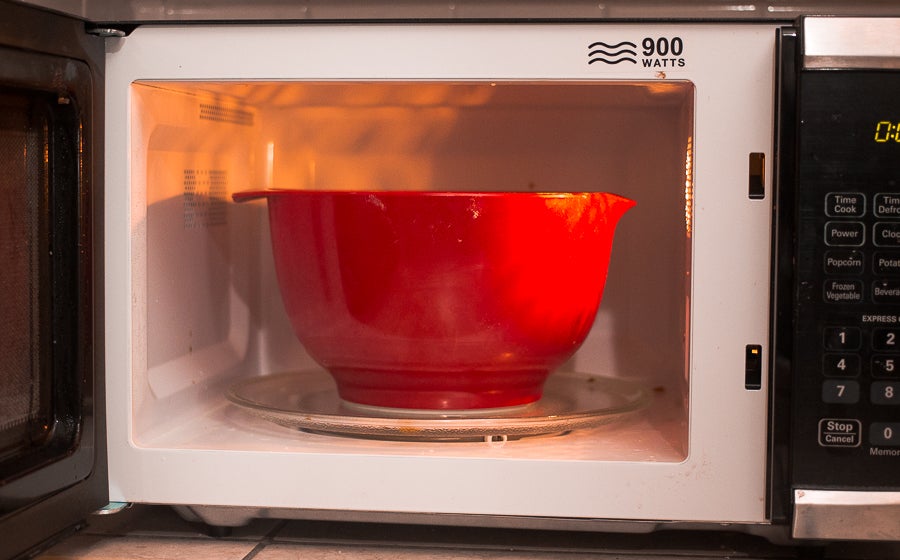
If you don’t have a bread proofer there are ways to simulate one. A microwave is a proof box waiting to happen. Just boil water in your microwave in a Pyrex cup, remove the cup, and set your dough without a cover in the microwave. WARNING: Don't turn on the microwave with the dough in it! AND FURTHER WARNING: Boiling water in a microwave can result in superheated water, which can cause a sudden explosion of boiling water in water that appears still. To prevent this from occurring: set the timer for no more than two minutes at a time and put a wooden spoon in the cup. Alternatively, you can boil the water on the stove, then pour it into the Pyrex cup and place it in the microwave (not on) for a few minutes to heat up the microwave space before placing the dough in it.
No microwave? You can do the same thing with an ice chest or cardboard box. If you’d like to turn your oven into a proof box, you’ll need a whole pot of boiling water to moisten and warm the air in the larger space. If your oven has a bread proofing setting, resist the urge to use it; the temperature is likely to be too hot for the long, slow fermentation sourdough requires.
While it's easy to recharge your microwave proof box by boiling the water again after an hour, your dough may not need to spend the whole time in the proof box. Check its temperature and see if a little outside-the-proof-box time is warranted. In my house an hour in the microwave proof box and an hour out seems to work well for maintaining the dough at around 76°F. On warm summer days your dough may be fine simply rising at room temperature covered with plastic wrap, no time in a proof box needed.
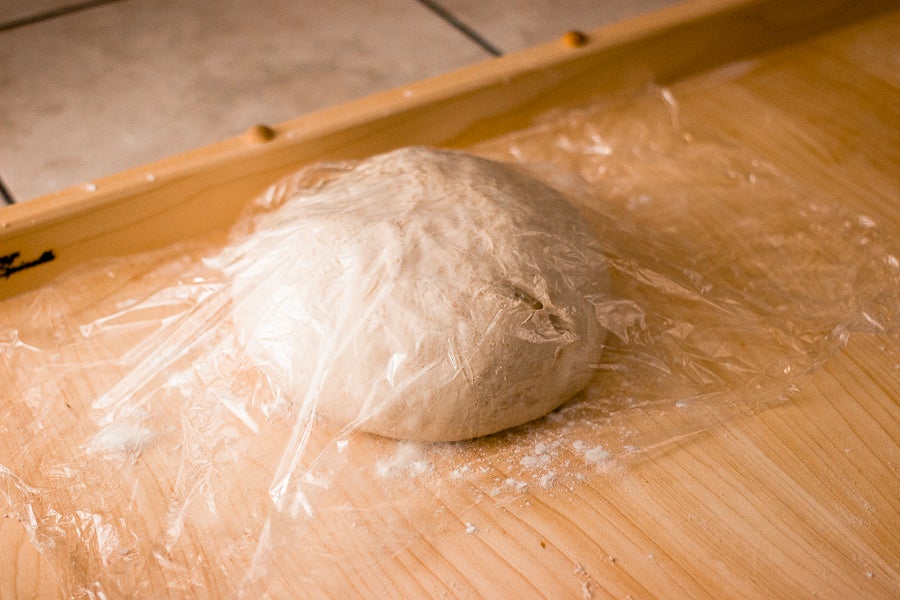
Now that our dough is sitting in a nice, moist 76°F environment, we'll set the timer for an hour and prepare for our next challenge – folding.
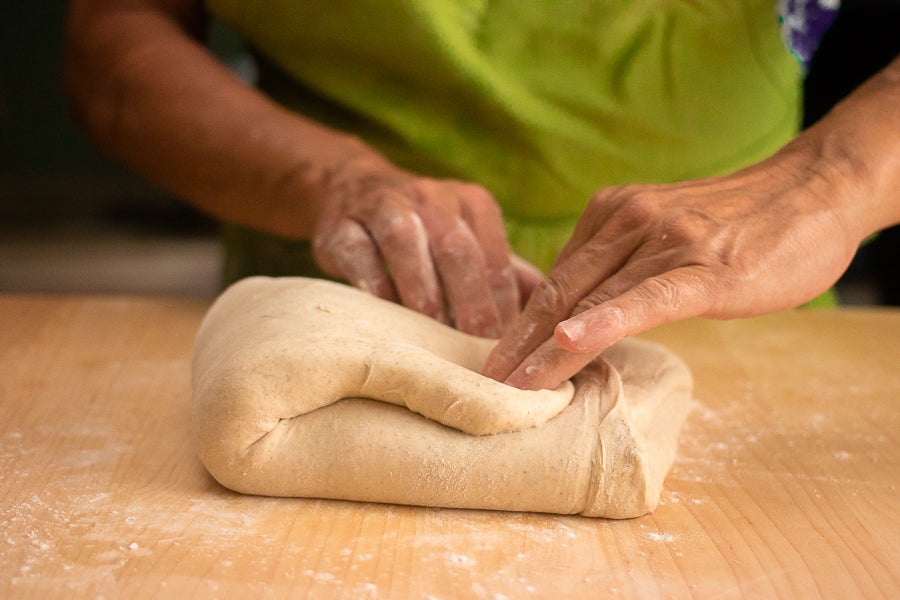
Folding is a simple step that develops the strength of your dough with very little effort. Artisan bakers know that both the dough and the baker can benefit from doing the least amount of work necessary to bring the dough to readiness.
Folding is just that – a series of stretch and folds that go from the four imaginary corners of your blob of dough towards the center, opposite sides folding over each other to form a neat little package by the end of the folding process. This brief exercise contributes a great deal of strength to your dough, and is especially helpful in developing the structure of a wet dough.
First, turn your dough onto a floured surface.
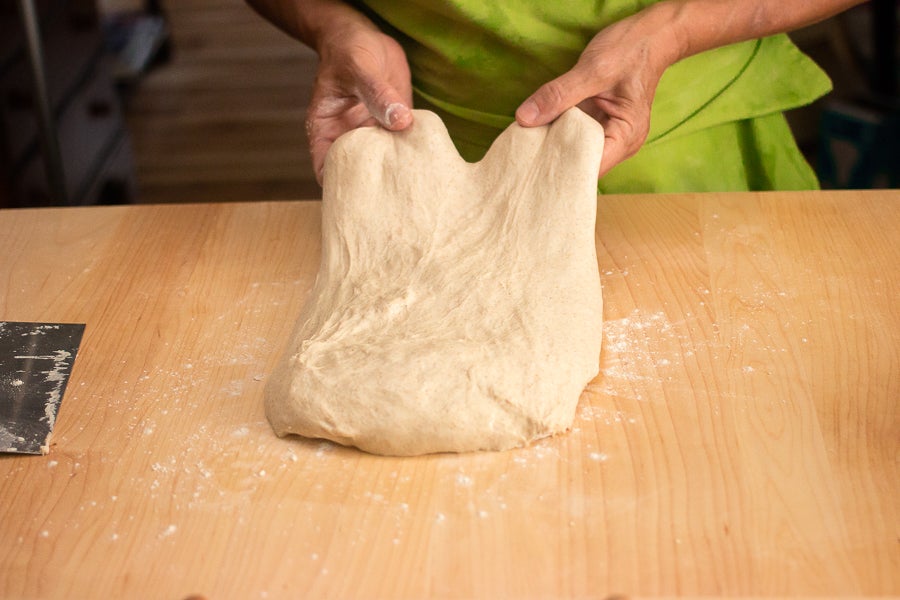
You can either flour or wet your hands before touching the dough to prevent sticking. Grab the dough with the fingers and thumb of both hands and pull one “corner” about two-thirds of the way across the dough and then press down to release some of the built-up gas.

Grab the opposite corner and stretch and fold the dough across the loaf, again pressing to de-gas the dough.
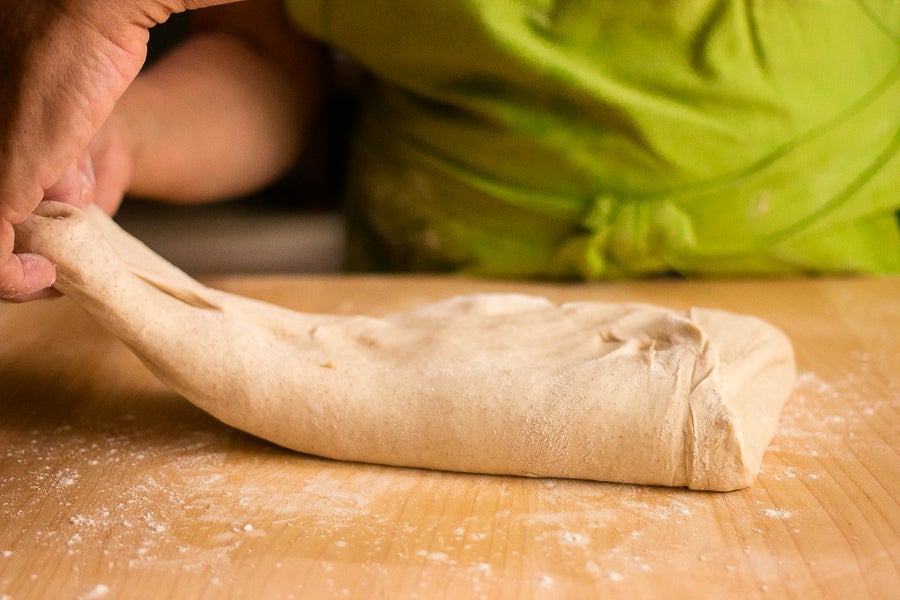
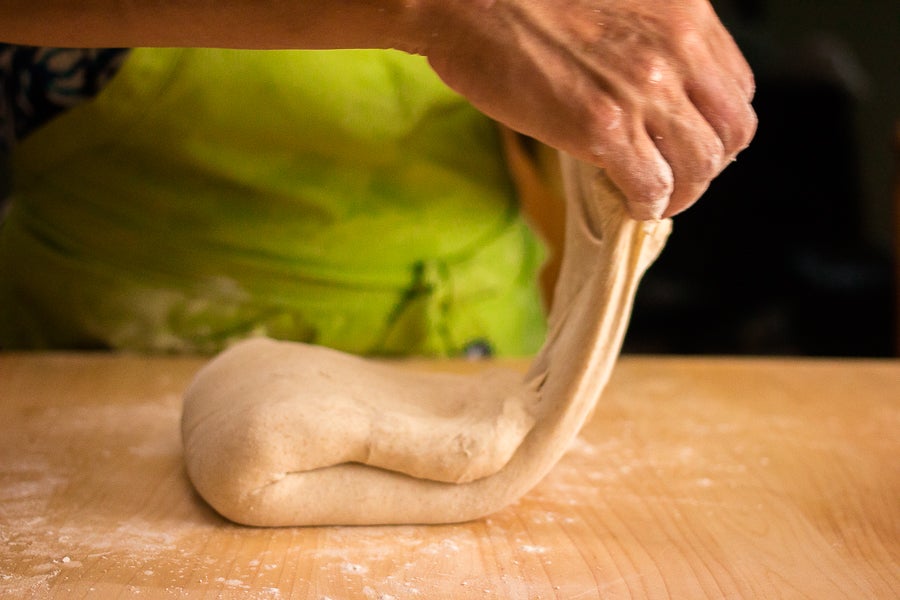
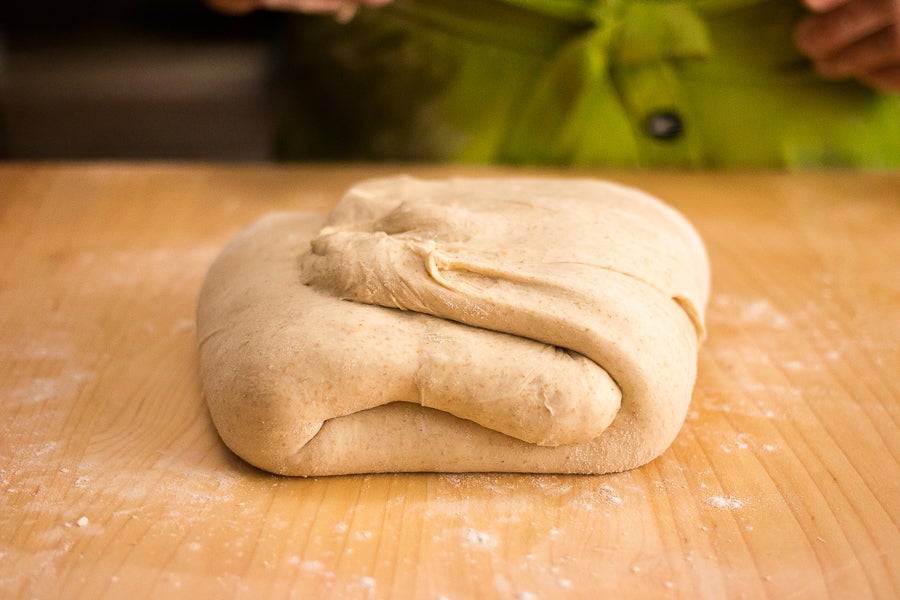
Repeat with the remaining corners to produce a square-like package of dough. Pat the dough to remove any excess flour and place it back in the rising bowl with the folded side down. Try to keep your fingers from digging into the wet dough, which can cause sticking and tearing. The whole folding process should take less than a minute.
Although you can fold your dough while it's in the bowl, I prefer the on-the-table-with-flour method because I find it easier to handle the dough and it gives me a better sense of how fermentation and dough strength are progressing.
The second rise lasts one hour. Repeat the folding process and place the dough back in the bowl.
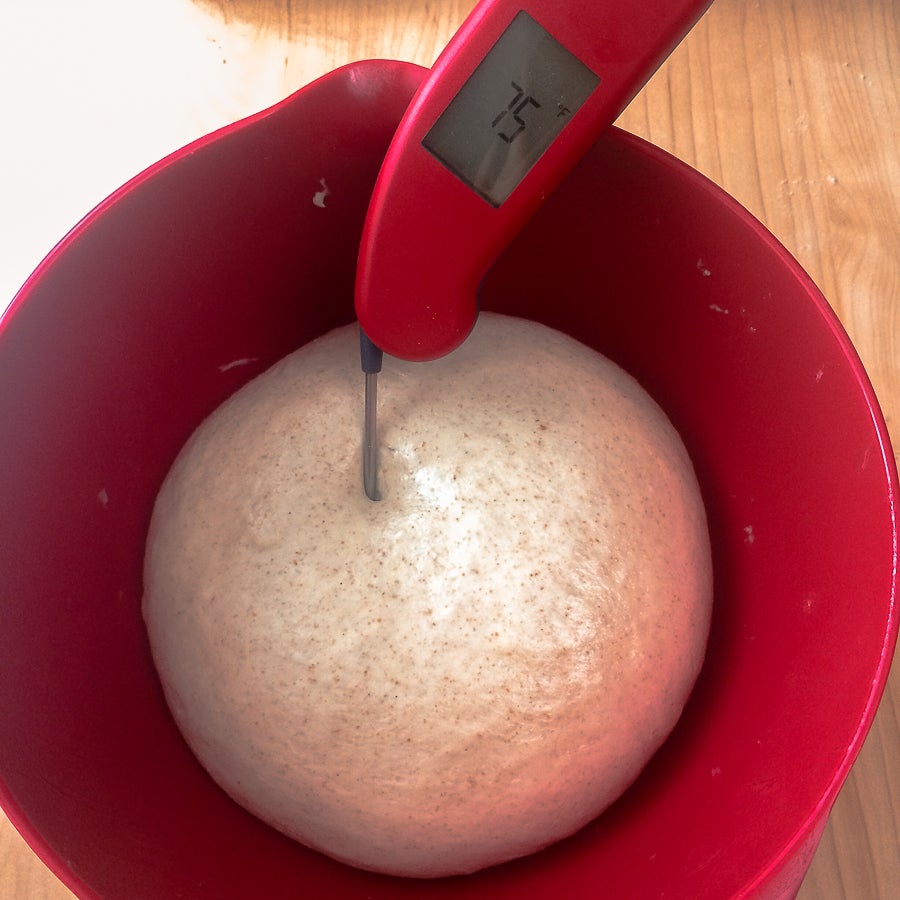
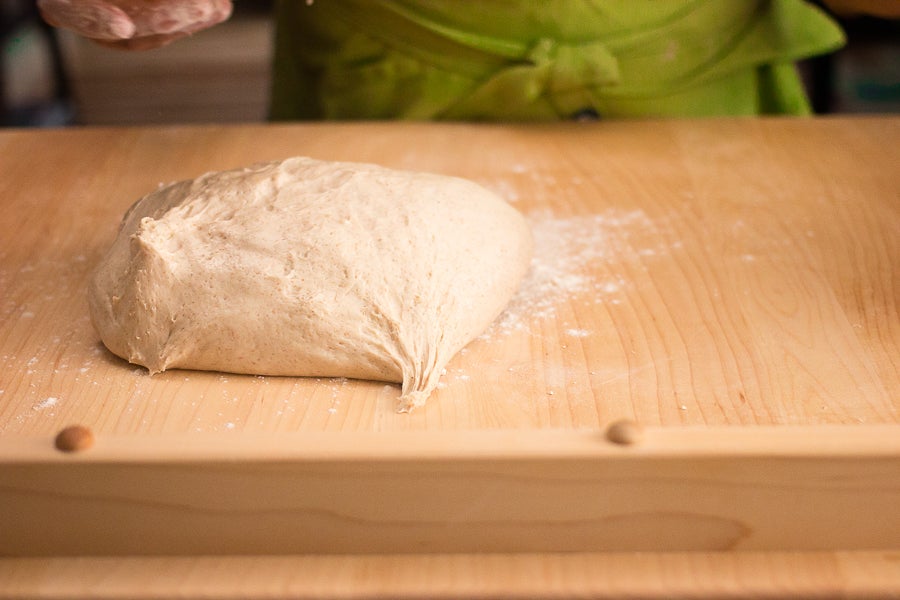
The third rise is 90 minutes. By the end of this rise your dough should feel much lighter and airier. If the dough feels cool and hasn’t risen as much as you think it should, give it another fold and another hour rising time. The folding process allows you to stay in touch with your dough and to read its readiness each hour. Gradually you'll learn exactly what the dough should feel like when it's ready to shape.
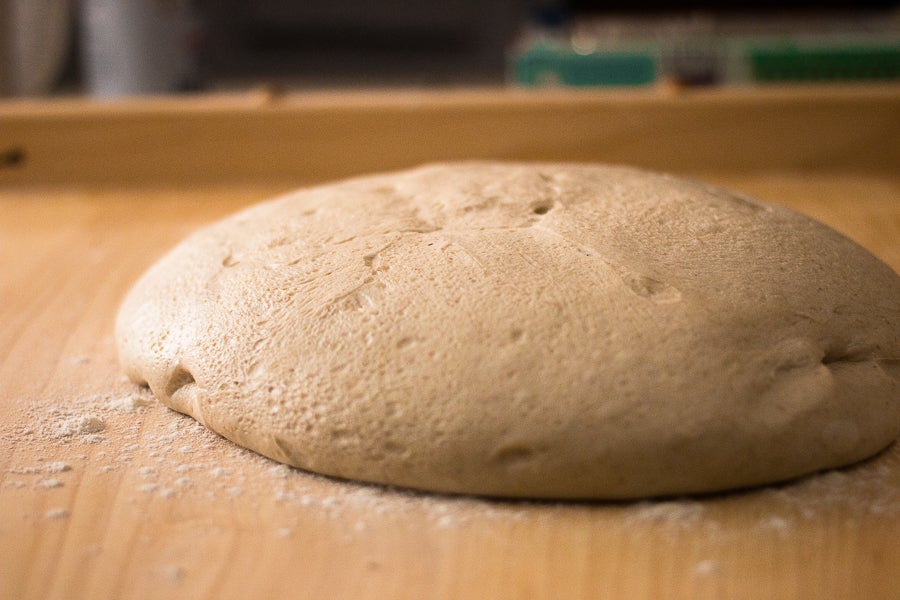
This is what your dough should look like when it's ready to shape. It will feel much lighter in texture than it did right after you finished kneading.

Before we preshape we can remove 8 ounces of dough, round it up, and place it in an oiled container. This hunk of dough can be kept in the refrigerator for up to a week and then fed and perpetuated as your stiff starter. Because the bread dough contains salt it holds up well in the refrigerator; and keeping this hunk of dough saves you the step of feeding your stiff starter in the midst of mixing bread.
Don't worry that this hunk of dough is a bit different than your normal stiff starter. It works well as a substitute and will become just like your stiff starter once you feed it according to our recipe for Stiff Sourdough Starter.
If you don’t want to perpetuate a stiff starter and feel more comfortable just converting your liquid starter to stiff each time you want to make this recipe, that’s fine. Don't discard the 8 ounces of dough; you'll simply make an extra large loaf, or divide the finished dough in half, for two smaller loaves.
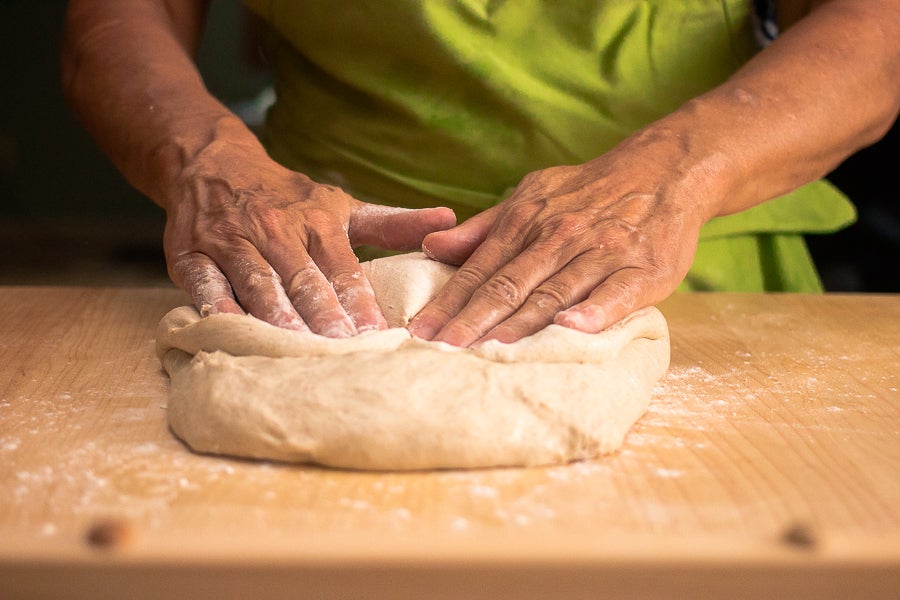
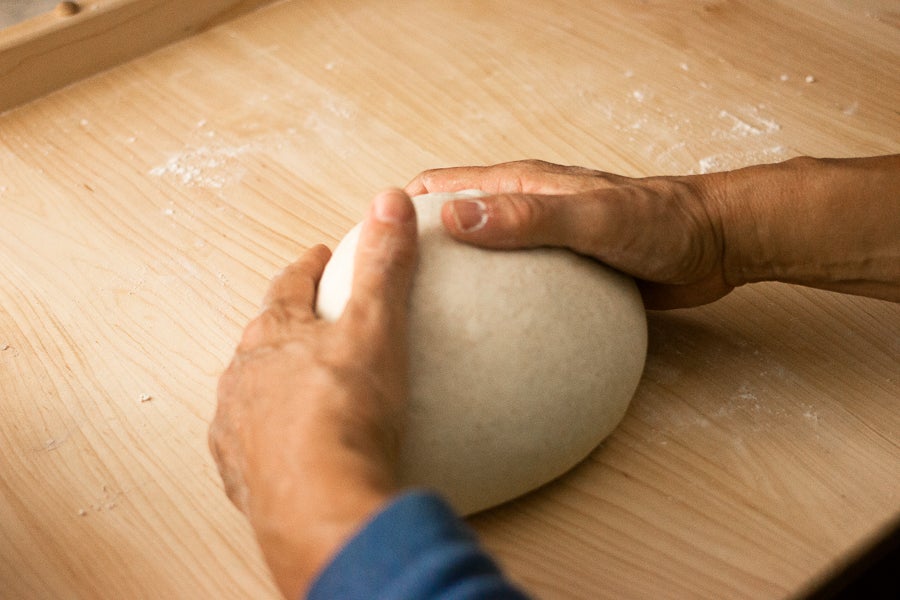
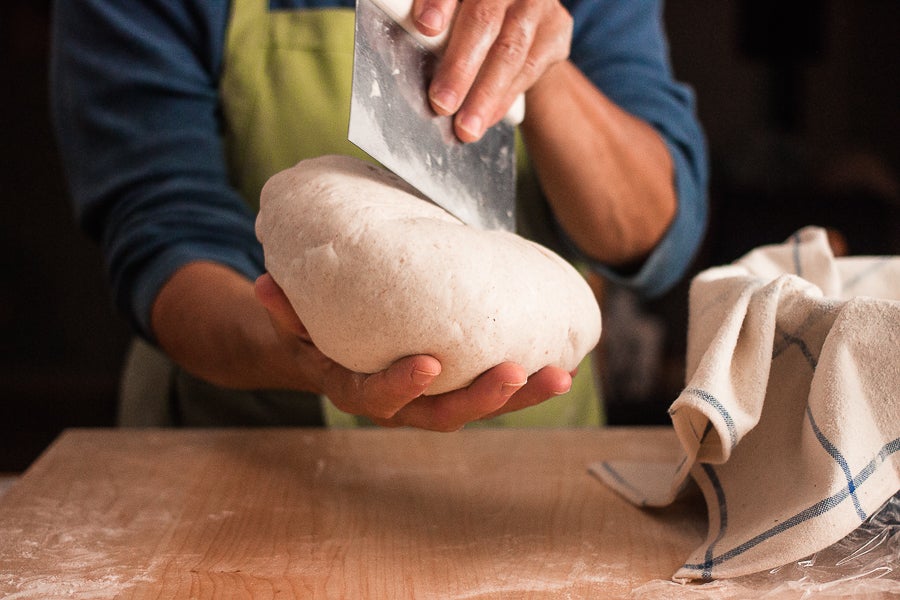
Now we're ready to preshape the loaf. Preshaping allows the dough to begin to think about being a loaf.
A preshape can vary in how tight it is depending on how loose or tight the dough feels. If you have a very wet, relaxed dough that's likely to flatten out, form it into a relatively firm ball without tearing the surface. For a dough that feels a little stiff, gently pulling the corners of the dough together may be all you need to do for a preshape.
Preshaping will help give more structure to a wet dough, and will ease a stiff dough into the desired shape without tearing.

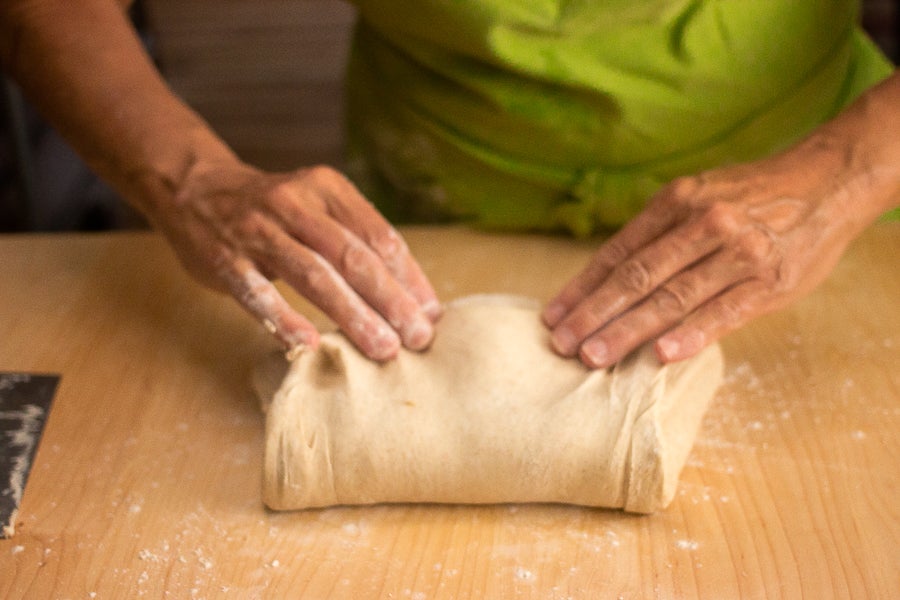
Allow the preshaped loaf to rest, top-side down and covered, on a floured surface for 15 to 20 minutes; then reshape it into a ball again.

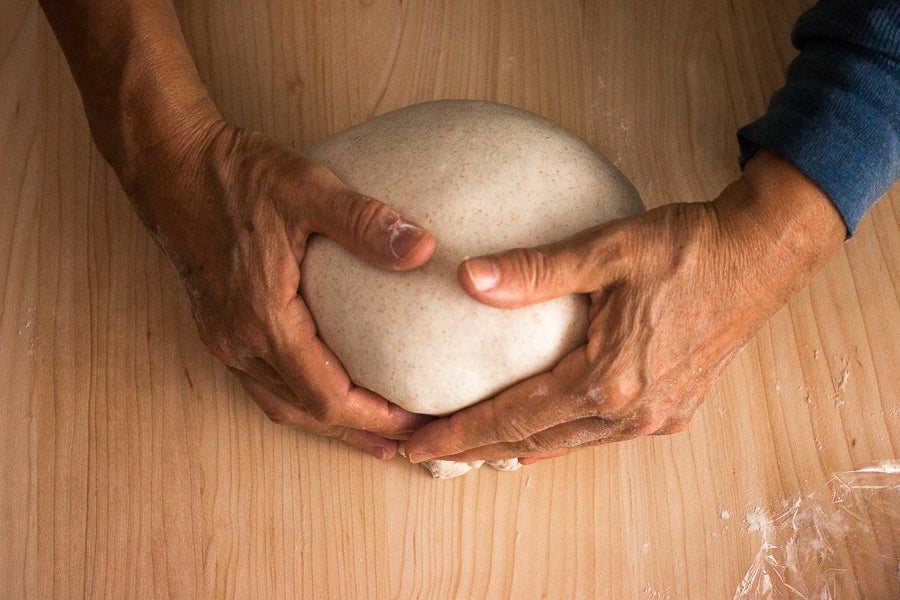
For the final shaping give the dough a light fold (try not to deflate it too much). Turn the fold side down and then round the loaf by applying pressure between the bottom of the loaf and the board with your hands cupped, moving around the loaf to tighten and round it.
Tearing that occurs during shaping will continue through the baked loaf, so it’s important to maintain a smooth surface. A little flour on your hands is helpful; but too much flour on the table may make it hard to seal the bottom of your loaf, so keep a clean spot for this purpose.
Want more details on this shaping method? Our blog post, Shaping a boule, will show you how to shape the perfect round loaf.
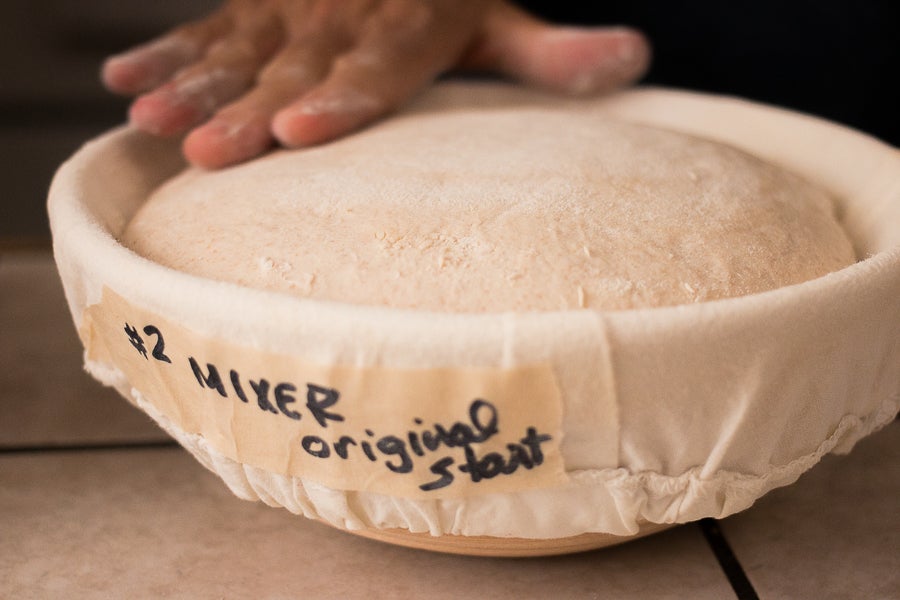
I like to allow my sourdough loaf to rise in a basket or brotform (a.k.a. banneton) because this prevents the loaf from flattening out before it gets to the oven. Brotforms often come with a cloth liner, which is helpful to use if the shaped loaf is to be “retarded” (chilled) overnight in the refrigerator.
If you don’t have a brotform, an appropriately sized bowl will work nicely.
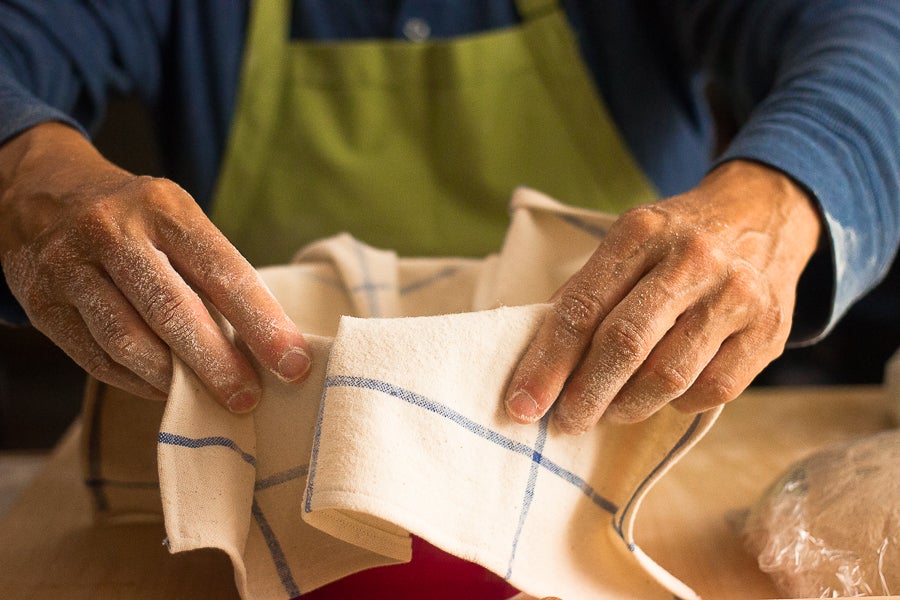
Rub flour thoroughly into a close-weaved dishtowel or napkin. Line the bowl with the towel, and then sprinkle it with more flour.
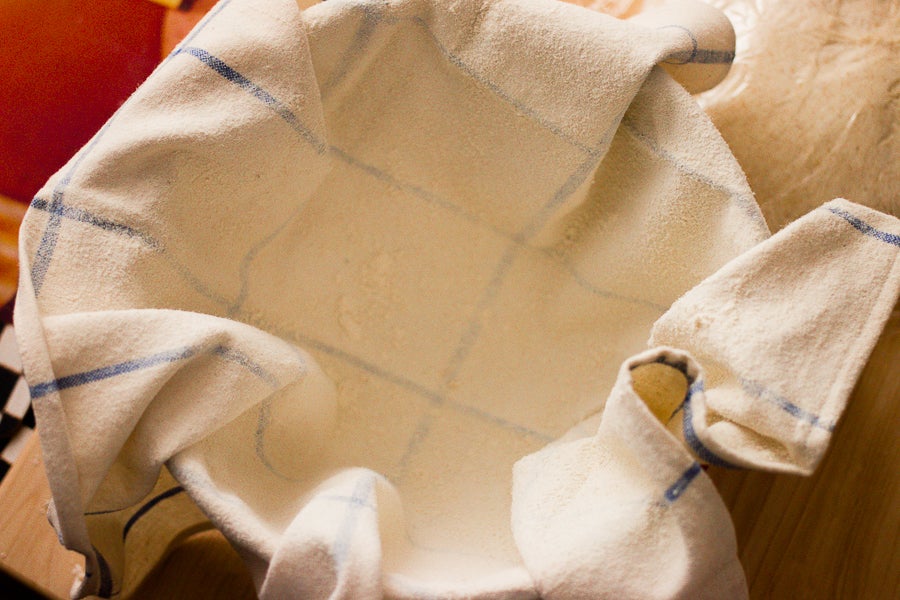
The well-floured cloth that lines the brotform or bowl provides added insurance against sticking. If you're not planning to refrigerate the dough and are using a brotform, the cloth liner isn't necessary, but you'll still need to rub the flour right into the grooves of the basket and then sprinkle with more flour. Without the liner, the floured ridges of the basket will be mirrored in your baked loaf.
I find a half and half mixture of brown rice flour and unbleached all-purpose flour works well for rubbing into either the cloth or the brotform. The grittier rice flour is less likely to be absorbed by the dough, and will do a better job of preventing sticking than all-purpose flour alone.
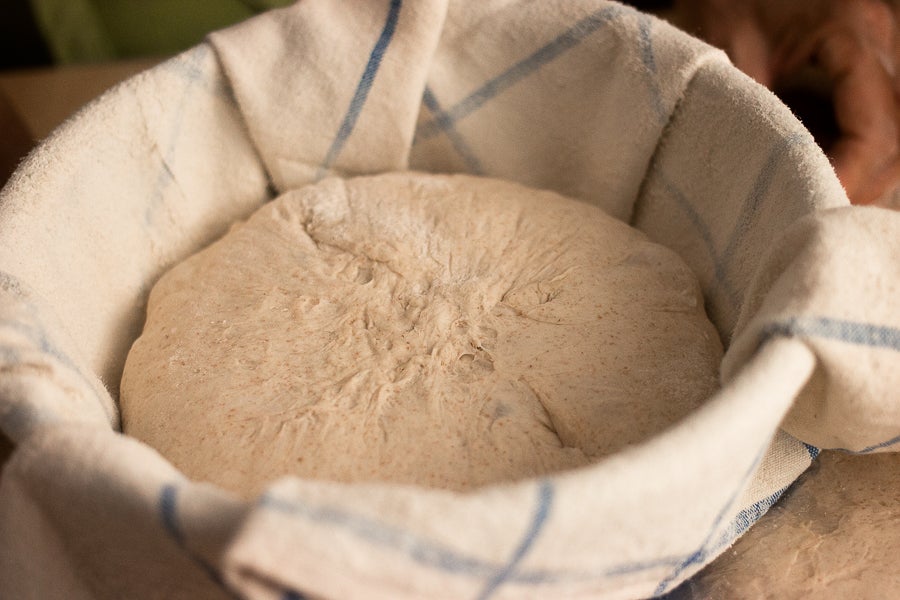
Since the loaf will be placed upside down in the basket, it’s helpful to let the loaf rest on the table for a minute or two after shaping, so the seam on the bottom is thoroughly sealed.
Wrap the bowl or brotform in plastic wrap to prevent the loaf from drying out. When using a bowl, fold the flaps of cloth over the loaf first.
One way to add more sour flavor to your bread is to be sure the dough has a small percentage of whole wheat flour or whole rye flour. Whole grain flours ferment more quickly and tends to intensify the sour flavor in sourdough bread recipes. This recipe contains about 15% whole wheat flour. Whole rye flour will deliver even more sour flavor. If your favorite sourdough recipe doesn't already call for whole grains, try substituting 10-15% whole grain flour for a portion of the flour in the dough portion of the recipe.
Now let's examine how you can make the most dramatic difference in the flavor of your bread. You have two choices here: one will yield a more mildly flavored loaf, and one a tangier loaf.
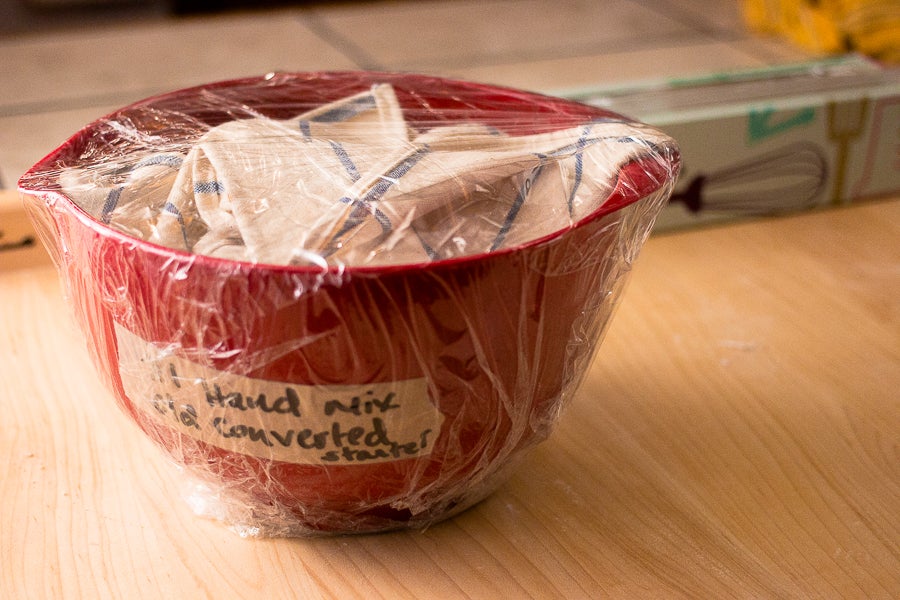
If you desire an extra-sour sourdough loaf, cover it and refrigerate immediately.
The dough will rise slowly overnight or up to 24 hours. Allowing the dough to remain longer in the refrigerator isn't beneficial, as an extended time in the refrigerator will lead to off flavors and diminished dough strength.
I’ve let my shaped dough sit in the refrigerator for up to 24 hours with success, but I don’t recommend longer than that. A total of 16 to 18 hours seems to be the ideal amount of time for chilling a shaped loaf.
If you prefer a more mildly flavored loaf, let the dough rise in the brotform or bowl at room temperature, covered with plastic wrap so it doesn't dry out. Or you can place the shaped loaf seam down in the lidded baking pot you plan to bake it in, with the lid on. Be sure to oil the baking pot and sprinkle some coarse flour (rice flour, semolina) on the bottom to prevent the dough from sticking. The mixture of all-purpose flour and brown rice flour works well for this. Rising time will be about 2 to 3 hours.
I find this method trickier than overnight refrigeration. A loaf that's rising at room temperature demands you stay much more attuned to fermentation; you need to gauge the right moment for baking. You need to stick around the house and kitchen, as it’s difficult to predict the perfect amount of rising time necessary; and a loaf that rises too long in the shaped form is more likely to fall or not rise well in the oven.
Stay tuned tomorrow as we learn to score our sourdough bread, explore different methods of adding steam to a home oven, and finally bake our delicious artisan loaf.
Want to start at the beginning? Read Artisan sourdough bread tips, part 1. Then continue from this post to Artisan sourdough bread tips, part 3.