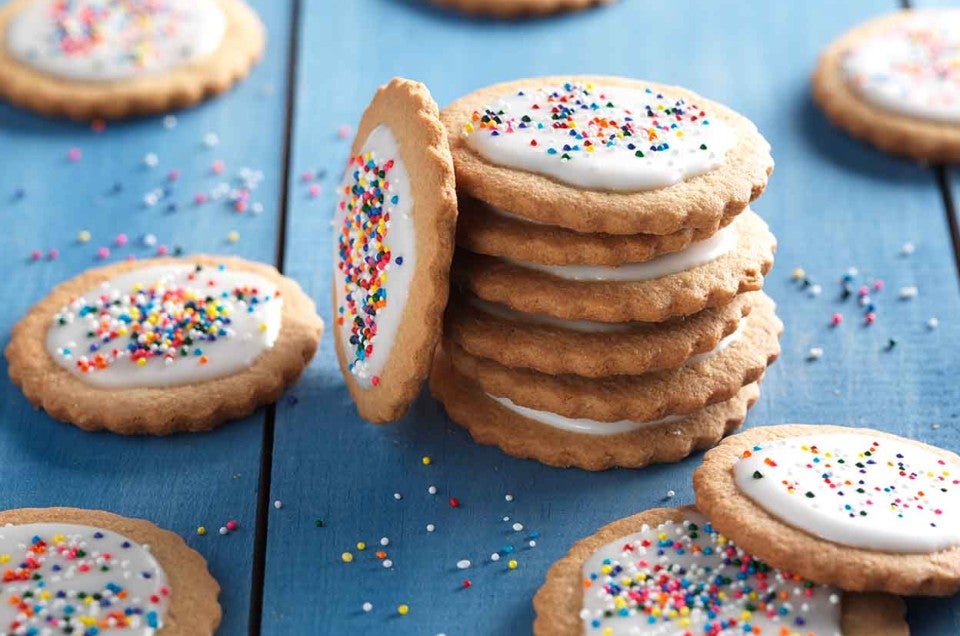


Chocolate curls, chocolate swirls, cherries bright, sugar so white...
For me, one of the greatest joys I know is creating pretty baked goods. Sure, I like to make bread and pizza and biscuits just fine; but to make a tray of cupcakes or cookies that is truly beautiful brings the biggest smile to my face.
Of course, when I bring the goodies to share and have to tell my friends "sorry...
...you can't have one," it makes me so very sad. Several of my co-workers and good friends here at King Arthur eat gluten-free, and as much as they tell me it's OK not to be able to eat something, I still want to have something special for them for the holiday season.
I was thrilled when our blog schedule included a space for gluten-free cookies, and snapped up the chance to try out our test kitchen's recipe for rollout cookies, that staple of the holiday cookie tray.
First things first. This recipe uses one of our gluten-free mixes as a base ingredient. And I'm good with that. Why? Because I know the hard work that went into creating the mix from the best ingredients out there, and I know the testing that goes on for every mix. I BELIEVE in these mixes, not just from a King Arthur Flour employee-owner standpoint, but from a truly-fussy-about-her-cookies standpoint, too.
Do I have a purely from-scratch gluten-free rollout cookie recipe? Nope, I don't.
Are you welcome to share yours here in the comments section? YES, YOU BETCHA, YEP. I'd love it, in fact.
Our goal here today is to share information on how to create a great-looking tray of cookies to share with everyone, our GF baking friends included. I'm using the recipe and method that worked well for me, but I'm just one gal so please, please, please share your recipes, tips, and experience with us at the end of the post.
Come along for the ride as we make Gluten-Free Rollout Cookies.
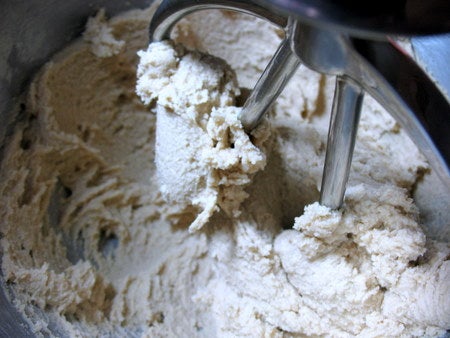
To make the dough, you'll need the following:
8 tablespoons (113g) butter, softened
1 box King Arthur Gluten-Free Cookie Mix
1 large egg white
Mix the butter and half of the mix together until creamy, then add the egg white and beat until fluffy. Scrape down the bowl well.

Add the rest of the cookie mix and 1 cup (96g) of nut flour. Here, I used toasted almond flour. You can use regular almond flour, hazelnut, toasted hazelnut, etc. Choose your favorite, and what will pair nicely with your planned fillings and toppings.
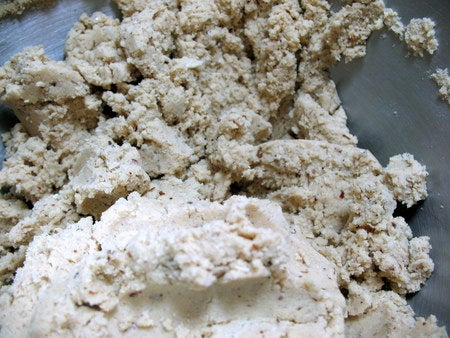
Blend on low speed until the mix resembles pie dough. It will be moist, but somewhat crumbly at this point. Divide into four disks, wrap well in plastic wrap, and refrigerate for at least 1 hour, or up to overnight.

After chilling, the dough will be firmer and less crumbly. Roll it out on a surface lightly dusted with cornstarch or confectioners' sugar. I found cornstarch to be the most effective at stopping the occasional sticking.
Roll the dough approximately 1/4" thick. You'll need this dough to be slightly thicker than normal, to provide stability.

Use your favorite cookie cutters to cut out shapes. I wanted to play more with toppings, so I kept all of my shapes the same. A nice 2" round cutter did the trick for me.
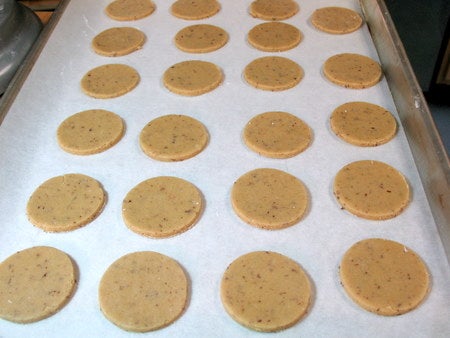
Place the cutout cookies on a parchment-lined baking sheet. They won't spread much, but do leave room between them for good air flow.

First up on my toppings and fillings list is red raspberry jam. Place 1/2 teaspoon of jam in the center of one of the cookies, and top with a second cookie. I used plain rounds for the bottom, and scalloped rounds for the top.
For best sealing, re-cut through both the cookies. If you need a touch of water to help the cookies seal, just brush it on with your finger.

Next, chocolate drops. You can place disks of chocolate on before or after baking, it's up to you. I find if you place the disks on before baking, the chocolate tends to "sink in" a little more. Try it both ways, and choose your favorite.
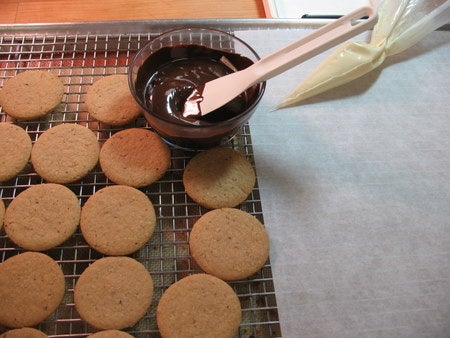
Bake the cookies in a preheated 350°F oven until lightly browned and crisp. Timing will vary by the size and shape of your cutters. My rounds took about 9 to 12 minutes.
Dipping and piping with chocolate really allows you to make so many different styles of cookie, you can let your imagination run free. Because I didn't need tempered chocolate for dipping, I slowly melted 6 ounces of dark chocolate in a double boiler. For the white chocolate, I melted about 1 ounce in a disposable piping bag in the microwave.
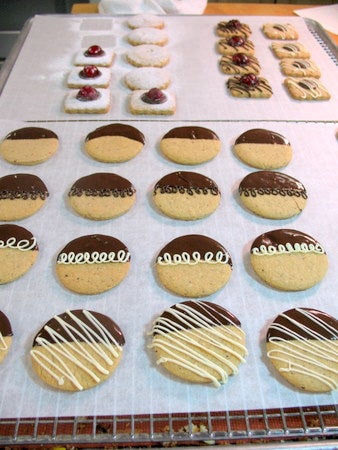
Dip, dip, dip. Swirl, swirl, swirl.
In the background you can see the fancier cookies with candied cherries set into the melted disks, the jam-filled cookies covered in white sugar and more candied cherries, drizzled with dark chocolate.

To coat the cherry cookies in snow white sugar without getting any on the cherries, I got creative with a 1/2 teaspoon measuring spoon and a fine sifter.
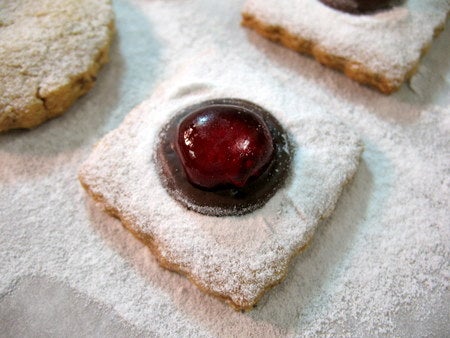
You'll need to move the spoon part way through sifting so that you don't have a handle line on the cookie base. You can see two slight impressions where the handle was on this particular cookie.
Trust me, no one is going to know your secret unless you tell them. They'll just be dazzled by the bright red cherry in the drift of fluffy white sugar.
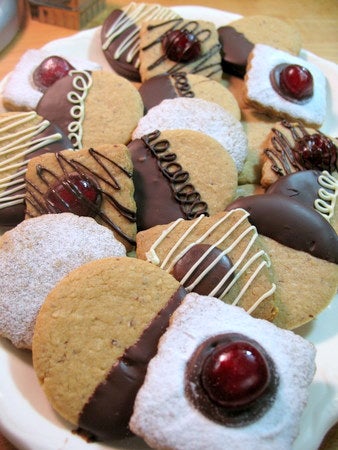
Simply amazing! Yes, all of the cookies on this platter are from the same batch of dough and they are ALL gluten-free!
I can't begin to tell you what a stir these caused in the kitchen as different folks stopped by to take a look. "Gluten-free, really?" "Seriously, those are all gluten-free?" I felt like I should have hung a sign on my station. "YES! I promise these are all gluten-free."
In truth, it was very flattering, and I was so pleased with the outcome. My goal was to provide a cookie tray that rivaled my regular spread of goodies, and I believe these really hit the mark.
So, you're up next. Please share your favorite gluten-free rollout cookie recipe, baking tip, decoration, etc. in the comments below.
Thanks in advance for sharing!
Please bake, rate, and review our recipe for Gluten-Free Rollout Cookies.

