


![]()
Classic challah is a soft loaf made with all-purpose flour (or a combination of all-purpose and whole wheat flours) and enhanced with both eggs and a sweetener (either sugar or honey).
Challah is similar in taste and texture to Greek tsoureki or Swiss zopf, but unlike those breads it's dairy-free. Traditionally served at the Jewish Sabbath and on most holidays (save Passover), it's safe to say challah and its many incarnations are a part of Jewish cuisine and culture in much of the world.
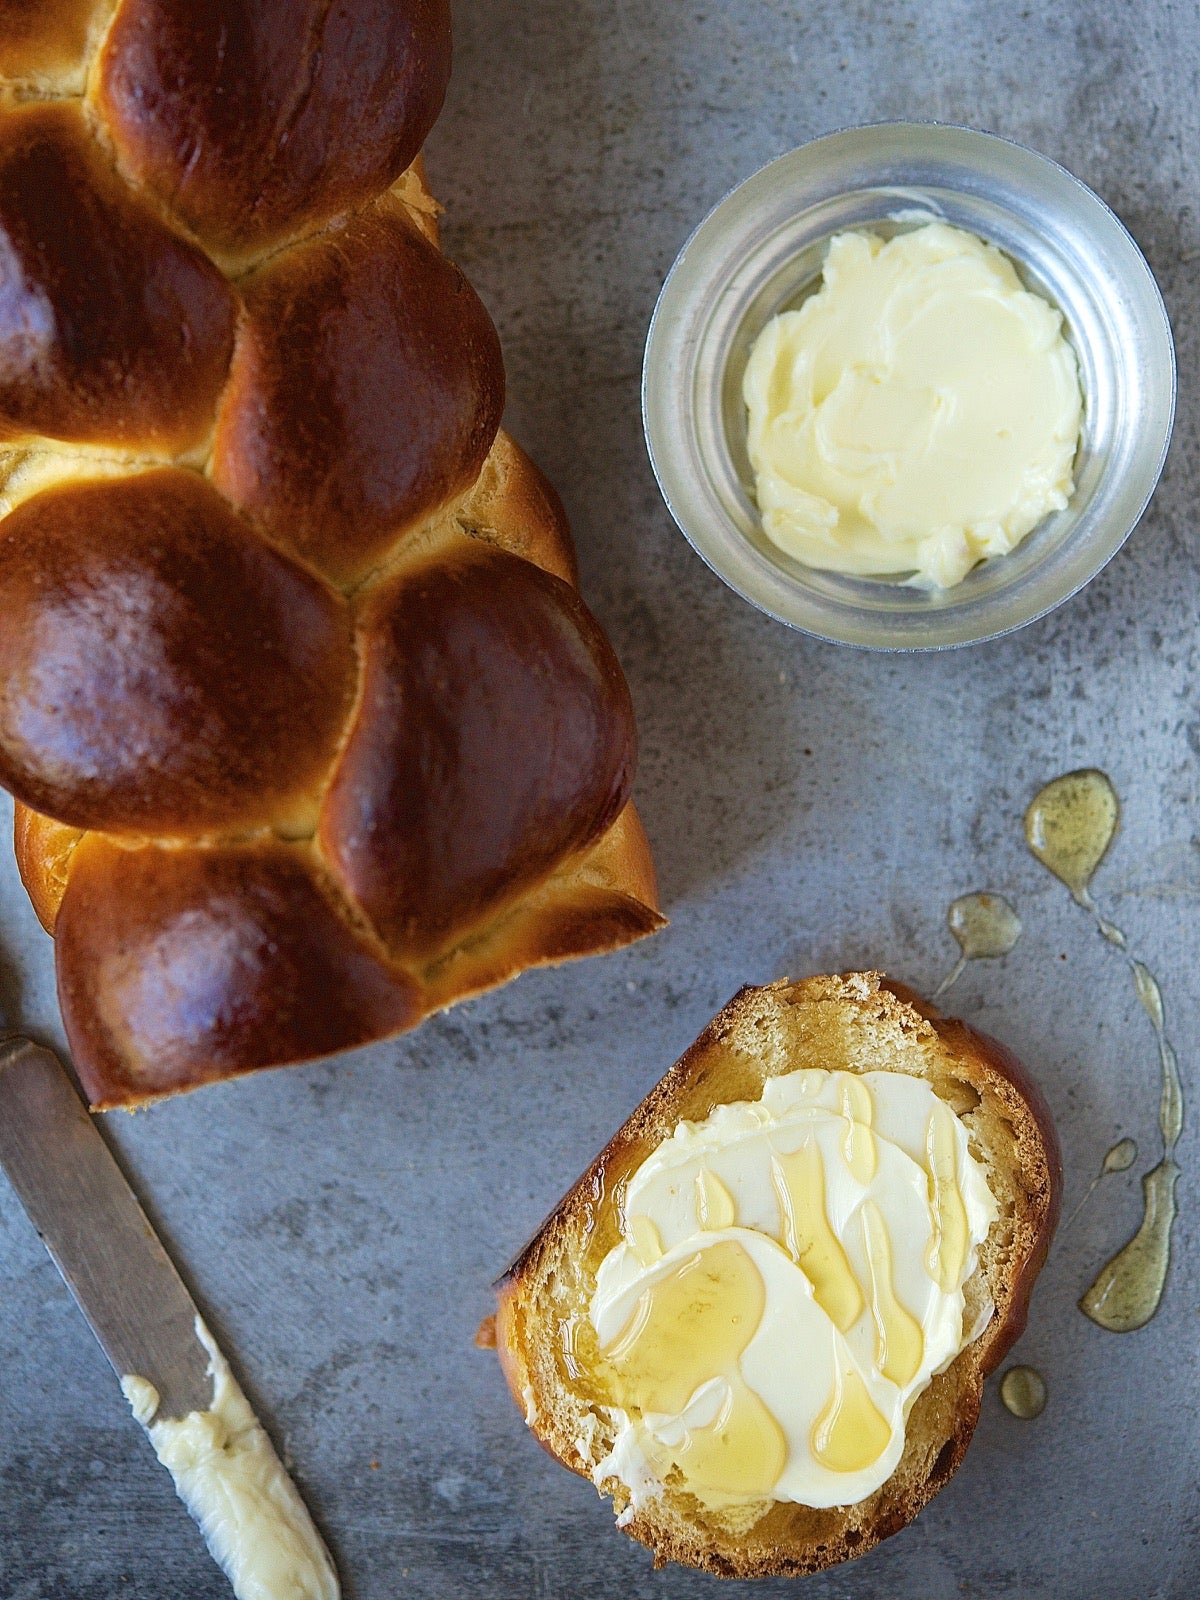
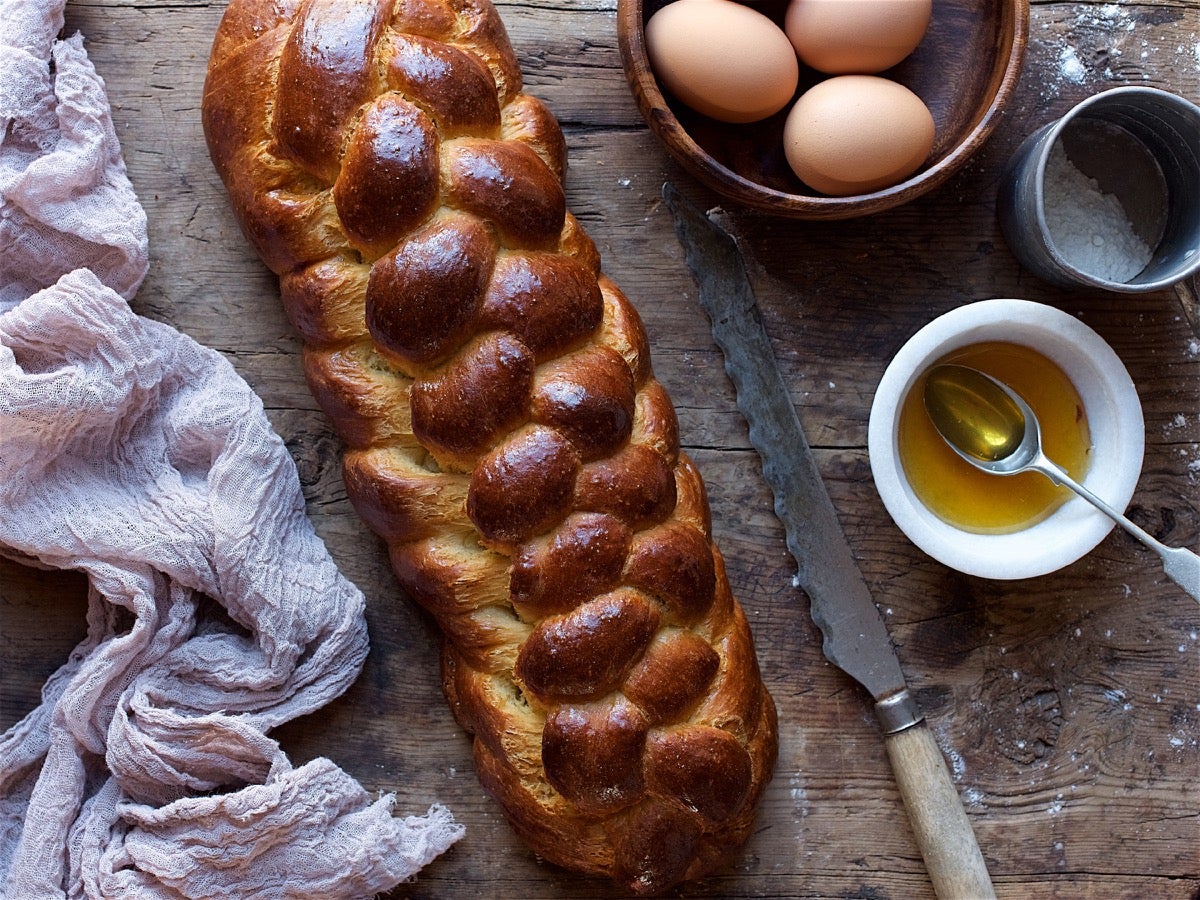
What distinguishes challah from other soft white breads is its striking appearance. Shaped into a coil or braid (from simple to intricate), the loaf is a shiny, deep-mahogany brown, thanks to a coating of egg glaze before going into the oven.
So, are you ready to test your yeast bread skills with this Classic Challah Bakealong? Don't worry, we'll offer you plenty of support along the way (even if you're an all-thumbs dough shaper like me!)
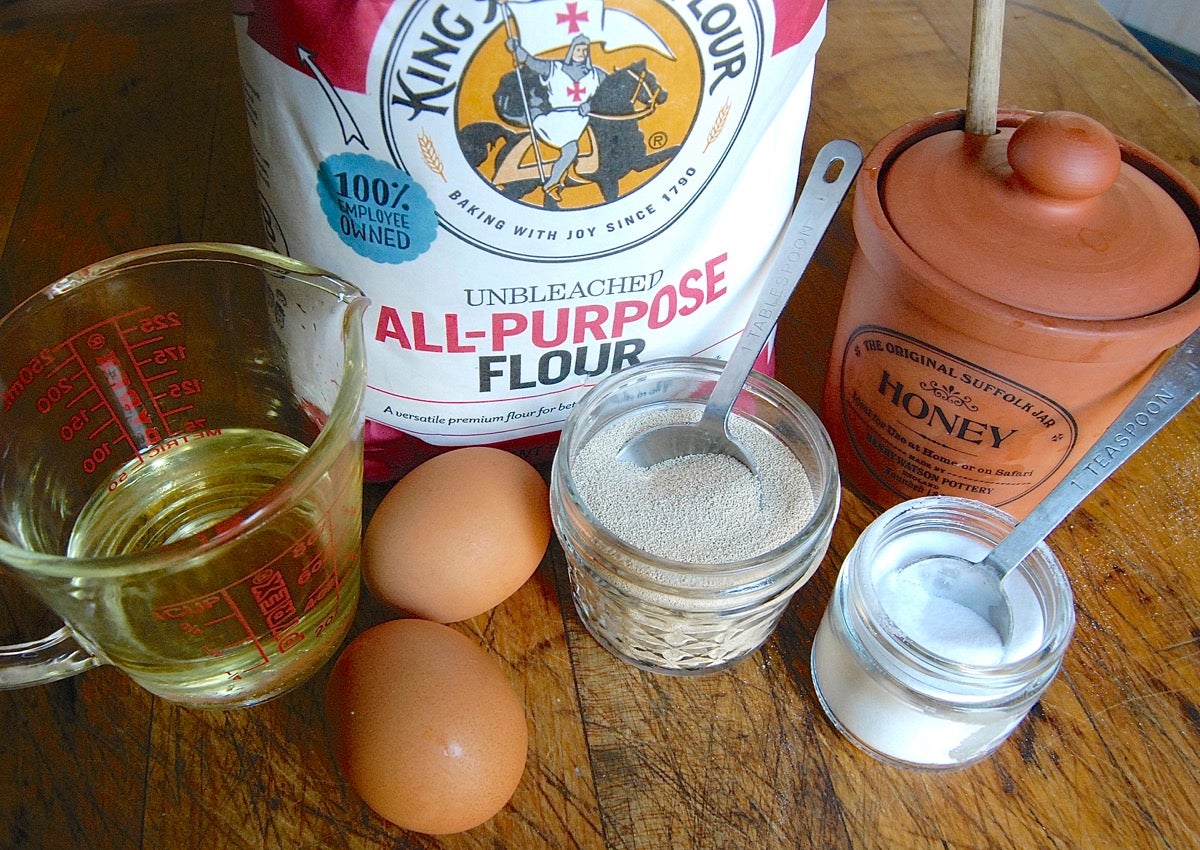
1/2 cup (113g) lukewarm water
6 tablespoons (74g) vegetable oil
1/4 cup (85g) honey
2 large eggs
4 cups (482g) King Arthur Unbleached All-Purpose Flour
1 1/2 teaspoons salt
1 tablespoon instant yeast
First step: Weigh out 17 ounces of flour; or measure 4 cups of flour by gently spooning it into a cup, then sweeping off any excess. The more accurately you measure your flour, the better your bread will be; too much flour will yield a dry, heavy loaf.
Combine all of the dough ingredients and mix to make a rough dough.
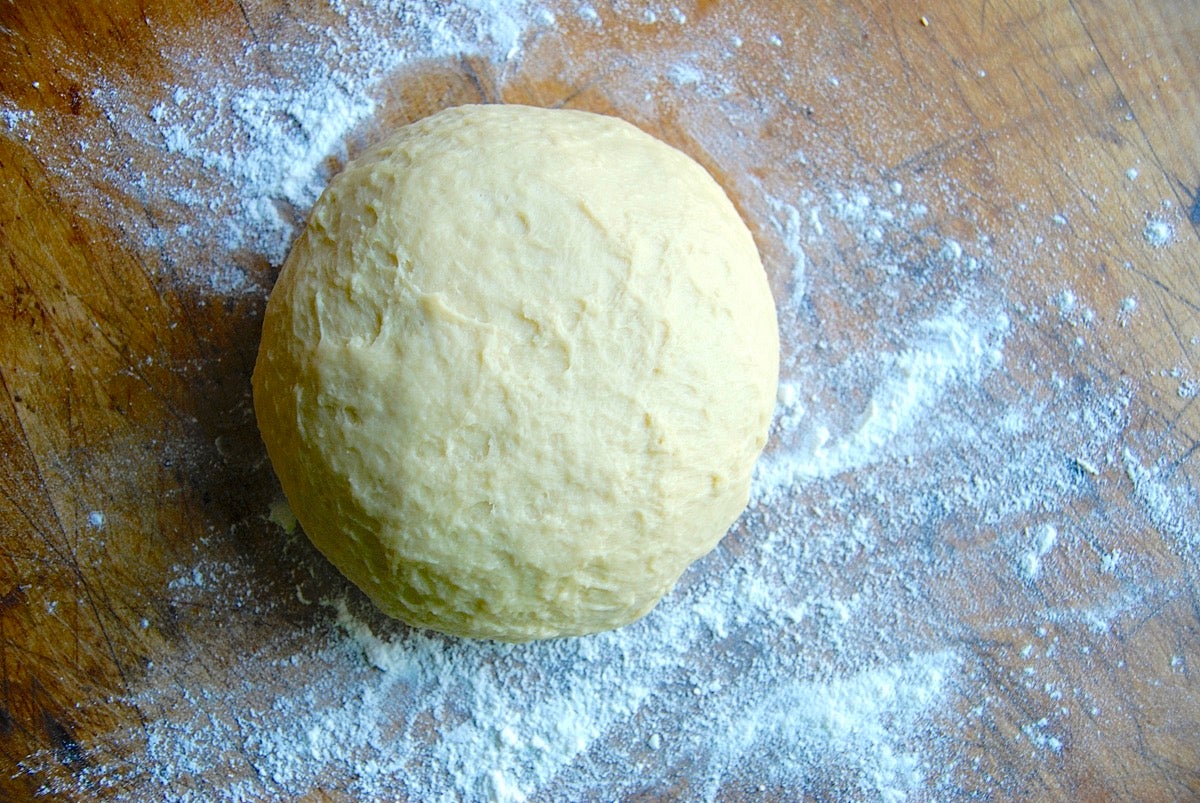
Knead the dough — by hand, using a stand mixer, or in a bread machine — to make a soft, smooth dough. It'll still have a slightly rough surface; that's fine.
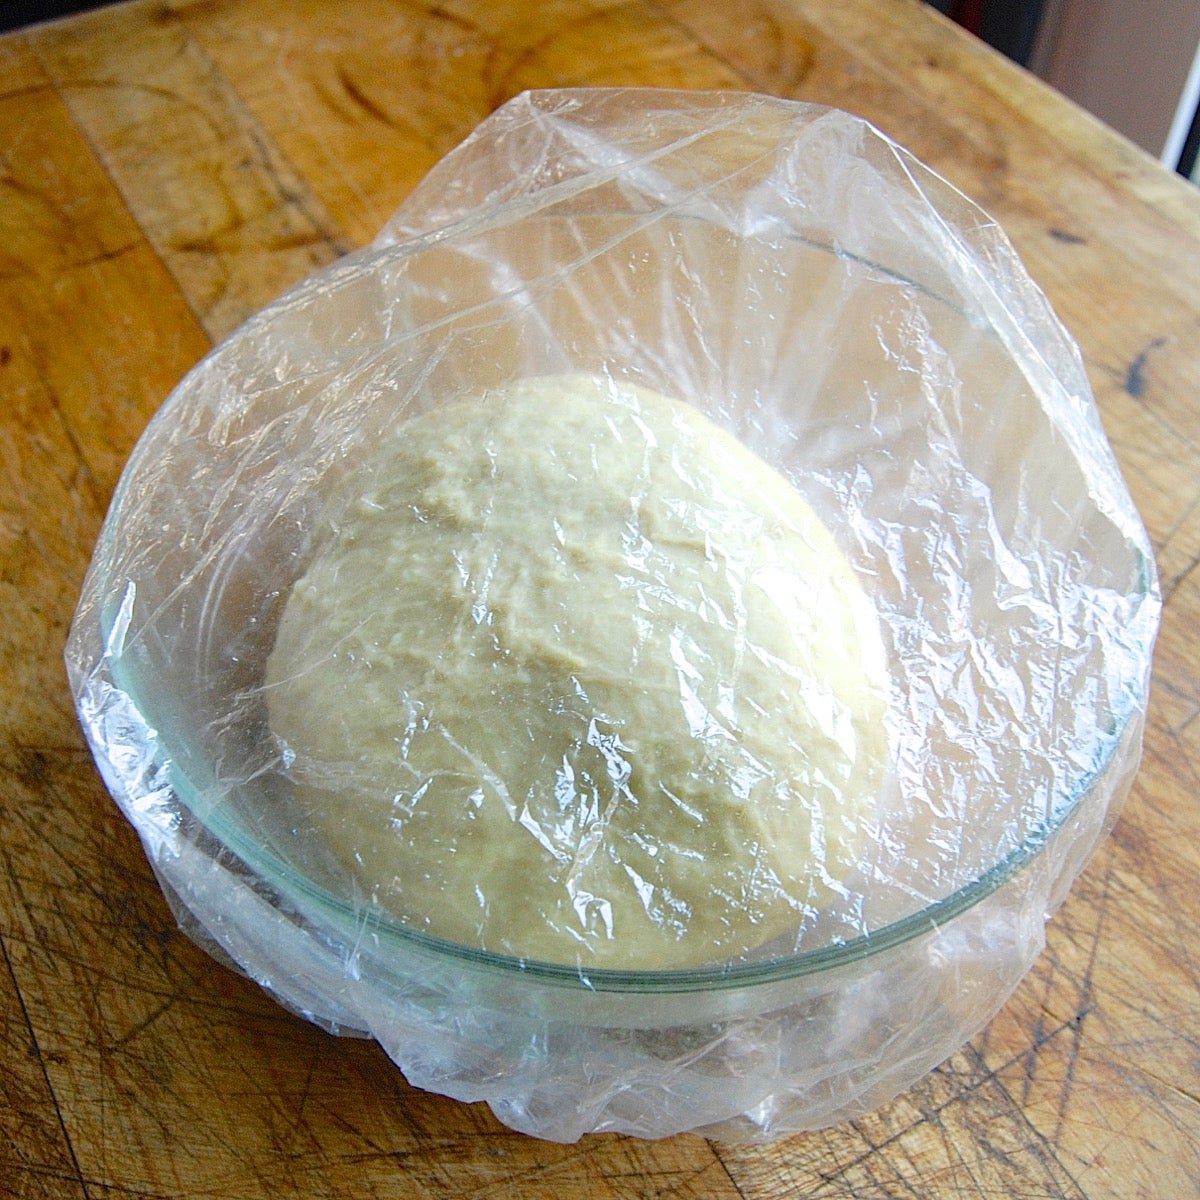
Place the dough in a lightly greased bowl, and cover the bowl.
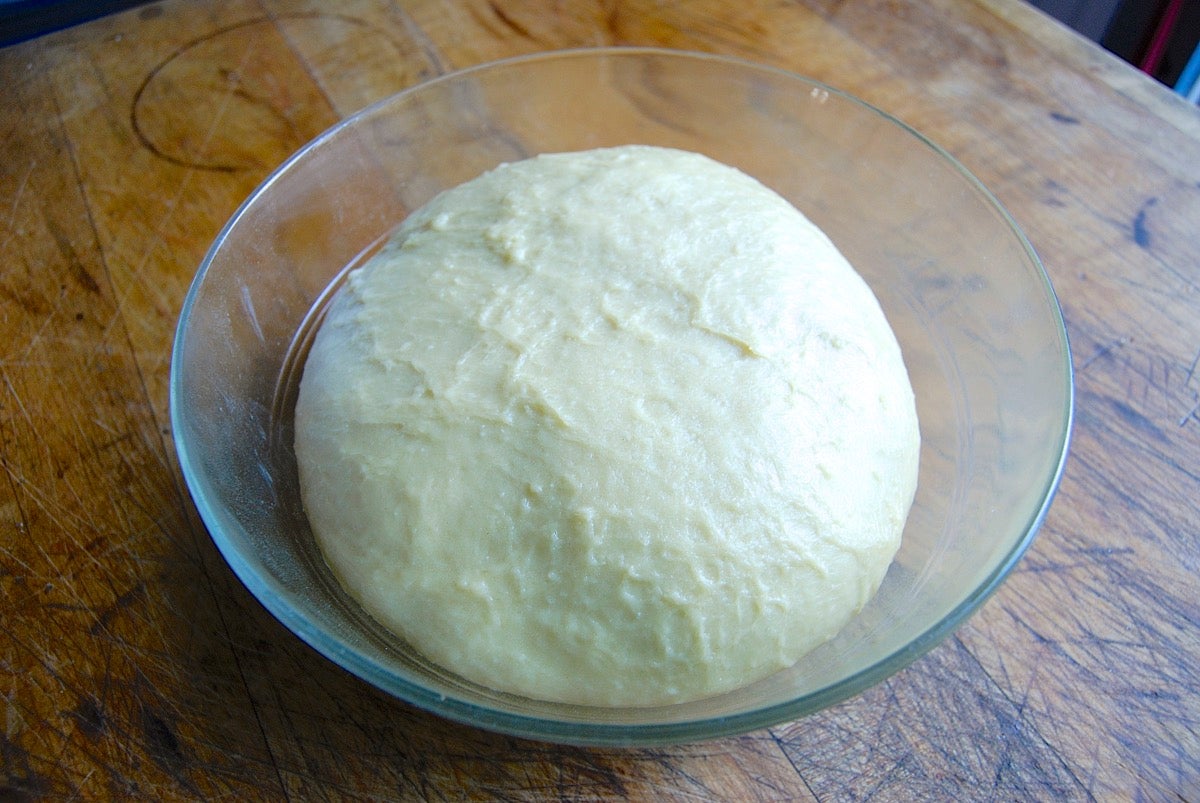
Allow the dough to rise for about 2 hours. It won't necessarily double in bulk, but should become noticeably (if not dramatically) puffy.
Gently deflate the dough, and transfer it to a lightly greased work surface.
You may braid the challah the traditional way, into a three-strand braid. But for this Bakealong challenge, we'll be tackling a fancier six-strand braid.
We'll show you how to make a six-strand braid in the step-by-step photos below. But we encourage you to first watch our video, which will give you a feel for the rhythm of this braiding technique:
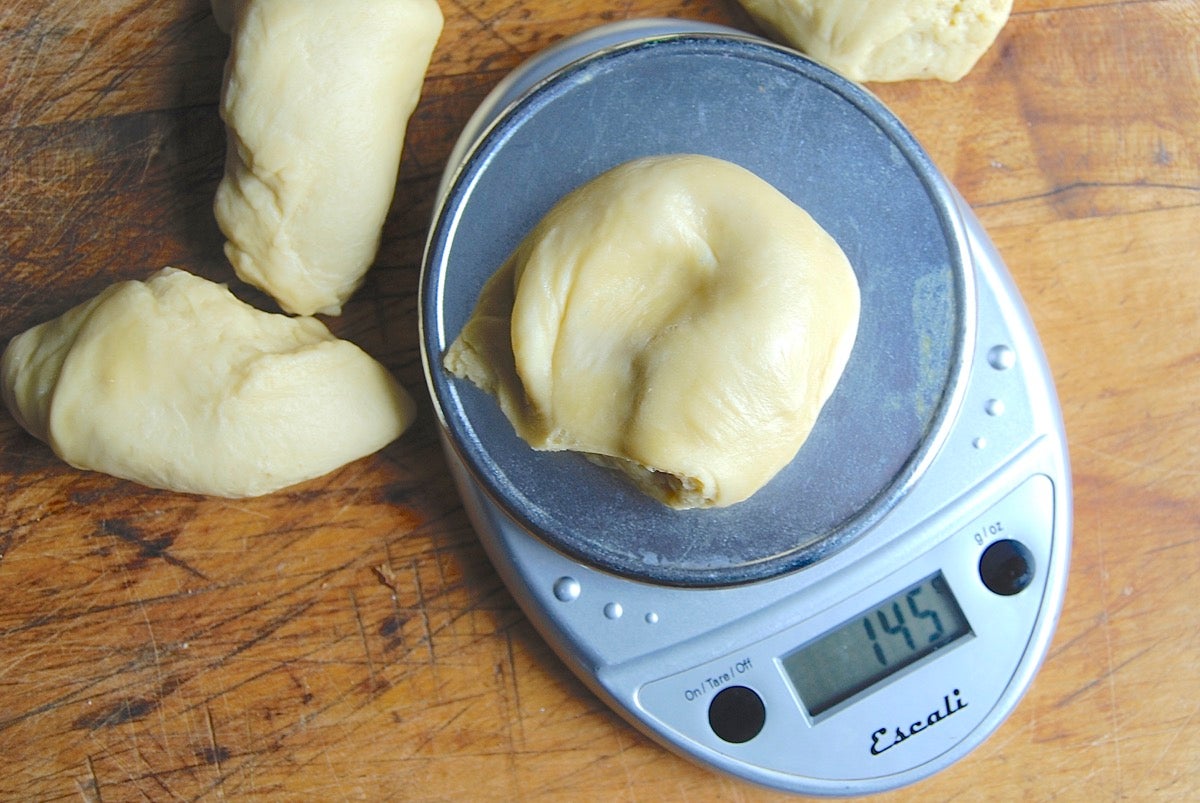
Divide the dough into six pieces. A scale is a big help in dividing the dough evenly.
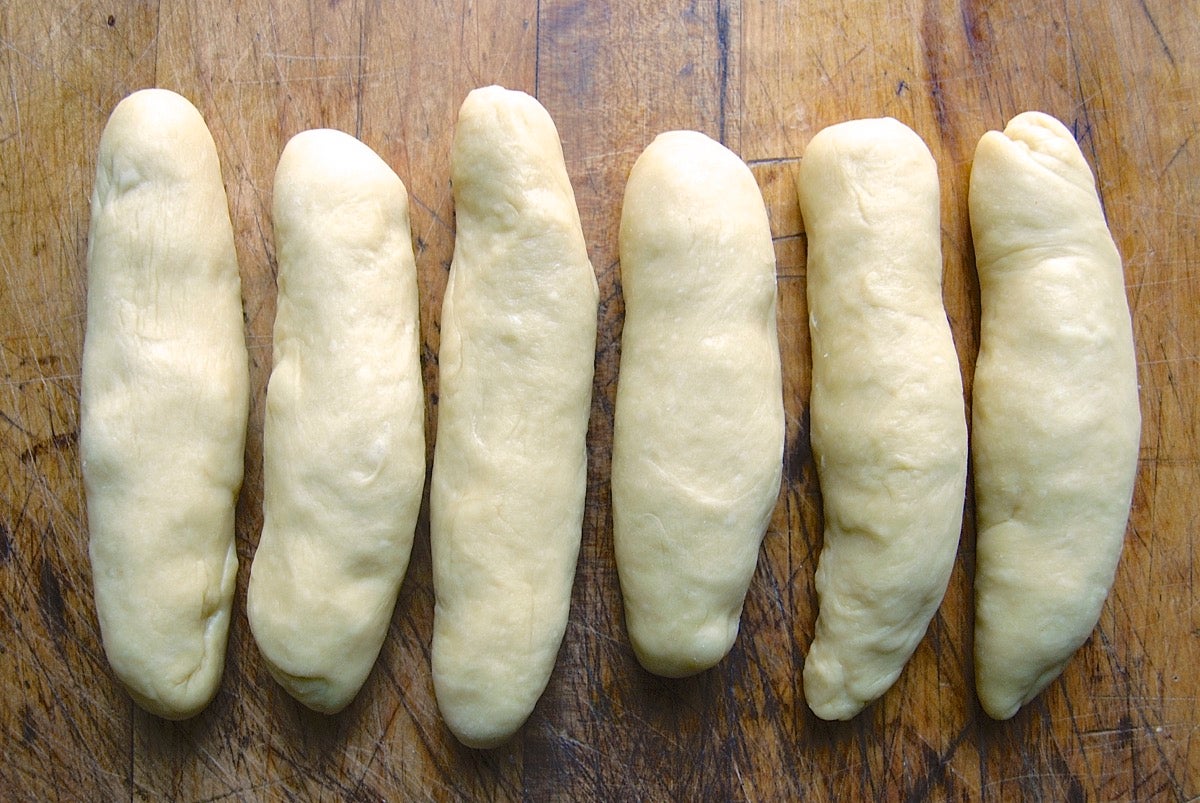
Shape each piece into a rough log.
Cover the logs, and let them rest for 10 minutes.
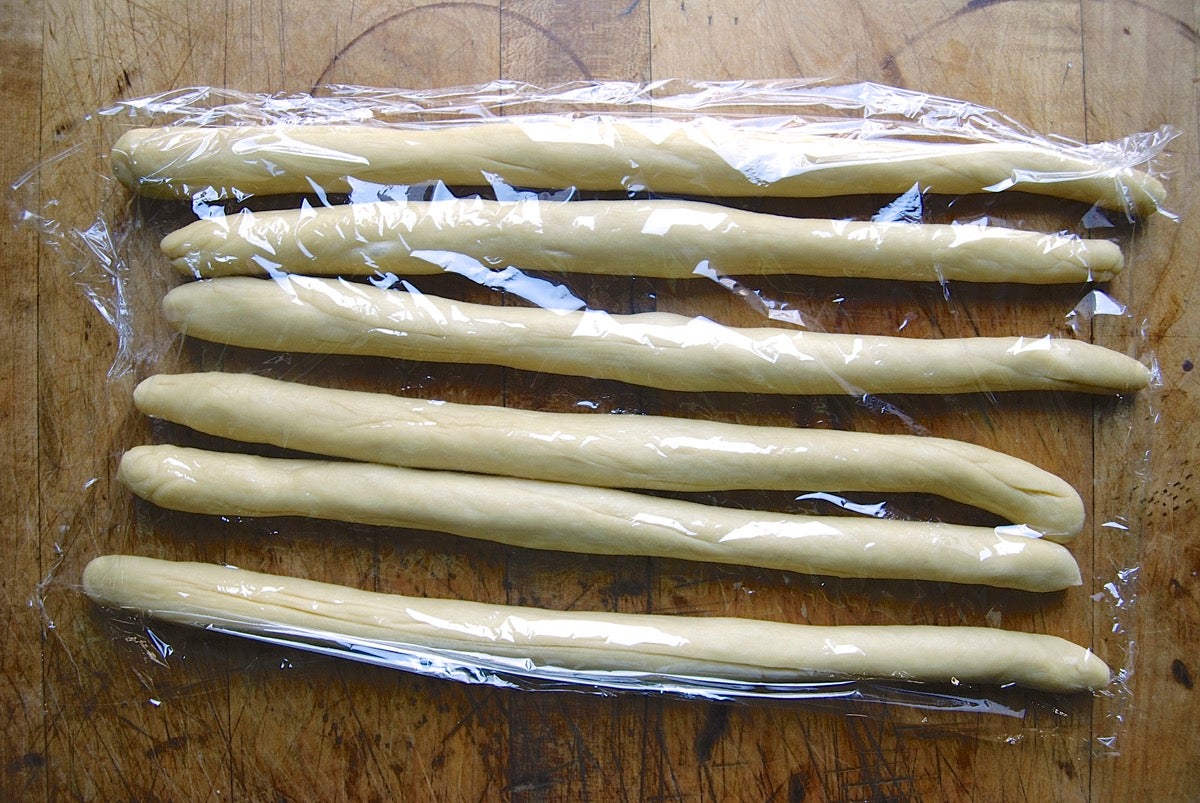
Roll each piece into a long rope. Your goal is ropes about 20" long; if the dough starts to shrink back as you roll, cover it and let it rest again for about 10 minutes, then resume rolling. The short rest gives the gluten a chance to relax.
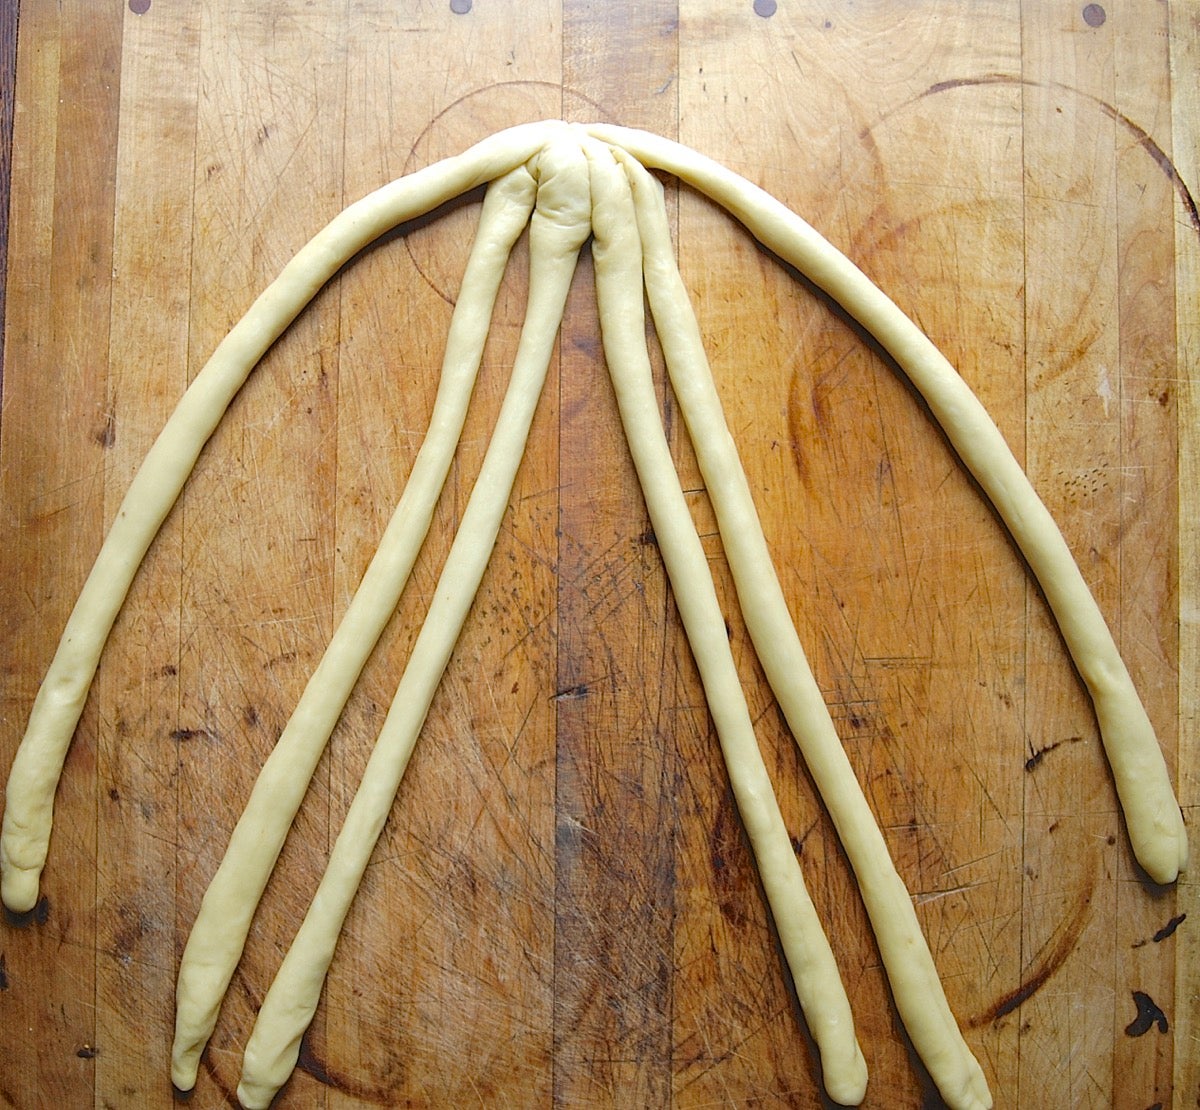
Pinch together the ends of the strands so that all six strands are joined at one end.
Mentally number the positions of these strands 1 to 6, going left to right. The outermost strand on the left is #1; the outermost strand on the right is #6.
While the individual strands themselves will move, this numbering of positions will remain the same: looking left to right, the order of the strands is 1, 2, 3, 4, 5, 6.

Now, cross the two outer strands. That's easy, right?
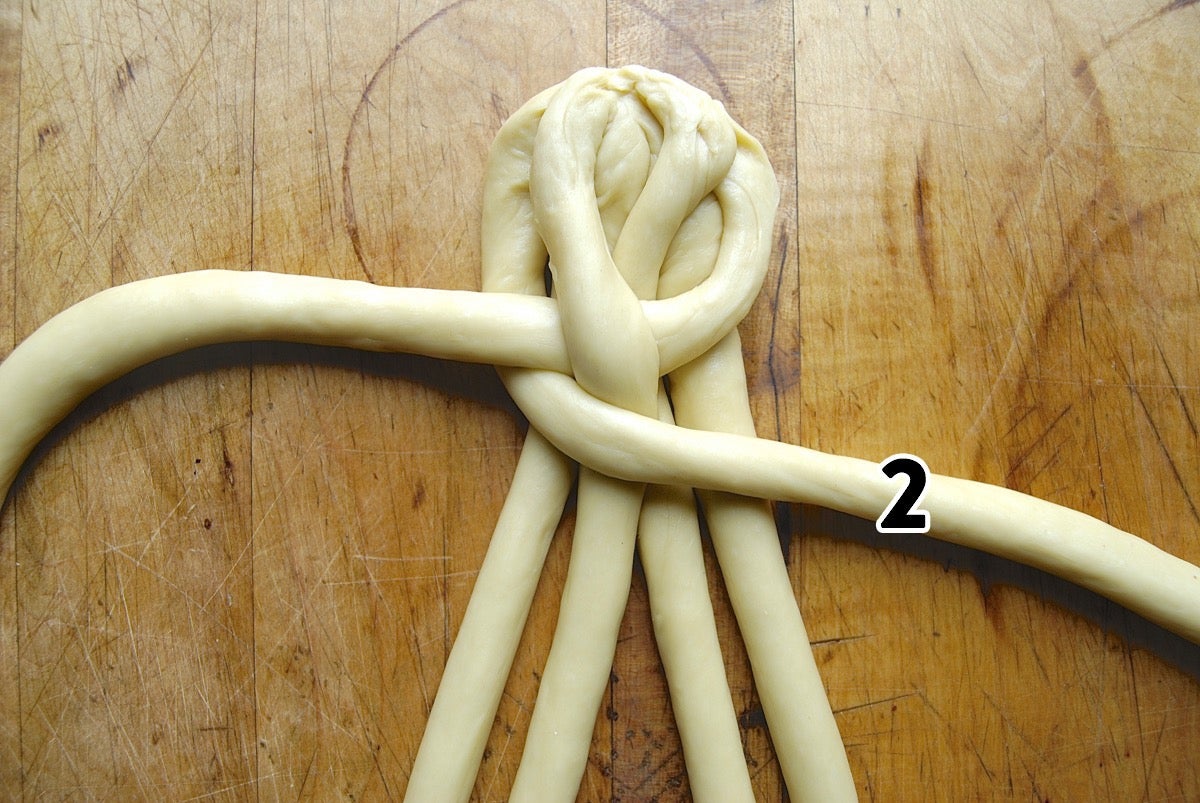
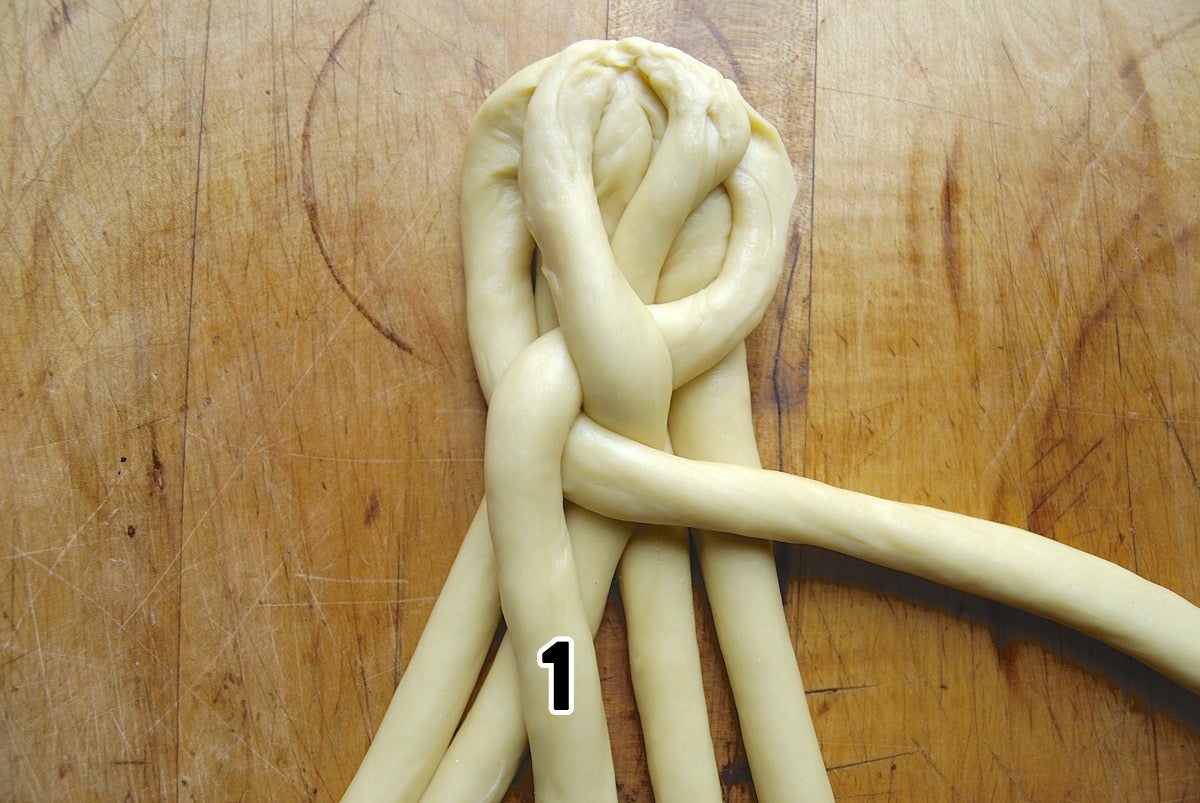
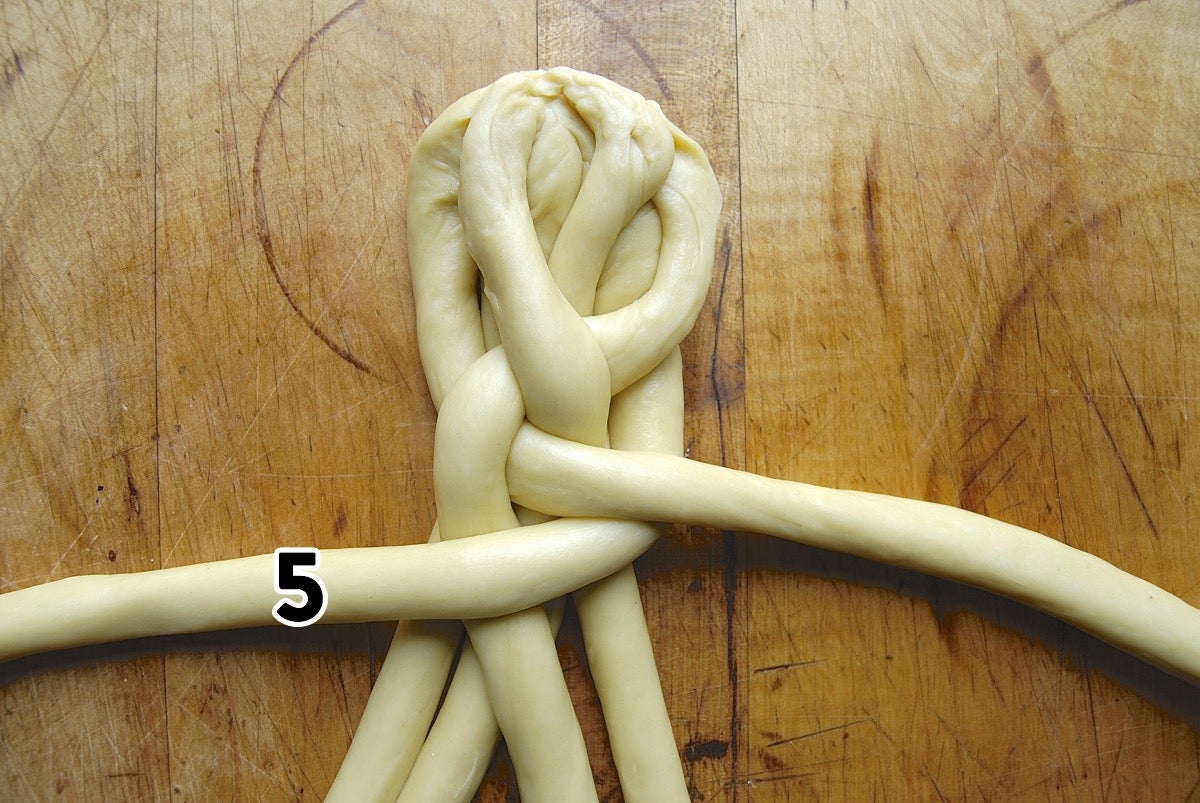
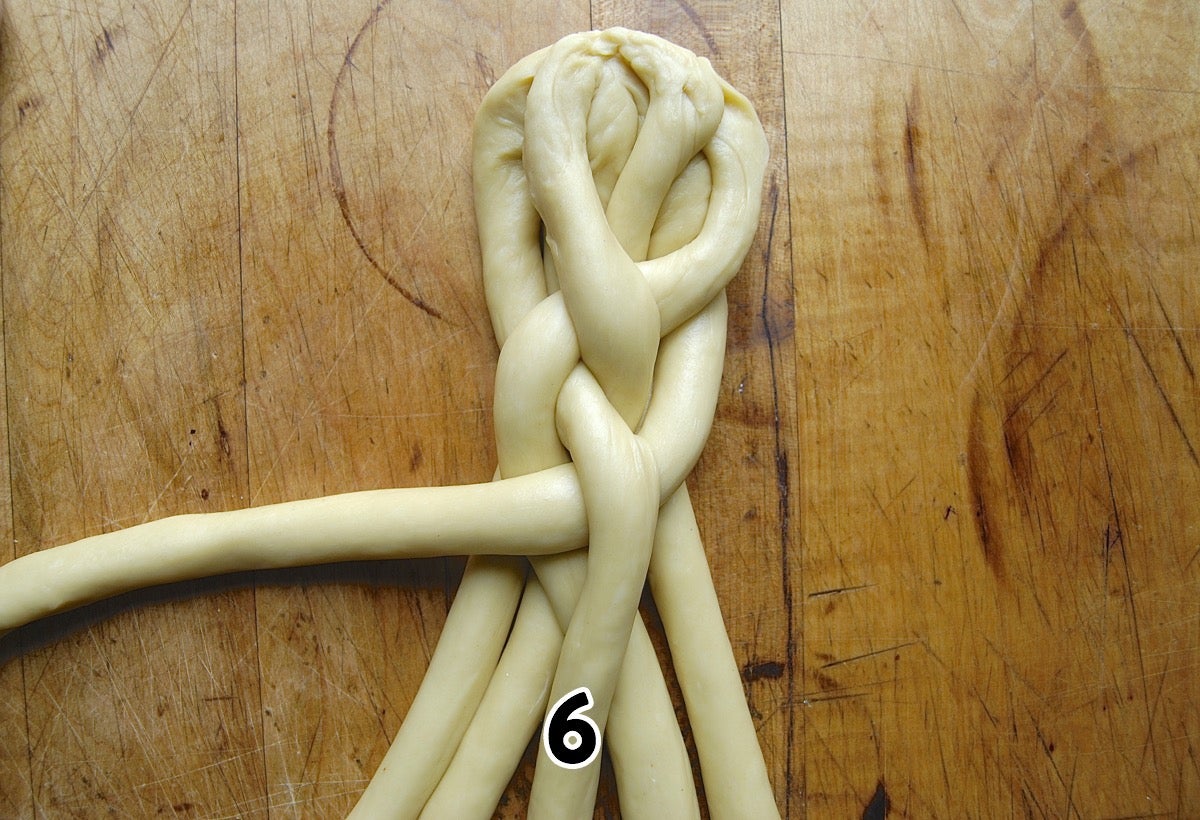
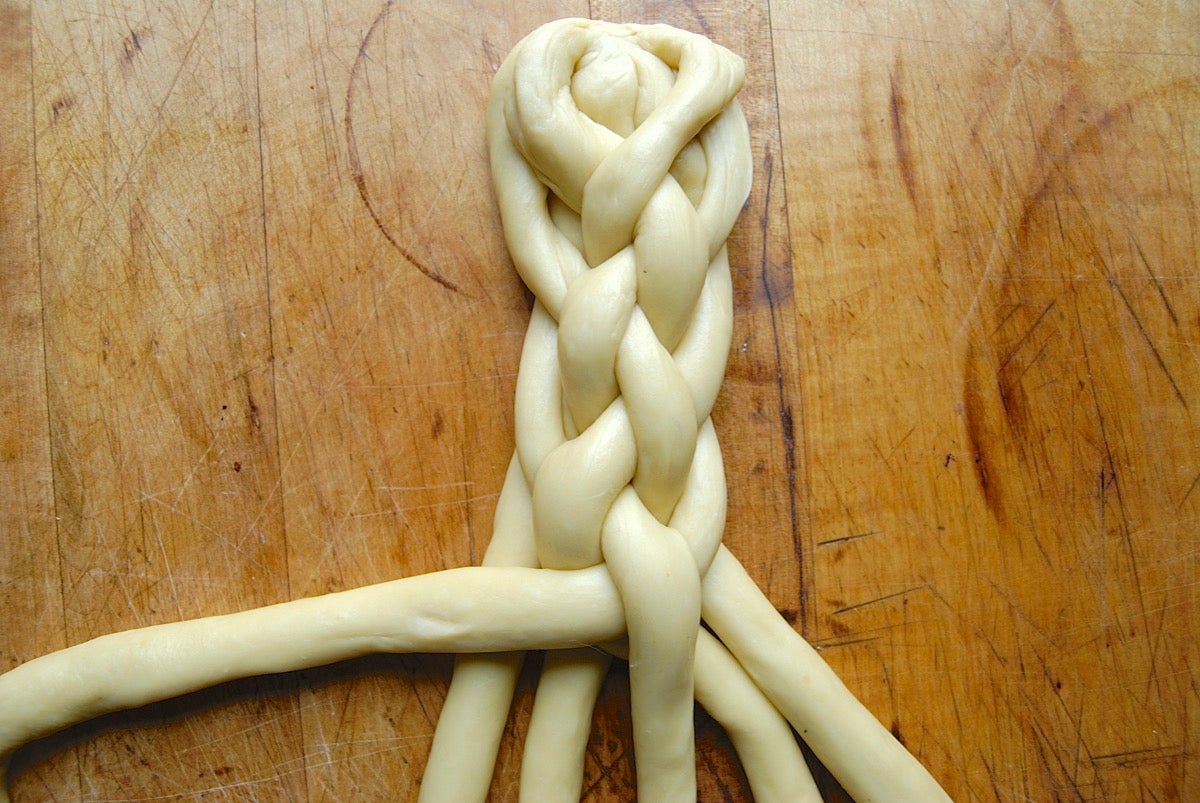
To continue and ultimately finish the braid, you're going to repeat a sequence of four steps (labeled 1, 2, 3, 4 below) all the way through. Each photo shows where the numbered strand should end up at the completion of the step you're performing.
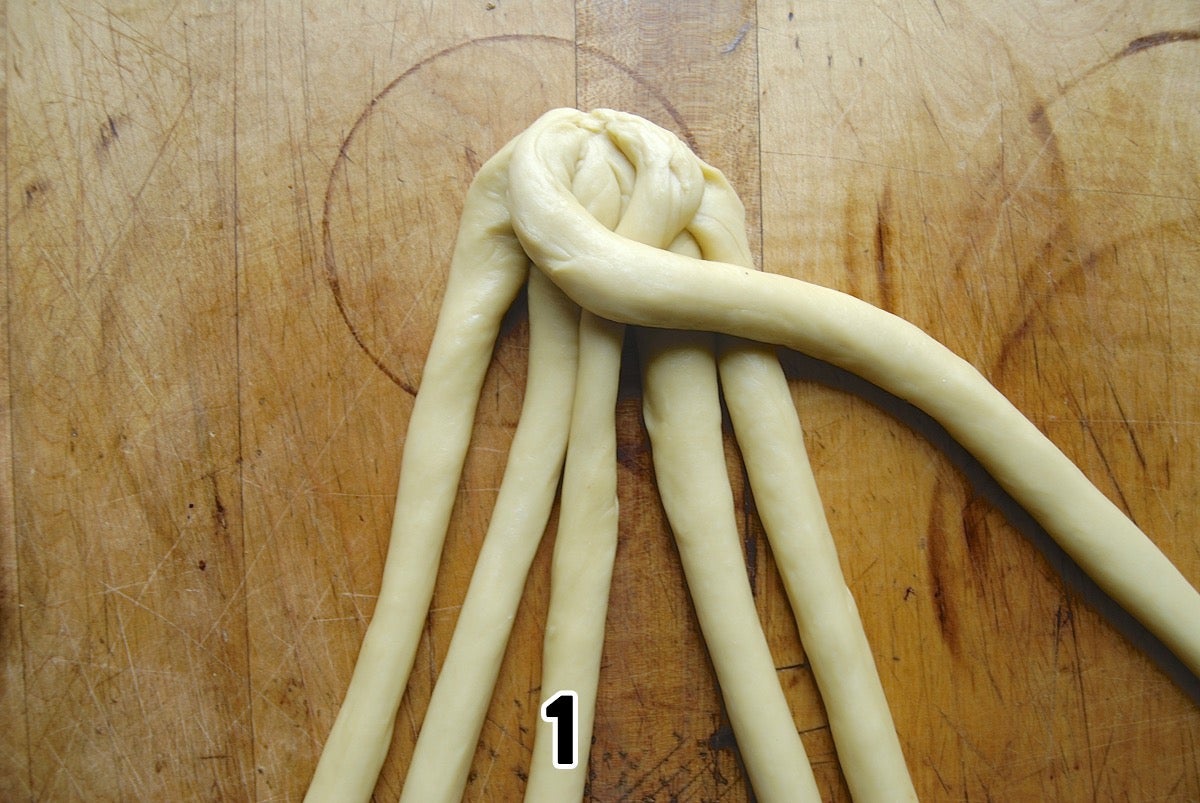
1. Cross 1 over 2 and 3.
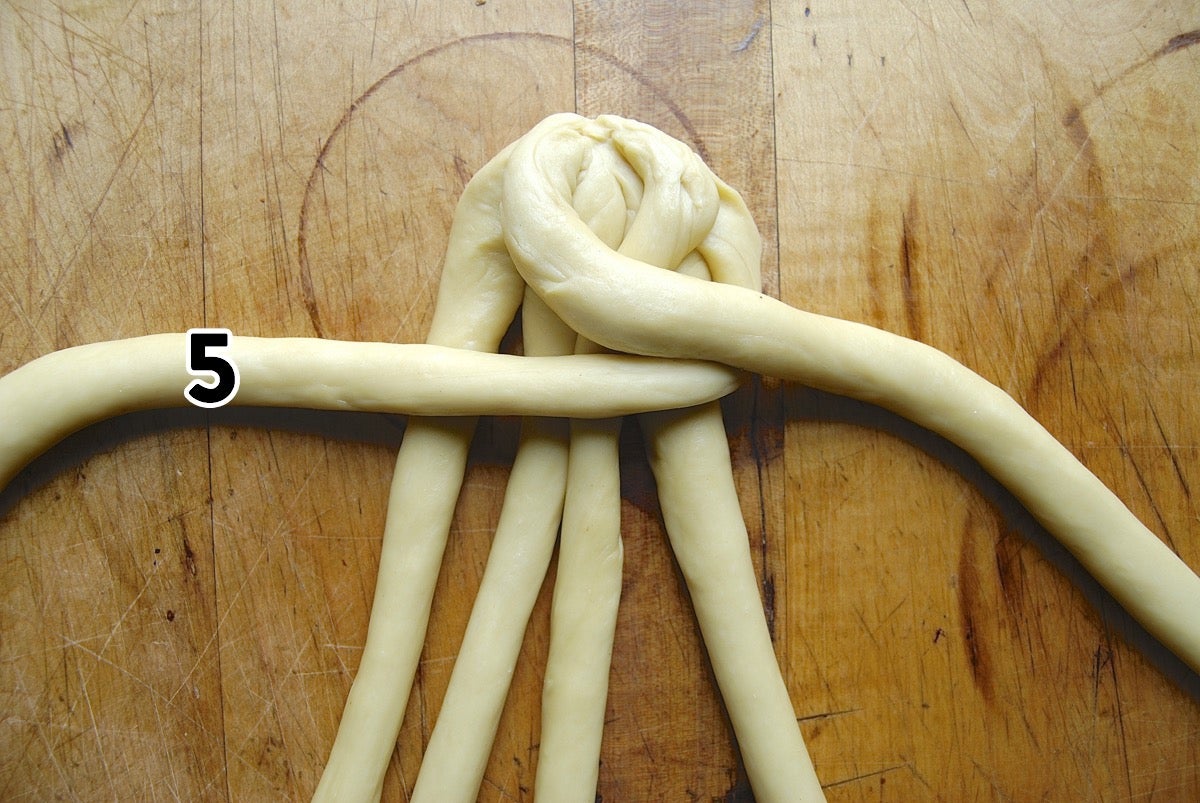
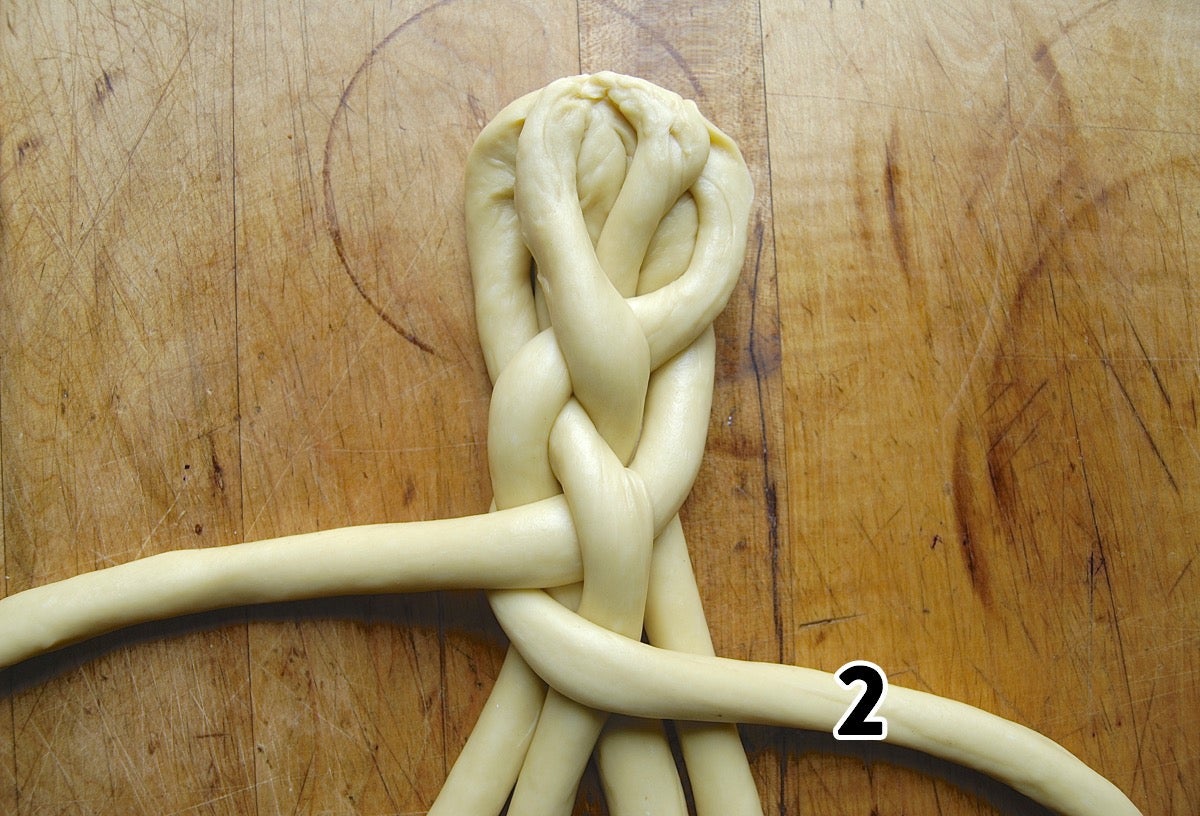
2. Cross 5 over 4, 3, 2, and 1.
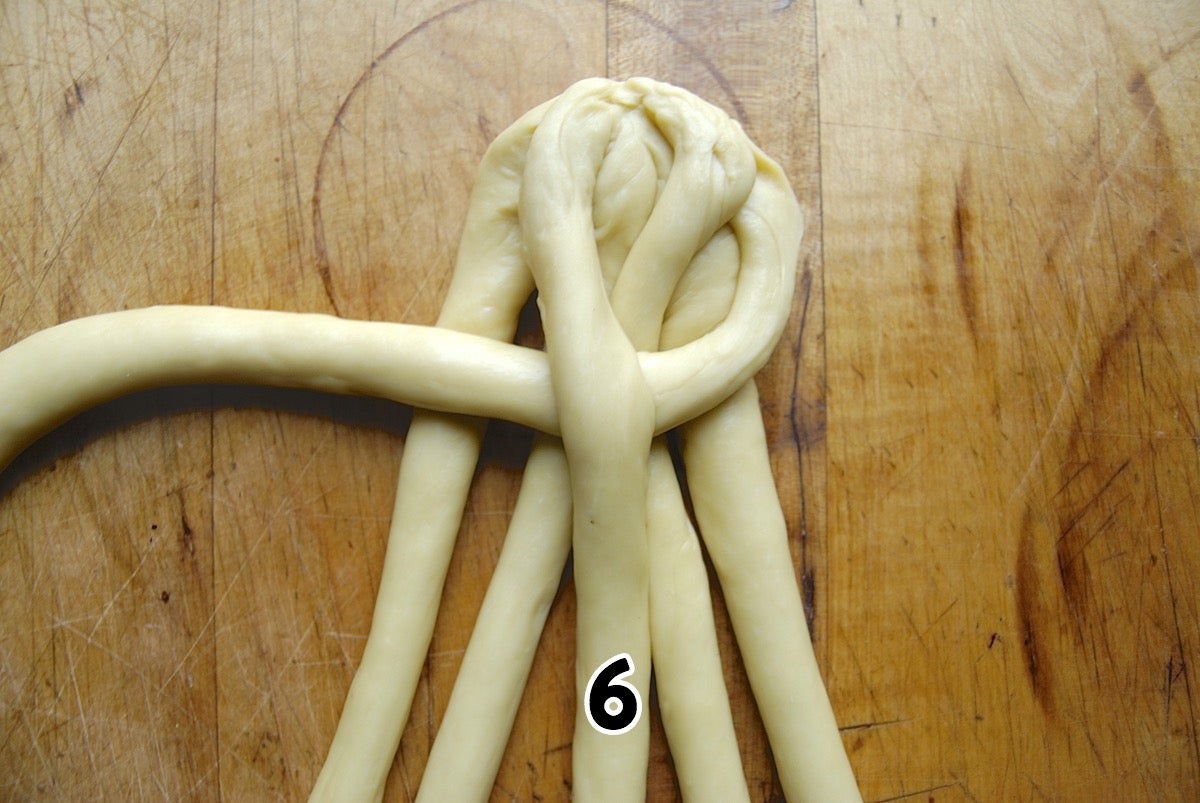
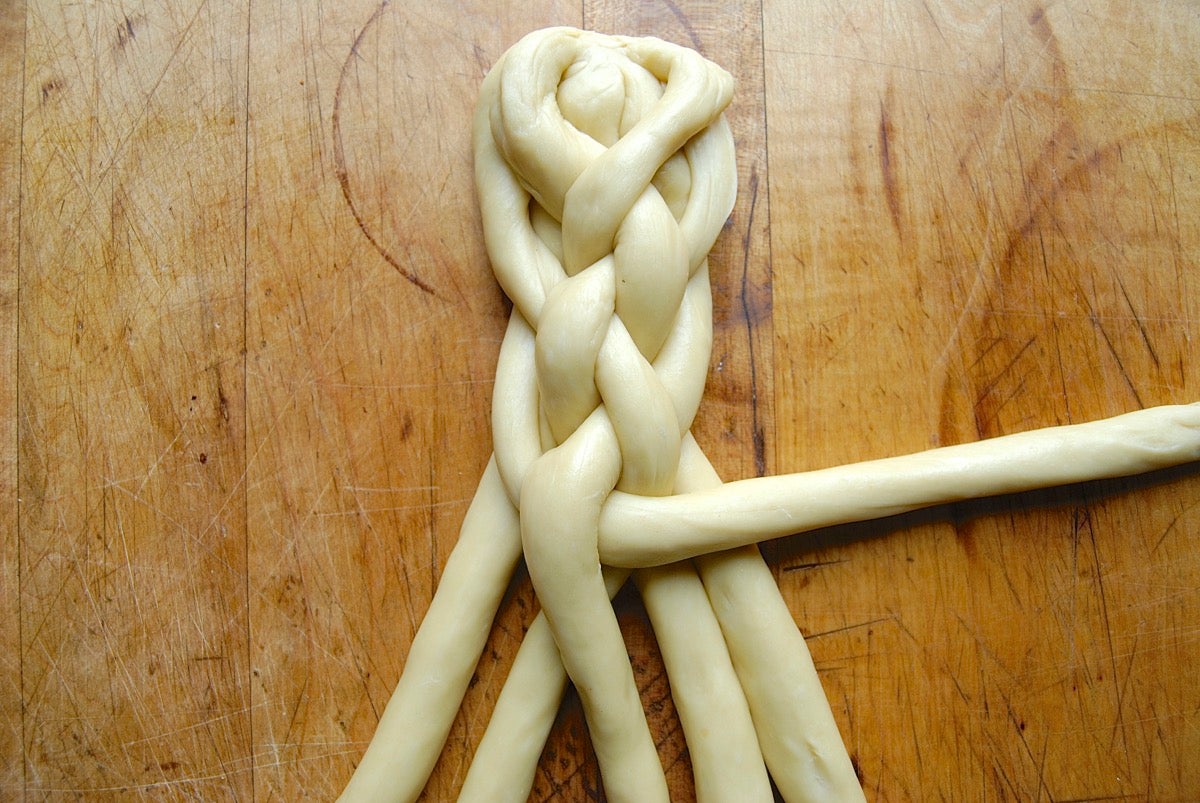
3. Cross 6 over 5 and 4.
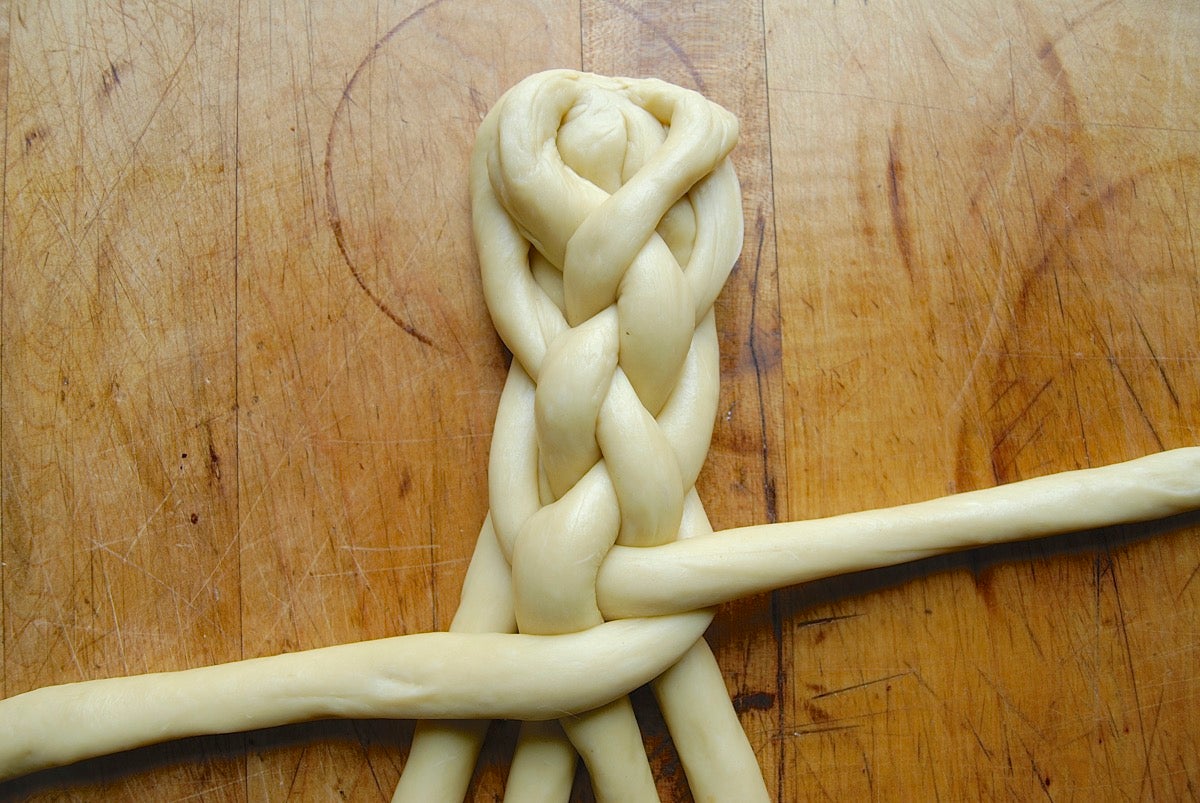
4. Cross 2 over 3, 4, 5, and 6.
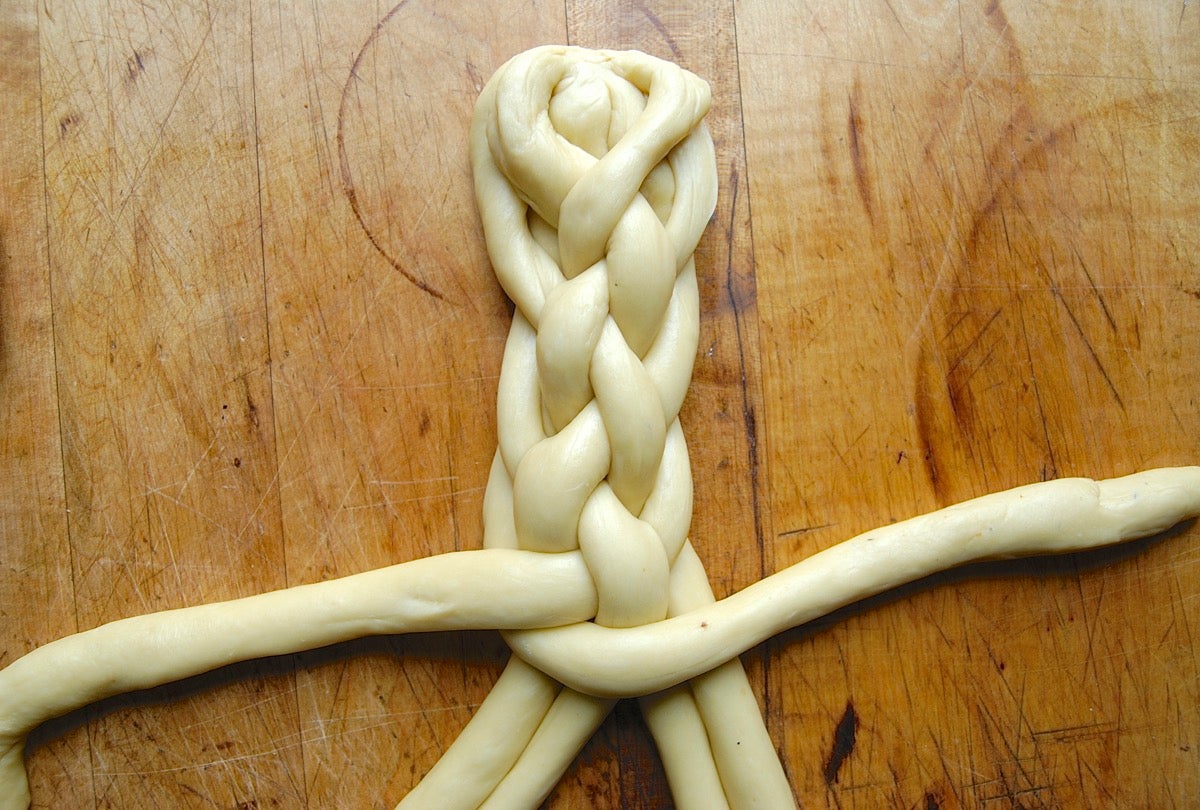
Repeat those four steps:
Cross 1 over 2 and 3.
Cross 5 over 4, 3, 2, and 1.
Cross 6 over 5 and 4.
Cross 2 over 3, 4, 5, and 6.
And repeat again:
1 over 2 and 3...
 5 over, 4, 3, 2, and 1...
6 over 5 and 4...
2 over 3, 4, 5, and 6.
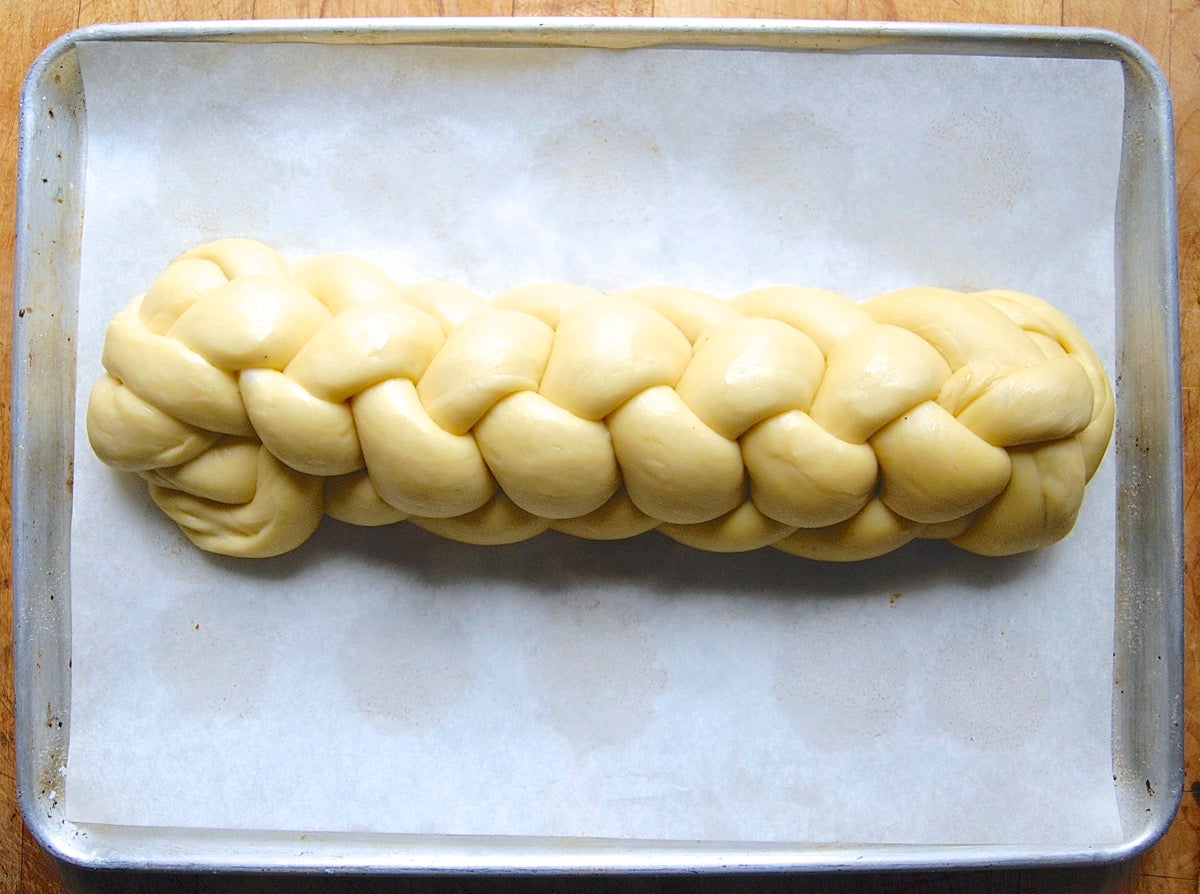
Keep repeating this sequence until you get to the end of your strands.
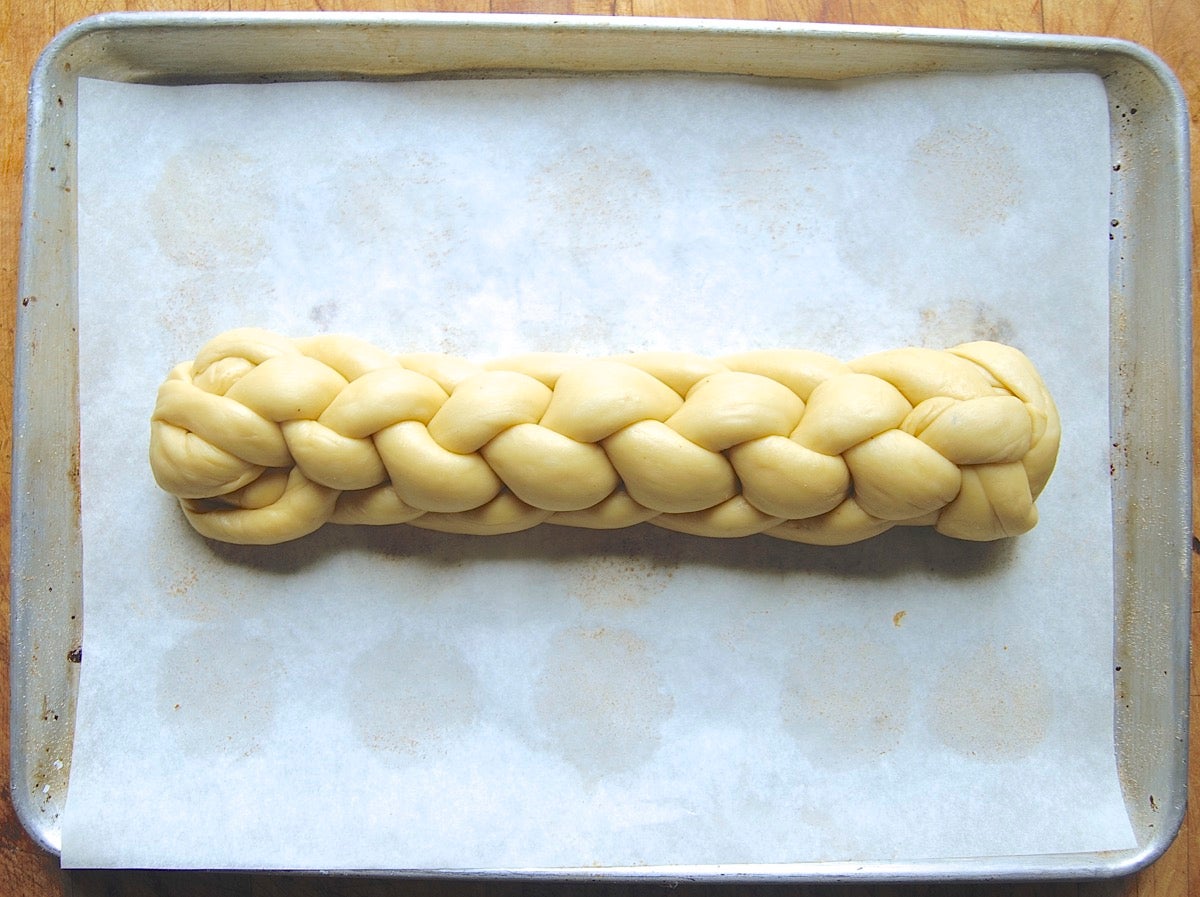
Gently pick up the braided loaf, and place it on a lightly greased or parchment-lined baking sheet.
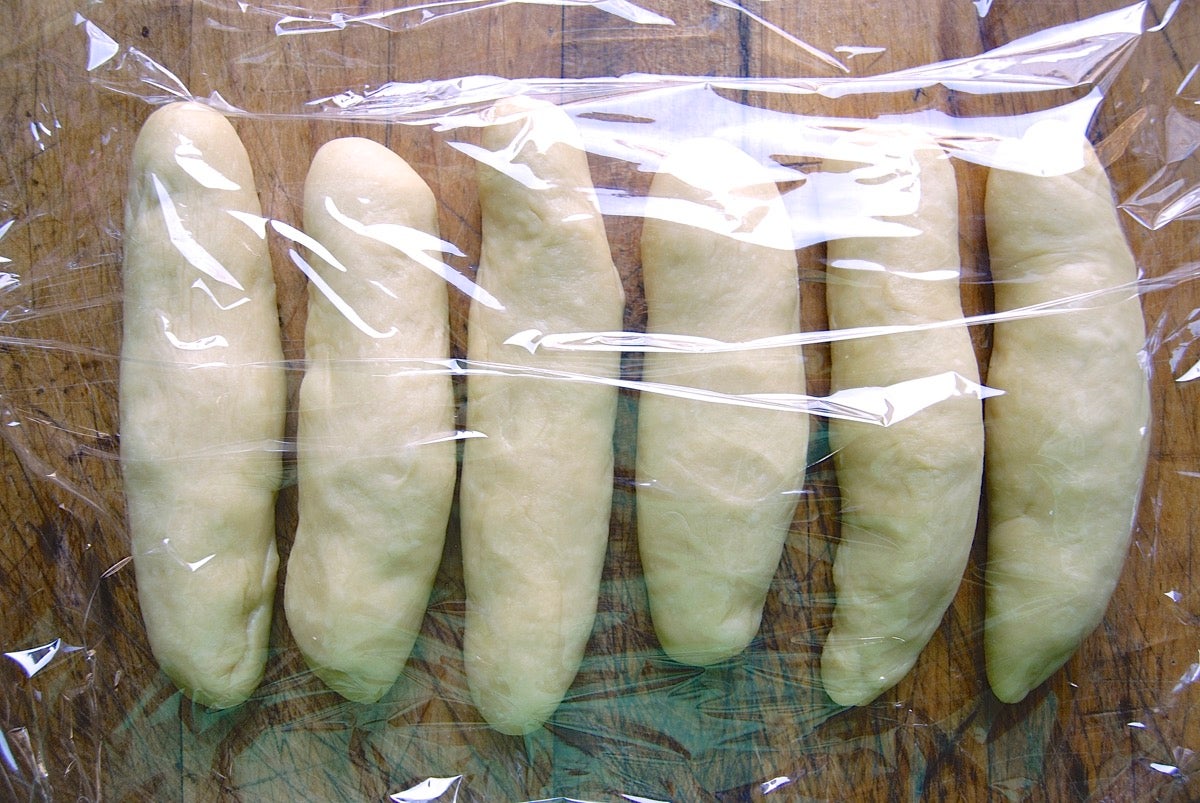
Cover the loaf with lightly greased plastic wrap, and let it rise until it's very puffy, 90 minutes to 2 hours at room temperature.
Towards the end of the rising time, preheat the oven to 375°F.
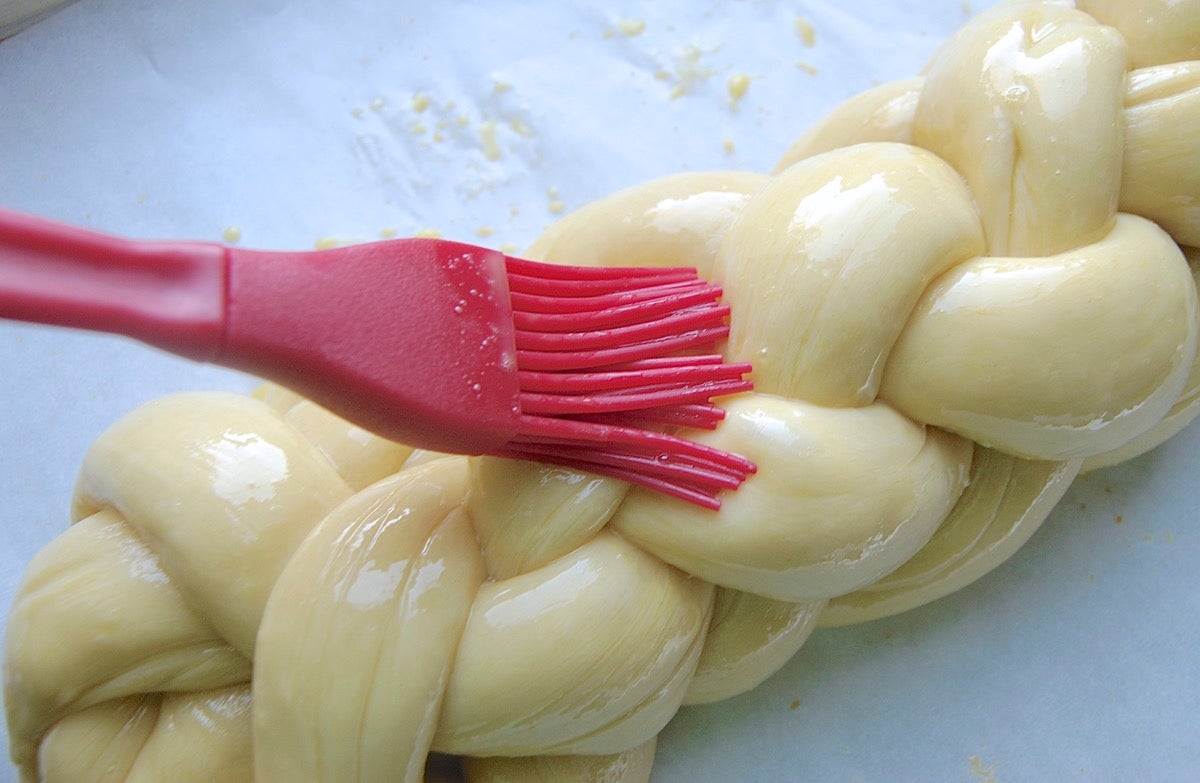
Whisk together 1 large egg and 1 tablespoon water. Brush this glaze over the risen loaf.
Nest the challah on its baking sheet into another baking sheet, if you have one. This double layering of pans will help prevent the challah's bottom crust from browning too quickly.
Put the challah into the lower third of the oven, and bake it for 20 minutes. If it's a deep golden brown, tent it loosely with aluminum foil. If it's not as brown as you like, check it again at 30 minutes.
Once you've tented the challah, bake it for an additional 10 to 15 minutes, until the loaf looks and feels set and its interior registers at least 190°F on a digital thermometer.
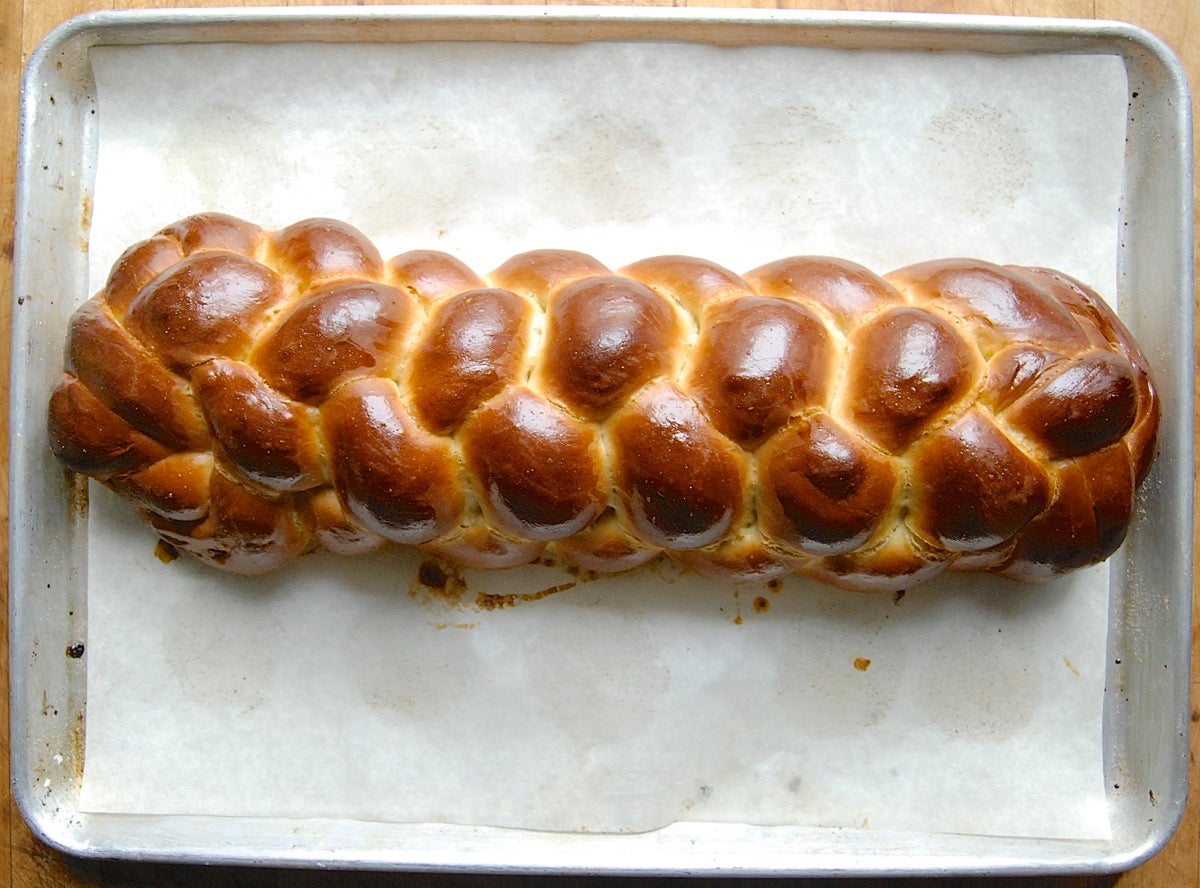
Remove the bread from the oven, and place it on a rack to cool.
Store any leftover bread, well wrapped in plastic, at room temperature for several days; freeze for longer storage. While challah does tend to dry out after a day or so, it's always good toasted or made into grilled sandwiches or French toast.
High-altitude adjustments
Do you bake at altitude? Check out our high-altitude baking tips.
Make it whole wheat
While challah made with 100% whole wheat flour will be heavier than that made with all-purpose flour, it will still be soft and delicious. For best flavor, we recommend substituting white whole wheat flour for the all-purpose flour. Increase the amount of water to 3/4 cup, adding up to an additional 2 tablespoons water if necessary to make a soft, smooth dough. Allow the just-mixed dough to rest for 20 minutes before kneading; this gives the flour a chance to absorb the liquid, making it easier to knead.
Make it ahead
Prepare the loaf up to the point where it's braided and on the pan. Tent it with greased plastic wrap, and place it in the refrigerator overnight. Next morning, remove the dough from the refrigerator (keep it covered). Let it warm and rise at room temperature for 60 minutes before baking as directed.
Baking gluten-free?
The intricate braiding involved in challah doesn’t easily lend itself to the absence of gluten. We don’t recommend you try to bake gluten-free challah, but instead urge you to check out our tempting array of gluten-free bread recipes.
Take the challenge!
Are you ready to take the Classic Challah Bakealong challenge? Follow this post on your tablet or laptop. And when you’re done, remember to post your photos, tagged #bakealong. We’re looking forward to seeing your gorgeous braided challah!
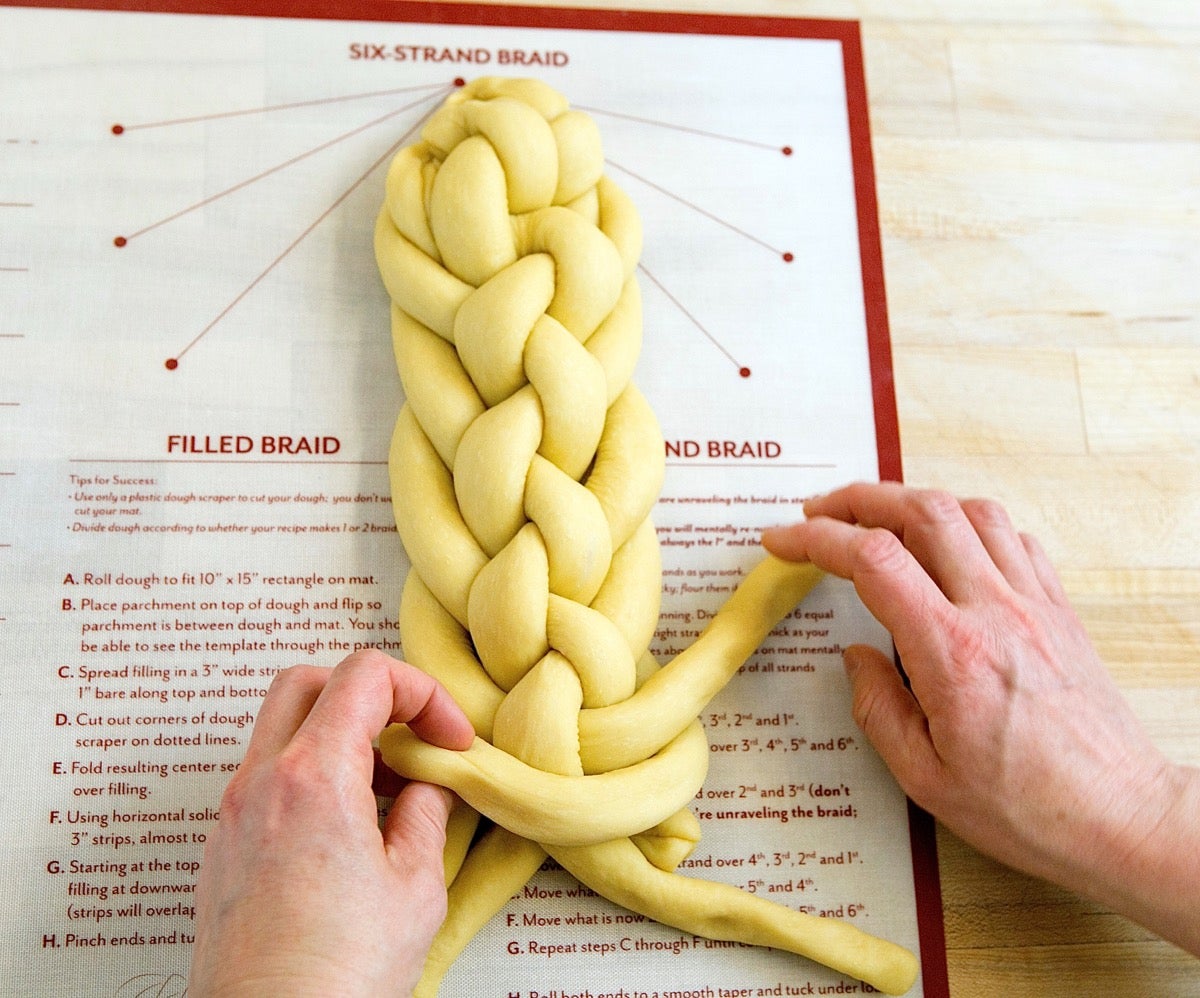
One final note: Our new silicone bread braiding mat offers both a reduced-stick work surface, and handy instructions for shaping a six-strand braid.
Interested in more? See our complete collection of Bakealong recipes.
