Picture it, if you will. Lebanon, NH. 1991. A newly married young woman carefully balances a loaf pan of yeast bread dough as she brings it to the oven.
The loaf is magnificent, standing at least 6" high and domed on top like the crown of a hot air balloon. Although gentle, her footfalls cause the loaf to wobble like pale, puffy Jell-O.
Lovely and lofty, the bread shares other features with a balloon. The dough at this point is nearly transparent; a slight breeze seems enough to blow the dome to one side. Placing the pan on the oven rack, she closes the door with a small thump, then watches in horror through the glass window as her perfect loaf collapses to roughly the height of a leaky inflatable wading pool.
Well, you've probably guessed by now that the bread in question was one of my first breads, and I'm sure most of you have shared a similar experience. Watching your "perfect" loaf wither away is one of the most disheartening things that can happen to a baker, and I'm sure has caused many a newbie to give up on yeast breads forever.
Luckily, I lived close enough to the King Arthur Flour Baker's Store that I was able to talk with a baker and learn how to prevent the colossal collapse from happening again. Over the years I've learned more from my fellow bakers, and added it all to my bag of tricks. So, speaking for my fellows, I'm here to help you determine when your bread is perfectly risen, to give you that consummate crown on every loaf you bake.
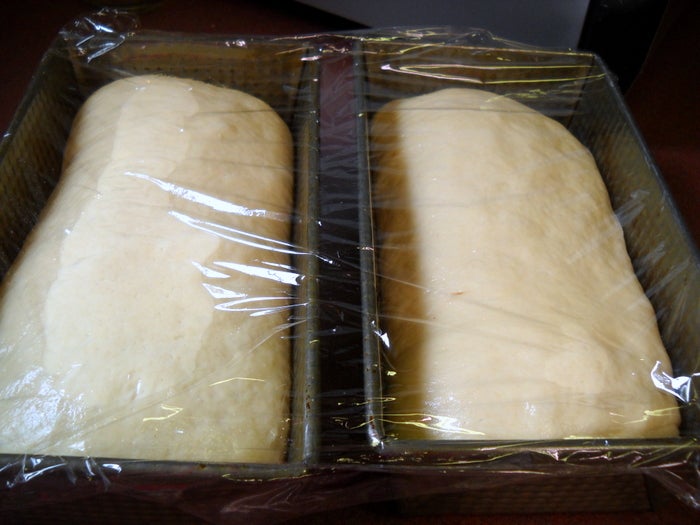
Let's start with a batch of basic white bread that's risen once, and been divided into two equal loaves. Usually I eyeball it when dividing dough, but for the sake of clarity I made sure to divide the dough by weight.
Each ball of dough was shaped and pressed into an 8 1/2" x 4 1/2" loaf pan. They were lightly covered with lightly greased plastic wrap, and set on the counter to rise in a 68°F room.
One loaf is destined for greatness; one will be forced into failure. Don't mourn the loaf, it's for science.
On our Baker's Hotline we frequently tell folks that when dealing with yeast breads and rise times, always go by the look of the dough, not by the clock. A loaf may rise in 25 minutes in one kitchen, but take 35 in another. Timeframes given in recipes are guidelines, rather than deadlines.
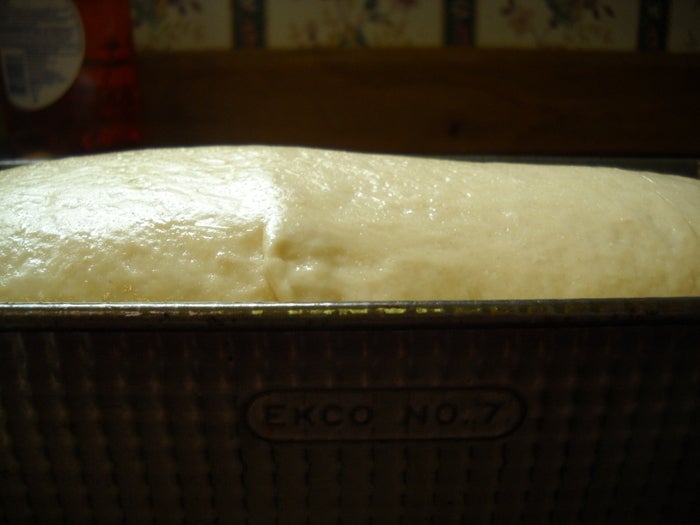
Our first loaf is looking good. It's risen visibly, so let's start checking to see if it's ready for the oven yet.
So, how do you tell when a loaf is perfectly risen?
First, the knuckle test.
I'm sure nearly every baker has seen a line in a recipe advising "let rise until 1" over the rim of the pan". In a perfect world, that line would actually read "OK, tilt your head to the side so you can look at the crown of the bread from the side. The very top of that dome should be 1" over the rim of the pan. No, no, not right at the edge, but in the very center."
That's all a little too wordy, so it's been shortened over the years, and now can lead us easily astray.
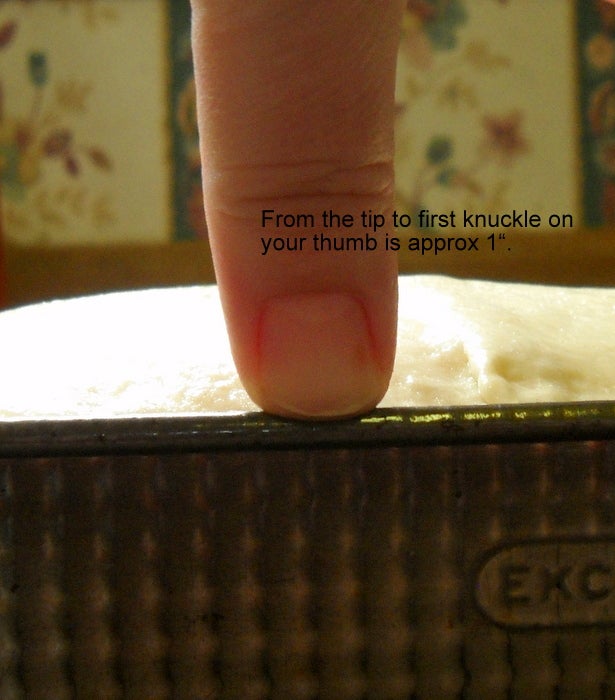
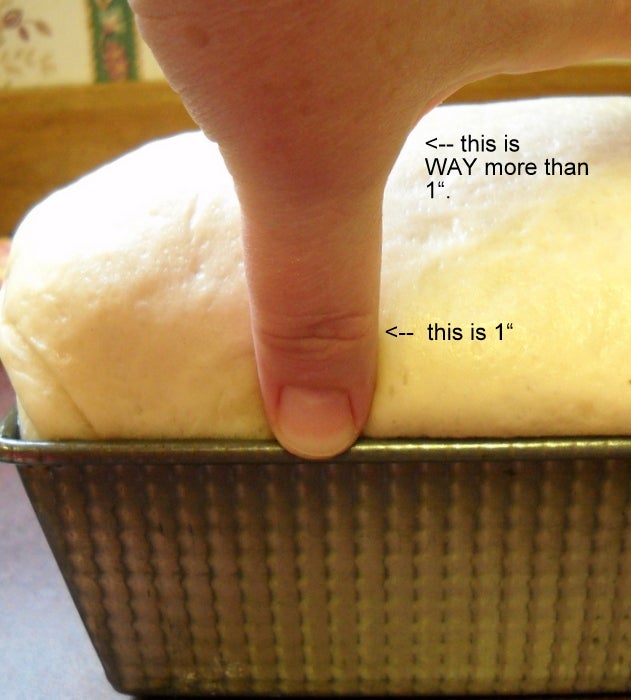
The good news is, you have a built-in 1" measure that can really help you determine how high your loaf has risen at a glance. From the tip of your thumb to the first knuckle is approximately 1". If you view the loaf from the side, placing your thumb on the rim of the pan, you should be able to tell if your loaf is under, over, or just about right.
Take a look at the photo above. Do you feel it's over 1", under, or just right? If you said under, you're right. I'd give this bread another 10 minutes, then check again.
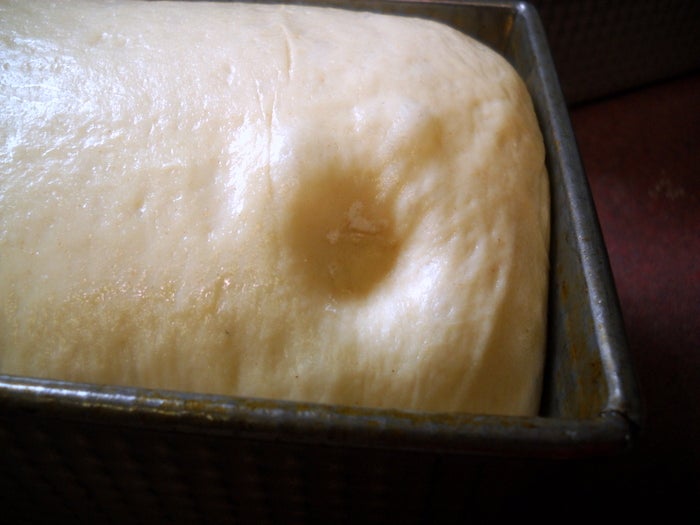
Next, let's check with the poke test.
Lightly flour your index finger and press it gently into the dough, about to the bed of your fingernail. If the indentation remains and doesn't spring back/fill in, then the bread is well risen and ready for the oven. Have no fear, the "belly button" will rise and bake out just fine in the oven.
Adios, first loaf. You're good to go. See you in 25 minutes!
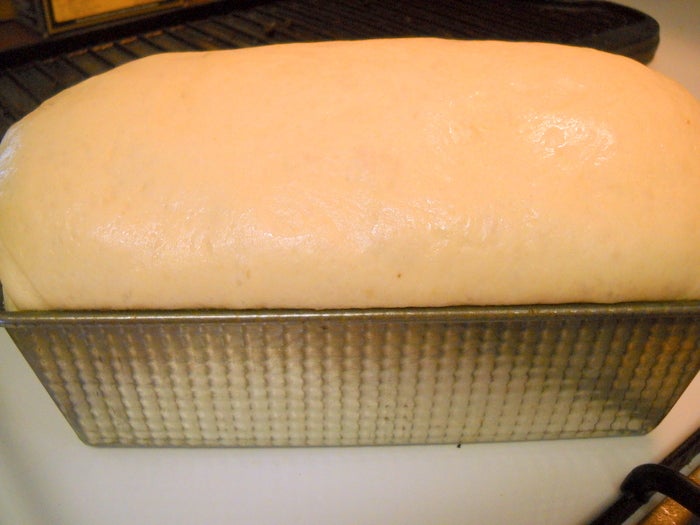
Bread #2 was left to sit at room temperature while bread #1 baked, so it got an additional 30 minutes on the counter. It looks like a buxom, well-rounded loaf. Let's give it the first test.
Well, I'd say it's more than 1", wouldn't you? Let's look at something else as well, from a different angle.
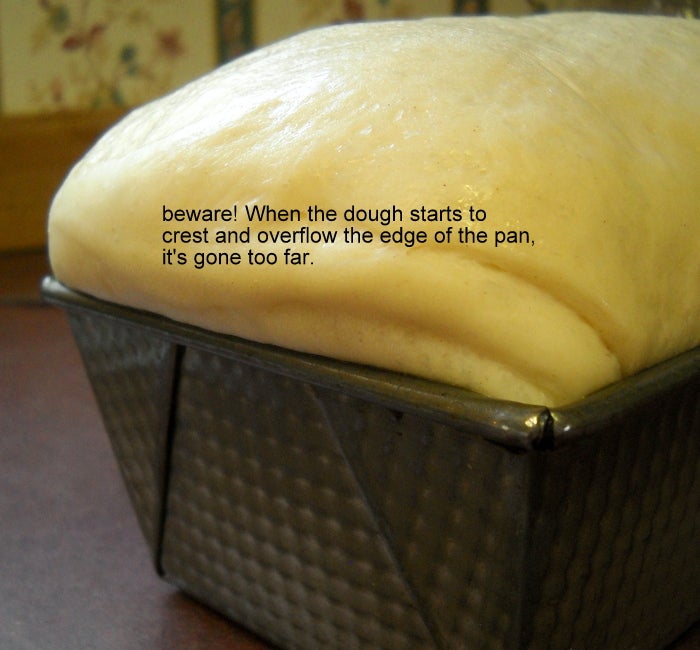
On the end of the pan, you can see the dough has crested over the rim and is starting to overflow. This is not a good sign. Remember, what goes up must come down, and if your loaf is starting to come down already, the internal structure from the gluten is becoming compromised and weaker.
The bread may not be a total loss at this point though. You can gently deflate the dough, reshape it, and set it to rise again. Watch it very carefully, as this third rise will go quite quickly and probably won't be as high. The yeast is becoming exhausted, and doesn't have as much oomph as it did a couple of hours ago.
Let's get this loaf to the oven before we wait any longer, to see what happens when you don't choose to deflate, reshape, and go for the third rise.
Here are the results.
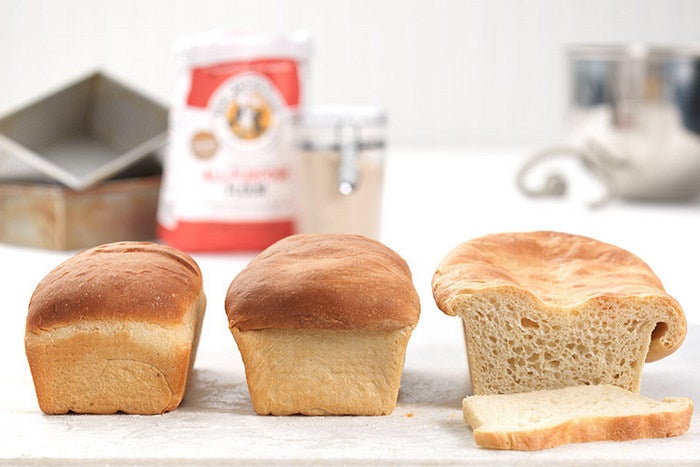
Loaf #1 is on the far left, loaf #2 is on the far right. In the middle is one more loaf that I baked the following week. As you can see, catching the loaf at the right time gives you the roundest, fullest crown.
The middle loaf is an example of how you can catch a loaf that' slightly over-risen and still bake it. You'll see a slightly sunken center, and you may see more bubbles and gaps under the top crust; but it isn't as big a flop as loaf #2.
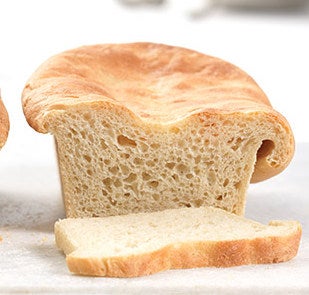
Poor, poor loaf on the end. The deeply sunken center, the curl of crust that fell over the edge of the pan, and that hideously coarse crumb all speak to severe over-rising. The scent of the bread is sour, but not the good healthy sour of sourdough: it's a more perfumed sour that makes you think of over-ripe fruit.
All in all, quite the disappointment for all the hard work and ingredients you've put into this loaf.
Now, wave good-bye to this kind of sad slab forever, for you know the secrets to never having this happen again. Armed (thumbed?) with your own personal measuring tools, you'll forever be able to judge when your loaves are ready to slide into the oven to emerge as golden brown domes of handsomeness and flavor.
Now, I'm sure there are questions or details that you still want to ask about, and that's great. Let's fill up the comments section with as much helpful information as we can. Tell me your own stories about "The Giant Loaf that Ate Cleveland." And, of course, my pals and I at the Baker's Hotline are happy to help you, too.