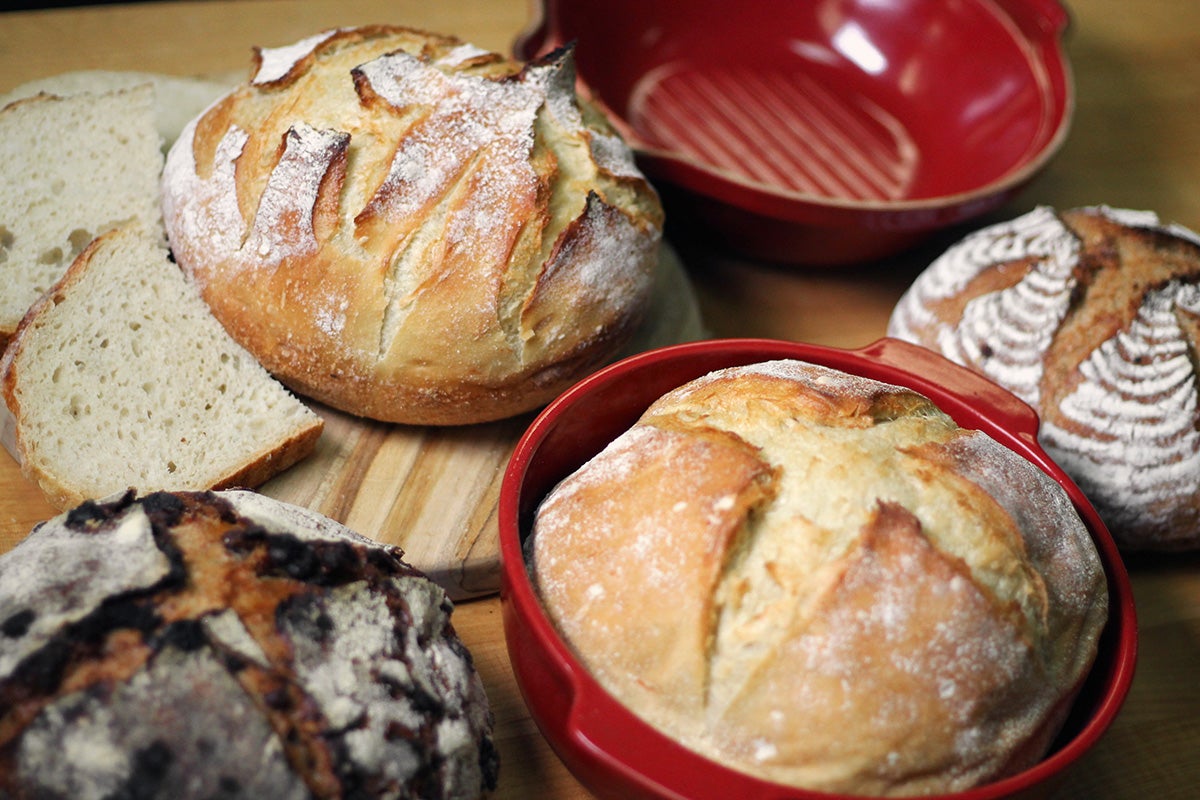
Making crispy, crusty, golden loaves of bread at home has never been easier. It all starts with bread baking in a Dutch oven (lidded pot), the perfect vessel for making artisan-style loaves. The steam that's created inside the pot miraculously transforms the dough, ensuring the bread's crust will shatter into delicate shards with each bite. The best way to produce steam inside a lidded pot? It's simple: preheat the pot.
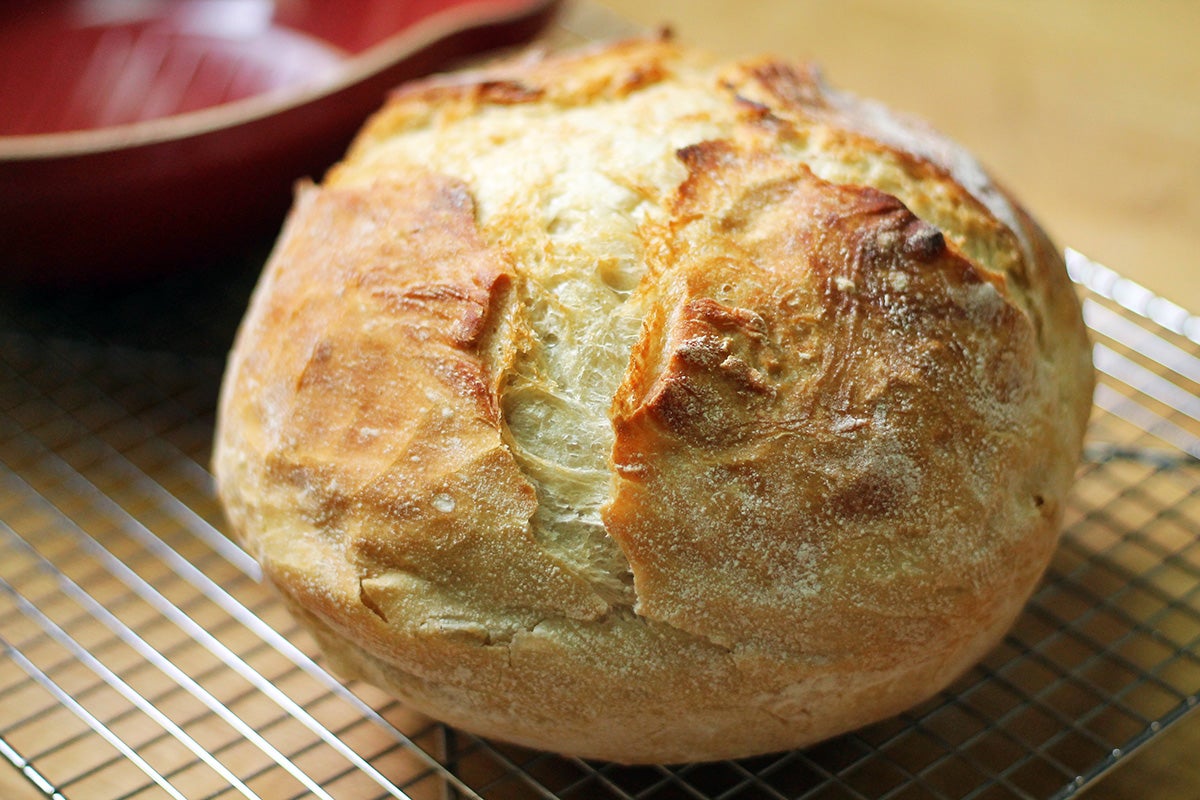
Gently slipping risen yeast dough into a searing hot pot and adding the lid creates steam. In turn, this results in bread with a crackly crust and a glossy surface that's beautifully blistered with bubbles.
We’re no strangers to baking with steam, but our excitement about this classic method has been rekindled. The arrival of Emile Henry’s Bread and Potato Pot, a unique Dutch oven, has us eager to bake!
 While this pot is often used in France to make perfectly cooked potatoes, it’s also a game-changer when it comes to bread baking in a Dutch oven. Some bread crocks can't withstand the intensity of being heated empty and are bound to crack when nothing's inside. However, this pot is part of Emile Henry's flame line, which is known for its durability and high-heat resistance.
You'll see why we love bread baking in Dutch oven like this — the loaves that come out of it are just as beautiful as they are delicious.
When the Bread and Potato Pot is preheated empty, it becomes a miniaturized version of a professional steam-injected oven. The heat is distributed more evenly than in a conventional oven, and the steam transforms the dough in a few magical ways.
When unbaked dough, with all its interior moisture, is put inside the hot pot, precious humidity is captured in the form of steam. The steam keeps the crust soft longer, so it can continue to expand during the early stages of baking. The result is a lofty loaf that looks like it came from the bakery down the street!
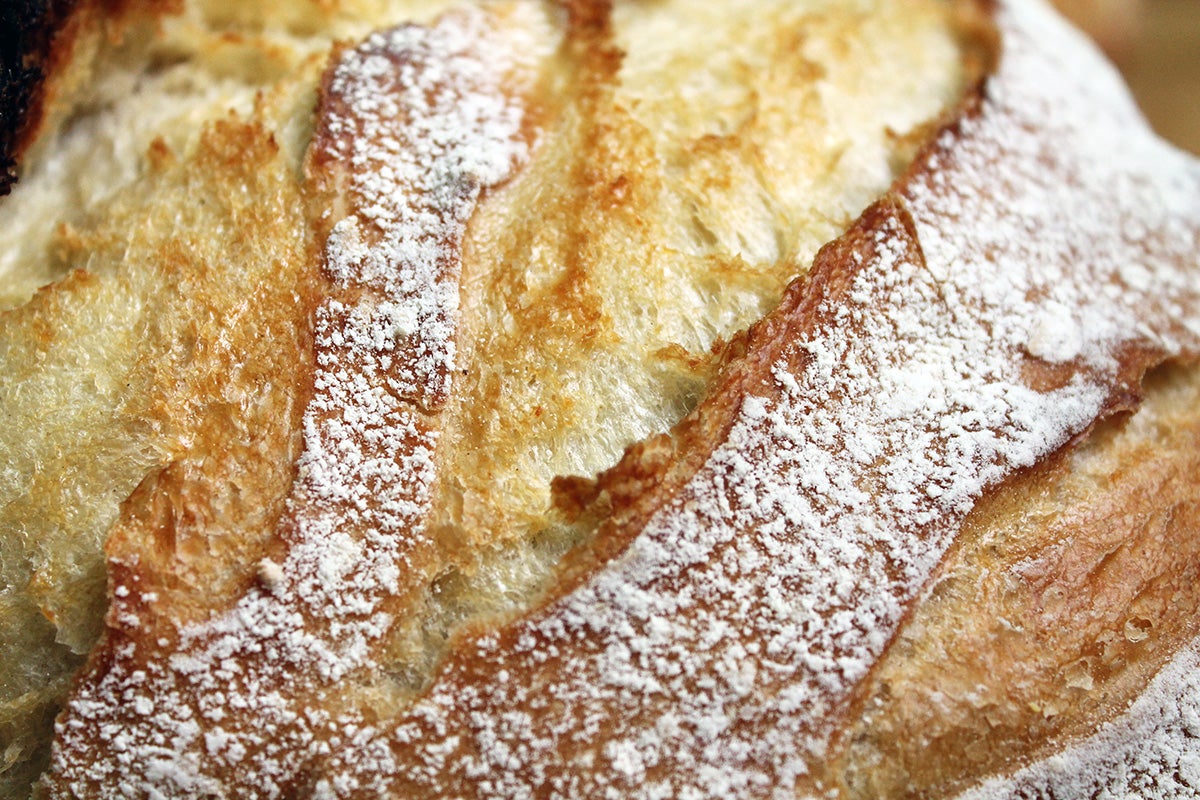
In addition, the steam hitting the bread's surface gelatinizes some of the starches there, which swell and become glossy, creating a crust with subtle, attractive luster.
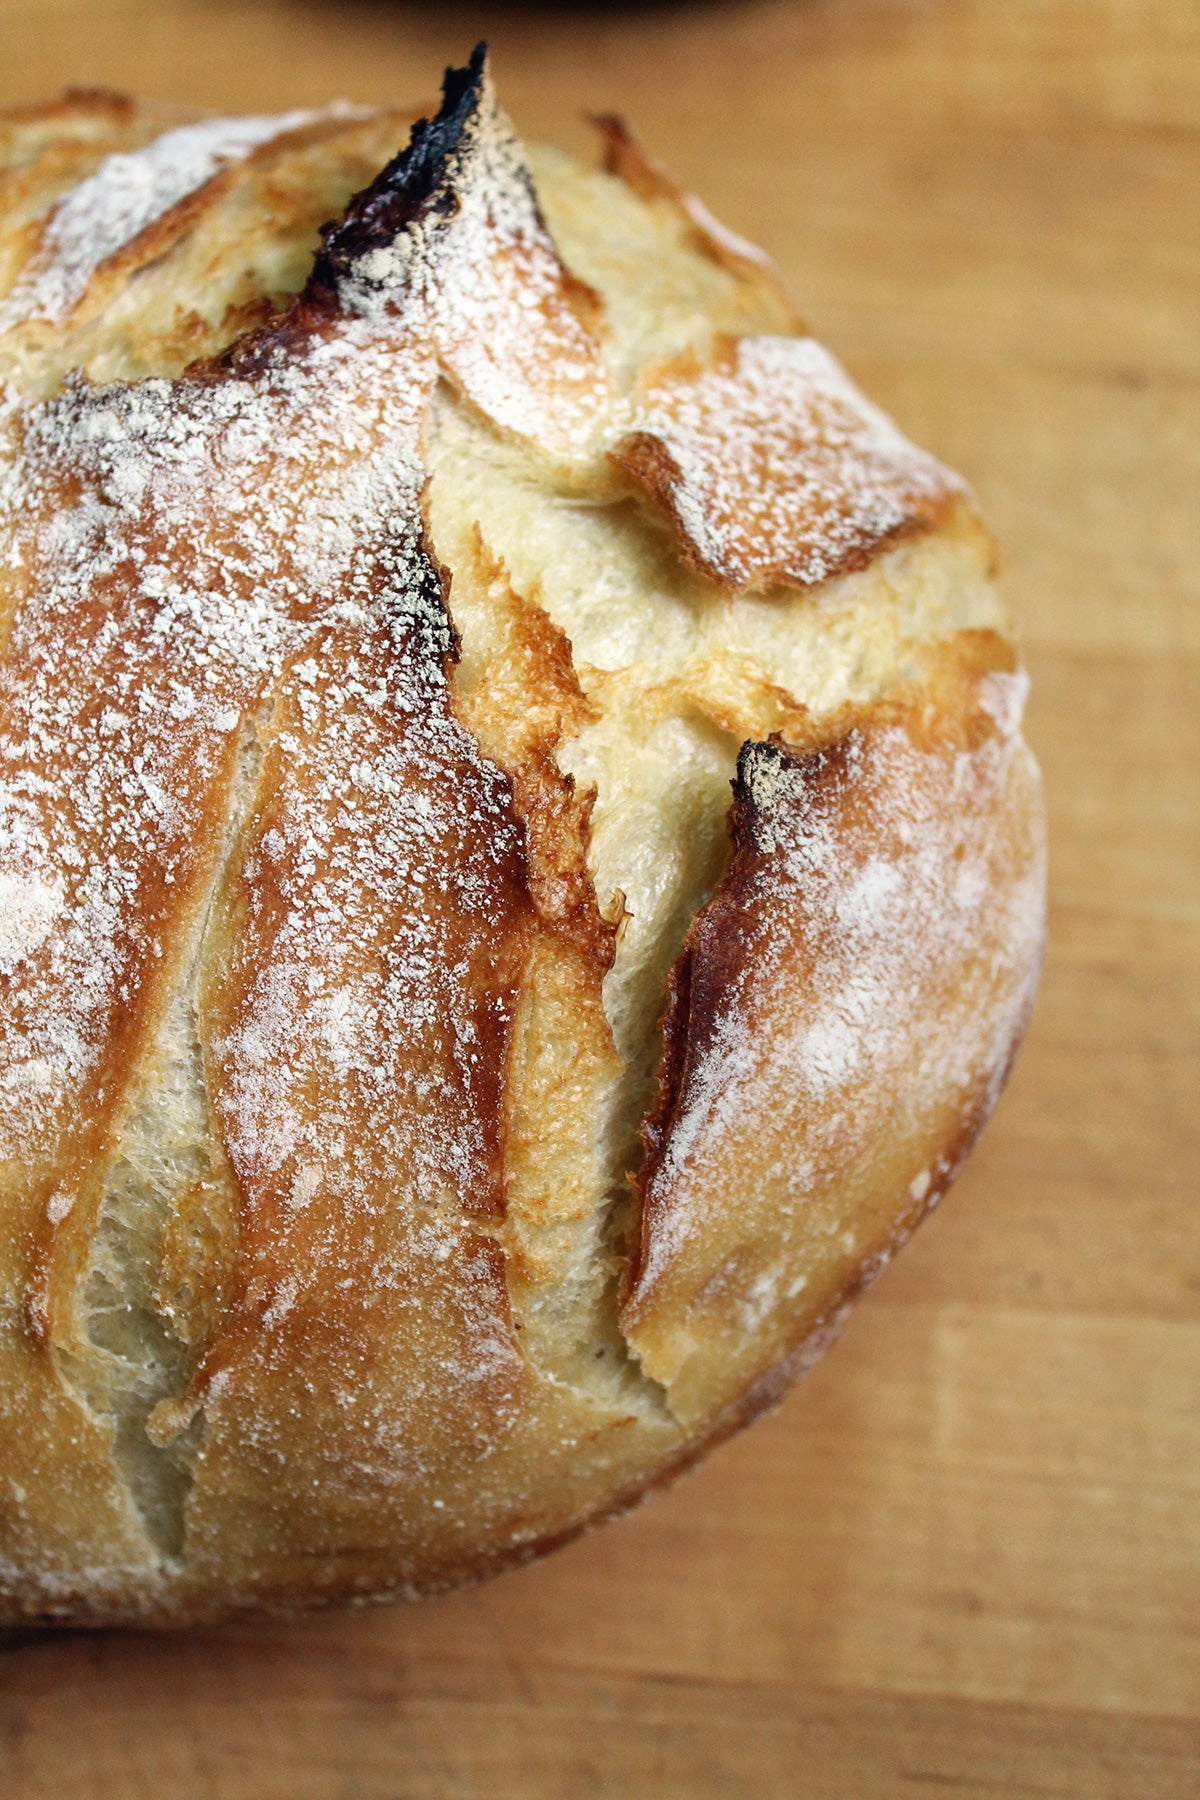
Also thanks to steam, any slashes or “scores” made in the risen dough open up beautifully during baking. They form “ears,” or crisp ridges that add crunch and an artisan-style look to your voluminous loaf.
Loaves baked with steam taste as good as they look, too.
Steam’s moisture keeps the surface of the dough cool for a longer amount of time as the loaf bakes, which allows enzymes (from the yeast) to continue reducing the starches in the flour to simple sugars.
“Simple sugars” might not sound delicious, but trust me — they are. These sugars caramelize and create the golden crust and irresistible flavor of a perfectly baked loaf of bread.
Intrigued? Let’s show you how it’s done!
First, choose your recipe. No-knead bread recipes are particularly well-suited to this method, as they’re typically wet doughs that release steam when they come in contact with the hot pot (plus they’re easy to make and delicious, too).
I used the quintessential No-Knead Crusty White Bread recipe to put this pot to the test, but you can use practically any bread recipe that makes at least two pounds of dough. (Look for recipes that call for at least four to five cups of flour.)
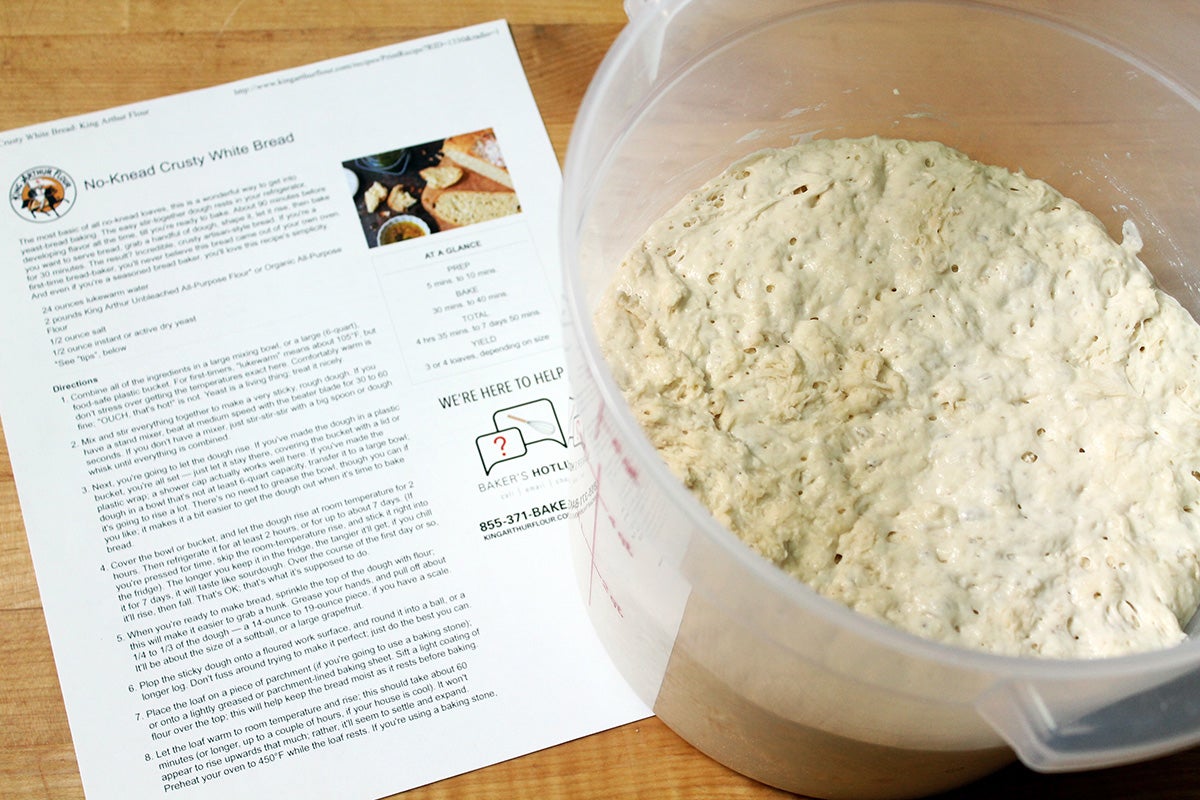
Prepare the recipe as written, which often includes a 24-hour (or longer) rest in the fridge for no-knead dough; be sure to plan ahead.
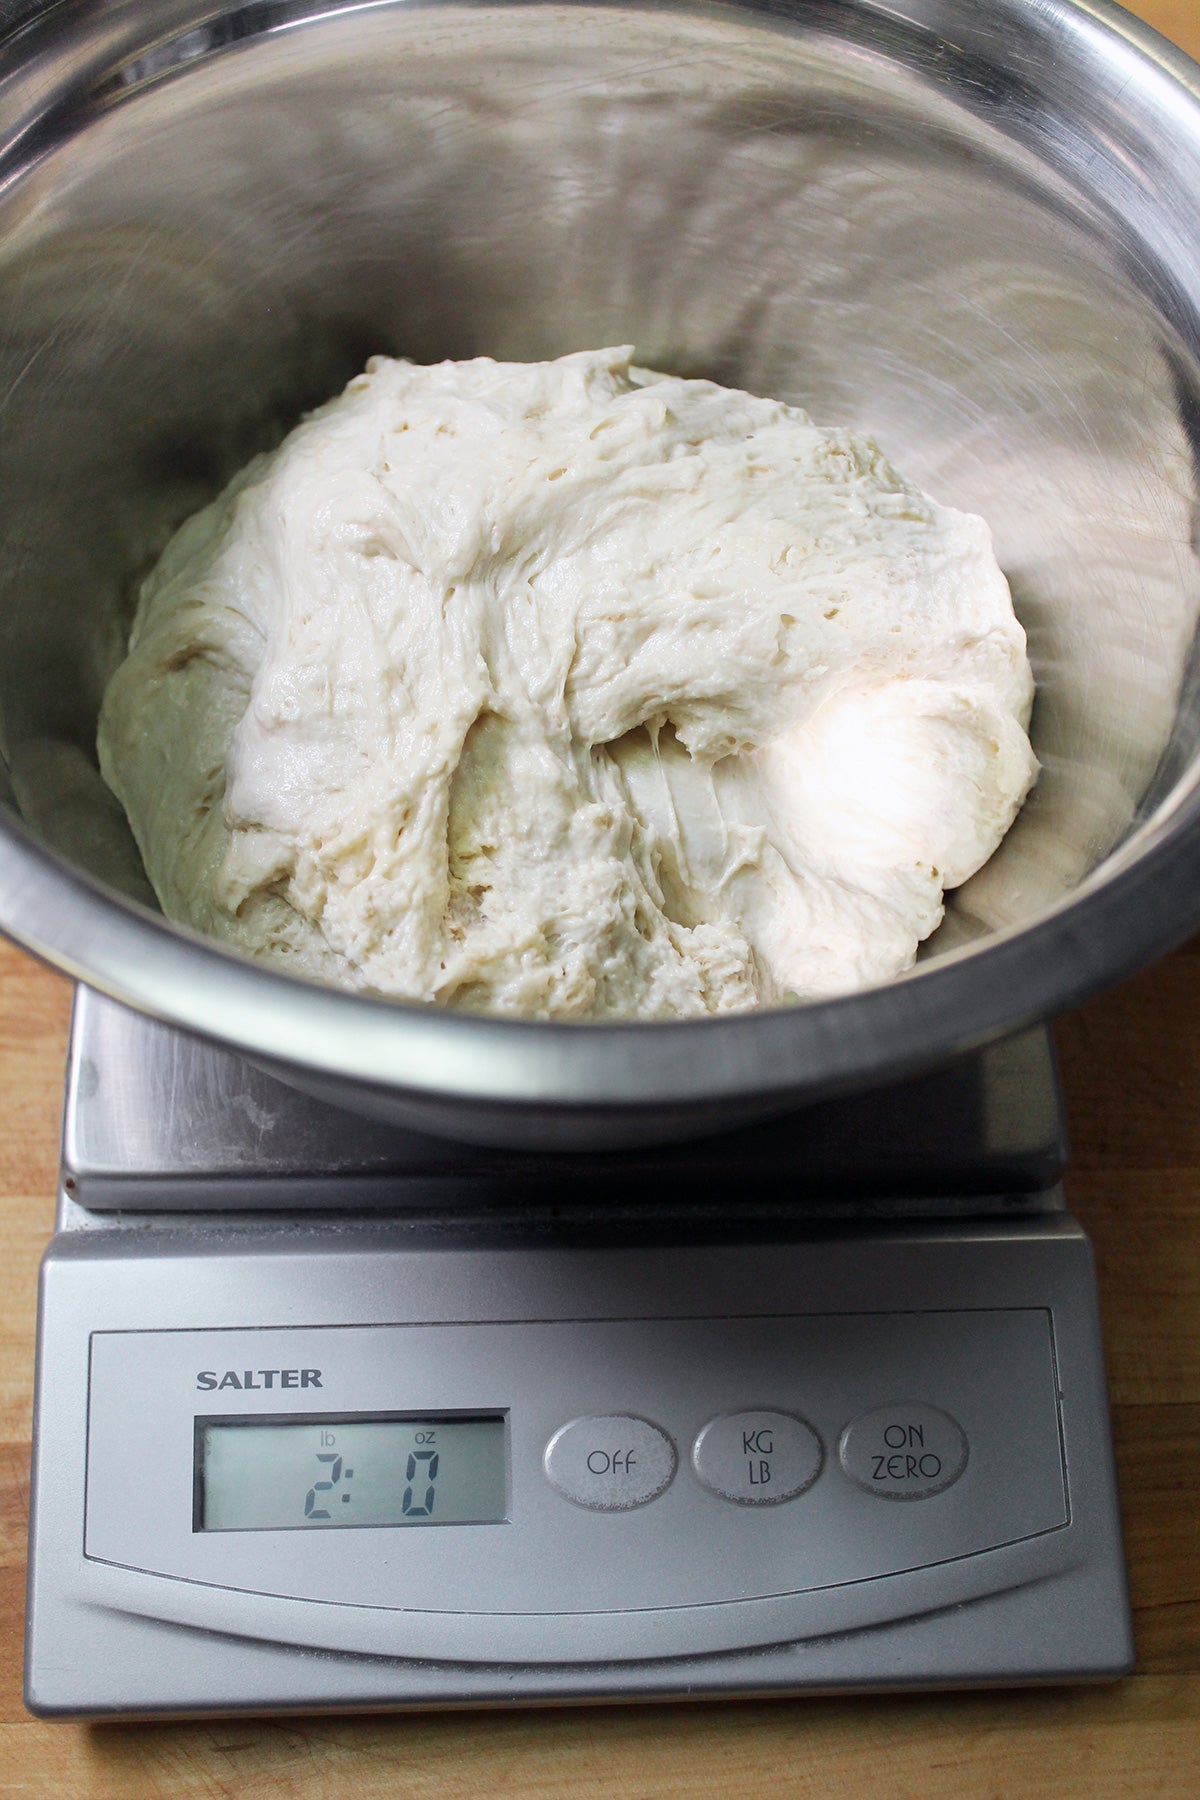
When you’re ready to bake, measure out a two-pound ball of dough. If you don’t have a scale, it should look like it will fill the base of the Bread and Potato Pot most of the way.
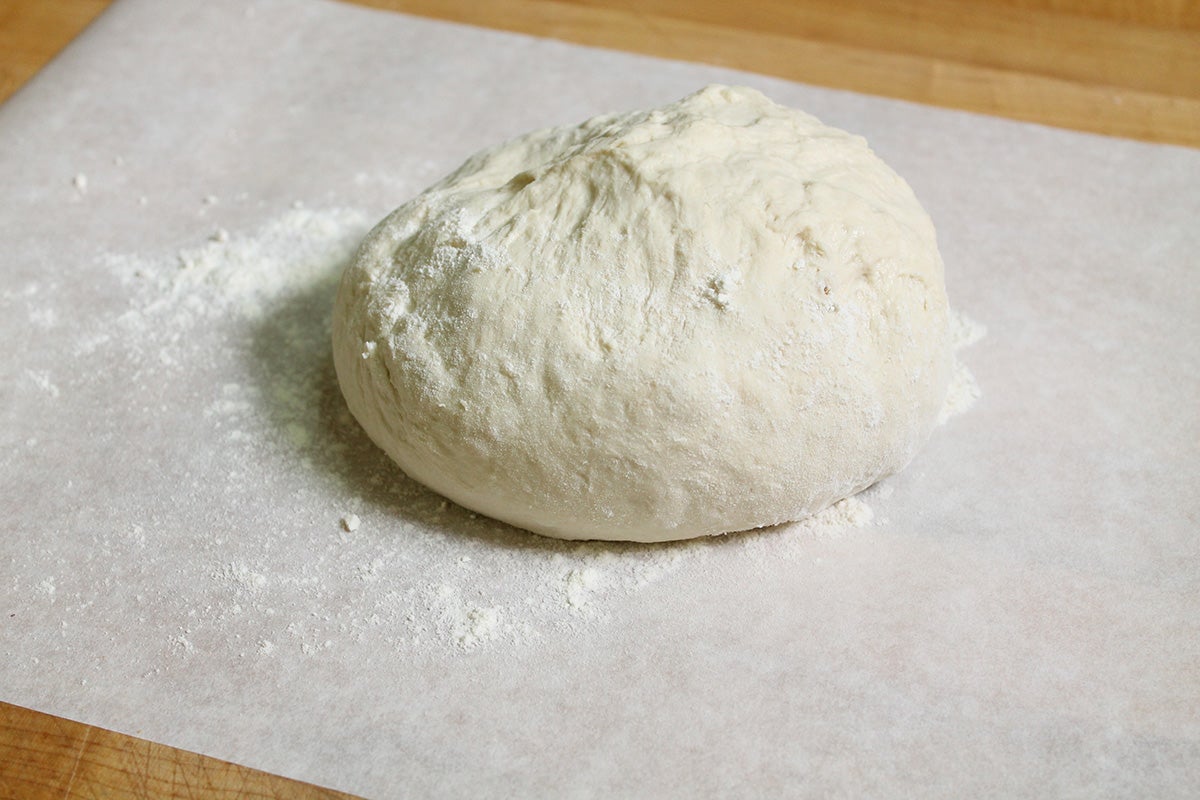
Shape the dough and let it rest on a floured kitchen towel or piece of parchment paper with the seam side up, covered, while it rises. (You can also use a brotform if you want to make some fancy rings on the surface of your loaf.)
To ensure you get a burst of steam when the dough is put inside the pot, it should be preheated empty for about 30 minutes. Start preheating your pot roughly 30 minutes before your rising dough is ready to bake.
Keep in mind the temperature of your kitchen will make a difference in how quickly the dough rises. The No-Knead Crusty White Bread dough can take anywhere from one to three hours to rise; in my cool Vermont kitchen, I usually let it rise for at least one hour before preheating the pot for 30 minutes, giving the dough a total of a 1 1/2 hours to rise.
When your dough looks like it will be ready in 30 minutes, put the Bread and Potato Pot (both the bottom and the lid) into the cold oven, and set it to 450°F (or the temperature your recipe calls for).
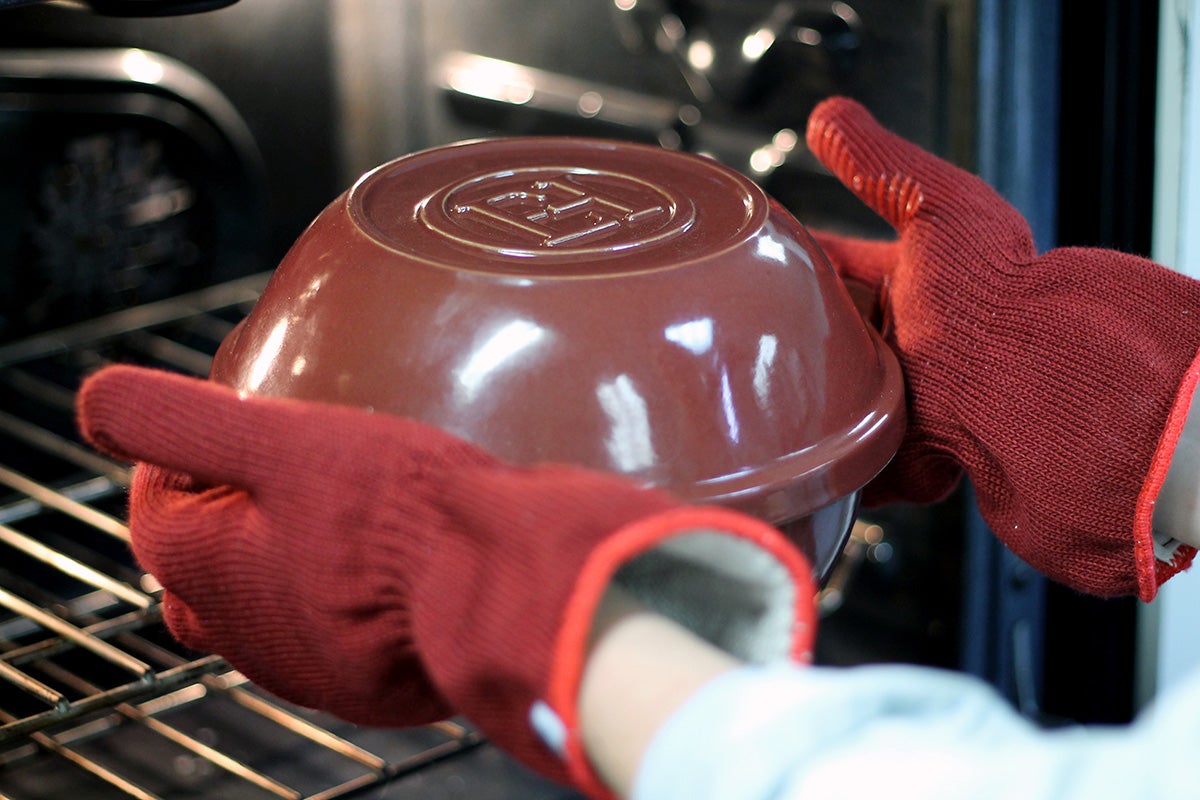
Half an hour later, the dough should be risen and the pot should be thoroughly preheated. Carefully remove the hot pot from the oven, taking care to place it on a neutral surface like a cooling rack, wooden board, or kitchen towel. (Avoid contact with anything cold, such as cold water or a cold surface; this may cause the pot to crack.)
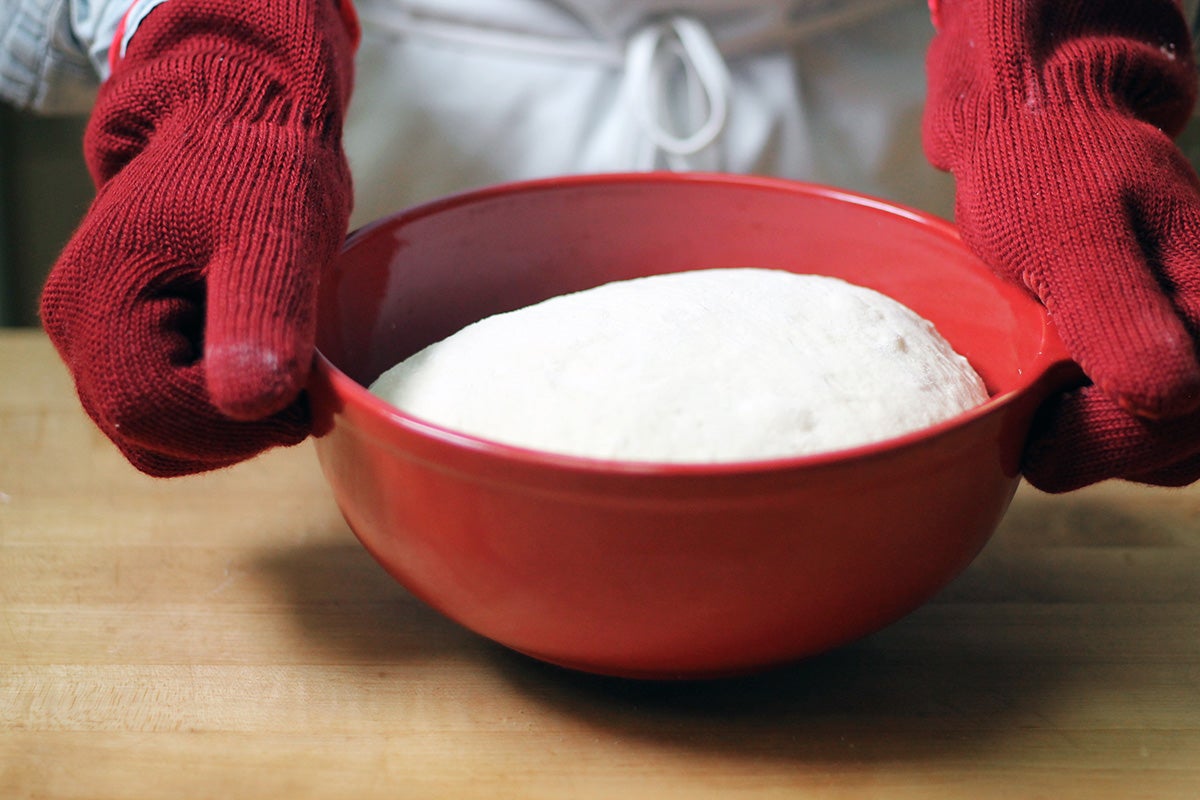
Apply a gentle coating of vegetable oil-based non-stick spray and sprinkle in some semolina flour or cornmeal. (Be careful during this step — the pot may smoke slightly when prepared.)
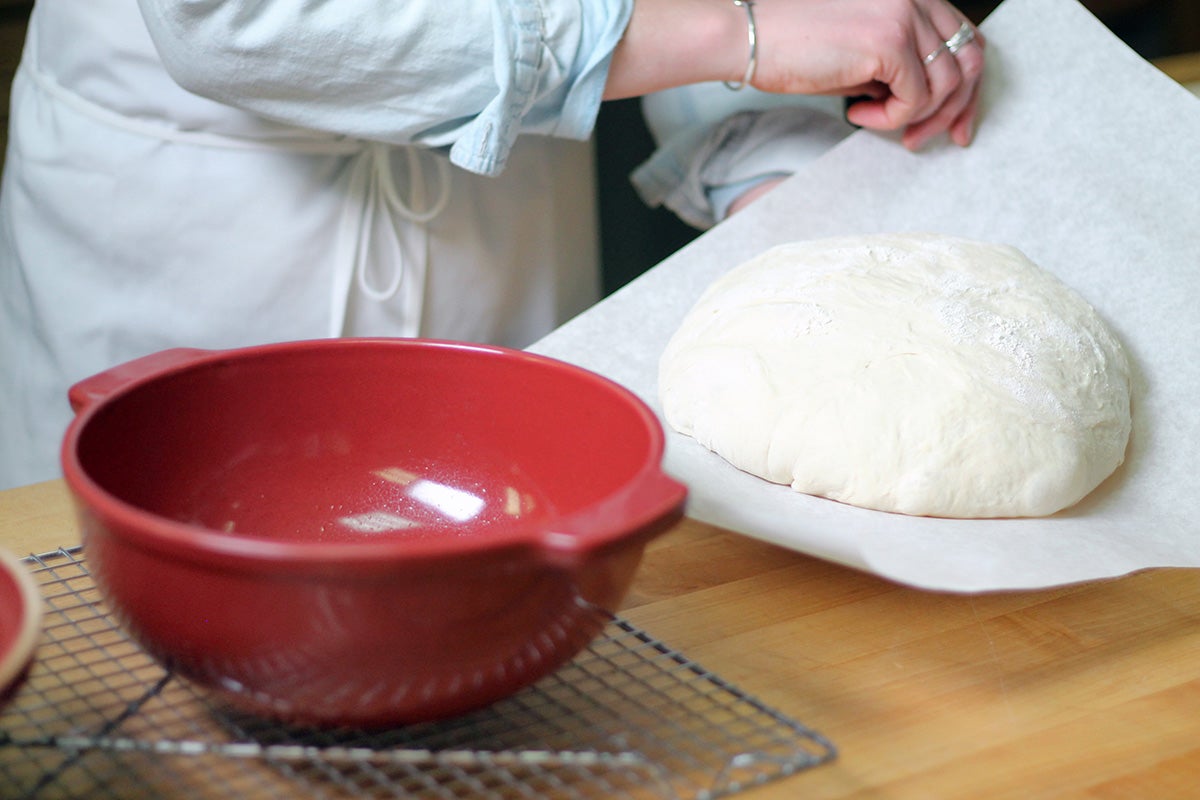
Slide your hand under the towel or piece of parchment paper and turn the dough over into the pot, seam side down. You can gently shake the pot from side to side to help the dough settle evenly in the bottom.
Don’t worry if your dough doesn’t look picture-perfect here; it will turn into a beautiful, golden loaf as it bakes.
Make a few slashes in the top of your loaf (a lame works well for this), and then put the lid on. Bake for 25 to 30 minutes; remove the lid and bake for another 5 to 10 minutes, until the loaf browns fully.
Remove the loaf from the oven and let it cool completely on a rack before slicing.
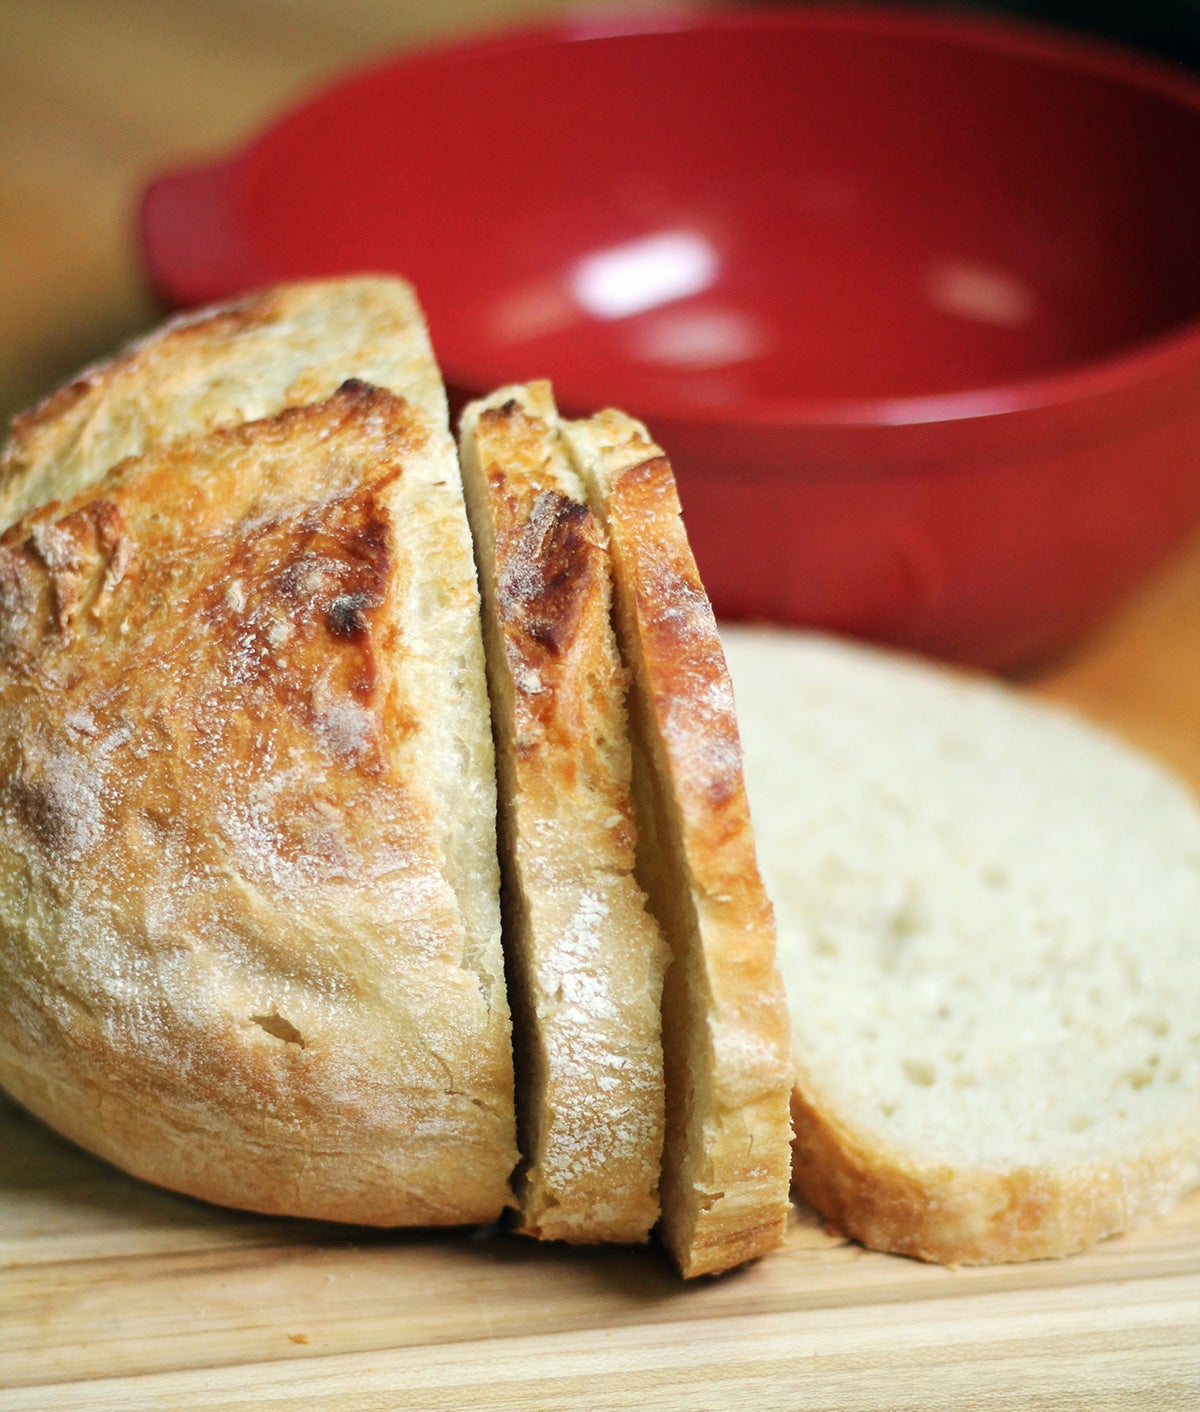
Beautiful crust? Check. Open crumb? Check. Yeasty flavor? Check.
I was stunned by the impressive looking loaf I pulled out of the oven the first time I used this method. I yelped with joy and declared it the best-looking loaf I had ever made! But then I wanted to find out, was it really the wonders of preheating the Bread and Potato Pot — or just this much-loved, no-knead recipe?
To see if there was any difference, I baked a second loaf (same recipe, same amount of dough, same length of time in the fridge) but baked it on a baking sheet instead of in the Bread and Potato Pot.
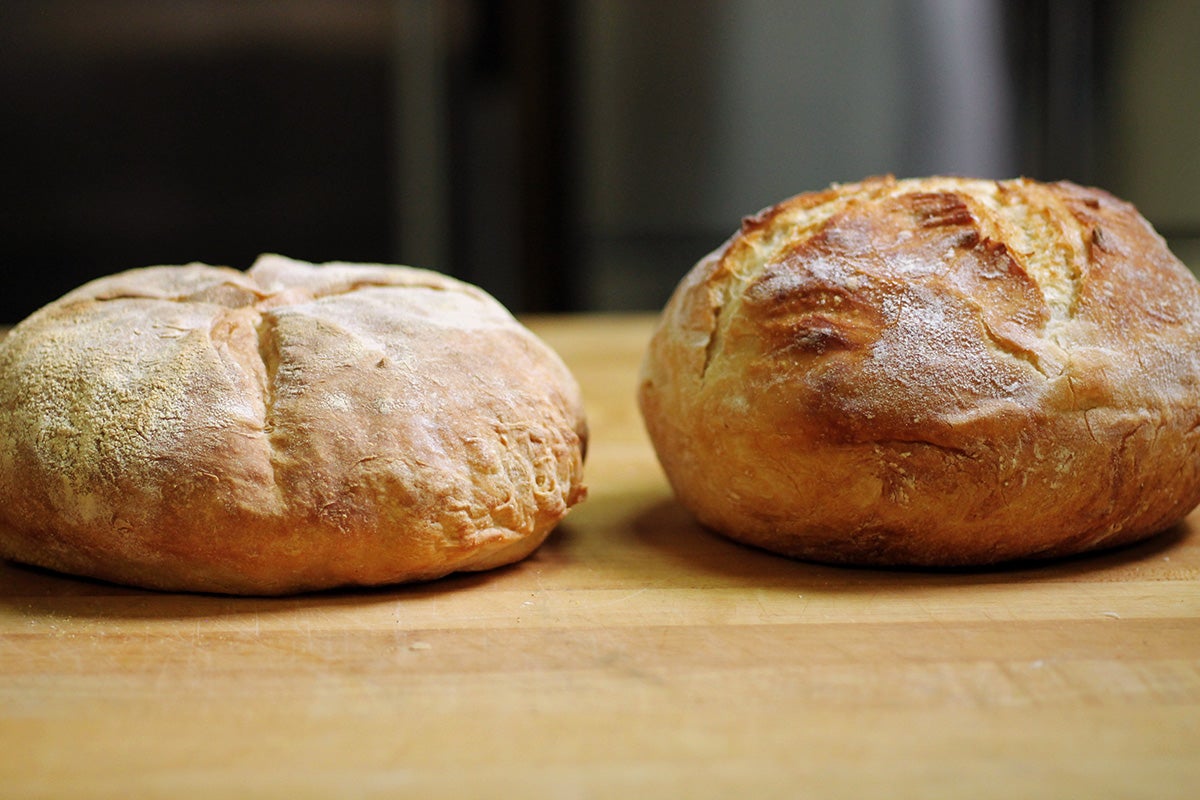
The side-by-side comparison shows that bread baking in a Dutch oven (and preheating it first) is the key to making an artisan-looking loaf. More steam is created inside the preheated Bread and Potato Pot than when water is poured into a pan in the bottom of the oven, one trick for making crusty bread. Plus, regular ovens vent, so it’s difficult to maintain a moist environment if you don't use a covered baker.
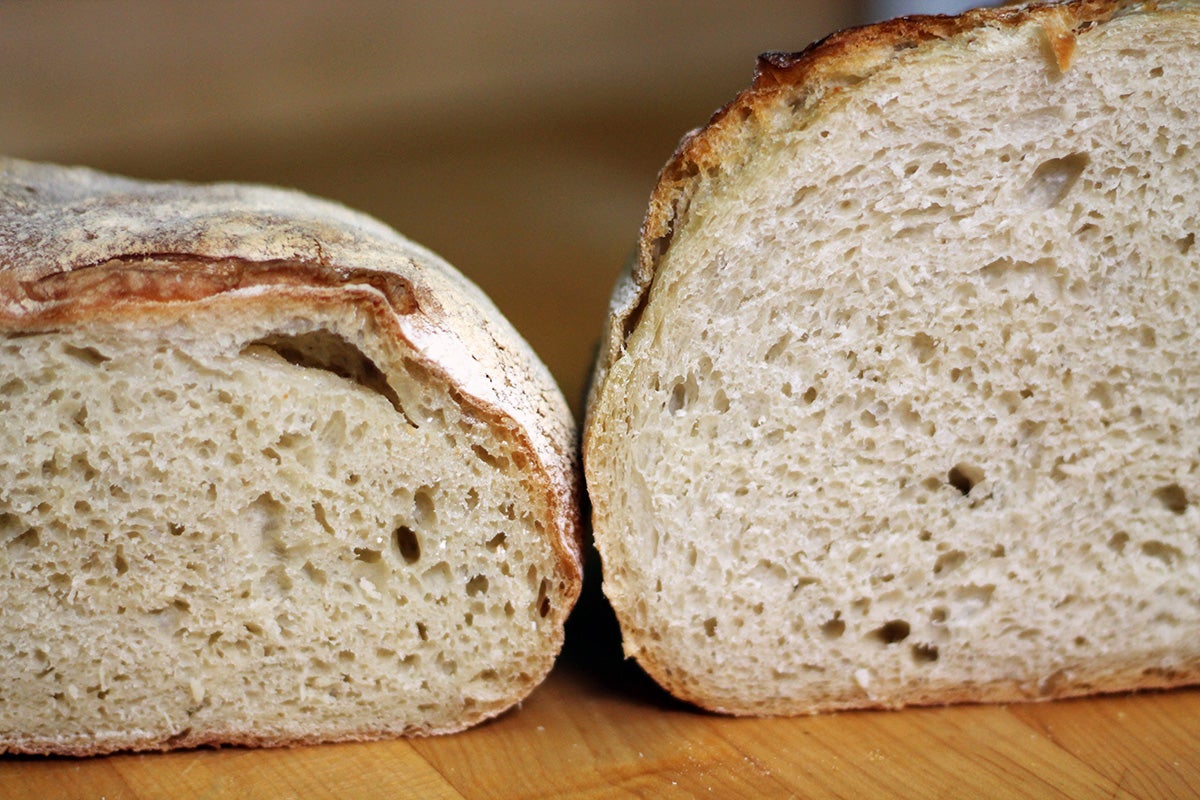
While the crumb was similar, the height difference and crust color of the bread baked in the Bread and Potato Pot made it a more appealing loaf.
A preheated Dutch oven captures a burst of steam, resulting in a perfectly baked loaf.
While the Bread and Potato Pot is perfectly suited to this preheating method, other pots in your repertoire may be able to produce similar results.
You can try using a 4- to 5-quart heavy covered pot, like a cast iron Dutch oven. Some Pyrex and ceramic Dutch ovens might also stand up to the task, but you’ll want to check the manufacturer's recommendation about preheating empty before giving it a try.
The wonders of this pot aren’t limited to No-Knead Crusty White Bread — you can try one of the delicious variations of this recipe if you’re looking to make bread that’s a little more exciting.
No-Knead Harvest Bread, No-Knead Crusty Whole Wheat Bread, and No-Knead Chocolate-Cherry Pecan Bread are also great choices when it comes to bread baking in your Dutch oven: the possibilities are endless when you use this simple preheating tip.
There’s so much to love about the Bread and Potato Pot — it can turn anyone into a bread baker. If you give this method a try, you'll say goodbye to store-bought bread in no time.
Share your experiences and best tips for bread baking in a Dutch oven in the comments, below.
Thanks to fellow employee-owner Seann Cram for taking the photos for this blog.