At last, a baked loaf! This is the third and final installment of our artisan sourdough bread tips series.
If you haven't been following us over the past few days, check out part 1 & part 2, which detail how to make a stiff starter, then use it in a naturally leavened (no commercial yeast) sourdough bread recipe, illustrating artisan baking skills along the way.
Of all the steps involved in mixing and baking bread, the final oven work is my favorite. I love the surprises revealed in this process – the loaf that's grown firm and plump in the refrigerator while I was sleeping; the beautiful scored and blossomed loaf that's revealed when I remove the lid from the pot halfway through the bake. Sometimes I feel like a little kid waiting to open a present – until the timer finally goes off and I can see what magic has occurred!
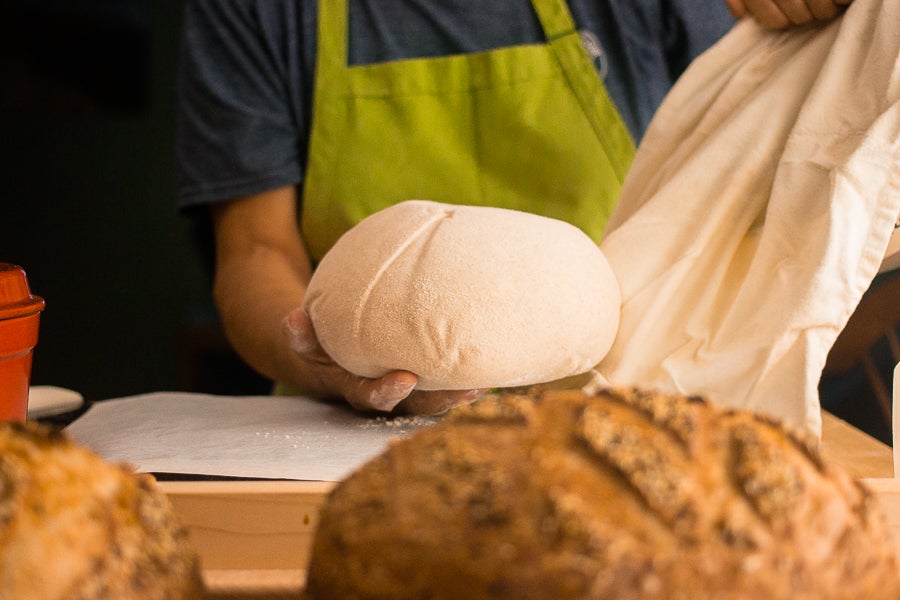
Today we'll score and bake our sourdough loaf, which has been rising slowly in the refrigerator overnight. Let's get started.
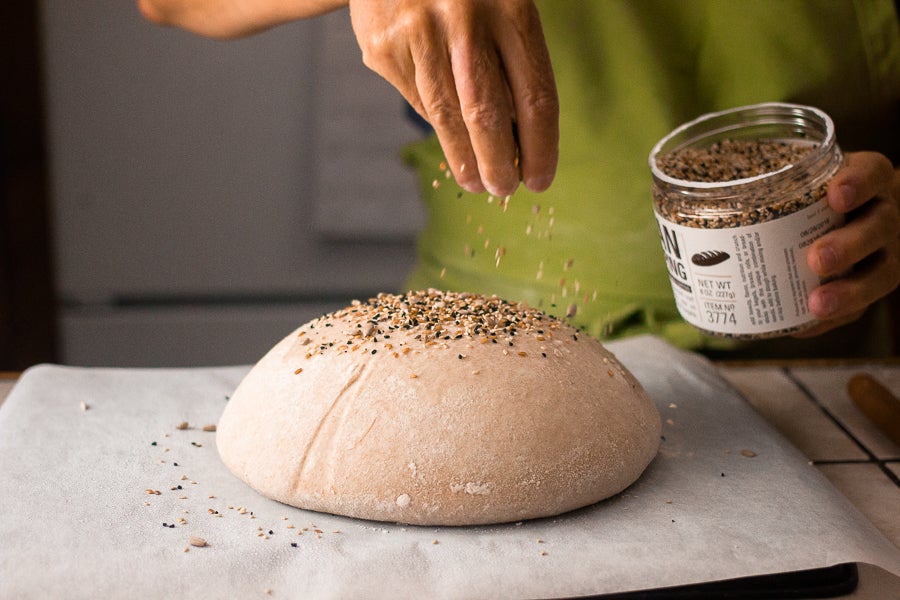
Right before you bake your loaf of bread it’s necessary to “score” (slash) the top of the loaf with a sharp knife or lame, to prepare the loaf for the rapid expansion that occurs when it hits the hot oven.
This initial rapid rise, referred to as “oven spring,” occurs when the yeast madly gives off carbon dioxide in response to the heat of the oven. When the loaf reaches 140°F, the yeast dies and the loaf sets. Loaves that aren't scored may exhibit blown-out sides or seams, where the gases have found a weak point to escape.
As in all things bread, scoring is something that gets easier with practice. Gradually you'll develop a sense for how fermented the loaf is and how much it's likely to rise in the oven. Dough that feels firm and that seems to have a lot of resilience when you poke it (a “young” loaf) will need a deeper cut; while an airy, delicate, probably over-risen loaf may not need much of a cut at all.
I’ve had many a call from a distraught baker who says, “When I slashed the bread it deflated like a balloon.” This is because the loaf had been allowed to rise too much. The result? The yeast consumed most of the available starches, leaving it nowhere to go and nothing to eat as it entered the oven.
The trick is to put the bread in the oven at the exact right moment – not too young, but not overly risen either. This is one of the advantages of refrigerating your shaped loaf overnight. Even after a 45-minute rest at room temperature the loaf will likely feel firm and less delicate than a loaf that's been allowed to rise at warmer temperatures. This makes handling and cutting the loaf easier, though care should still be taken not to deflate it.
A baker teacher of mine once told me that when scoring bread it’s helpful to imagine you’ve been scoring bread for years, so that your hand moves quickly and certainly, without any hesitation, allowing only the tip of the blade to come in contact with the loaf.
Hesitation often causes a corner of the blade to catch, and you're more likely to rip the surface of the dough rather than to create a clean cut. So, take a deep breath and say to yourself, “I know this – I’ve done it a million times.”
Just to get you in the mood, you might enjoy watching this video about how to score baguettes.
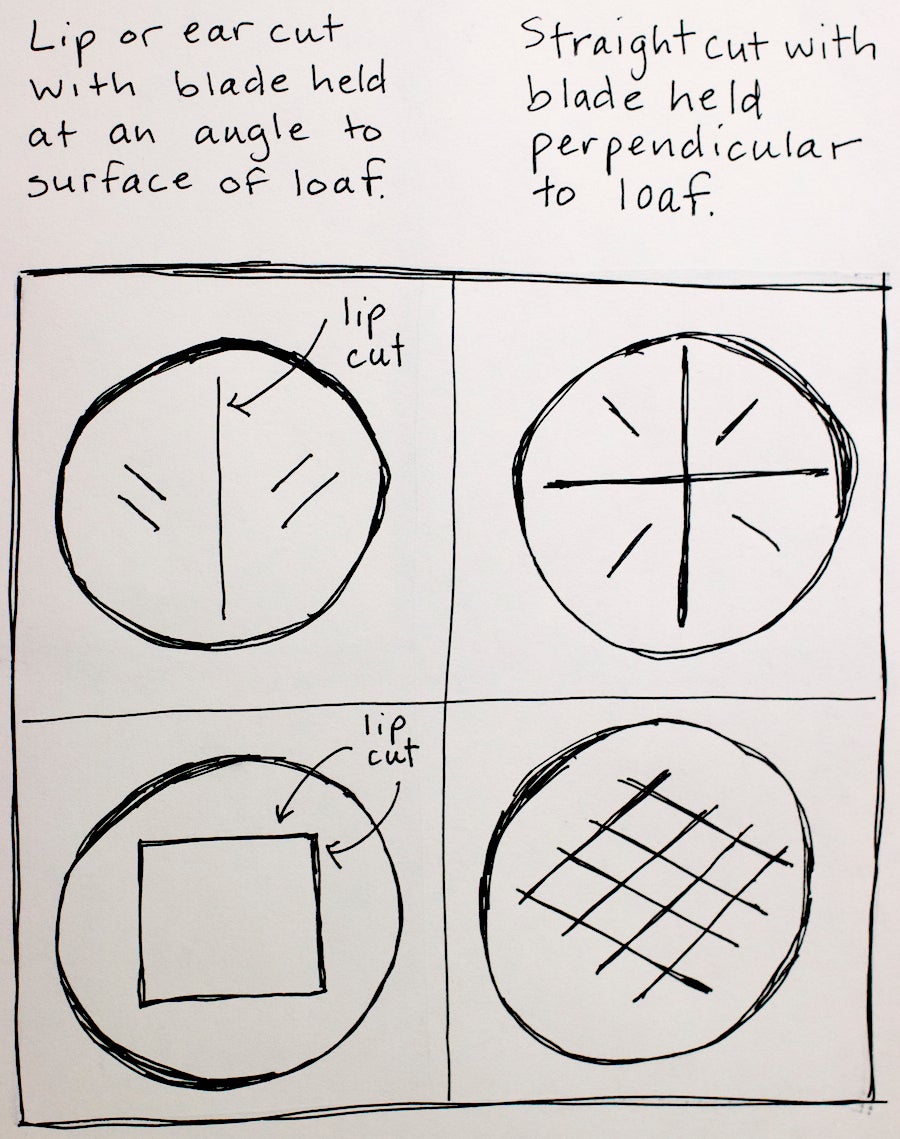
There are many traditional cuts that bakers use to create both a nice design and an evenly risen loaf; it’s fine to experiment and see what works best for you. Here are a few designs you might like to try.
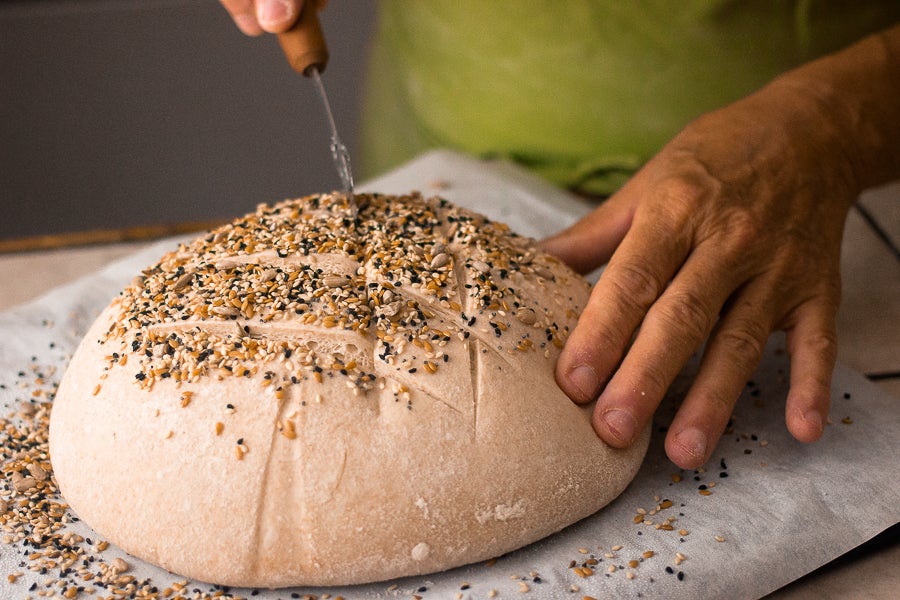
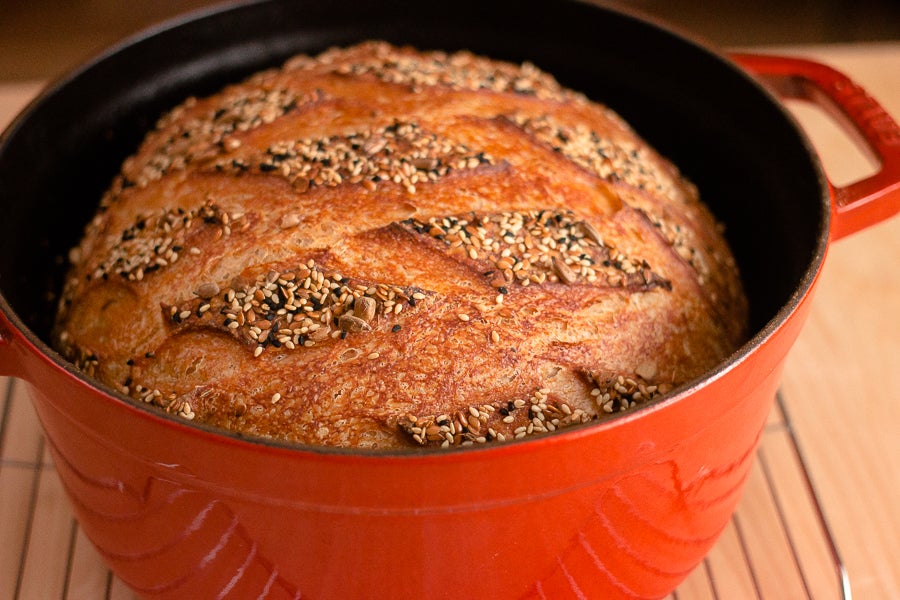
The design on the bottom right is the one I used for the loaves pictured in this post. It's easy to accomplish by cutting four straight lines across the top center of the loaf, and four more lines angled across the original lines. Practice it on paper so you get an idea of how your hands will need to move. With the loaf that's been refrigerated overnight you can cut fairly aggressively – between 1/4” to 1/2” inch deep.
The two on the left require what's called a “lip” or “ear” cut, where the blade is held at a 45° angle to the surface of the loaf. The two on the right require a straight cut, with the blade held perpendicular to the loaf. A lip cut should create a lip or ear of dough that rises above the loaf as the bread rises in the oven; think a well-made baguette.
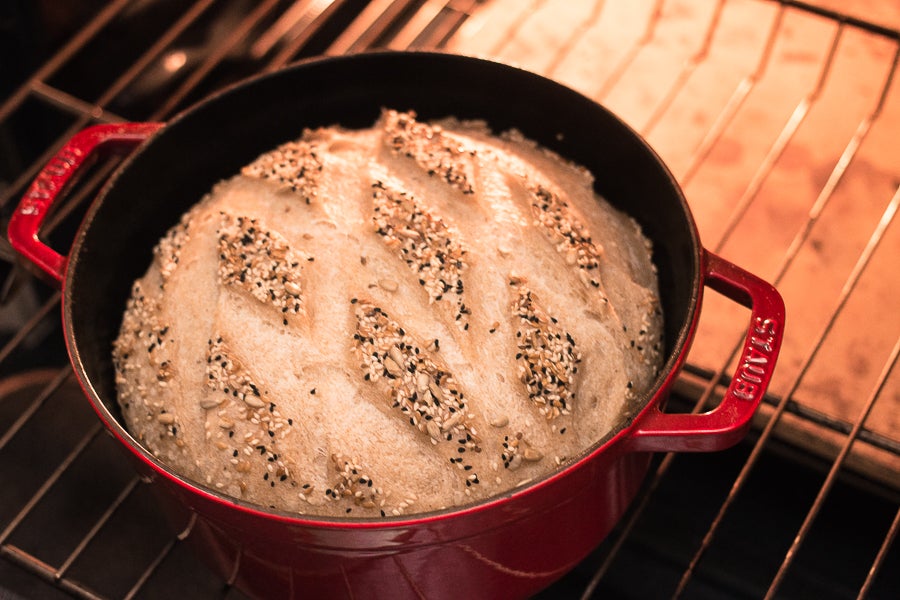
Many home bakers expect that the scored cuts will remain smooth on top of the loaf, but in actuality you're looking for something more dramatic: the loaf rising in patterned ridges. This reveals the loaf's energy, the excess gases being released and the internal crumb opening up.
A scored loaf that remains smooth on top has risen too long. The rising that occurs in the oven is minimal, and the internal crumb may look more closed, or even a little deflated.
Depending on the type of tool you're using, you may be able to curve the blade to make the lip cut easier, because this cut requires the blade to slide beneath the surface of the loaf at a narrow angle.
It’s harder to do a lip cut with a rigid blade, like that of a knife. Some bakers hold the blade so that they're cutting away from themselves, while some find it easier to cut towards themselves. Experiment and see what feels most comfortable to you – just be careful that your other hand isn't within cutting distance.
Now here's where things get really exciting!
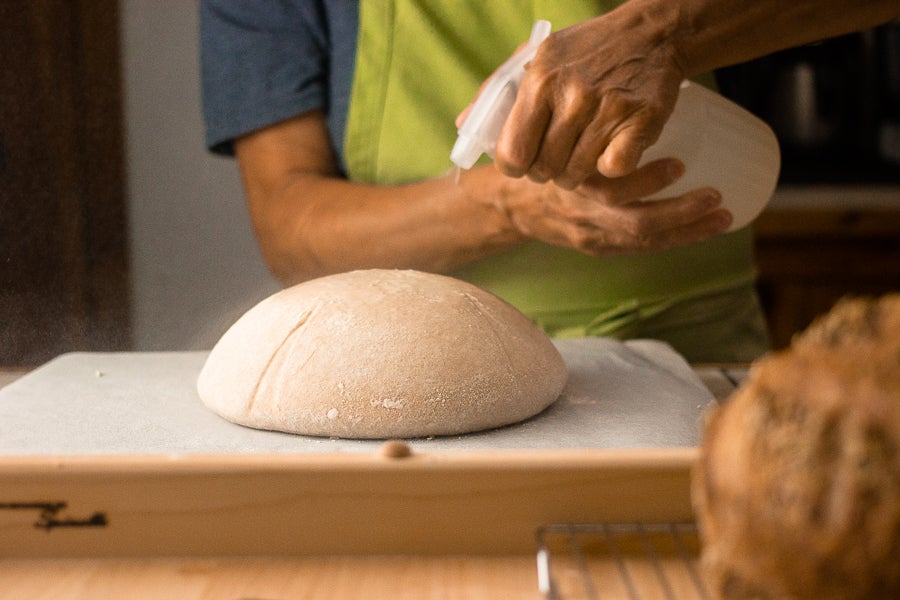
Your bread will benefit from an initial period of moist air in the oven, as this allows the surface of the dough to expand rapidly during the oven spring period. Steam also contributes to a crisp, shiny crust; but once the loaf has risen fully, a dry oven is preferable to prevent the crust from becoming thick and rubbery.
Luckily, home bakers have several options when it comes to providing a steamy environment for their bread.
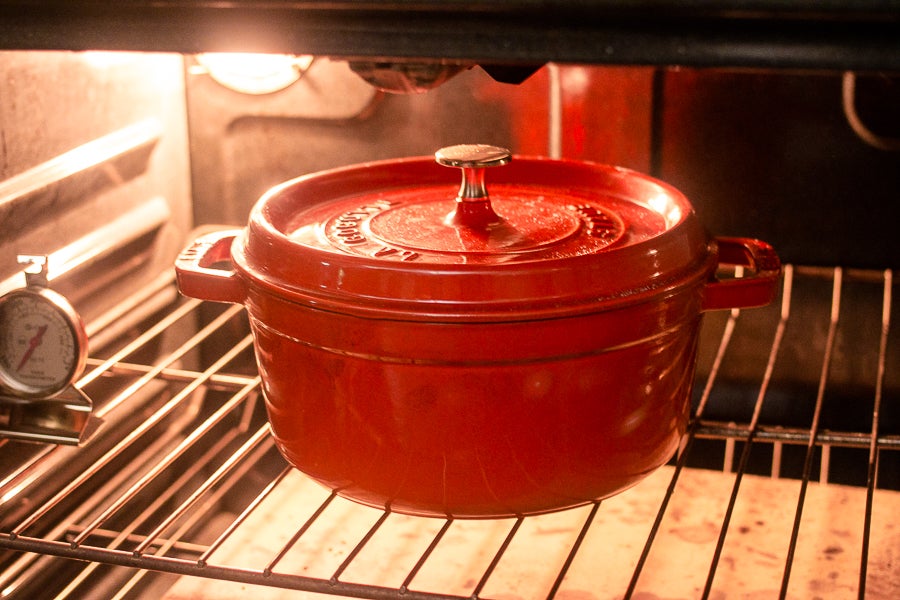
A Dutch oven, cloche or other lidded baking vessel will trap the steam given off by the rising dough, keeping the surface of the loaf moist during oven spring.
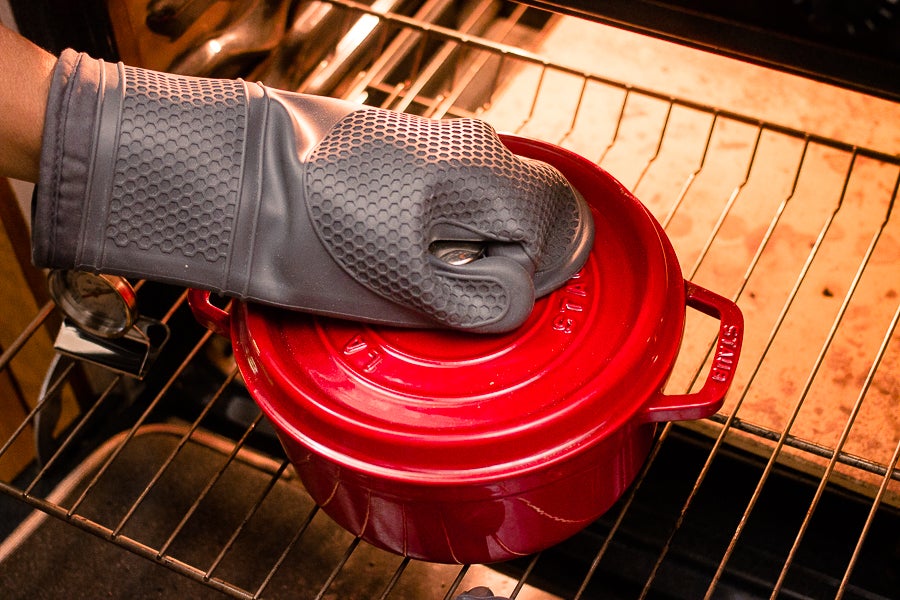
Once the loaf is set, the lid is removed and the loaf can finish baking in a dry oven.
Note: When baking in anything but plain cast iron, take care to avoid thermal shock, which may crack the enamel or the ceramic vessel itself. As a general rule, we don't recommend preheating any non-cast iron baking vessels empty, a method popularized by Mark Bittman through the New York Times over a decade ago. It's wise to check with the manufacturer of your Dutch oven to see if they recommend using your pot in this way.
However, we do sell two pots that are suitable for this method of baking: Emile Henry's 4.2 quart Dutch Oven and their Bread and Potato Baker can both be preheated empty. These pots should only need 30 minutes to preheat, but take your loaf out of the refrigerator 45 minutes before baking so that it can warm up a bit. Remove the lid after 20 minutes of baking.
If you don't have a pot that can be preheated empty, you can still get great results with the following two methods of Dutch oven baking. With either method, you'll want to prepare the pot by spraying or rubbing oil into the sides of the pot and then sprinkling the bottom of the pot with a coarse flour, such as the rice flour/all-purpose flour blend I recommended in Part 2. Semolina or cornmeal will also work well for this purpose. Another option is to grease the sides of the pot and place a parchment round on the bottom of the pot.
To avoid thermal shock, let your loaf warm up a bit after taking it out of the refrigerator. Give it at least 45 minutes at room temperature in the vessel you plan to bake it in before placing it in either a cold or preheated oven.
Method 1: Put the dough and pot in the center of a cold oven. Set the oven to 450°F, turn it on, and set a timer for 30 minutes. When the timer goes off, remove the lid and allow the bread to continue baking until it's a dark golden brown, probably an additional 25-30 minutes. Since ovens and baking pots can vary quite a bit, set your timer for 15 minutes, and check the bread periodically after that.
Method 2: Preheat the oven to 450°F, giving it at least 30 minutes to come up to temperature. Place the loaf in its lidded pot into the preheated oven and set the timer for 25 minutes. Remove the lid after 25 minutes and set the timer for 15 minutes, checking the loaf periodically after that until it's a rich golden brown.
With either method if you find that your loaf isn’t browning enough on the sides and bottom, it's fine to finish the bake outside the pot, directly on the oven rack.
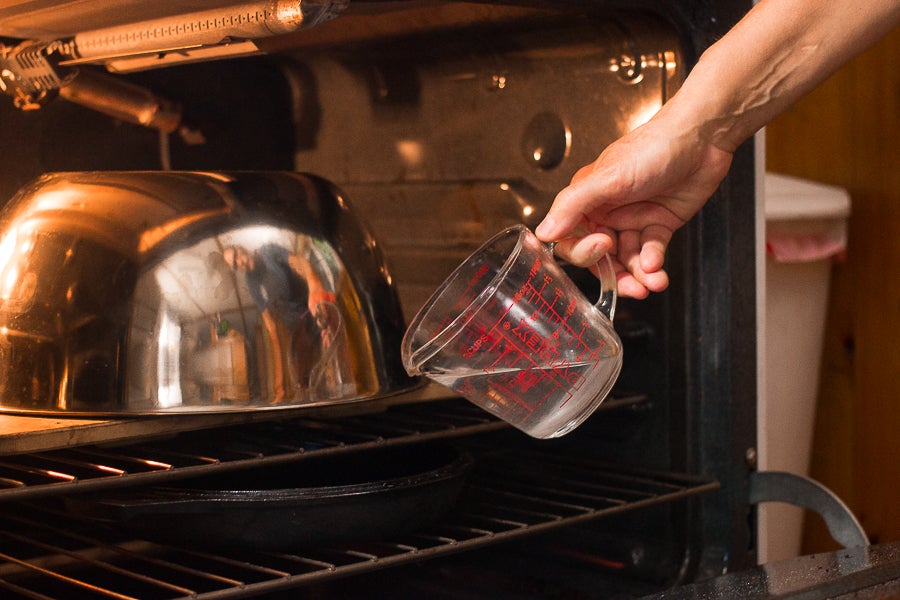
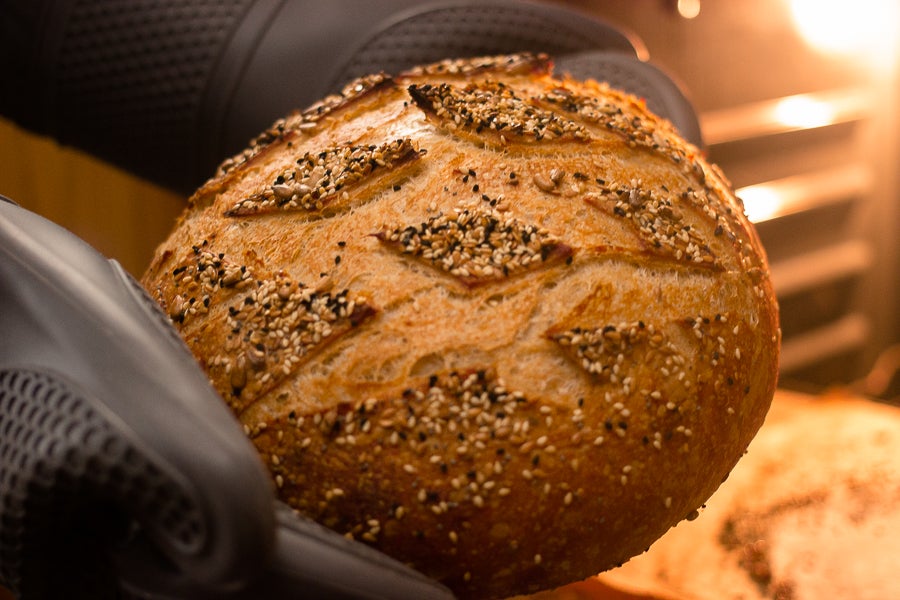
You can also simulate the closed environment of a cloche or Dutch oven using a pizza stone and a metal bowl. There's no need to allow the loaf to come to room temperature when using this method, and you may find that the loaf spreads less if you bake it directly from the refrigerator.
Preheat both the stone and a metal pan below the stone for a full hour at 450°F. Transfer the loaf to the hot stone, using parchment paper or a peel, and place a stainless steel bowl (I use an 8-quart mixing bowl) over the loaf, leaving a portion of the bowl hanging over the stone in front, so that the opening lines up with the pan below. To add steam, pour 1/2 cup boiling water into the hot metal pan below. The resulting steam will rise into the bowl.
NOTE: Long oven mitts and care are necessary for this method to prevent a steam burn! I don't have oven mitts on in the picture above, as the photo was taken when the oven was cold, so I could illustrate the oven set up. Also, many bakers have suggested that a towel should always cover your glass door prior to steaming. Water drops that splash on the hot glass can cause it to break.
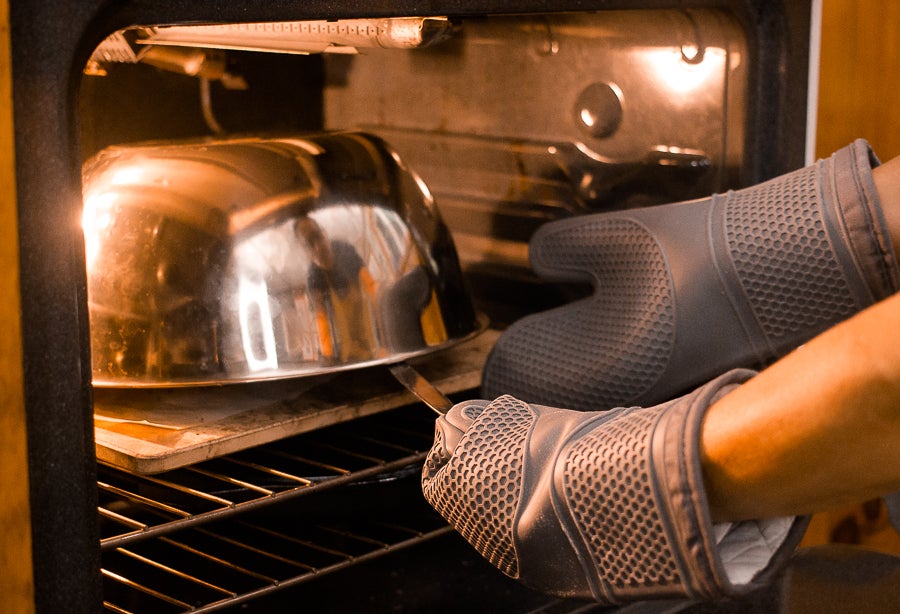
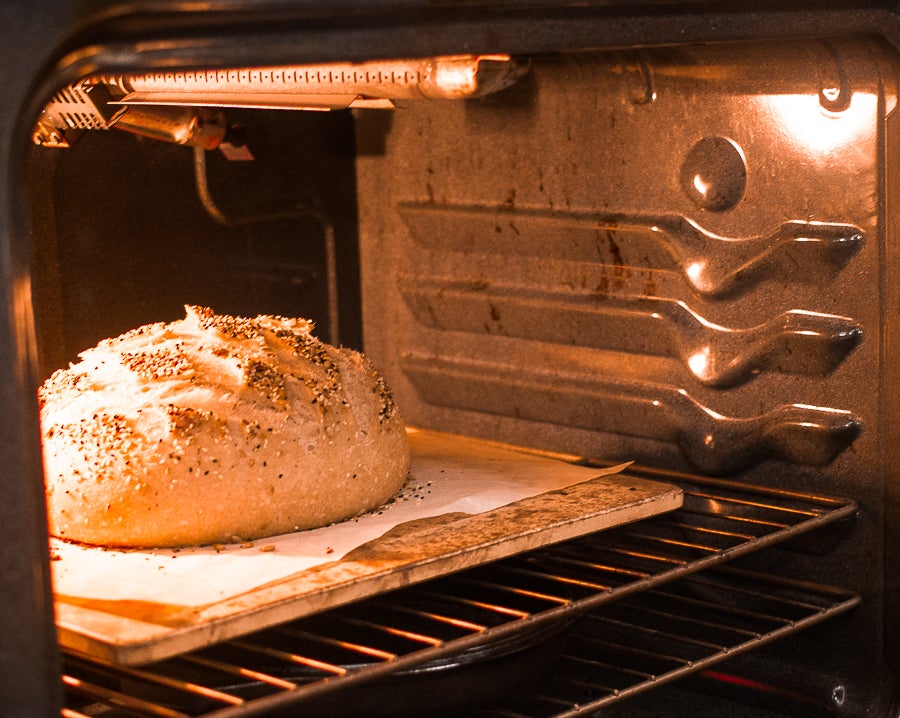
After 20 minutes remove the hot bowl by lifting the edge with a butter knife and grabbing hold of it with oven mitts. Set the timer for another 20 minutes.
Check the loaf periodically after that until it becomes a rich golden brown.
Finally, if you have neither a covered baker nor a pizza stone, bake your loaf on a cookie sheet lined with parchment paper, with or without the bowl, adding steam right after you load the loaf into the oven.
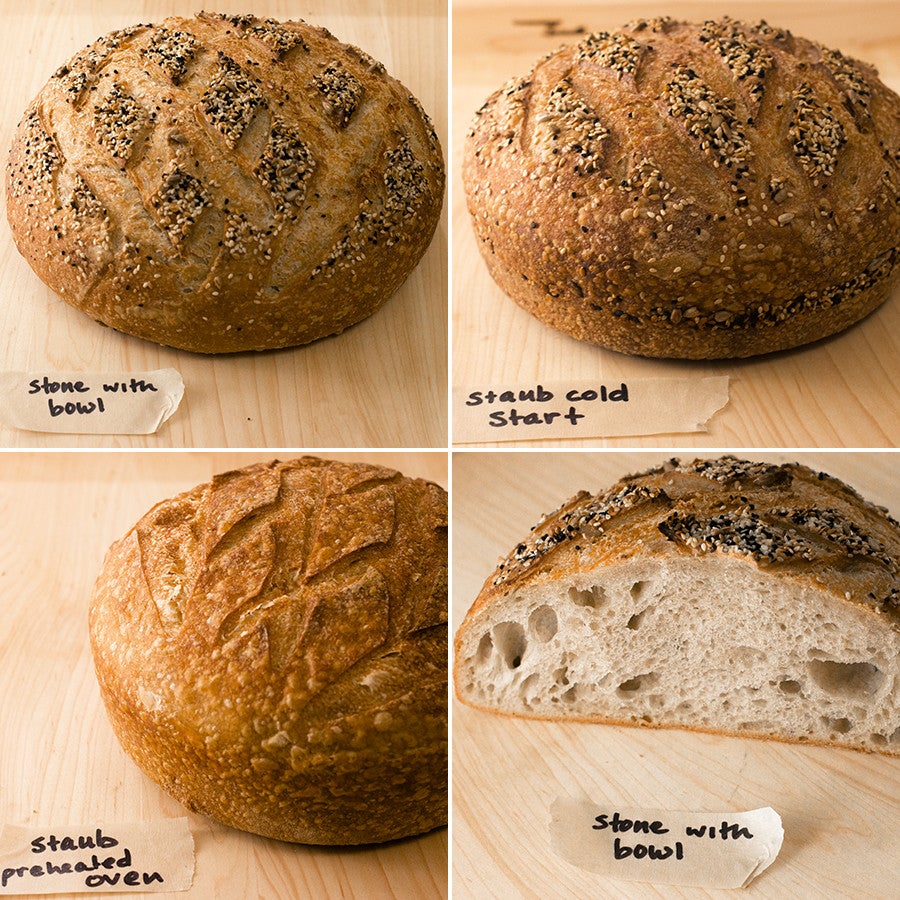
In the course of testing this recipe, I decided to take our new 4 quart Staub Dutch oven for a ride. Here are photos of loaves, all of which rose in the fridge overnight, baked with three different methods:
1. On a stone covered with a bowl, added steam;
2. In a Staub Dutch oven, cold oven start;
3. In a Staub Dutch oven, preheated oven
The fourth picture is the crumb of loaf #1.
As you can see, all three methods yield lovely, robust loaves. I love the result I get with the stone and bowl, but for ease of use you can’t beat the Staub, and the cold start seems to give very similar results to the preheated oven, so choose whichever technique works best for you and your schedule.
Now that our bread is baked, what have we learned?
For a more open crumb:
For consistency, and predictable results:
For a more sour loaf:
For a milder-flavored loaf:
The artisan baking techniques I've presented to you over the course of the past few days will soon become easily applied tools in your sourdough arsenal as you practice and gain more confidence.
And remember, we’re here at the Baker’s Hotline: 855-371-BAKE (2253) to help you take on the challenges and develop the skills you need to take your baking to the next level.
Want to start at the beginning? See Artisan Sourdough Bread Tips, part 1; and Artisan Sourdough Bread Tips, part 2.