


Who makes perfectly flaky, tender pie crust, time after time after time?
OK, don't all raise your hands at once!
Making wonderful pie crust is one of those skills learned, honed, practiced, lost, and rediscovered over a lifetime. If you're one of the lucky bakers who has the process down pat, congratulations – and bear with the rest of us, who are still on the path to enlightenment.
After over three decades of pie baking, I still occasionally produce a flop: a crust that's hard as concrete, solid as sheet rock, and not at all worthy of its filling. But there are two things that, when I remember to do them, produce a reliably excellent crust.
OK, are you ready? Here goes.
And what's so special about this particular recipe?
Well, don't you just kinda stir it in?
Yes, but simply adding water to your bowl of flour and fat encourages you to add too much. The dough won't come together, so what do you do? Add another couple of tablespoons of water.
In my ongoing experience, if you add enough water for the dough to be lovely and silky and pliable - you've added too much.
So what's the solution?
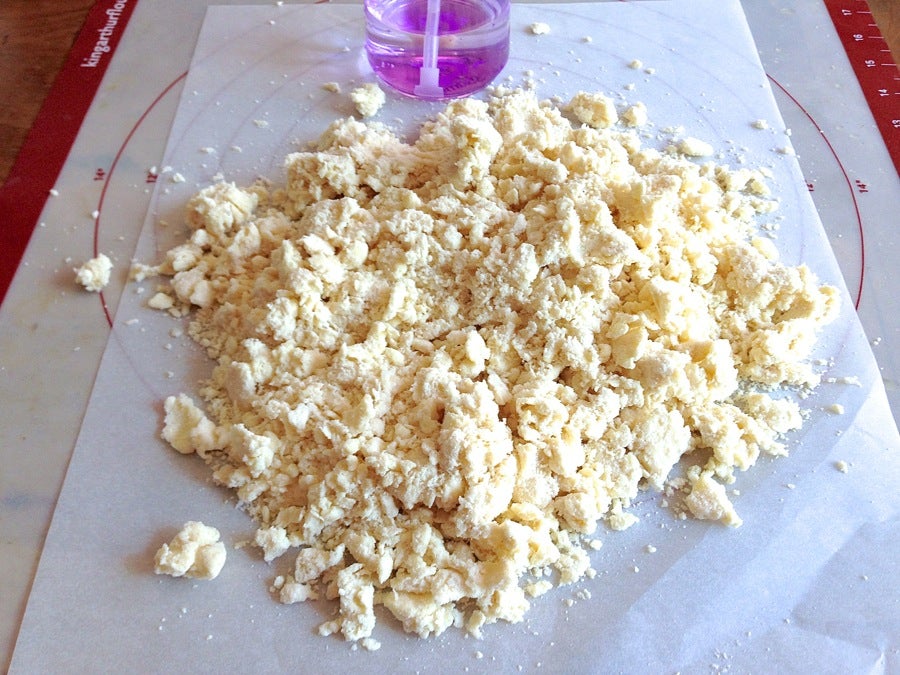
A spray bottle.
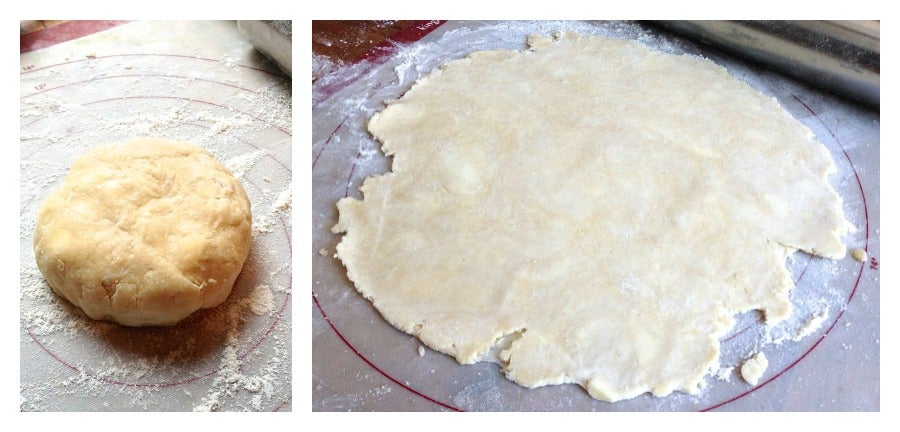
Once your flour and fats are combined, and you've added enough water that large clumps have started to form – but the dough isn't holding together yet – dump everything out onto a sheet of parchment or waxed paper.
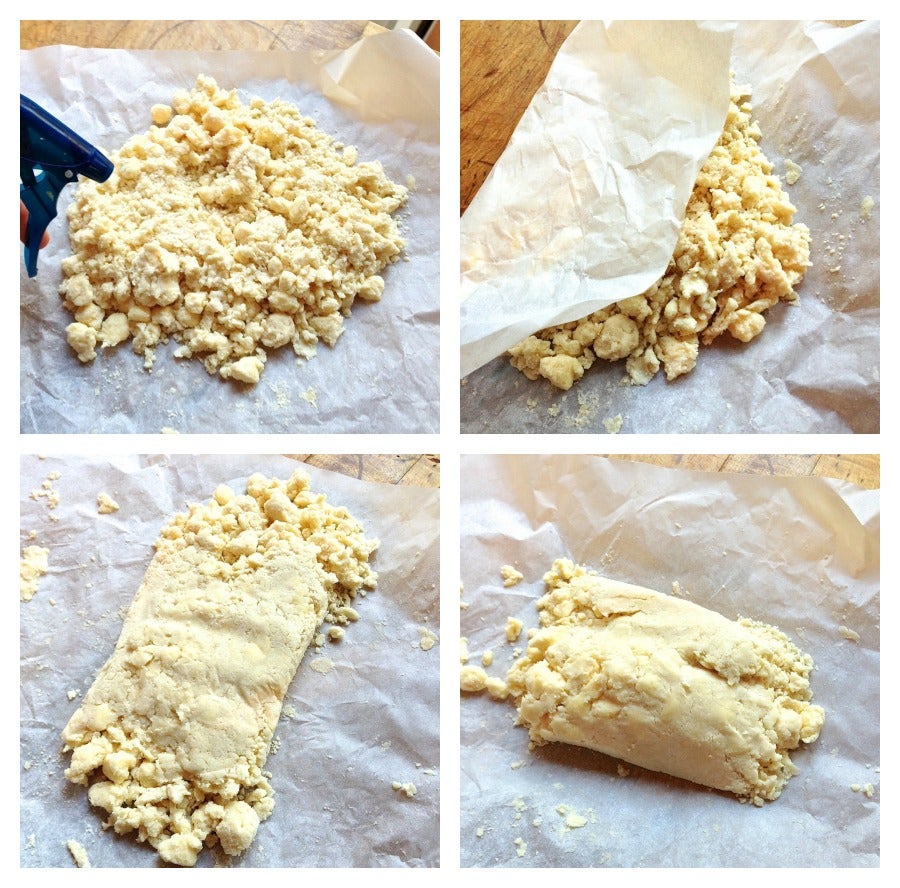
Spray the crumbly dough with a light mist of water, paying special attention to any dry/floury spots.
Using the paper, fold the dough over on itself a couple of times to make a rough rectangle. Fold the ends into the center, too, to make a fatter rectangle.
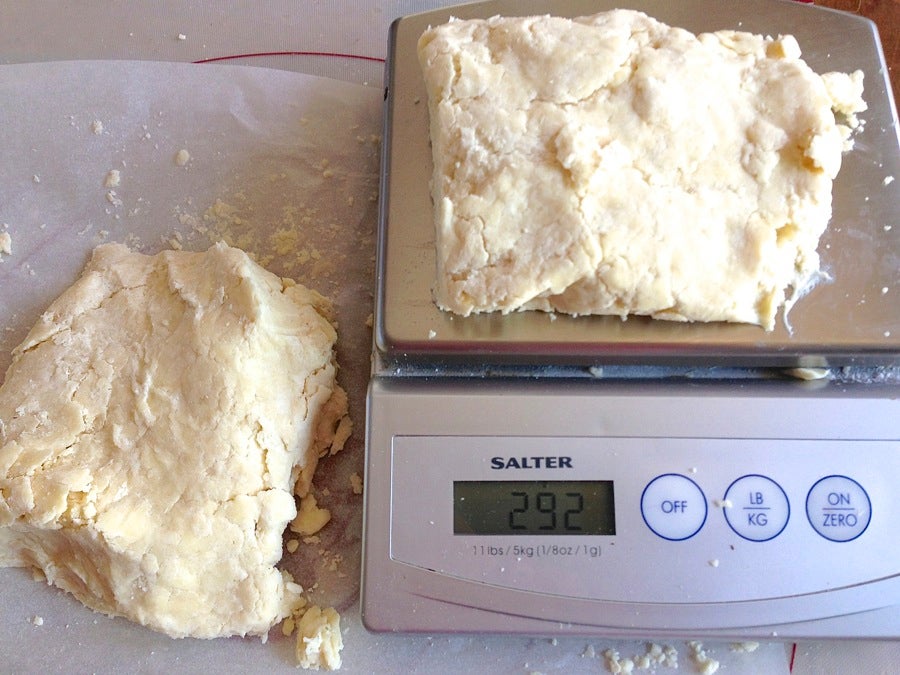
Divide the dough in half.
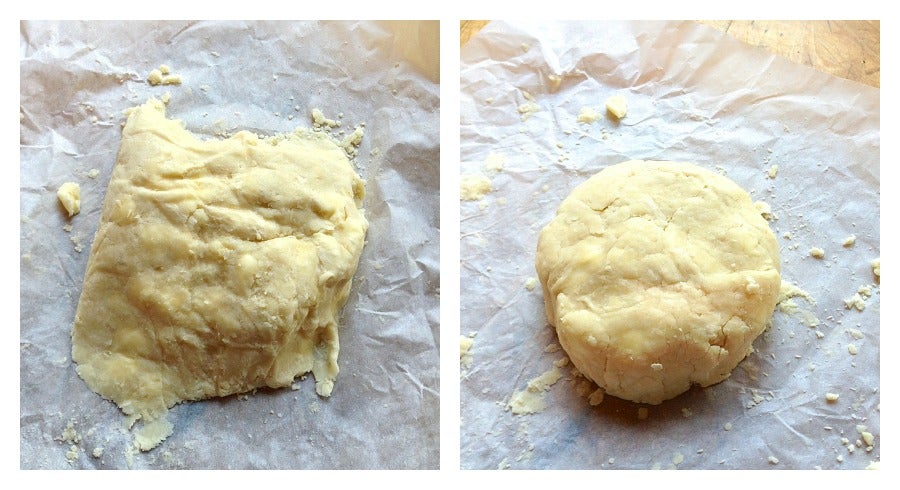
Shape each rough square into a disk. The dough will still feel dry; little pieces will keep flaking off. Just gather them up and gently squeeze them back into the mass.
Wrap your dough disks in the paper or in plastic wrap, and refrigerate for at least 30 minutes.
During this step, the gluten in the flour will relax; the water will redistribute itself; and the fats will harden.
The result?
The relaxed gluten will allow you to roll the crust without it shrinking back and fighting you. The dough that seemed so dry just 30 minutes before will feel much smoother. And the hardened fats will work with the flour to form a flaky crust.
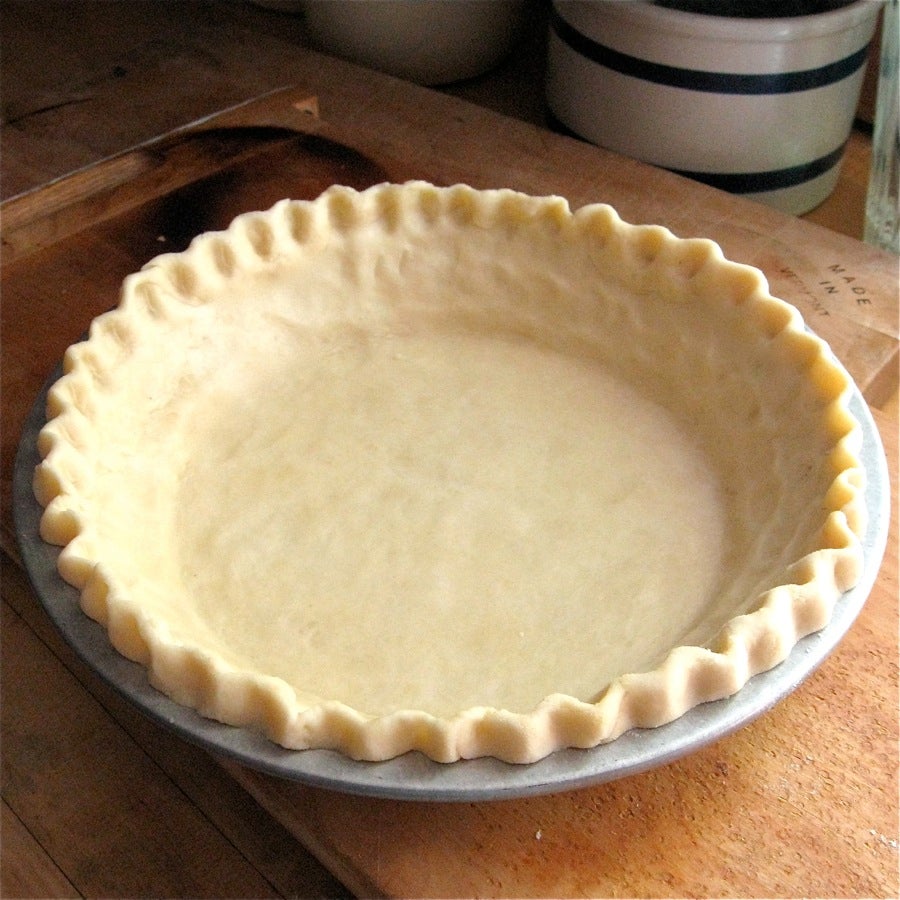
Now, is this not a thing of beauty and a joy forever?
Not only is the crust a pleasure to roll (no tearing or falling apart); and large enough to cover the pan, even with a nice, tall crimp...
...it makes a dynamite pie.
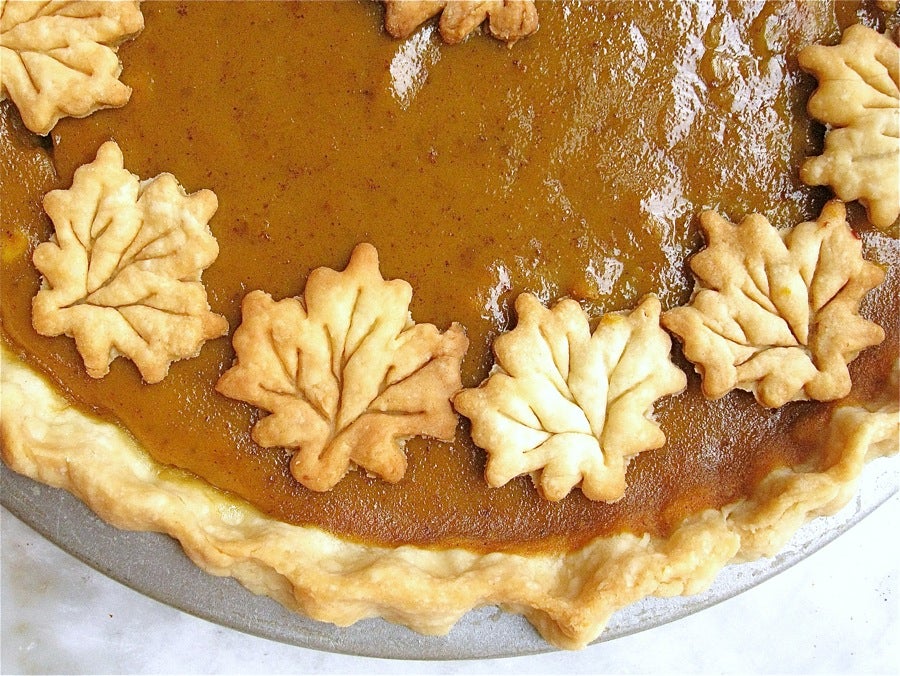
Now, this picture will never appear on the cover of Saveur...
...but look at that texture!
Now THAT'S a tender, flaky pie crust.
Go thou, my children, and do likewise.
Ready to get pie-baking? See our comprehensive Pie Baking Guide for tips, recipes, inspiration, and more.
