I consider any month to be a good time for apple pie, but November is a particularly notable time for it to shine. Between the peak apple harvest just behind us and Thanksgiving dessert just ahead of us, apple pie is poised for its moment in November.
What makes a perfect apple pie? Unlike blank-canvas desserts like ice cream or layer cake, apple pie is a simple classic we rarely tinker with. Instead of reinventing it with creative flavors or techniques, we can focus on nailing the fundamentals.
A word on the recipe: You likely have a favorite pie crust recipe, and feel free to use that! I'm using our classic Apple Pie recipe here, which is a wonderful basic crust and filling. I'll share some tips that I use to make an apple pie, but keep in mind that these are just suggestions for you to try out in your kitchen. You might have your own methods (and I'd love to hear them in the comments).
Truly, the best way to master pie is practice. Get in the kitchen and start baking! Try this recipe and these tips, and experiment until you find what works best for you. Our guides to pie baking and pie crust are an excellent resource, with tips for even the most seasoned pie bakers.
Any basic pie crust recipe will work, but for this Apple Pie crust, you'll need:
2 1/2 cups (300g) King Arthur Unbleached All-Purpose Flour
3/4 teaspoon salt
1/3 cup (60g) vegetable shortening
8 tablespoons (113g) unsalted butter, cold
7 to 10 tablespoons (99g to 142g) ice water
Whisk together the flour and salt. Work in the shortening until the mixture is evenly crumbly. Dice the butter into 1/2" pieces, and cut into the mixture until you have flakes of butter the size of a dime.
Add the water 2 tablespoons at a time, mixing with a fork as you sprinkle the water into the dough. Add more water as you need it, until the dough comes together in a ball.
Gather it together, divide it in half (here are some tips on dough division), press each half into a disc, and refrigerate (wrapped in plastic wrap) for at least 30 minutes.

You'll need:
8 cups (964g) peeled, sliced apple (from about 3 1/4 pounds whole apples)
2 tablespoons (28g) lemon juice
3/4 cup (149g) granulated sugar
2 tablespoons (14g) King Arthur Flour Unbleached All-Purpose Flour
2 tablespoons (14g) cornstarch or Instant ClearJel
1/4 teaspoon salt
1 teaspoon cinnamon*
1/4 teaspoon nutmeg*
1/4 teaspoon allspice*
1/4 cup (85g) boiled cider or 1/4 cup (70g) undiluted apple juice concentrate, optional
2 teaspoons vanilla extract, optional
2 tablespoons (28g) butter, diced in small pieces
*Or 1 1/2 teaspoons Apple Pie Spice
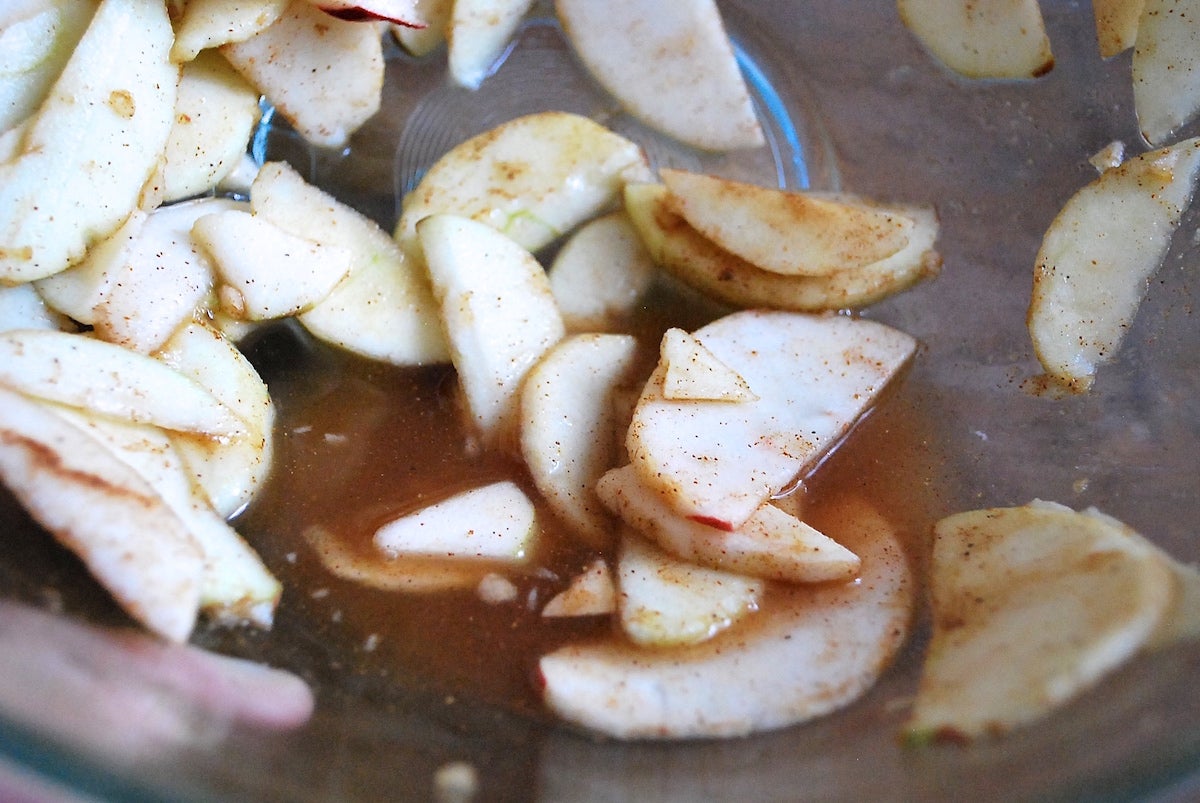
Begin by prepping your apples and placing them in a large bowl. You'll see I have apples of all shapes and sizes: I like using a mix of varieties to keep the flavor and texture interesting. Apple pie will be delicious regardless, but I suggest finding the best apples you can get your hands on. Go apple picking! Go to a farmers' market! They're wildly more flavorful than what you can usually find at a supermarket.
The main concern with fruit pies is a soggy crust. This happens because the fruit filling releases lots of liquid as the pie bakes, which soaks the crust and prevents it from staying crisp and flaky. Most recipes include a thickener in the filling to help firm up all that liquid. This recipe calls for Instant Clearjel as an option, or you can just use cornstarch if you want; it has slightly less thickening power, but it will still be effective.
I add in one extra step to prevent a soggy crust that deviates slightly from the recipe. I slice my apples and toss them with just the sugar, salt, spices, and lemon juice (no boiled cider, no thickener or flour). Then I let them sit and macerate for up to 2 hours. If you're in a hurry, you can certainly skip this step, or just let them sit for as long as you can.
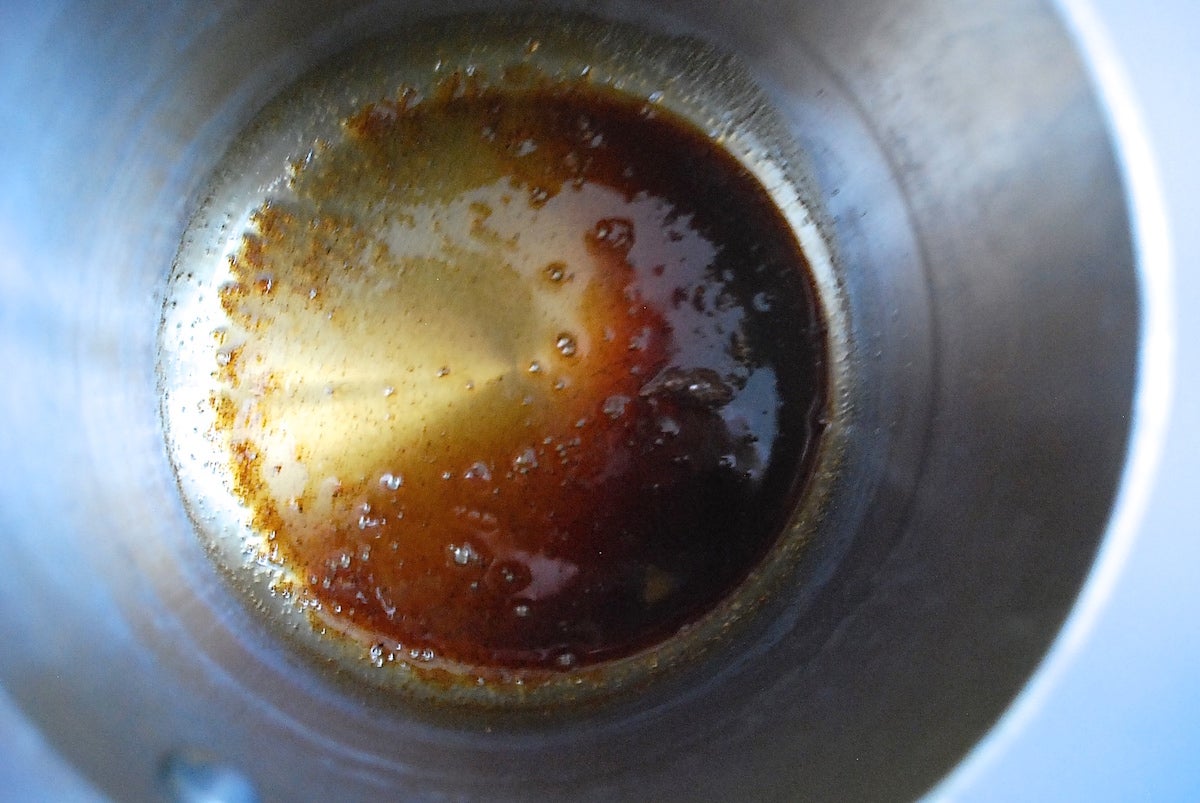
While they sit, the apples will start to release some of their juices. When you're ready to bake, take the liquid at the bottom of the bowl and put it in a small saucepan (you can also do this in the microwave). Depending on the type of apples, you may have as little as 1/4 cup or as much as 1/2 cup. It doesn't look like much, but it makes a difference! Add the boiled cider and cook the liquid until it has reduced by about half and thickened into a syrup. Don't let it get too thick: It should be easily pourable.
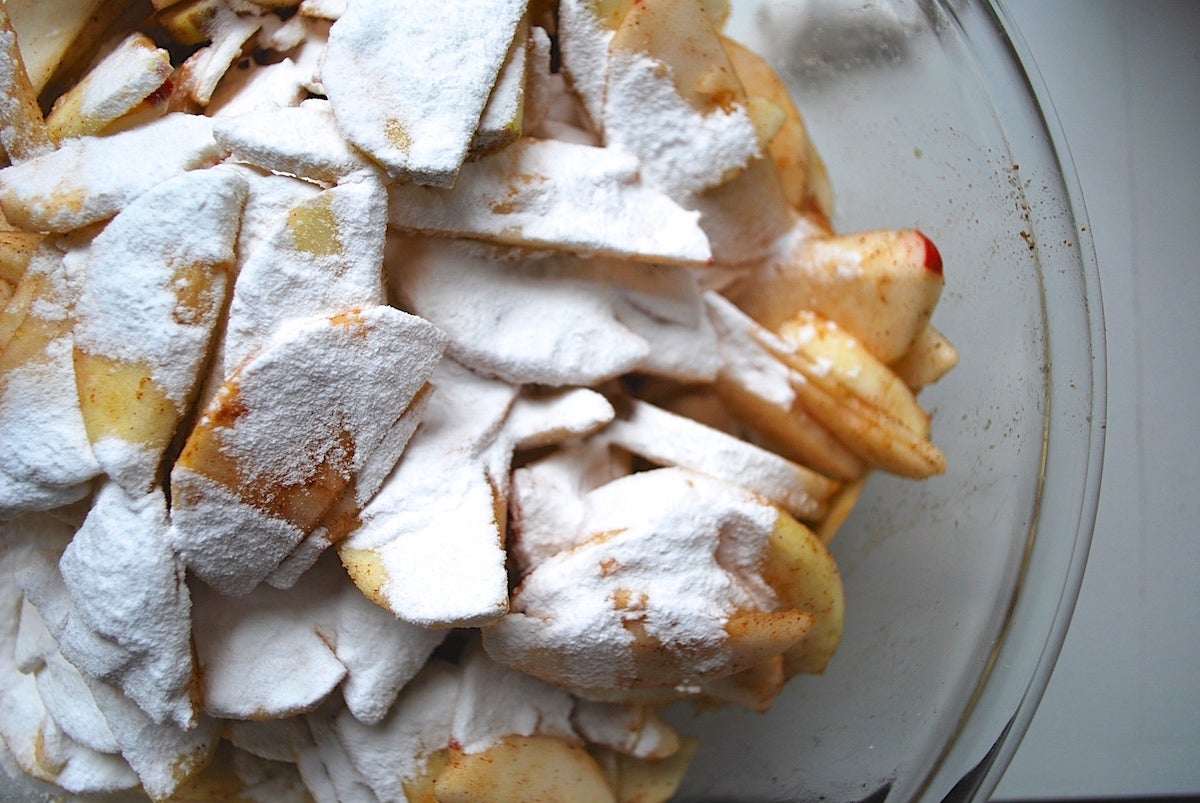

Now, add the flour and Instant ClearJel (or cornstarch) to the sliced apples. Roll out your crust and place the prepared apples into the crust. Drizzle the syrupy reduced apple liquid over the filling and top with the second crust.
This method proactively reduces the amount of liquid that the apples will release while baking, and it also adds a wonderful concentrated, almost caramelized, apple flavor to the filling. The boiled cider adds an additional depth of apple flavor, creating a pie that's far more rich and decadent tasting than a regular apple pie, without adding extra sugar or anything else!
Even if you don't follow this extra step of reducing down the liquid, this particular recipe will still be more flavorful than most because of the boiled cider.
A general life tip: Boiled cider is exceptionally good drizzled over ice cream or stirred into thick whole milk yogurt. Some might say dangerously good.
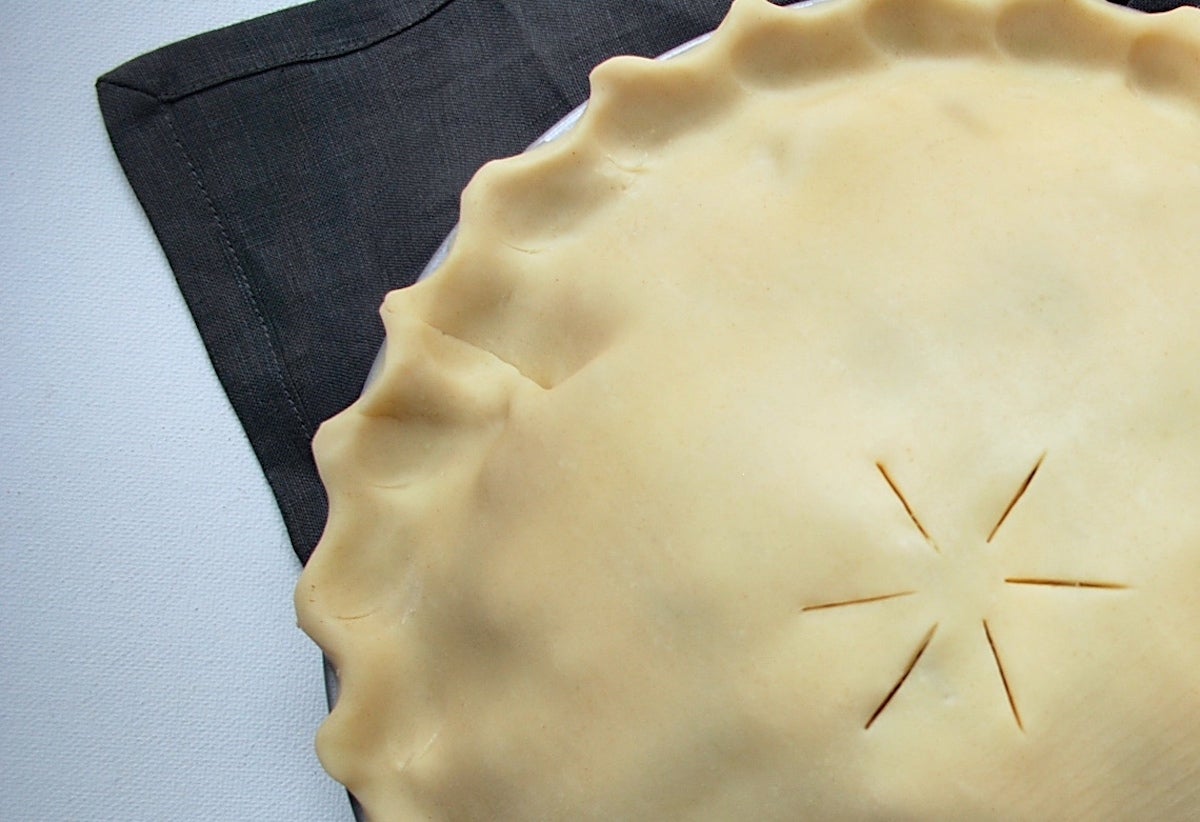
When you top the pie with your second crust, you can either use a full crust or a decorative topping like lattice or a design. I prefer a full crust because, to be honest, that means more crust for me to eat!
Be sure to cut slits in the top of your pie if you use a full top crust. This allows steam to escape, which prevents the top crust from getting soggy and soft.
Bake the apple pie in a preheated 425°F oven for 20 minutes, then reduce the heat to 375°F and bake for an additional 40 minutes. The pie is ready when it's golden brown and the juices are bubbling.
You'd be wise to bake your pie on a parchment-lined baking sheet to catch any rogue drips of filling.
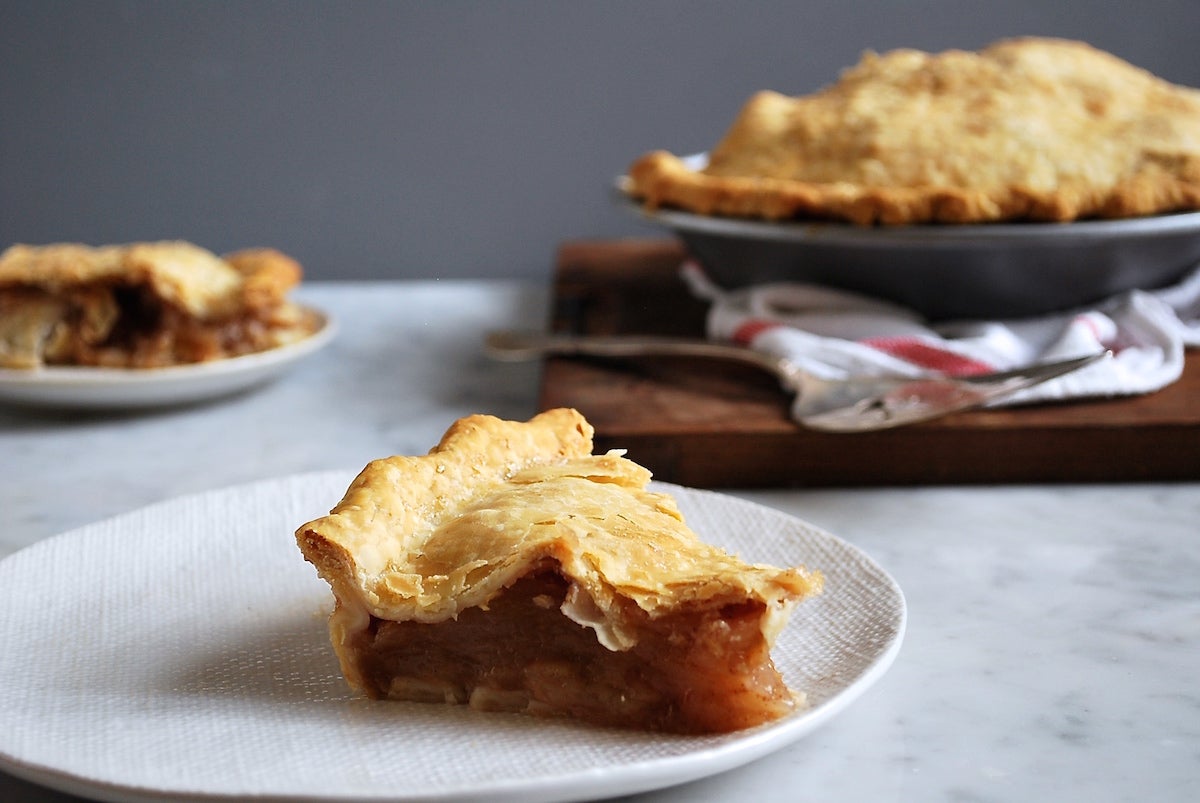
Let the pie cool for at least 15 minutes, and then serve it warm with a scoop of vanilla ice cream. If you can resist eating the entire thing, save a slice or two in the refrigerator to eat chilled for breakfast.
A cold slice of apple pie on a misty, chilly November morning is one of life's greatest small pleasures. Here's the Apple Pie recipe; find out for yourself!