


When I see Saveur magazine appear in my mailbox each month, I usually pick it up and flip through it right away: a preview of coming attractions for the evening ahead. My current issue of Saveur was delivered last Friday, and it featured a headline that boated “Baltimore's Favorite Cookie.” What baker can resist a come-on like that?!
So I found them: Berger cookies, vanilla cookies with a HUGE slather of chocolate icing on top.
Hmmm, I said to myself. I remembered baking these cookies, somewhere in the distant past... Oh, right—The King Arthur Flour Cookie Companion, where they were a variation on black and white (a.k.a. half and half, a.k.a. half-moon) cookies.
I broke out my copy, and there they were, p. 294. Imagine that—we scooped Saveur by about 3 years! So of course, I had to make these cookies again, now that I see them getting some press. Here we go: Baltimore's finest Berger cookies, King Arthur version.
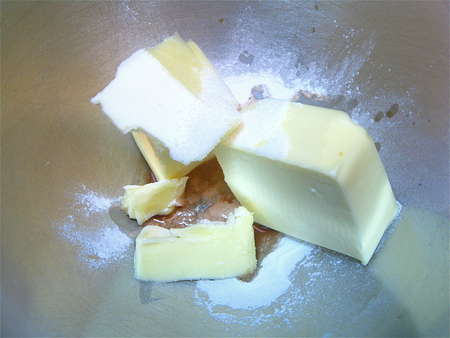
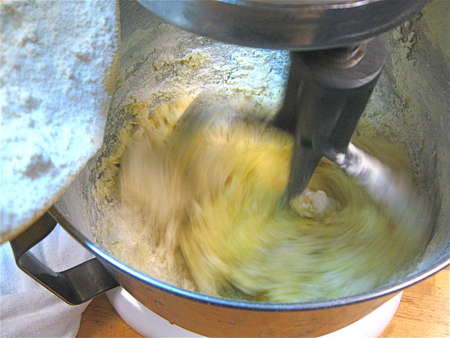
Start with butter, salt, vanilla, and baking powder. No sugar? Not yet.
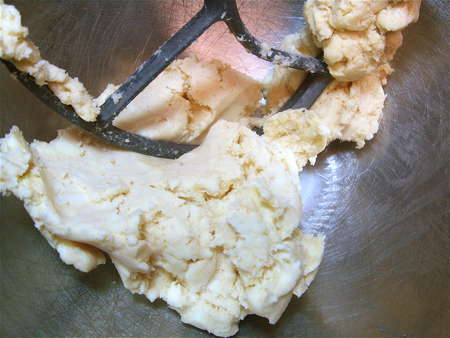
Beat together till fairly smooth; some little chunks of butter may still show.
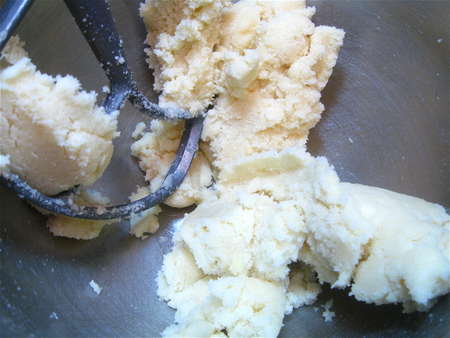
Now comes the sugar, and the dough starts to take on some body.
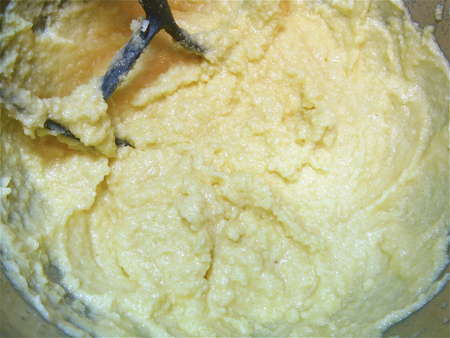
Add eggs, and it looks like... well, scrambled eggs. That's OK; the curdled effect will disappear when you add the flour.
Stir in the flour...

...alternately with the milk. You don't have to beat; just stir to make sure everything is combined. Flour, milk, flour, milk... however many additions it takes, start and end with the flour.
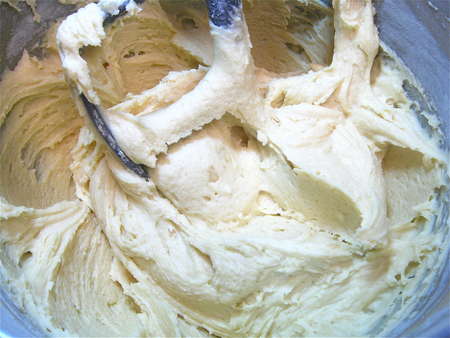
Nice batter, huh?
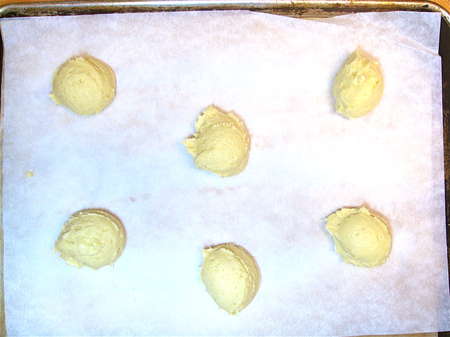
Plop the batter by the 1/4-cupful onto parchment-lined or lightly greased baking sheets. A muffin scoop works perfectly here. Since these are such big cookies, you'll only fit six on each pan. And since the recipe makes 2 dozen, you'll need four pans or, barring that (since who has four pans), you'll need to bake in batches.
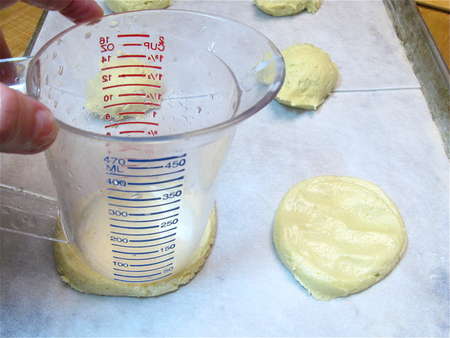
Flatten each mound of batter into a 3” round. I use a measuring cup with a 3” base. Dip it in water, and press down gently; works just fine. You can also use your fingers (dipped in water), or whatever method you prefer.
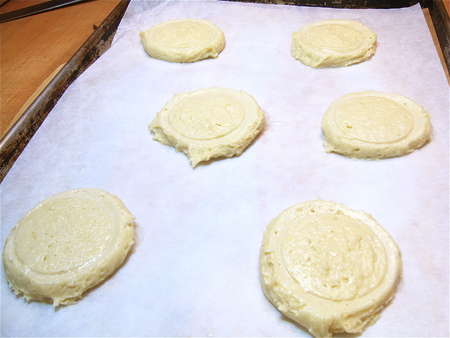
Here they are, ready to go into the oven.
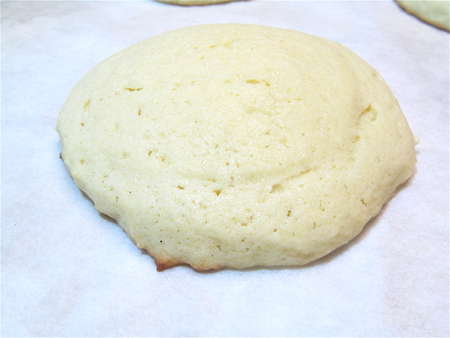
Eleven minutes later, they're ready to come out. They WILL NOT be brown on top; they're supposed to stay cream-colored and soft. You may notice the tiniest little bit of brown along the edge, as you can see here.

Tilt one hot cookie up on its edge; you're a baker, your fingers are tough, right? If not, use a pair of tongs. Notice the bottom is a mottled, golden brown. This signals that the cookies are baked enough. Allow them to cool while you prepare the icing.

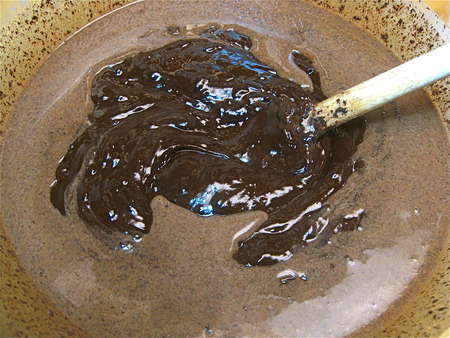
This is one of my favorite icings: chocolate ganache, a mixture of chocolate and heavy cream. This one is enriched with butter and some corn syrup, and uses both semisweet and unsweetened chocolate. Put everything in a microwave-safe bowl.
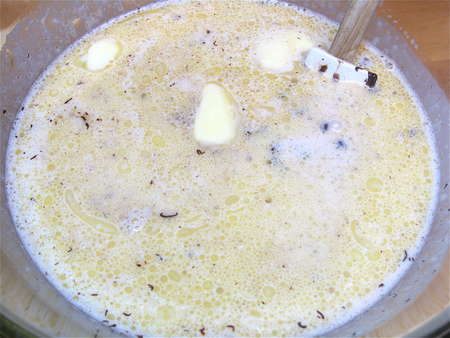
Heat till the butter is mostly melted and the cream is becoming bubbly.
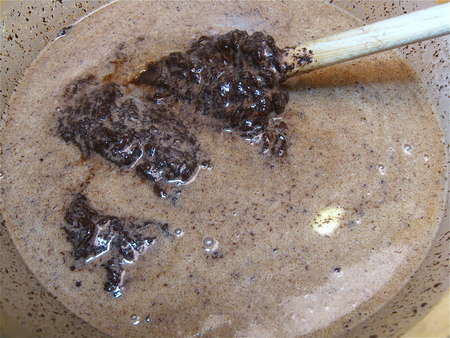
Then start to stir. At first you'll think, no way. What a mess! Oh no, I just wasted all that chocolate! Calm down... keep stirring...
...and pretty soon, the chocolate will begin to come together in the center of the bowl.
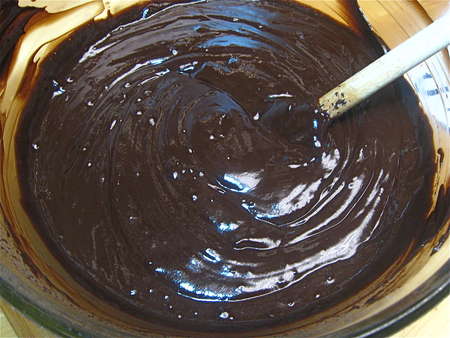
Continue to stir till it's totally combined and smooth. And there you have it: chocolate ganache! But we're not done yet. First, let the icing cool to room temperature; this will probably take several hours. Yes, you can speed the process by refrigerating; just be sure to stir frequently, so the icing doesn't get too thick around the edges while it's still warm at the center.
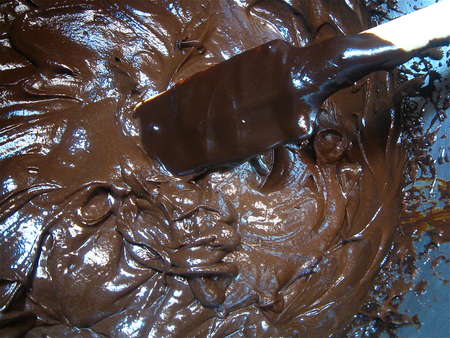
Beat the icing for 6 to 7 minutes, till it lightens in color a bit, and thickens a bit. The change will be noticeable, but not dramatic; compare the color of the unbeaten icing on the spatula with that of the beaten icing in the bowl.
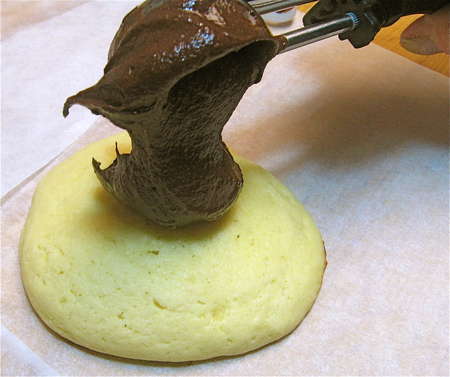
Dollop about 3 tablespoons of icing on each cookie. A generously heaped tablespoon cookie scoop works well here.
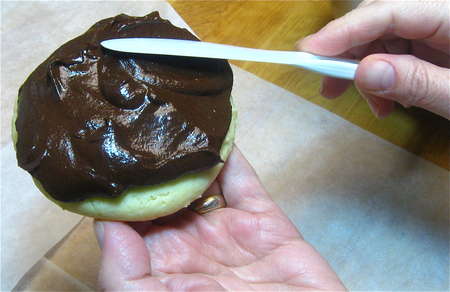
Spread the icing atop the cookie, leaving a border around the edge bare. This bare border accomplishes two things. First, it makes it easier to pick up, handle, and store the cookies. And second, it serves to heap the icing even higher in the center, which makes for a very impressive presentation.

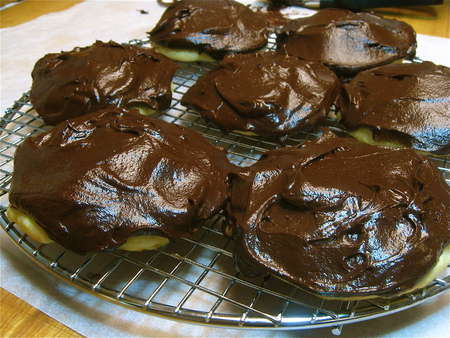
Here they are, all dressed up and ready to enjoy.

Notice the height of icing and cookie—they should be close to equal.
This is what the cookies look like if you ice all the way to the edge. Do it this way if you choose; it makes them look more like the originals in the Saveur photo.
Find the complete recipe for Baltimore Berger Cookies. Note: the recipe has been updated, as of June 2014.
