


Chocolate cake.
Yeah, chocolate cake.
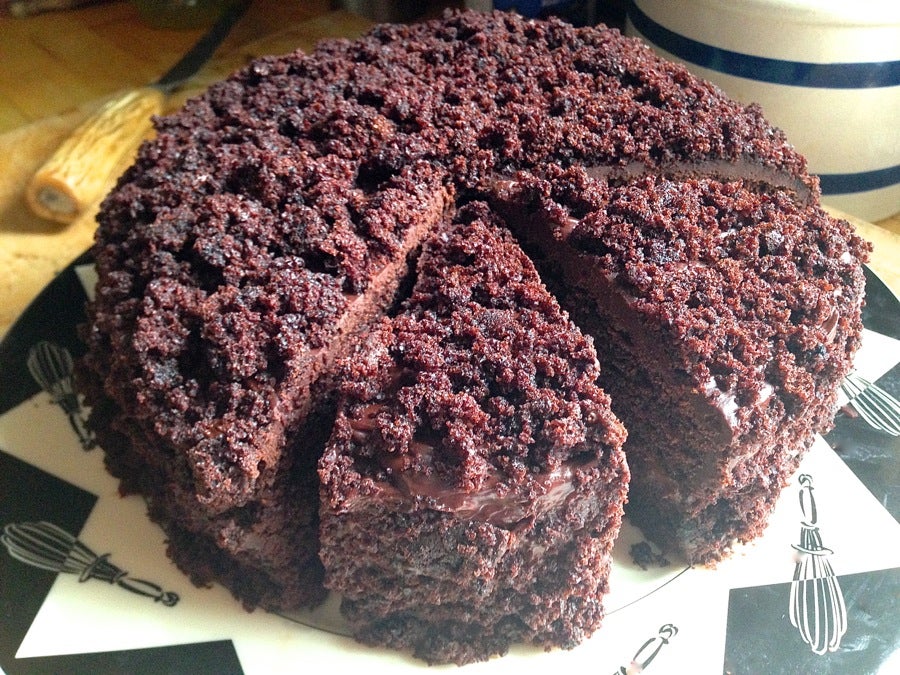
If those words (and this picture) don't cause a significant uptick in your baking adrenaline, then you might as well stop reading right now.
Because you're simply not a chocolate cake fan. And this post is ALL about chocolate cake. In fact, it's about one of the best chocolate cakes I've ever made.
Just ask my family; the guys at the auto shop, and the volunteers at our local nature preserve. Each and every one of my impromptu taste testers said, "Oh, man, this is THE BEST chocolate cake I've ever had!"
Now given, these folks aren't professional foodies; they're normal people, people whose palates aren't honed to perfection. Most would probably just as gladly down a Twinkie as tiramisu.
Still, they're all regular recipients of my baking abundance. And as such, they've tasted some pretty darned good stuff. Just ask them about the chewy chocolate chip cookie bars sometime.
But this chocolate cake? Epic success.
And it all came about because I decided a recipe on our site needed updating...
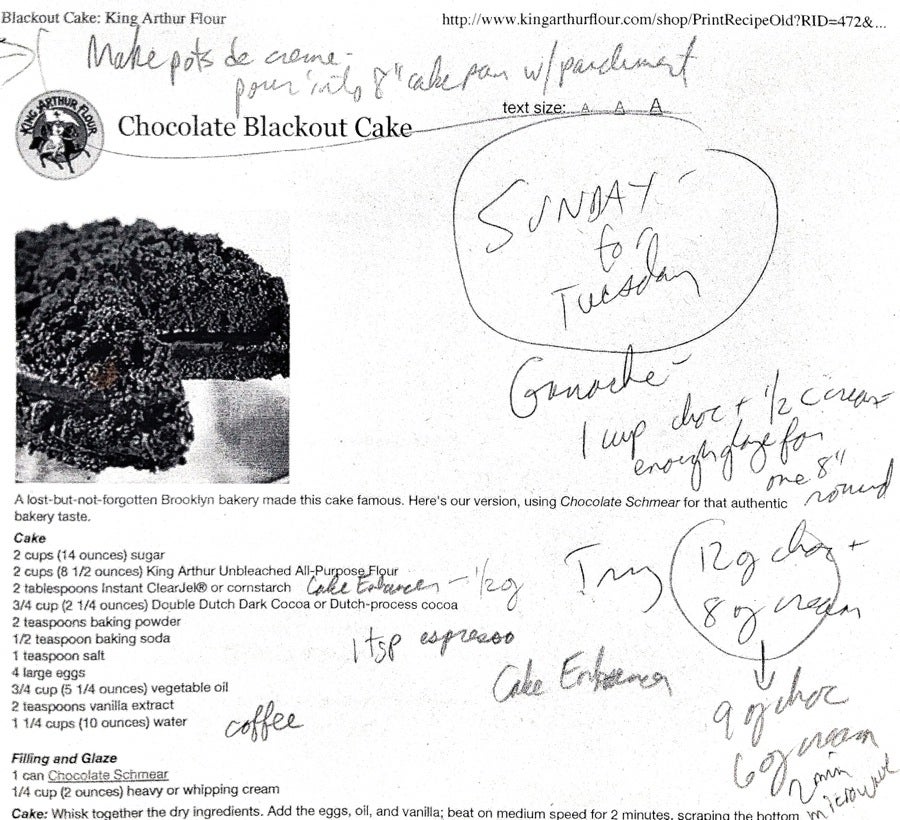
This recipe was born years ago. And, like many of us in the same boat, it needed some sprucing up. My main goal for baking the cake was to shoot a new photo; but as I got into it, I found all kinds of things I wanted to try.
Substituting Cake Enhancer for the ClearJel or cornstarch, for one. Cake Enhancer is a relatively new product, and works a bit better in cake than either of the two starches previously called for, in my opinion.
I love the Double Dutch cocoa blend this recipe originally called for, but Cocoa Rouge is a new favorite, as well; it adds a pleasing hint of deep red to chocolate cake and cookies, as well as rich flavor.
And espresso powder - seldom do I bake a chocolate recipe these days without adding anything from a pinch to a couple of teaspoons of espresso powder, an all-purpose chocolate flavor enhancer.
Then there was that filling... readers had noted that the current size can of Chocolate Schmear we sell is smaller than the can called for in the recipe; it just wasn't working anymore.
So I thought, well, ganache is certainly the same consistency as Schmear, so why not substitute?
For the icing, yes. But the more I looked at photos of Chocolate Blackout Cake online, the more convinced I was that the filling needed to be different than the icing; in fact, it shouldn't be icing at all, but pudding. Chocolate fudge pudding.
No, not Jell-O. Quick Pots de Crême. I can do that.
Anyway, I make no claim to this recipe assiduously following the ingredients and technique of the original Chocolate Blackout Cake, a cake made famous by Brooklyn's Ebinger's Bakery, and beloved by New Yorkers everywhere.
But I do hew to the spirit of that lost but not forgotten icon: a moist layer cake, filled with pudding, coated with icing, and smothered in cake crumbs.
And all of it chocolate, chocolate, CHOCOLATE.
Ready to add another chocolate cake to your recipe repertoire? Give this one a (chocolate) shot. While the steps below may seem numerous, none of them demands any particular skill – other than the ability to read and follow directions!
Let's start with those pots de crême. Only we're not filling individual pots – we're turning this classic dessert into cake filling.
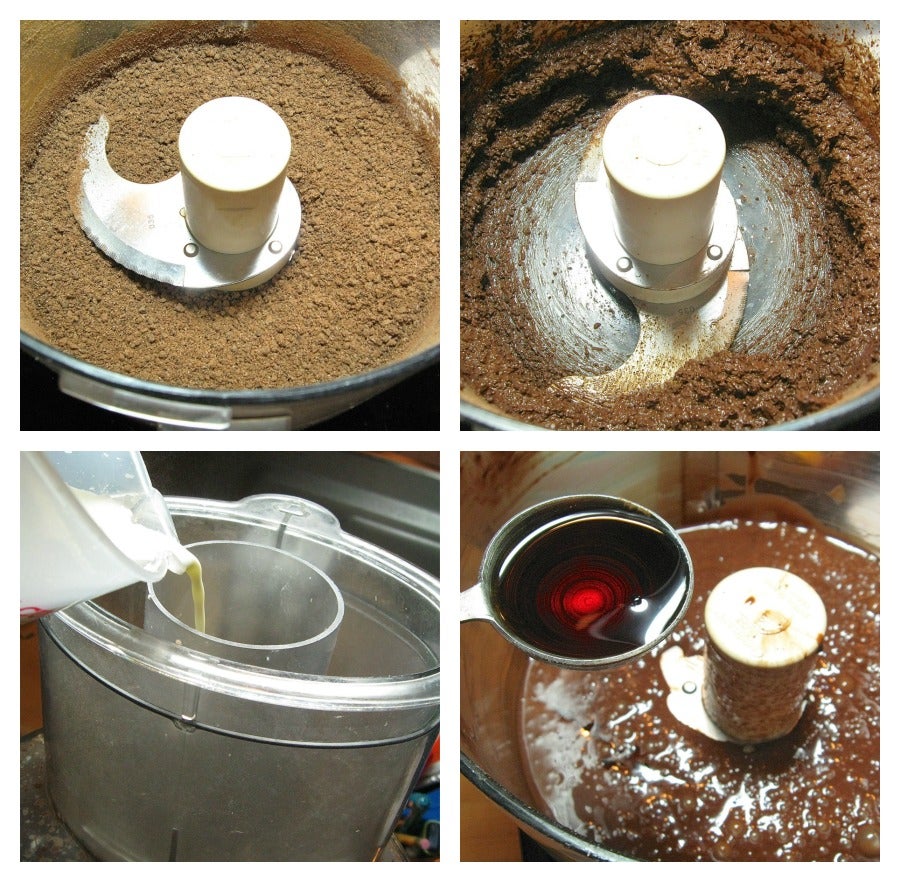 Put the following in a food processor or blender:
1 cup semisweet chocolate chips
1/8 teaspoon salt
2 tablespoons sugar
1/2 teaspoon espresso powder, optional; for enhanced chocolate flavor
Pulse until finely ground. Add 1 large egg, which you've brought to room temperature. Don't want to wait? Submerge the egg in a glass of hot tap water for 10 minutes.
Pulse just until the mixture is fairly smooth.
Heat 1 cup heavy or whipping cream to just below a boil, with small bubbles forming around the edge of the saucepan (or microwave-safe bowl). Turn on the blender or processor, and slowly add the cream. Scrape down the sides of the container if necessary. Add 1 teaspoon vanilla extract (or 1 to 2 tablespoons Kahlua, or the liqueur of your choice), and pulse to blend.
Pour the pudding into a shallow bowl, and refrigerate it until chilled and thickened, 2 hours to overnight.
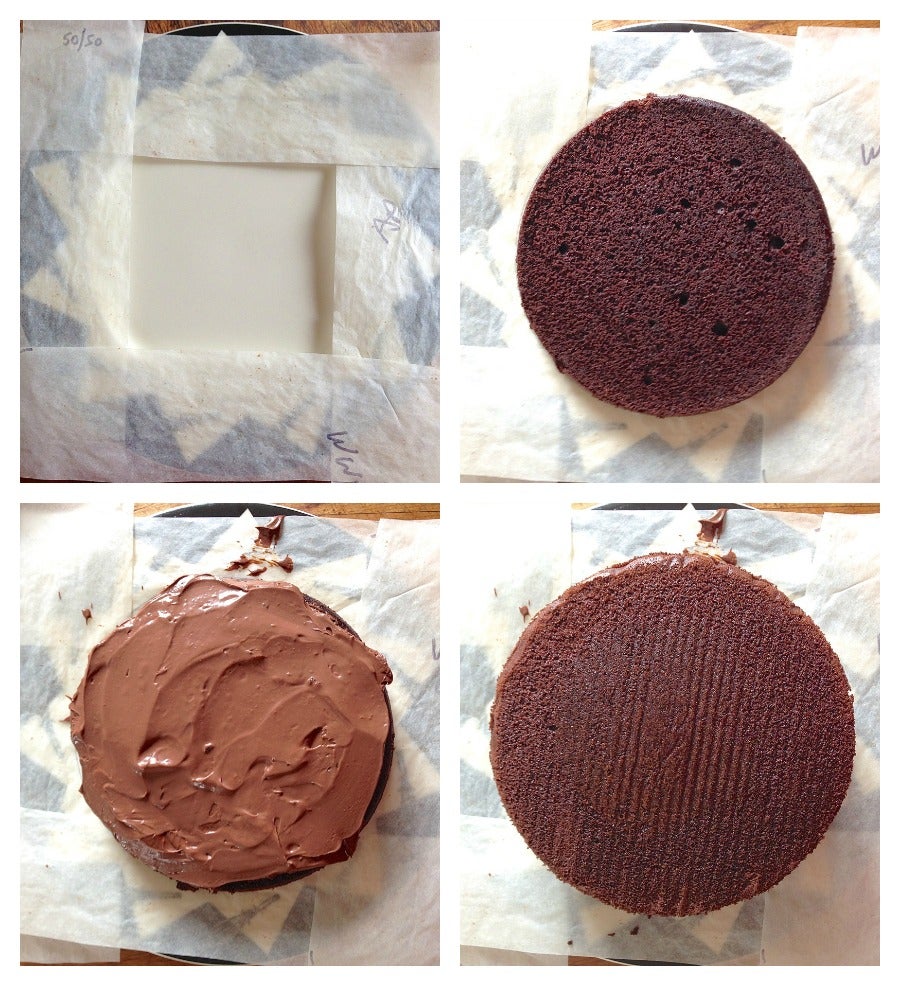
 Or, try what I did: line an 8" round cake pan with greased parchment, and pour the pudding atop the parchment. Refrigerate for at least 2 hours.
One caveat – if you only have two 8" round cake pans, don't try this; you'll need both for the cake.
Next: the cake.
Preheat the oven to 350°F. Lightly grease two 8" x 2" round cake pans. Line them with 8" parchment rounds, if desired, and grease the parchment; this step will ensure your cake's crumble-free turnout from the pan.
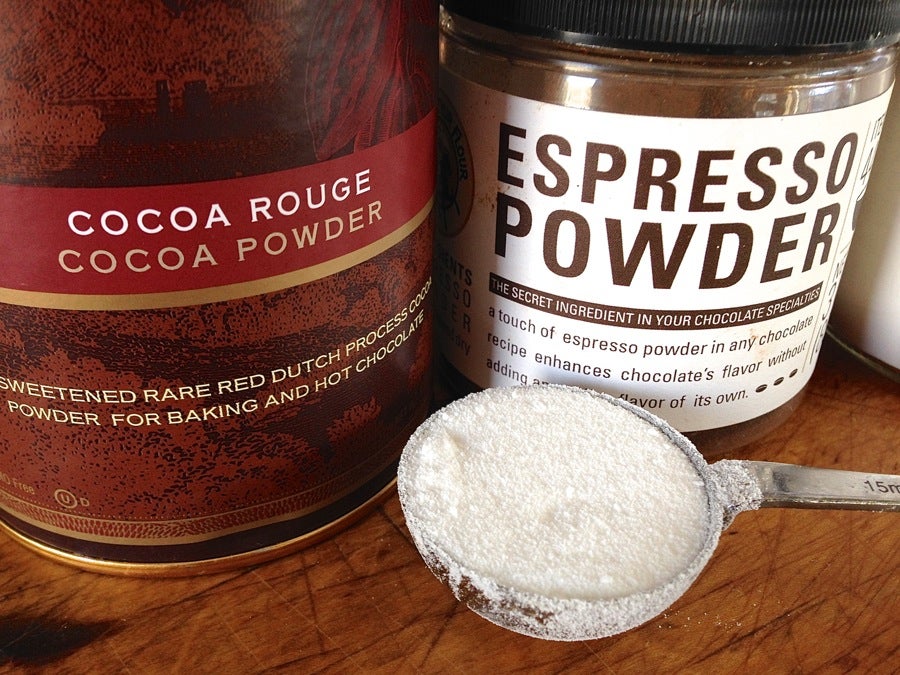 Here they are: some of the updated ingredients I mentioned. That's Cake Enhancer in front. Let's put them to work. Whisk together the following in a large bowl:
2 cups sugar
2 cups (8 1/2 ounces) King Arthur Unbleached All-Purpose Flour
2 tablespoons Cake Enhancer, Instant ClearJel, or cornstarch
3/4 cup (2 1/4 ounces) Double Dutch Cocoa Blend, Cocoa Rouge, or Dutch-process cocoa
2 teaspoons baking powder
1/2 teaspoon baking soda
1 teaspoon salt
1 teaspoon espresso powder, optional; for enhanced chocolate flavor
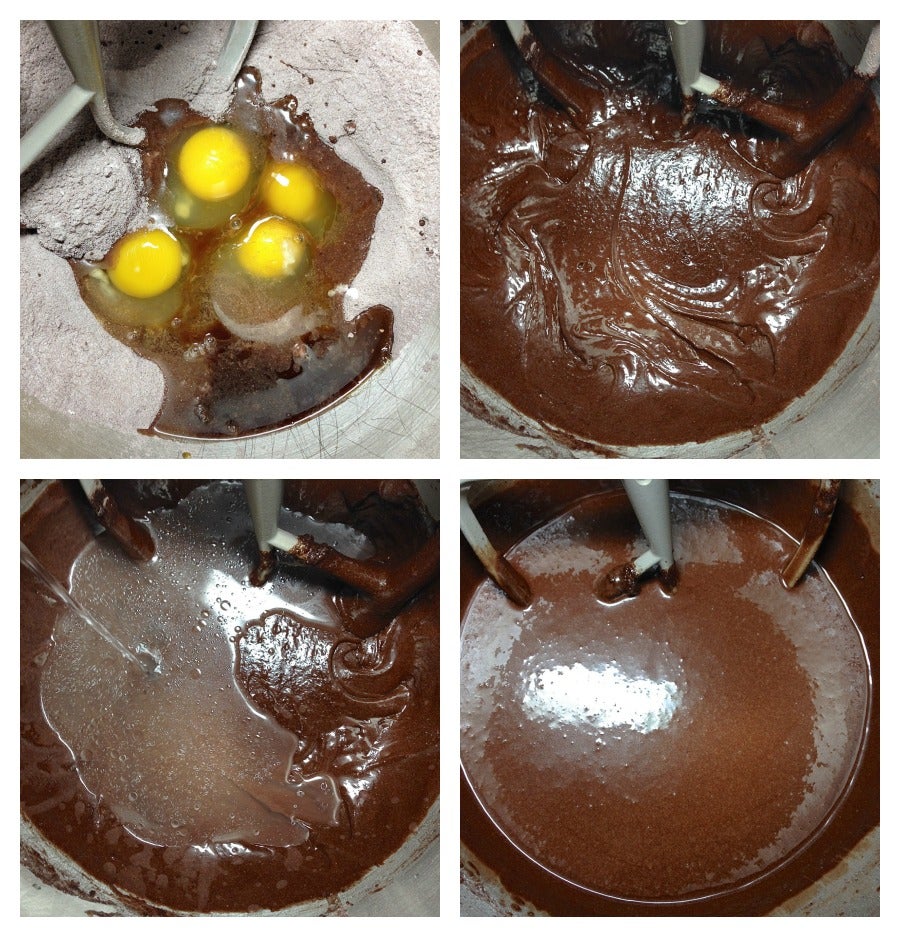 Add 4 large eggs, 3/4 cup oil, and 2 teaspoons vanilla extract; beat on medium speed for 2 minutes, scraping the bottom and sides of the bowl.
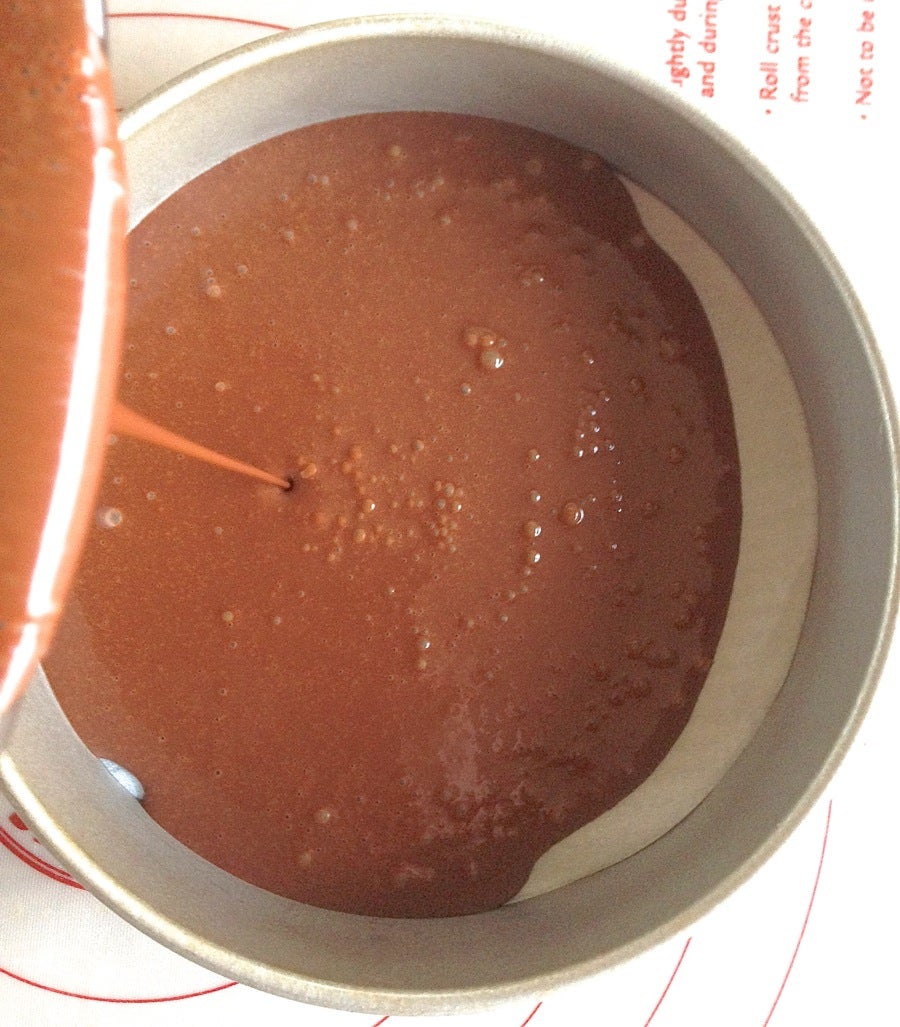
Stir in 1 1/4 cups cold water; the batter will be thin.
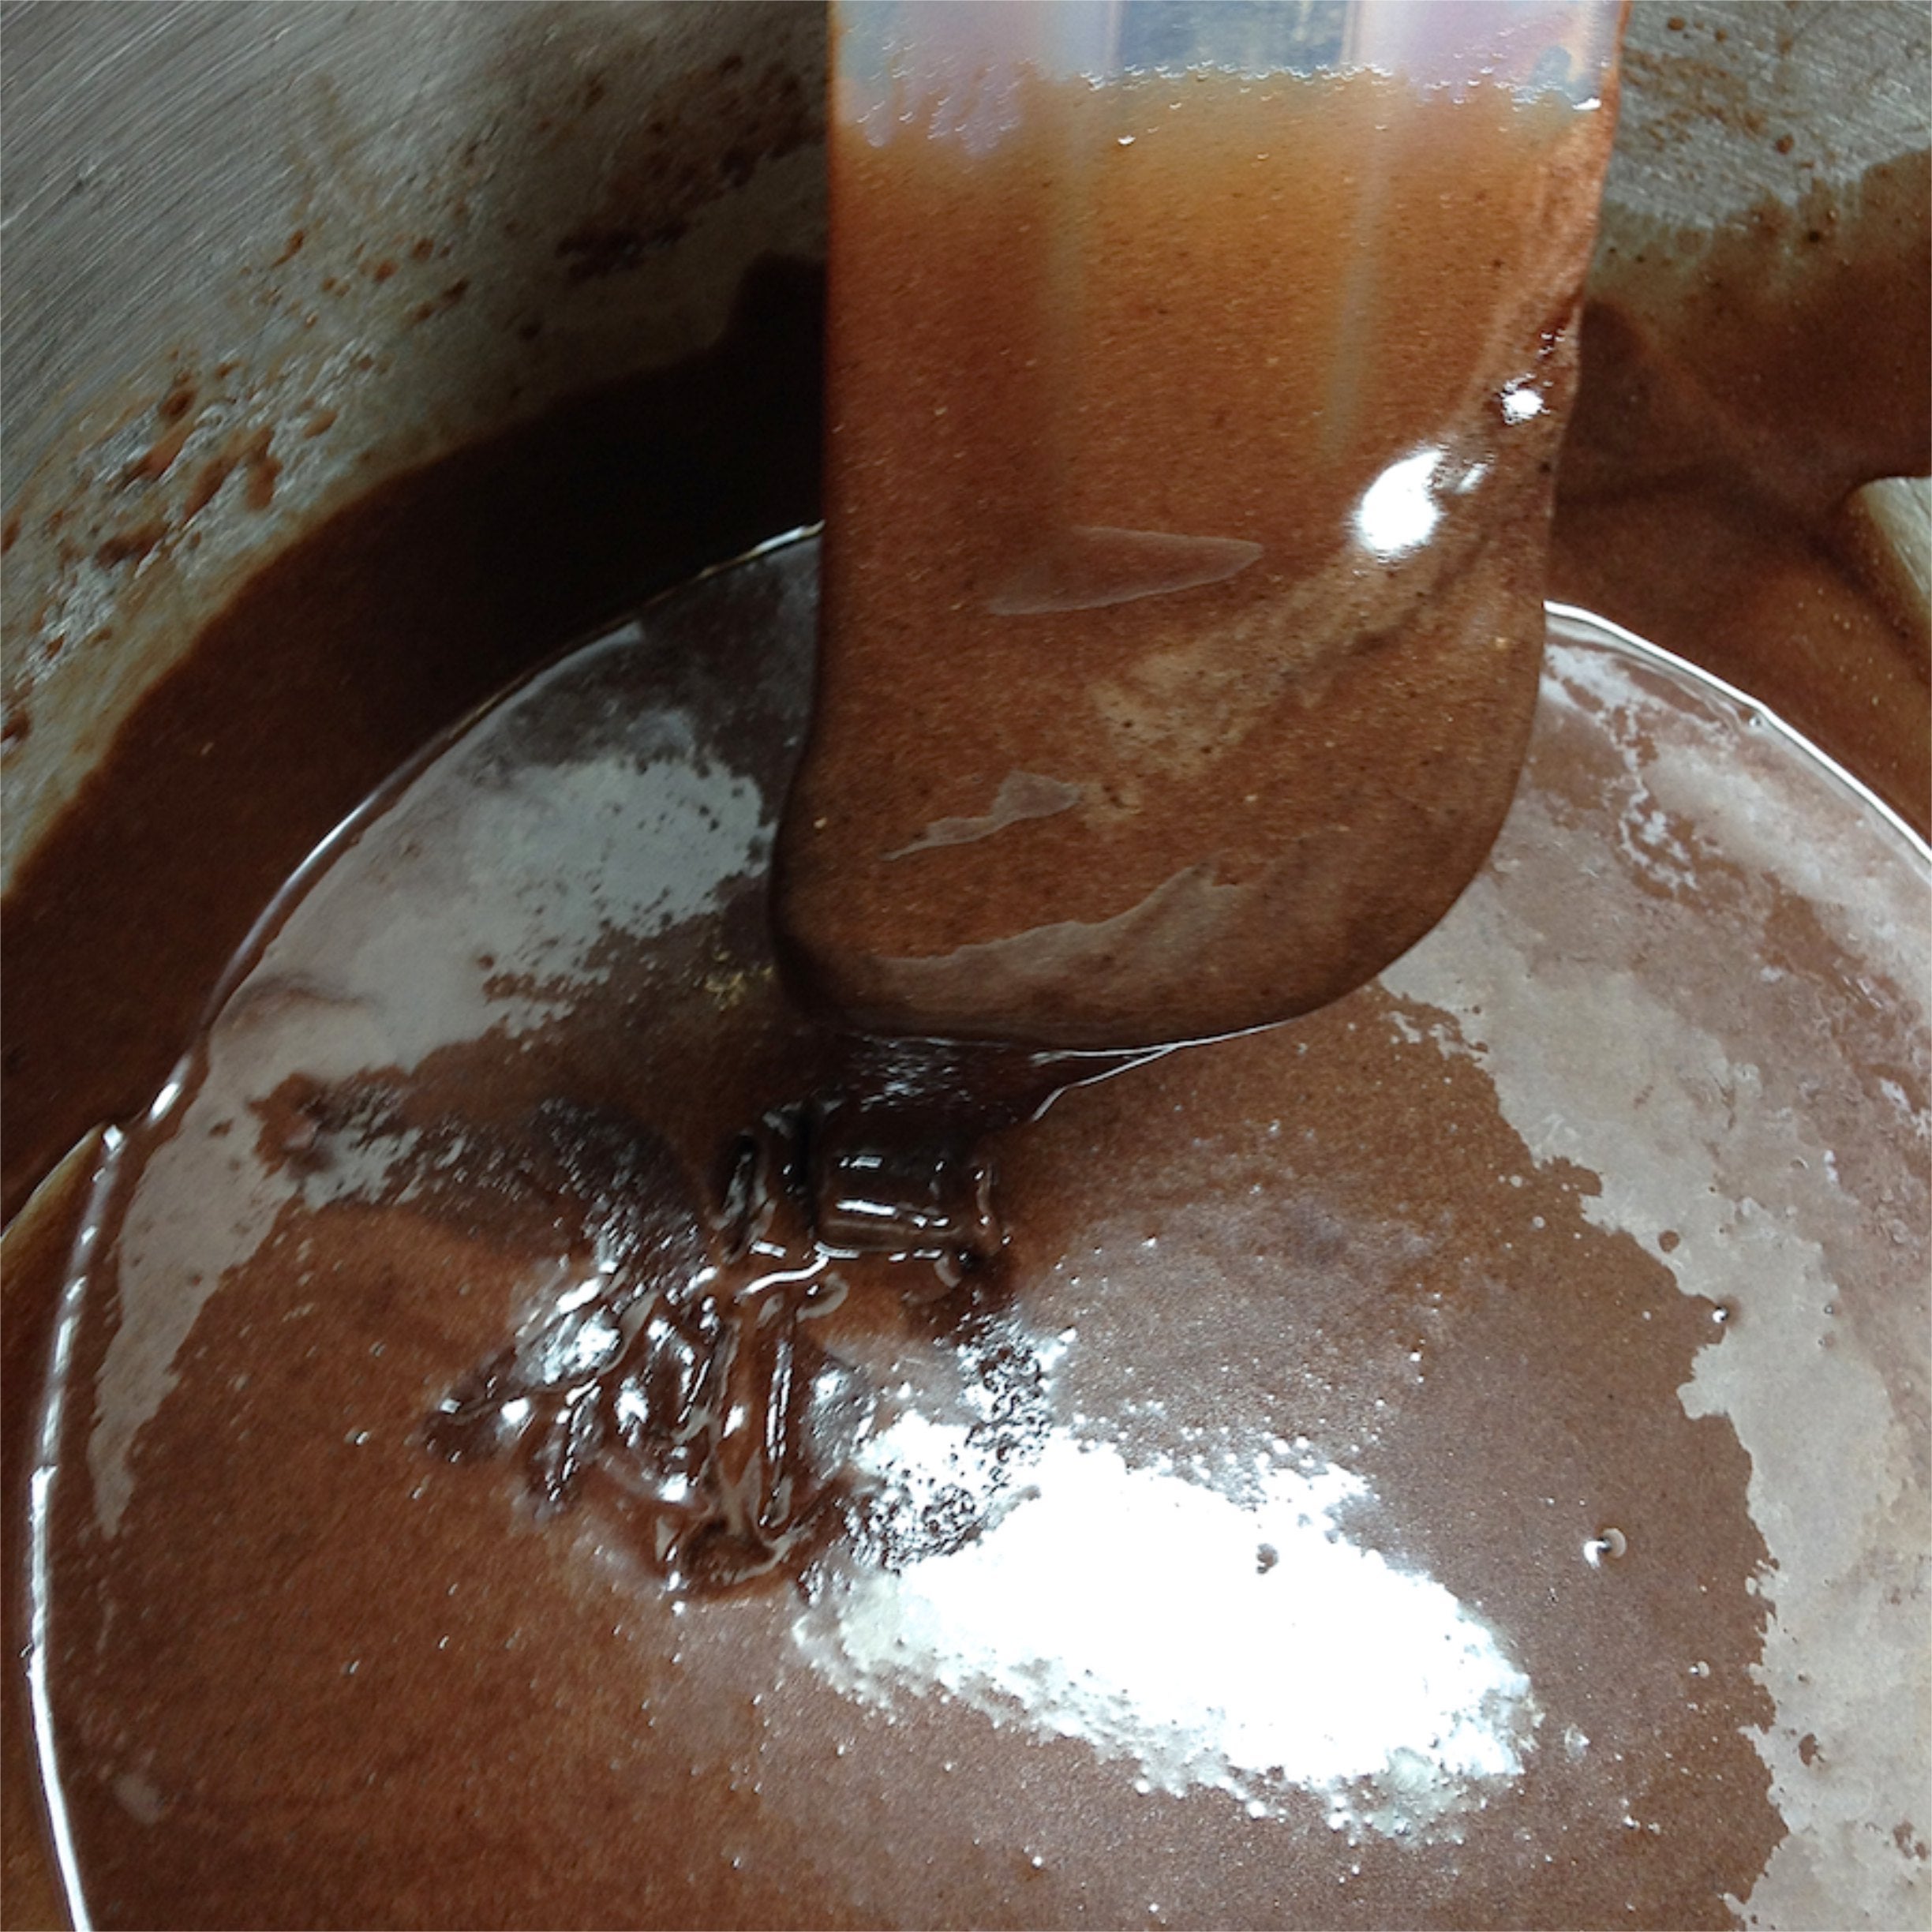 Scrape the bottom and sides of the bowl again, and beat until smooth.
See the thick chocolate "gunk"? This is why you "scrape the bottom and sides of the bowl."
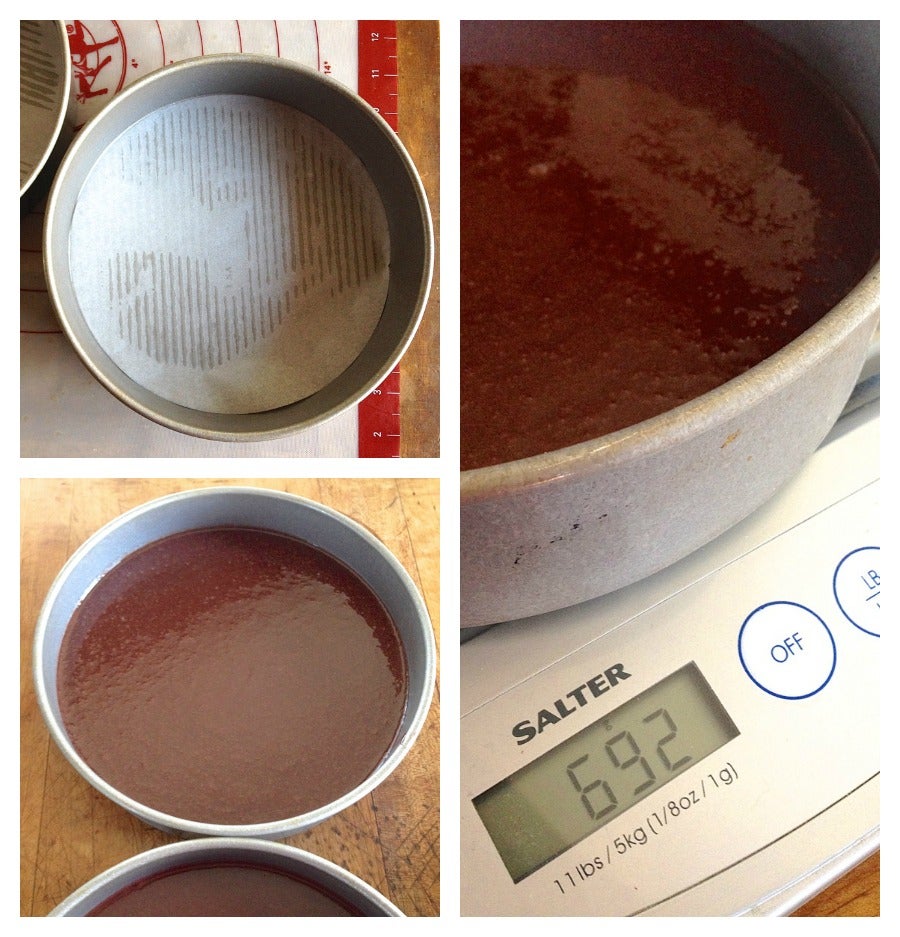 Pour the batter into the prepared pans. It's easy to divide the batter evenly between the pans when you use a scale.
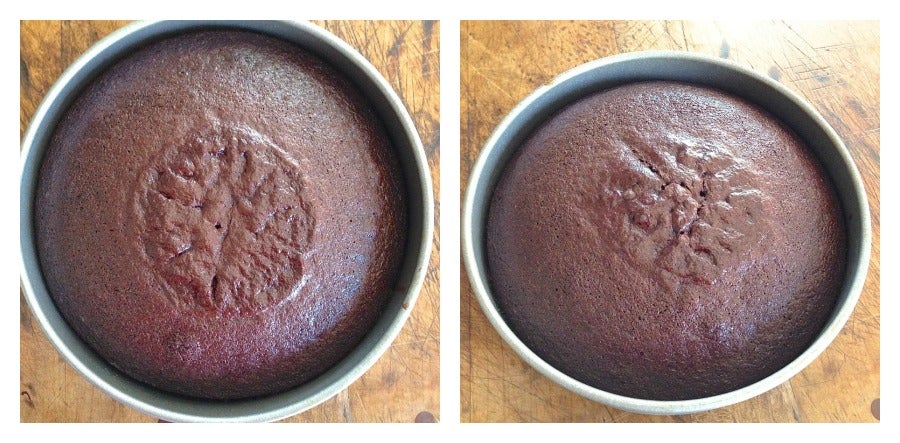 Bake the cakes for 35 to 45 minutes, or until a toothpick inserted into the center comes out clean.
The picture at left shows the cake when it's not quite ready; see that ring of puckered, soft dough in the center? At right, the puckering has started to disappear; and when I stuck a toothpick into the center, it came out clean.
Remove the cakes from the oven. Cool them for 15 minutes, then turn them out of the pans to cool completely on a rack.
Since the ganache icing needs to cool for 30 minutes or so, we'll make that next.
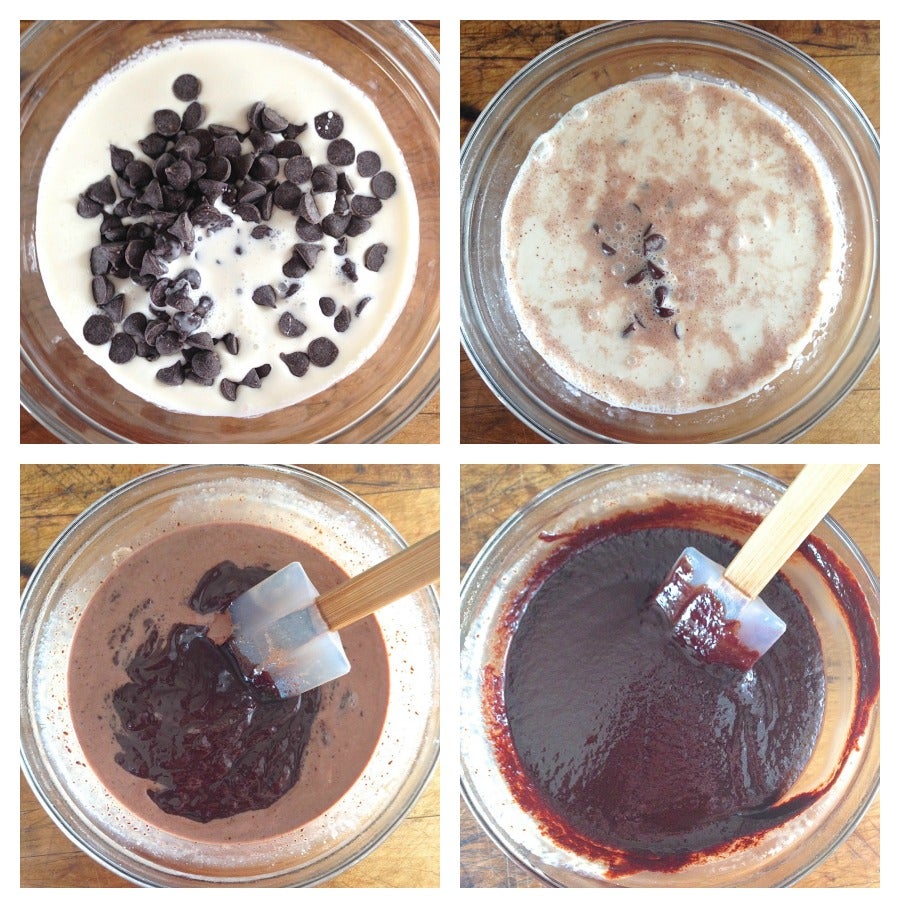 Combine the following in a microwave-safe bowl or in a saucepan:
1 1/2 cups chocolate chips or chopped semisweet or bittersweet chocolate
3/4 cup heavy or whipping cream
Heat until the cream is steaming and showing small bubbles around the edge.
Remove the chocolate/cream from the microwave or burner, and stir until the chocolate is melted and the mixture becomes completely smooth, with no lighter areas remaining visible.
Refrigerate the ganache for 30 minutes.
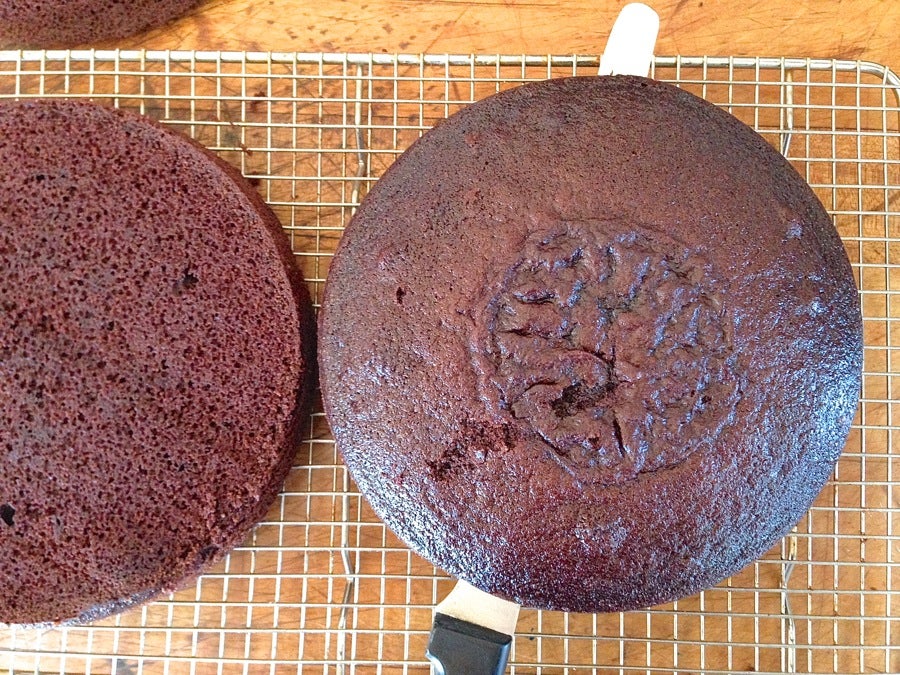 Cut the domed tops off both cake layers; these will become your crumb coating, so hide them somewhere where they won't get scarfed up by your "little helpers."
 To assemble the cake: Place one layer on a serving plate. For best presentation, lay strips of parchment around the edge of the plate before setting the cake on top; these will catch the inevitable icing drips, and can be removed once you're done icing the cake.
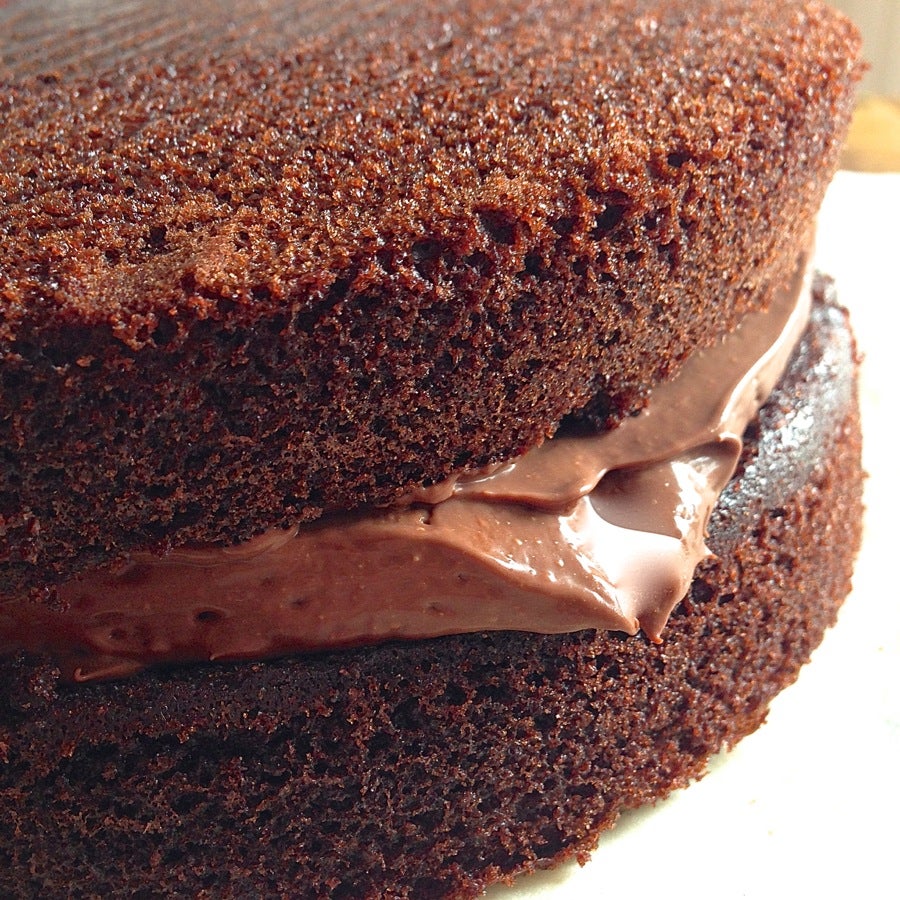
Top the cake with the filling, spreading it evenly to the edges. Center the second layer of cake atop the filling.
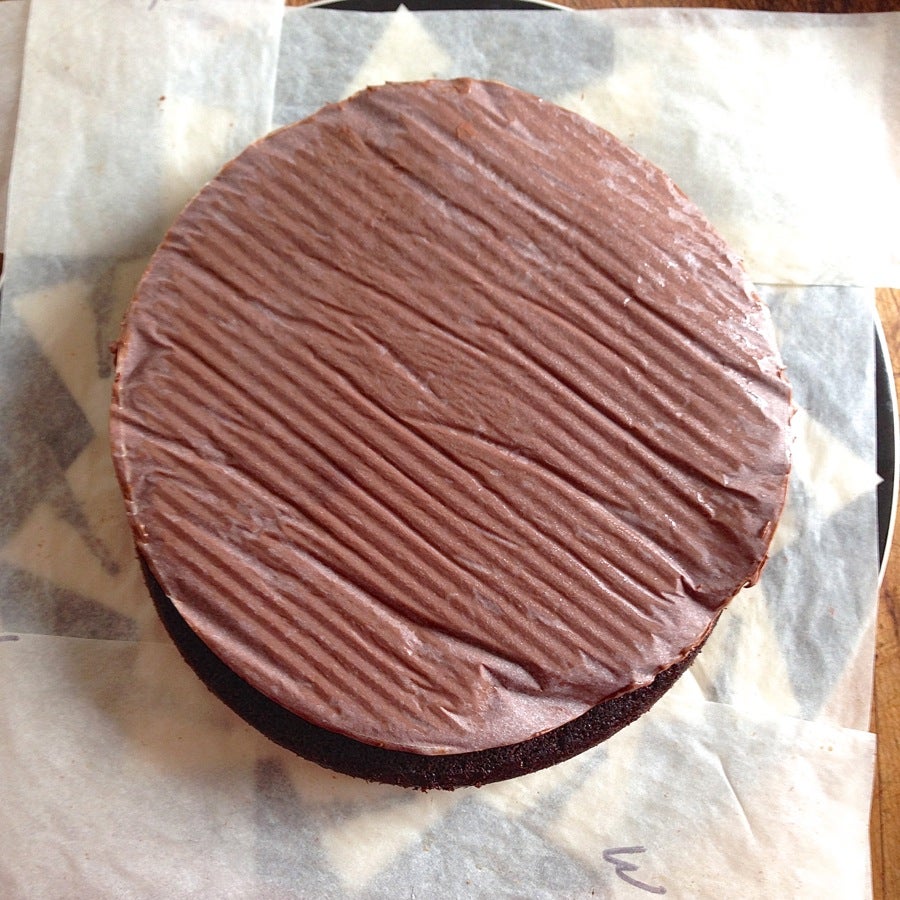 Now, it you poured the filling into an 8" round cake pan, you should be able to center it over the cake, tap the pan to release the filling/parchment, then peel off the parchment.
That was my theory, anyway. The implementation was something else again. I thought the filling, with the aid of the parchment, would just sliiiiiiide on out, right onto the cake.
Wrong.
It stuck. I shook the pan. Nothing. I shook harder. PLOP.
Unfortunately, by that time the pan was no longer centered over the cake. So after peeling off the parchment, I had to take a spatula and noodge and spread the filling from its precarious overhang on one side of the cake, to the bare edge of cake on the other side.
 All's well that ends well, right? And frosting, as always, can hide a multitude of cake-baking sins.
Now, back to that ganache.
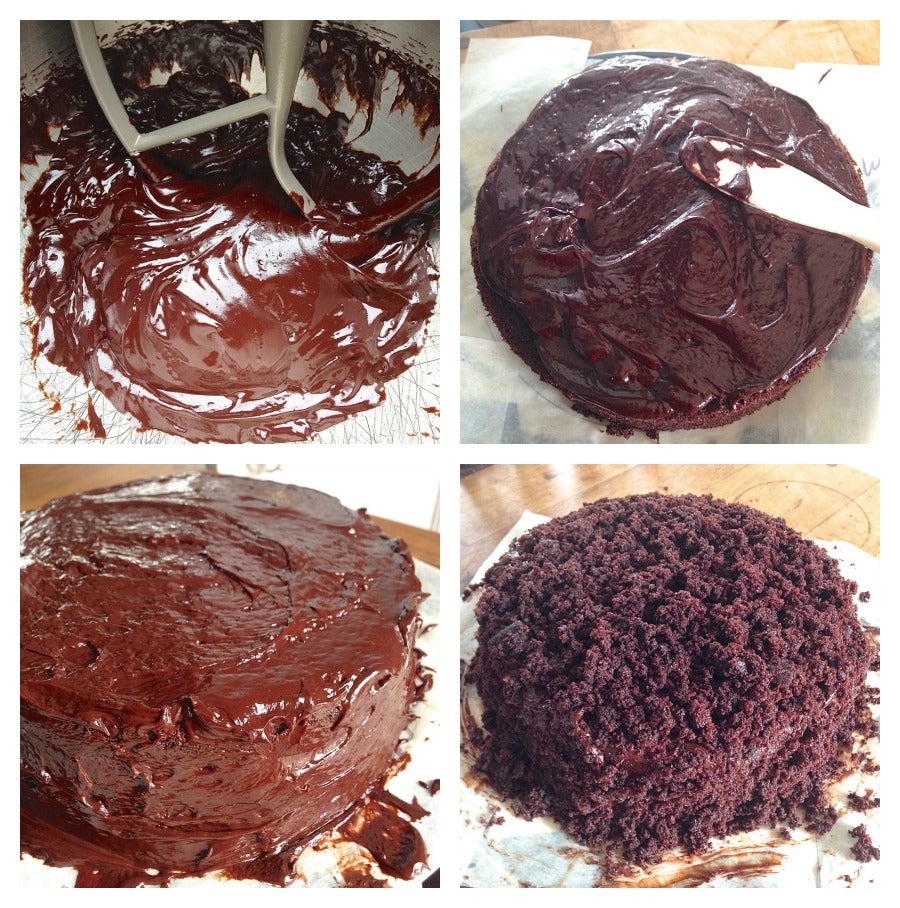 Beat the chilled ganache briefly, until it thickens a bit and becomes spreadable; this only took me about 30 seconds at high speed of my KitchenAid.
Spread the icing over the top and onto the sides of the cake. Crumble the reserved cake, and gently press it onto the top and sides of the assembled cake.
Serve immediately, if desired.
 However, an hour or so in the fridge helps set the filling, making the cake easier to slice cleanly.
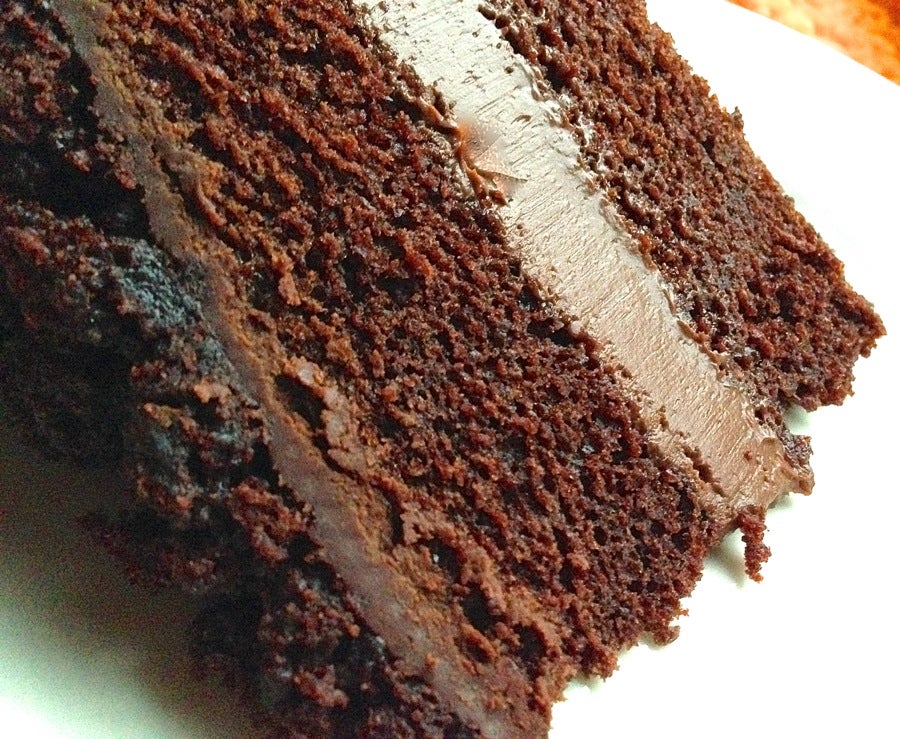
See how neat and tidy the serving plate is once you pull away those parchment strips?
This cake is best served the same day it's made, or within 24 hours. Freeze, well-wrapped, for longer storage. You may also choose to freeze individual slices – for those times when you HAVE to have a piece of chocolate cake!
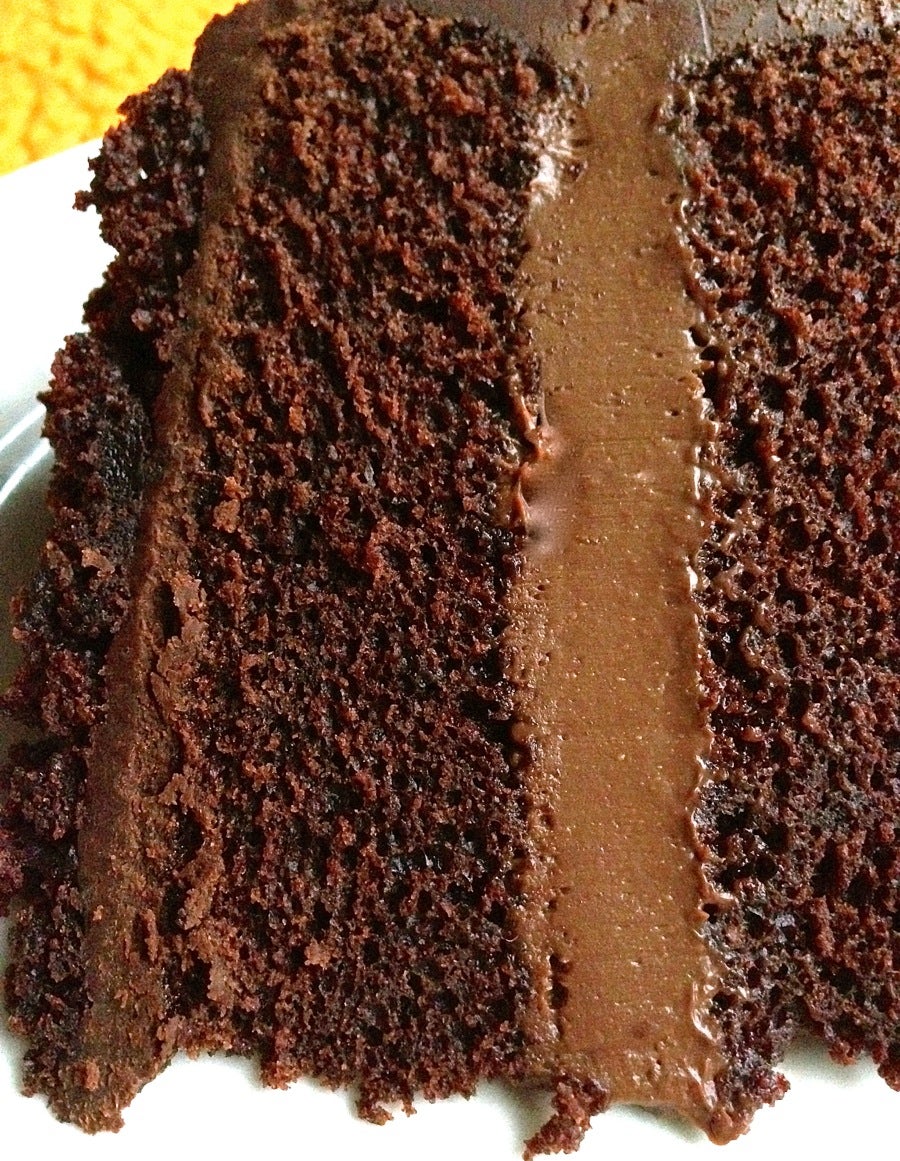
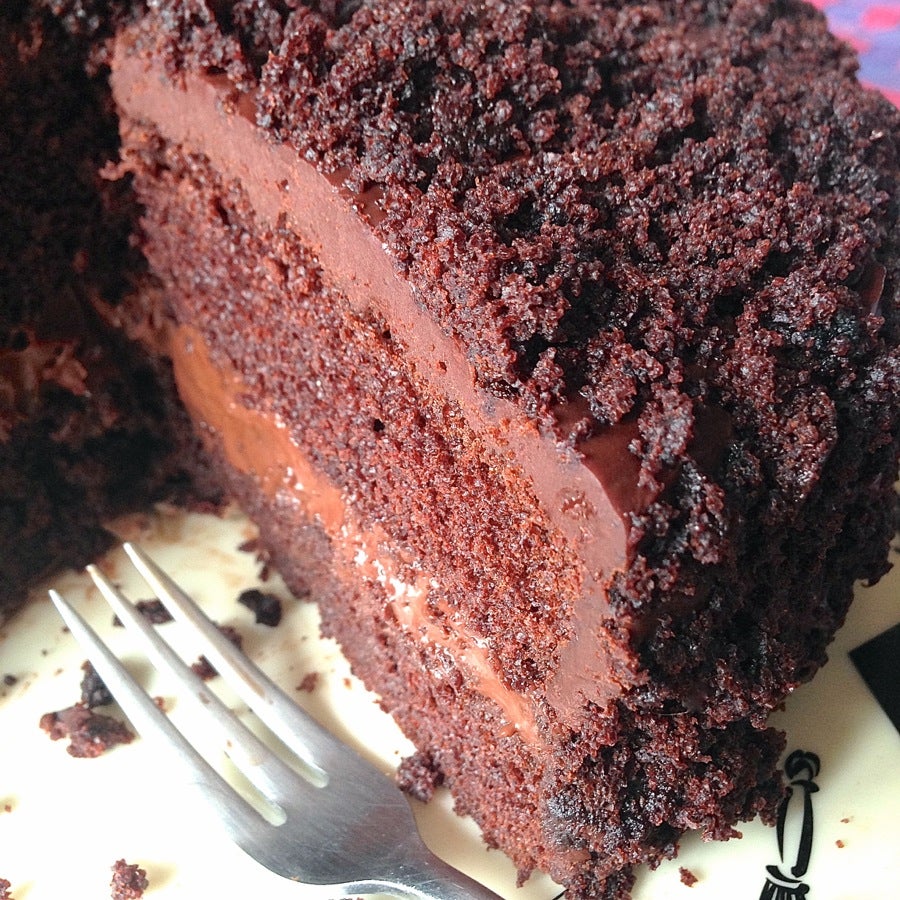 In this late afternoon slant of light, you can really see the red from the Cocoa Rouge, can't you?
So: soft (yet firm enough to slice) filling; fudge-like ganache icing; the cake itself, with its moist crumb and wonderful chocolate flavor; and those soft crumbs pressed over everything... well, it's not surprising everyone loves this distinctive cake.
And, while it takes quite a few (simple) steps to make it, trust me; it's worth every one.
Please bake, rate, and review our recipe for Chocolate Fudge "Blackout" Cake.
