Good morning, fellow bakers, and welcome to downtown Horrorwich, VT. Home to the world- renowned King Arthur Fear Company and the Boooo-kers Catalogue, our little town is full of thrills and chills, all in good taste. Really, really good taste.
From our candy-covered rooftops down to our sugar-sprinkled sidewalks, there isn't another town as sweet and spooky as ours. October breezes carry the spicy scent of gingerbread down Mean Street and past the General Store as children scamper onto the ghoul bus in the early-morning fog.
Over at the bakery, workers are turning out dozens of Cinnamon Bombs, Scare Claws Danish, and cream-filled WoOoOpie Pies. Be sure to stop by for one of our famous Roast Beast sandwiches, served on fresh Pun de Mie bread. Our Death by Chocolate cake is the perfect finish to a leisurely lunch, or a long life for that matter.
On the weekends, come enjoy a band concert by the Greatfill Dead or stroll around the common. For the shoppers out there, why not cross the river to Hangman, NH, home to Ivy League Dratmouth College? Visit the Dratmouth Bookstore, the Hooded Library and the Baker-Bury café. Nothing says autumn like a cup of our devilishly hot coffee and a pumpkin cupcake with battycream icing.
We hope you've enjoyed this tour of our little town nestled in the haunted hills. Come and make yourself at home – you'll be staying for a long, long time.
Are you ready to make your own spooky village? Here's how we made ours.
One gently worn folder makes two fronts, and one triangular brace template.
Luckily for the home baker there are some very simple ways to make stunning gingerbread houses without having to invest much money at all, and in a very reasonable time frame. One of our favorite tips from our Baking Education Center's gingerbread classes is to make simple house fronts, rather than full houses.
I've made my share of houses of all types over the years, but I'm willing to admit that my favorite part has always been decorating the front of the house, the main face that most people will see at first glance. See for yourself how easy it is.
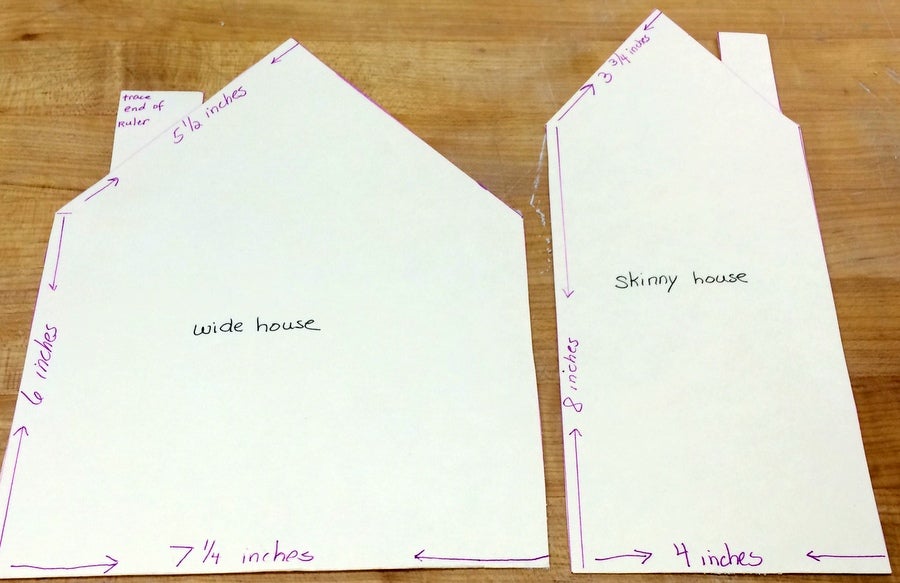
To make your templates, get out some heavy card stock or a manila file folder, a pen or pencil, and a ruler. As you can see, you can make different sizes of fronts by varying the size of the base, height of the walls, and peak of the roof. If you're nervous about getting started, simply use the measurements from the photos above and below.
Be sure to label your pieces. They last through several cuttings but eventually you'll want fresh ones.
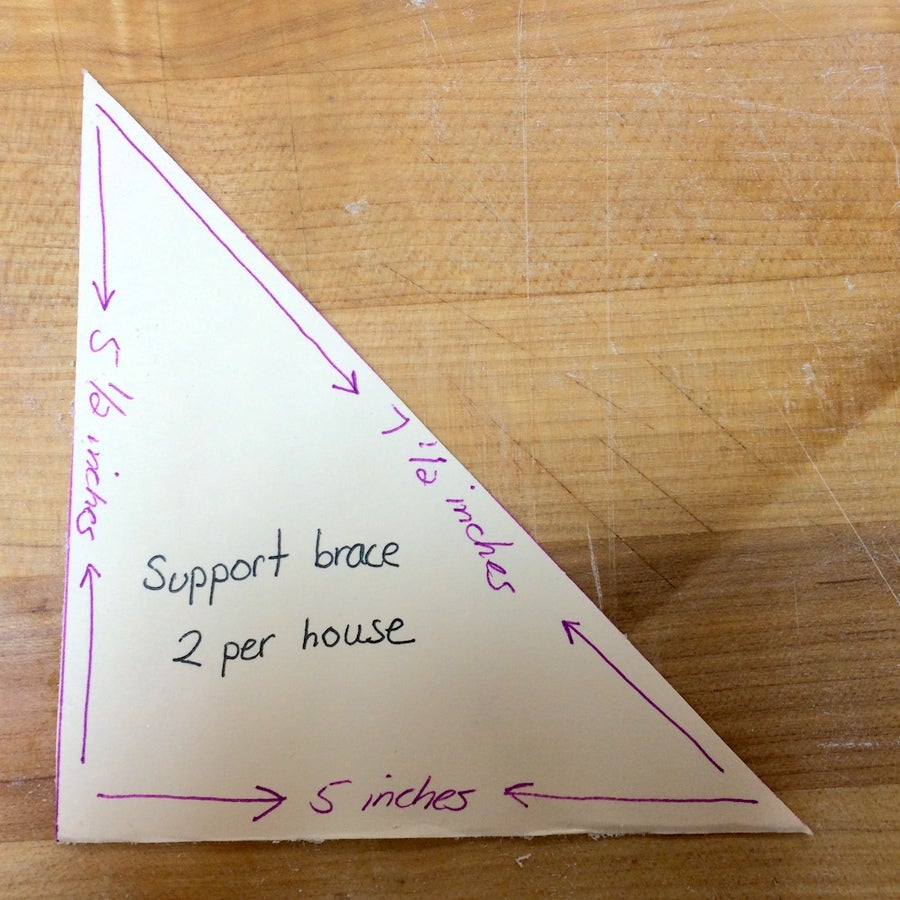
When you build house fronts only, you'll still need some supports to brace the house. For a wide house, use two supports. Skinny houses are fine with just one, but you can use two if you prefer the symmetry.
The supports get attached to the back of the house at the corners for big houses, and in the center of the back for skinnier house. If you check out the main photo, you can see the brace on the larger house clearly.
A sharp knife or pizza cutter works a treat for cutting around your templates.
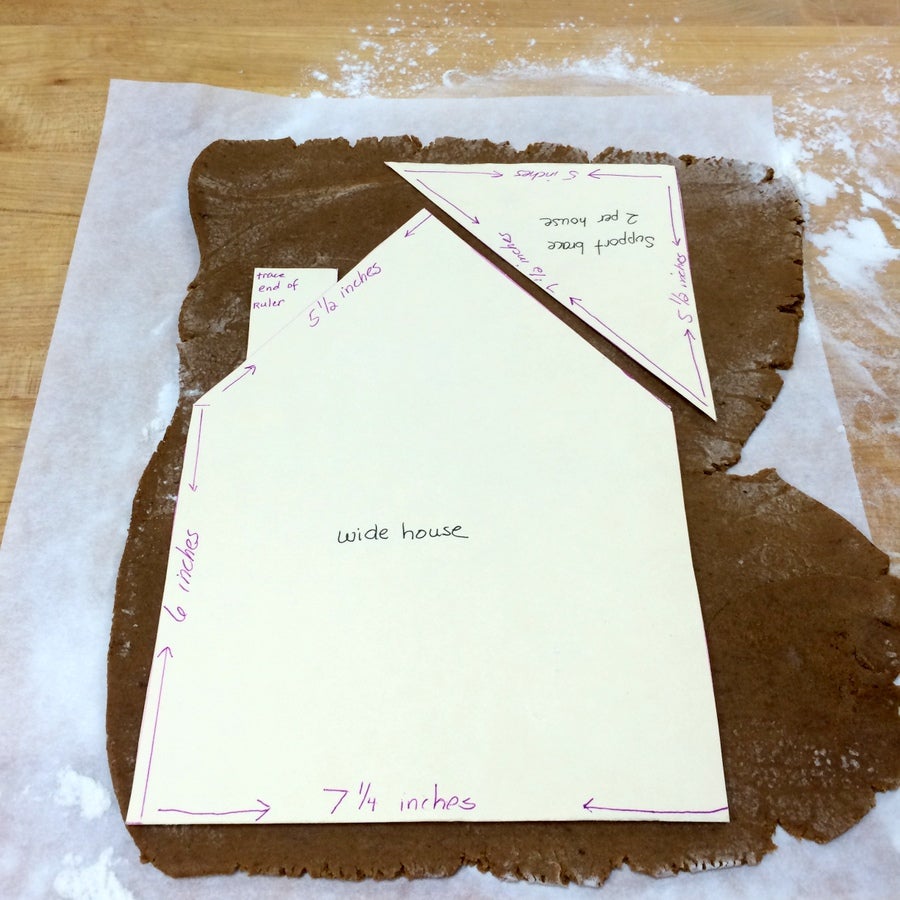
When you're making house fronts that don't have to support a roof, your gingerbread doesn't need to be as stiff and strong as with full-sized houses. My favorite gingerbread dough to use is that made from our Gingerbread Cookie & Cake Mix. It rolls out smoothly and doesn't bubble or wrinkle, and one boxful makes two to three houses. Your favorite construction gingerbread recipe is fine to use as well.
To keep your pieces from drooping out of shape when moved, roll and cut them on sheets of parchment.
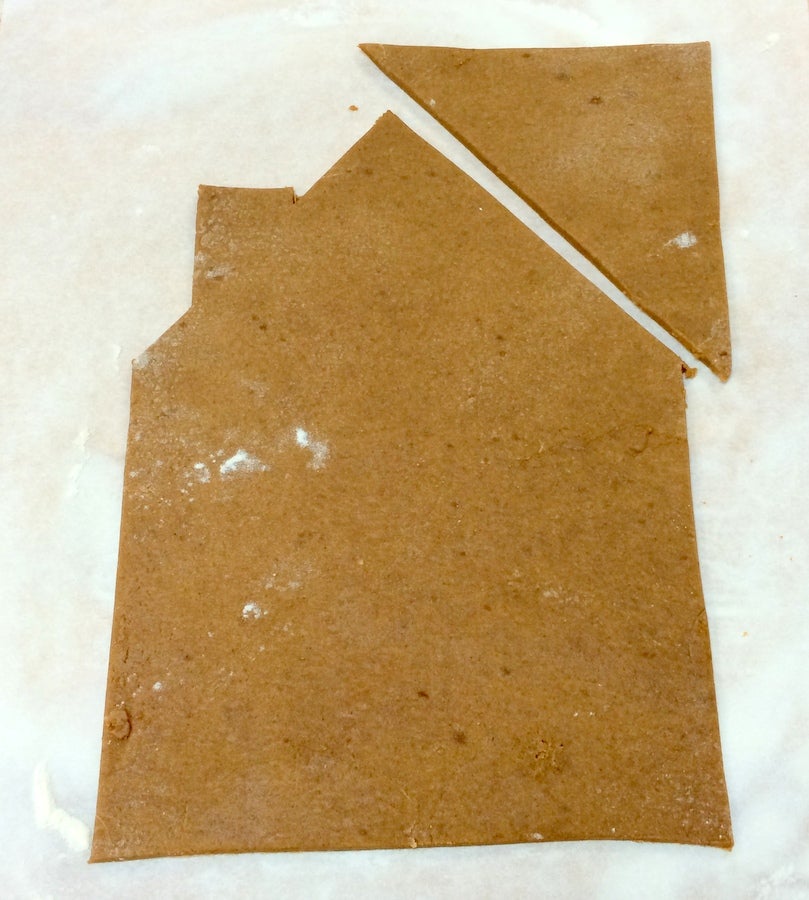
Be wiser than me and bake your fronts and braces on separate sheets in the oven. The braces will bake in less time, and you don't want them to burn.
Rolled out 1/4" thick and baked at 325°F until firm to the touch, most houses will be baked in 25 to 30 minutes. Leaving plenty of space between your pieces will ensure that they don't bake together and become fused.
For truly warped haunted houses, leave your bottom edges slightly askew. It gives them character to lean a little or have a ripple here or there. If you prefer perfectly straight edges, a microplane will grate down any edges that, well, grate on you.
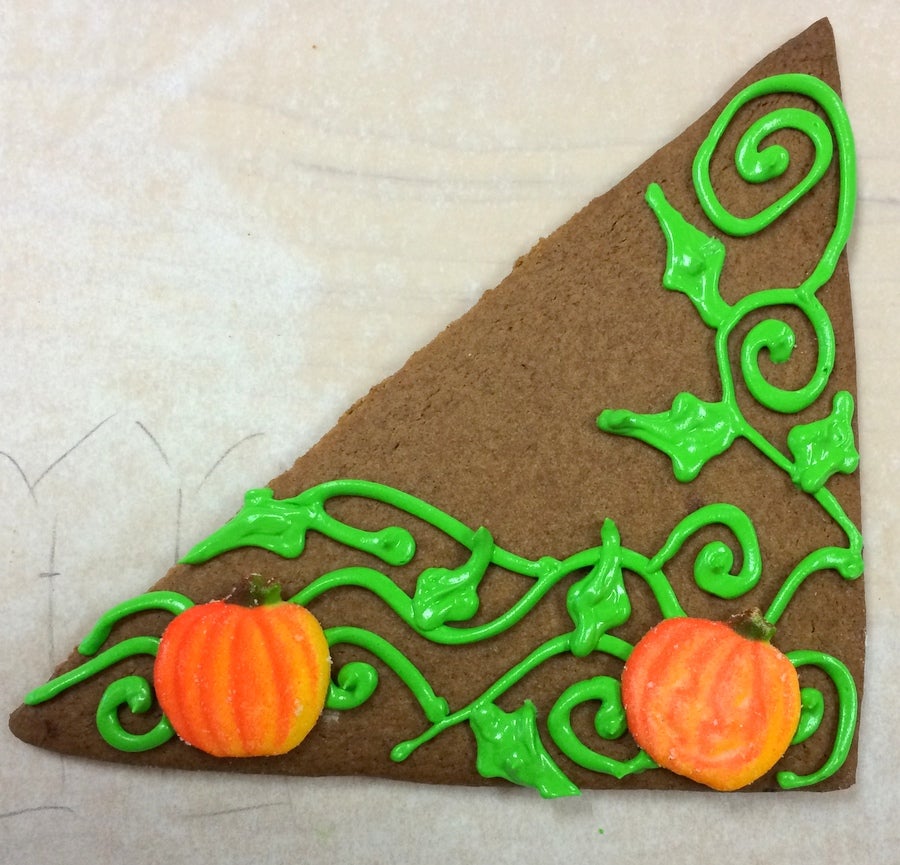
I love to make little gardens or side yard scenes on the braces. It's a nice extra touch.
Once your pieces are cold to the touch, it's time to start decorating. You'll need a batch of Royal Icing, and a happy trip to the candy aisle. When my daughter and her cousins were little we used to let them roll quarters and dimes and use that money at the bargain candy bin. Each could choose their own special candies, and it didn't break the bank.
Many of the decorations you see in this blog were purchased at our local fabric and craft store. They have a surprisingly large cake decorating section full of pressed sugar decorations, like pumpkins and leaves. The party supply store has also become a favorite haunt of mine for seasonal candies (pun intended!).
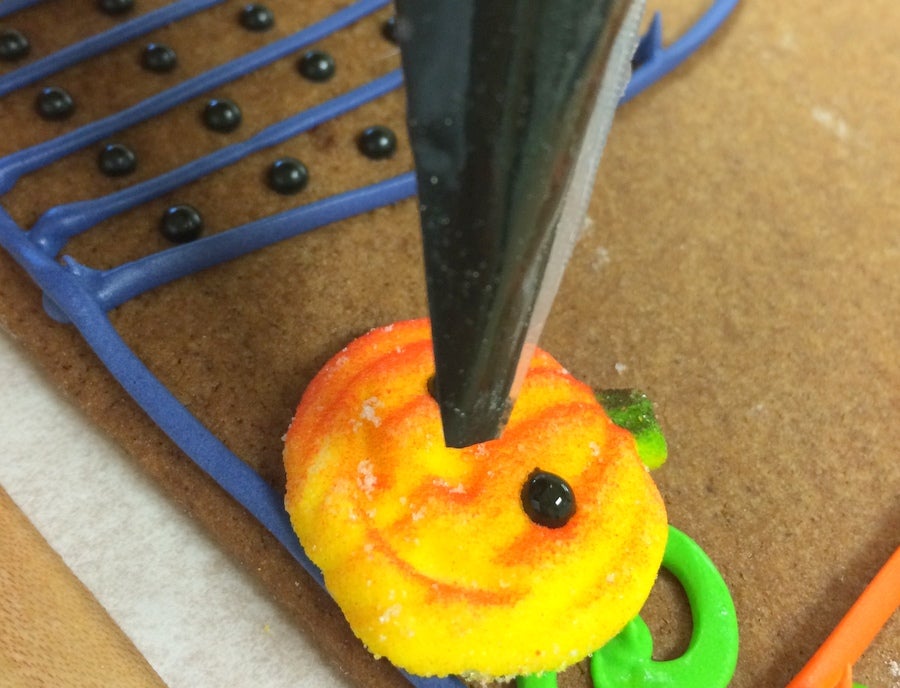
Don't be afraid to add your personal touch to store-bought decorations. Make it YOUR house!
Once you've added the final touches to your house fronts and braces, allow them to lie flat to dry overnight. Save out some icing to use to glue the braces to the back of the house to keep it upright.
If you're sure you won't be eating the house, you may certainly use a hot-glue gun for assembly. It's fast, easy, and will keep your house standing tall for the whole season.
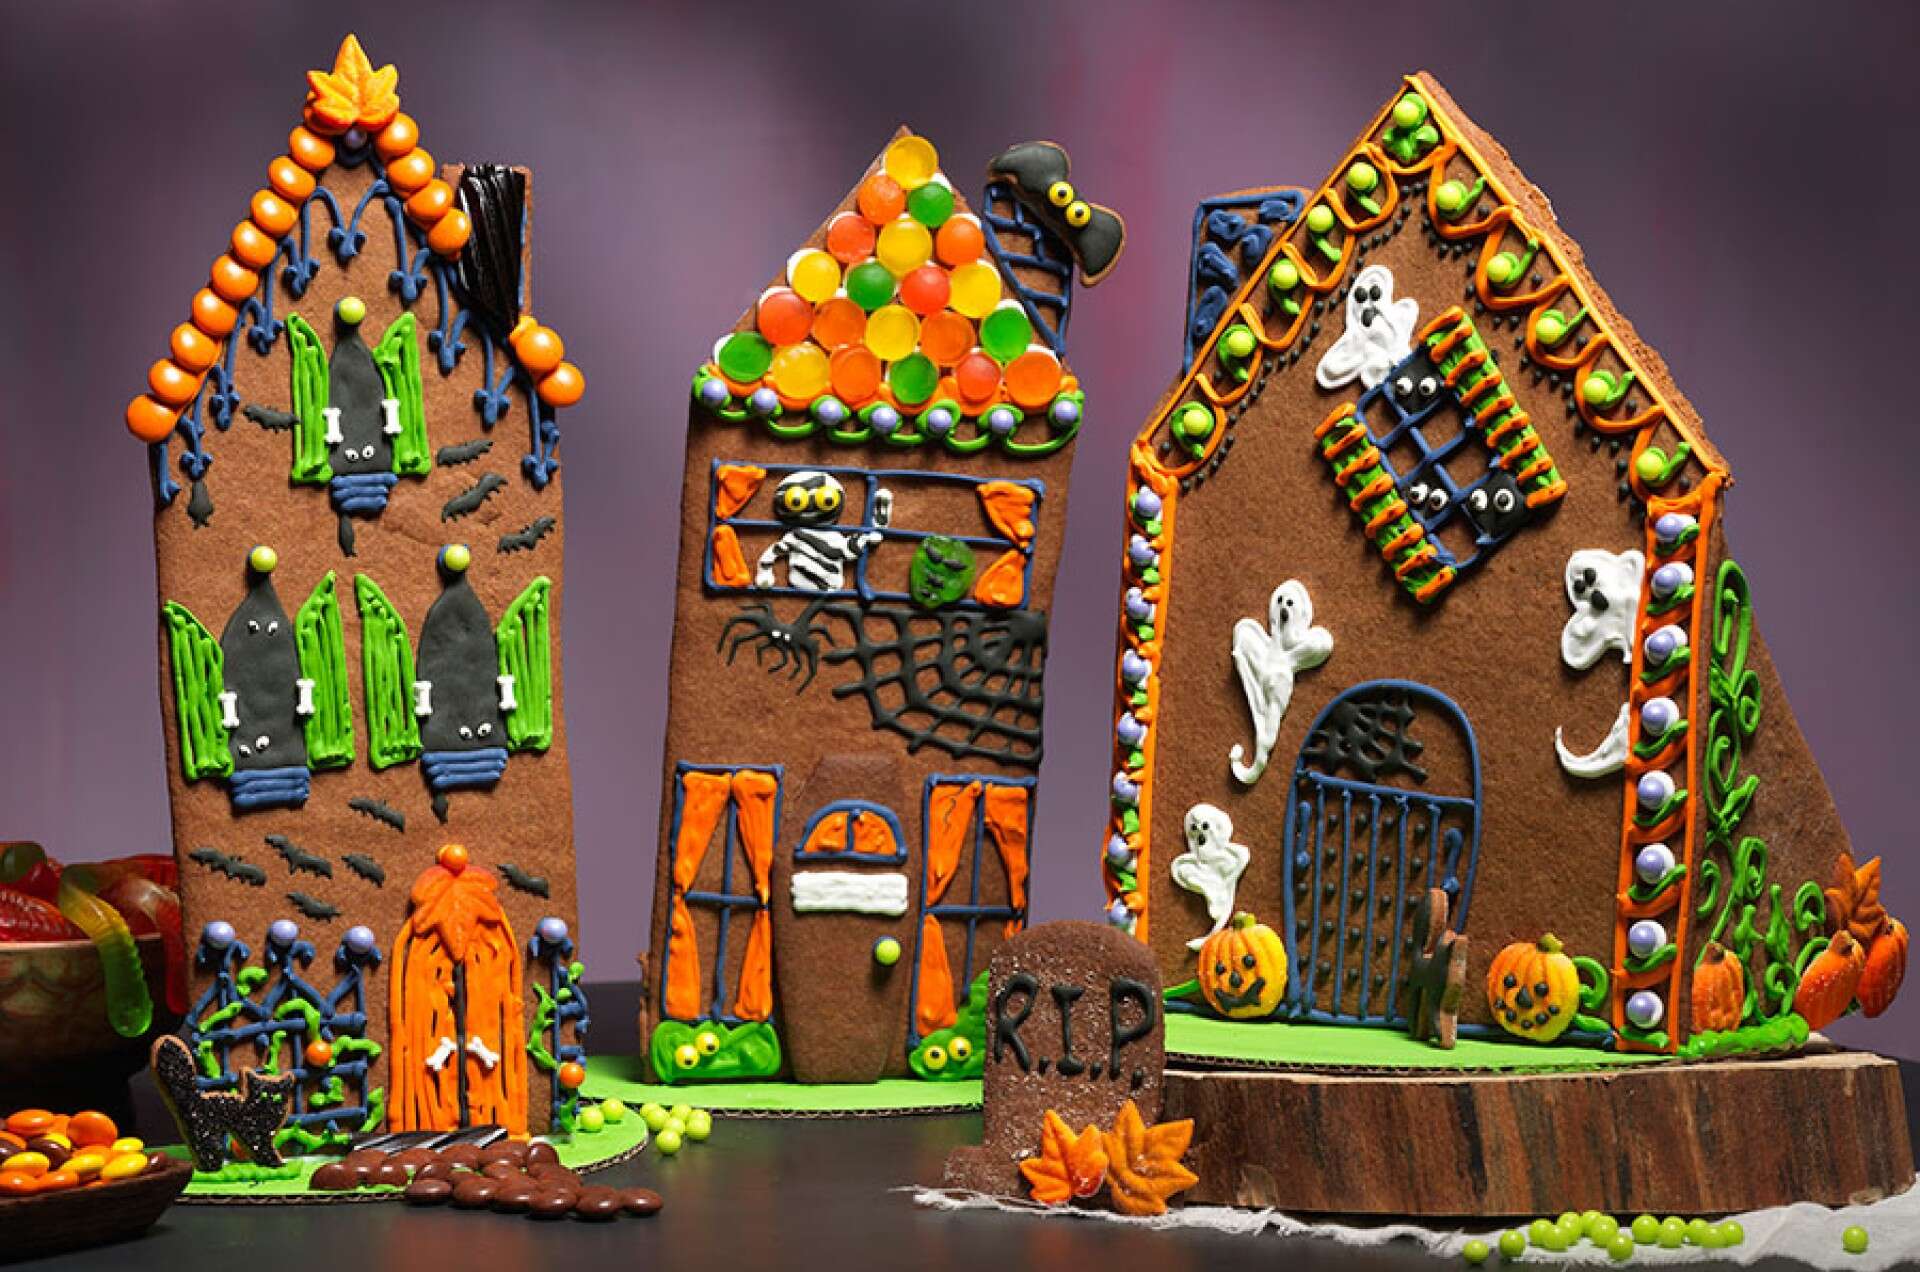
And now for a game of spooky I SPY. See if you can find these crafty creatures and devilish decorations in our houses.
 Special thanks to KAF visual merchandiser Brook Lewis for decorating this house. What a great afternoon we had!
I spy a gravestone, a spider, and more. One friendly mummy, an alien face, and a coffin-cookie door.
I spy a chimney of licorice black, an upside down bat and a sweet sparkling cat.
A yard full of pumpkins, a ghost through the wall, so many ideas we can't think of them all!
I hope you've had as much fun with this blog as I have. Please share your Halloween house ideas, suggestions, questions, and stories with us in our comments section, below. The more, the merrier scarier!