


Are you the cake baker? The go-to birthday/anniversary/school function/retirement party person-who-brings-the-cake person?
Or are you just the loving mom/aunt/grandmother/friend who's always wanted to express your caring with the gift of a special cake for the most special of days?
It's almost upon us: wedding cake season. And any minute now the baker's hotline phone calls will start.
Caller: "I said I'd make a wedding cake for 150 people, I've never done this before, and I need a recipe!" Baker's Hotline: "When's the wedding?" Caller: "Next week!"
My test-kitchen colleague and former baker's hotline member Frank reminded me this morning of the wedding cake calls we love: the ones we get in January for a wedding the following September. Those are the folks who:
But it's May already, and it could be that you've been too busy, or too nervous, to face the prospect of what you've agreed to do. I'm hoping I can help. Here's your first checklist:
Before you get too intimidated, I can tell you that half the time you're going to spend on this project is going to be in the planning, shopping, and strategizing. And it's time very well spent.
For years, I've been recommending a small, but enormously practical book by Dede Wilson, who teaches at our Baking Education Center from time to time. It's called Wedding Cakes You Can Make, and it's one of the best tools any go-to cake baker can have in their arsenal. Some of what I'll tell you here is reiterated in Dede's book, but here are some of the highlights.
Cake is to be eaten. It should taste good, and it should look like food, not like some perfect plastic thing. You can easily make yourself crazy trying to get every last bump, bubble, or blemish out of the cake's surface, then turn around and drag your elbow right through it. Forgive yourself in advance for the likelihood of gravity, close quarters, or in my case, spelling mishaps having their way.

Almost any mistake you make is fixable, with a little advance planning.
Some tools and equipment are indispensable for this task. Cake boards, offset spatulas, a cake turntable or lazy Susan, a wooden or Masonite cake base for big layered cakes, cake boxes, pastry bags and tips, some kind of support for stacked layers (pillars, milkshake straws, wooden dowels).
Let's go after the checklist above; I'll give you my best hints for dealing with the questions I've raised.
How many people? Most cakes I've done have been for weddings with between 80 and 200 guests. Dede has good guidelines in her book for how many servings you can expect from what size layer; I generally make more than I think I'll need. If it's good cake, the staff at the venue will be most grateful to have a piece.
What flavors? My writing partner Gwen and her now husband Ben (our Web designer) wanted something light, sort of citrus-y, but a little different. We settled on white cake soaked with citrus simple syrup, filled with passionfruit curd and frosted with passionfruit Italian buttercream.
I've done chocolate layers with vanilla frosting, and alternated raspberry and mocha fillings in the layers. I've made gluten-free tiers and separate gluten-free cakes for some weddings. The flavors are kind of the fun part. Once you know what they are, our baker's hotline will be able to help you find recipes to make them come true.
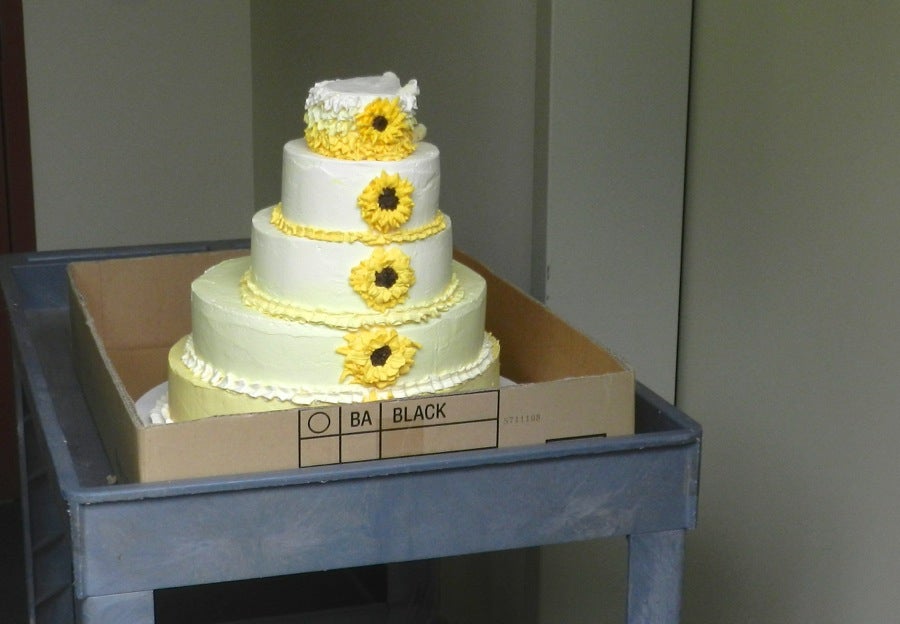
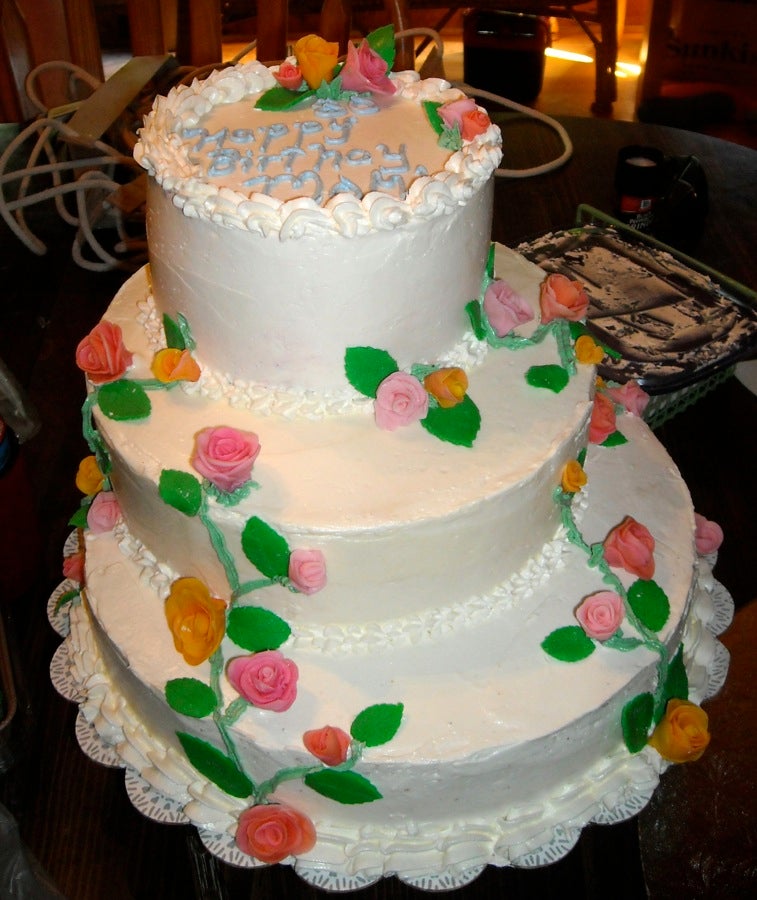
How many layers? Three tiers are pretty workable for most wedding cakes. They'll give you enough to make a nice presentation without too much anxiety. Whether square, oval, or round, the cake will look best if you have at least 2" and preferably 3" difference in diameter between tiers. The cake below has a 6" top, 9" center, and 12" bottom layer. I almost always make a half-sheet cake of all the same flavors to have in the kitchen to cover weddings of more than 100 people. Banquet staffs appreciate it (easier to cut) and it saves you a lot of time and aggravation, believe me.

Refrigerator/freezer space: This is one of the things that doesn't occur to people until they're way down the pipeline. I'm lucky to work at King Arthur; we have a two-door freezer with lots of shelves in it that can almost always be reconfigured to accommodate five cake layers of varying sizes. I also have a spare "project fridge" in our garage at home that gets turned on for these sorts of things. If you don't have that luxury, it's time to book space in the refrigerators and freezers of friends, neighbors, or family.
Frosting and assembly: Crumb-coating layers and putting on a finish coat is pretty simple, and most people will have no trouble with the top two tiers; they're a manageable size. Once you get to a 12" layer, you're going to need more table space and elbow room around it. Also, it's important that your assembly space is either air conditioned or has plenty of refrigerator space at hand. Putting together a wedding cake in the back of a panel truck when it's 90°F out is not a good place to be.
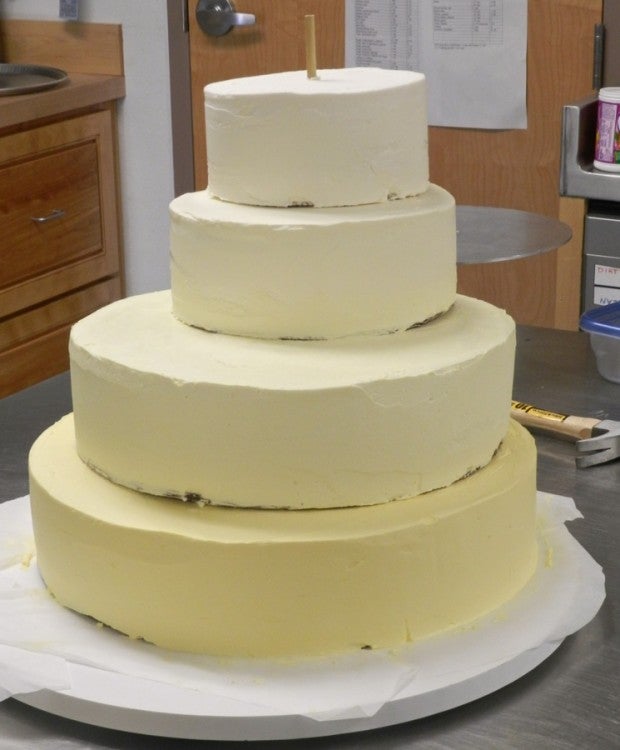
Ben and Gwen's cake was five tiers tall, and offset so the backs of the layers lined up.
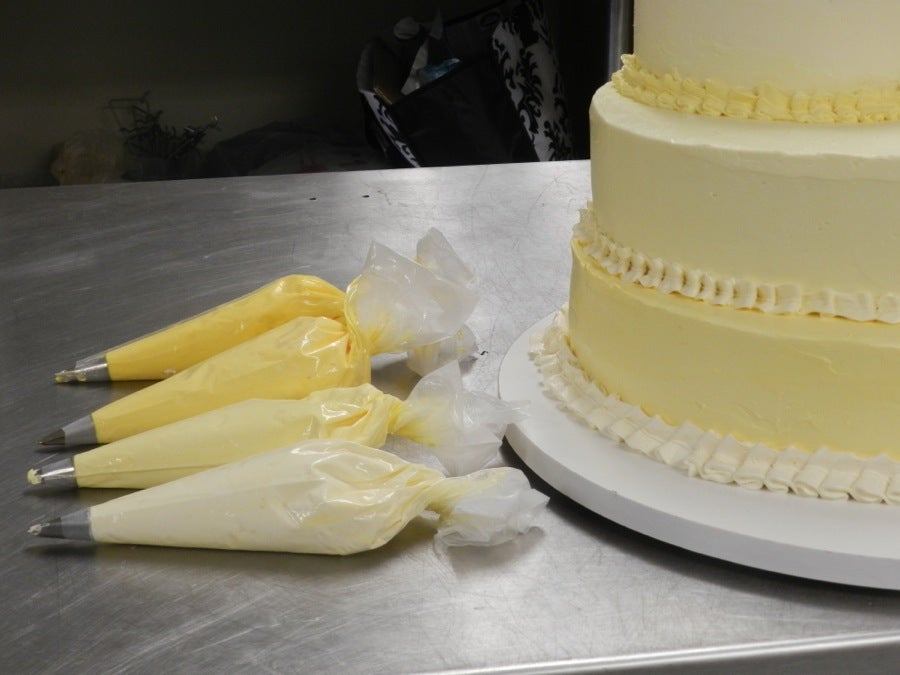
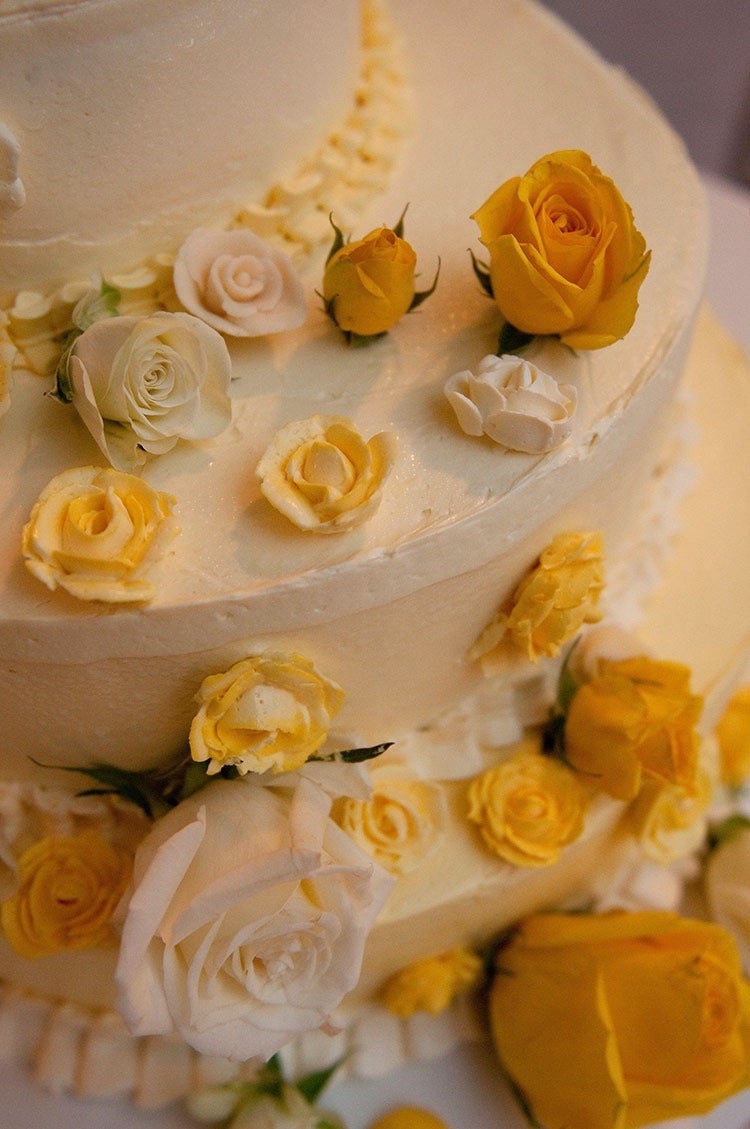
Notice how "imperfect" the surface of the layers are. I'll be piping frosting with a leaf tip to cover the seams, and placing both white chocolate plastic roses and piped buttercream flowers on the cake; that's what people will notice, not the slight track marks my offset spatula left in its wake.
Infrastructure: Notice the Formica-covered board that the cake is sitting on. It has feet (very important, so you can get underneath to pick it up). My business card is also taped to the bottom, so I have a chance at getting it back!
If you don't want to invest in such a thing, you can buy foil-covered cake bases at most party or decorating supply stores. They're made of several cardboard cake circles stacked together (kind of like a laminated beam) and wrapped with food-grade pretty foil. The cake above weighed about 45 pounds in its assembled state, and was getting moved all at once, so a reliable base was absolutely essential.
Other infrastructure considerations: If you want to separate your layers, you can buy sets of pillars and cake separator plates, and cut the pillars so they stick up out of the layers by about an inch. This leaves you a nice gap to put flower stems into if you're planning to finish the cake off with fresh blossoms.
If you're stacking the layers on top of each other, the same pillars will work, but they're usually white plastic and can be hard to find and take out when the cake is cut; I like milkshake straws for holding up any layers 10" in diameter or smaller. They're easy to cut, easy to see, and don't cost too much.
Transportation: This can easily be the most nerve-wracking and traumatic part of the process. Ideally, you'd be able to box each layer and assemble them on the presentation table wherever the wedding takes place. For Ben and Gwen's cake, I moved it in assembled form. Before I took it out of the kitchen, I got my car set up.
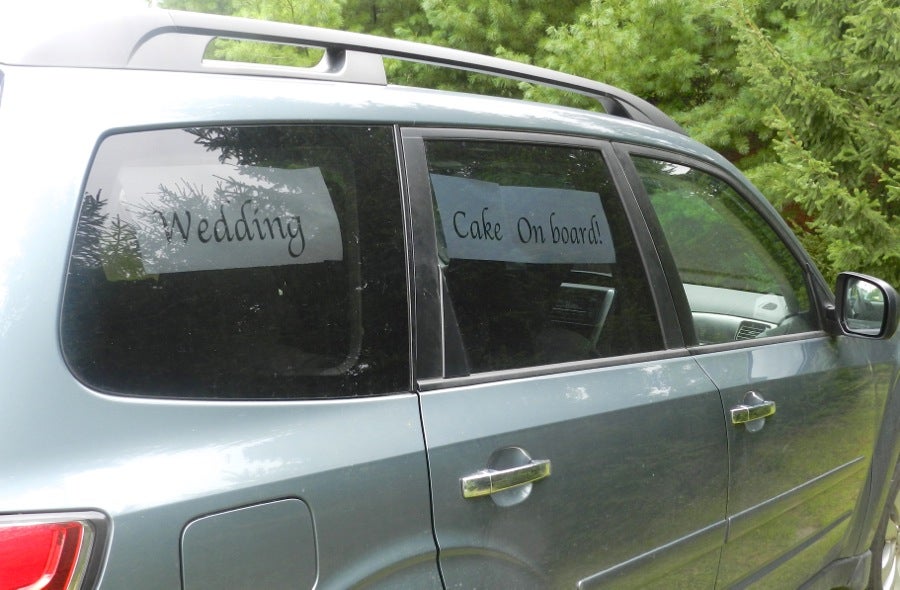
I've learned over the years that the right vehicle (my Subaru Forester has a generous flat cargo space in the back) is important; you need something with a lot of flat space in it. If your seats don't fold flat, best to borrow a vehicle that has the space you need. MAKE SURE IT HAS WORKING AIR CONDITIONING! Buttercream is not too terribly heat tolerant.
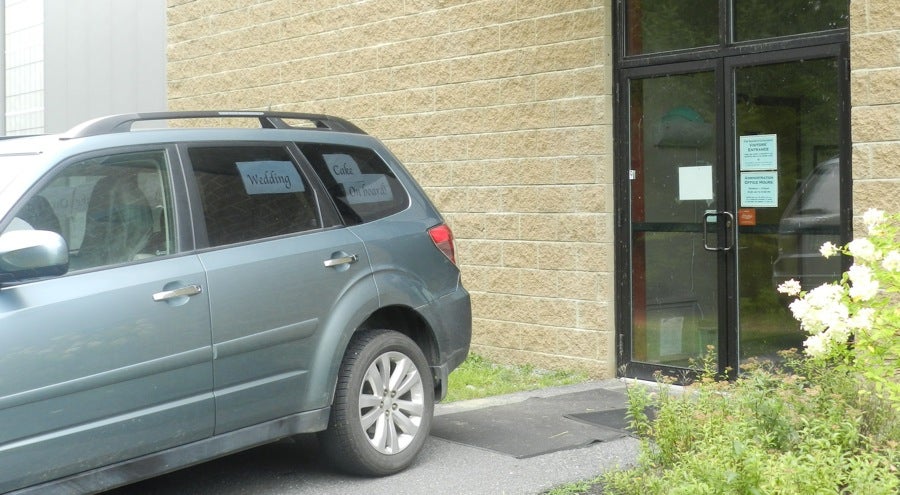
Put signs in the car window. It decreases the potential for road rage from other drivers. When they come up on you driving your white-knuckle 25mph, they're aggravated at first. Then they'll see the "Wedding Cake on Board" sign, and you'll probably get smiles and waves.
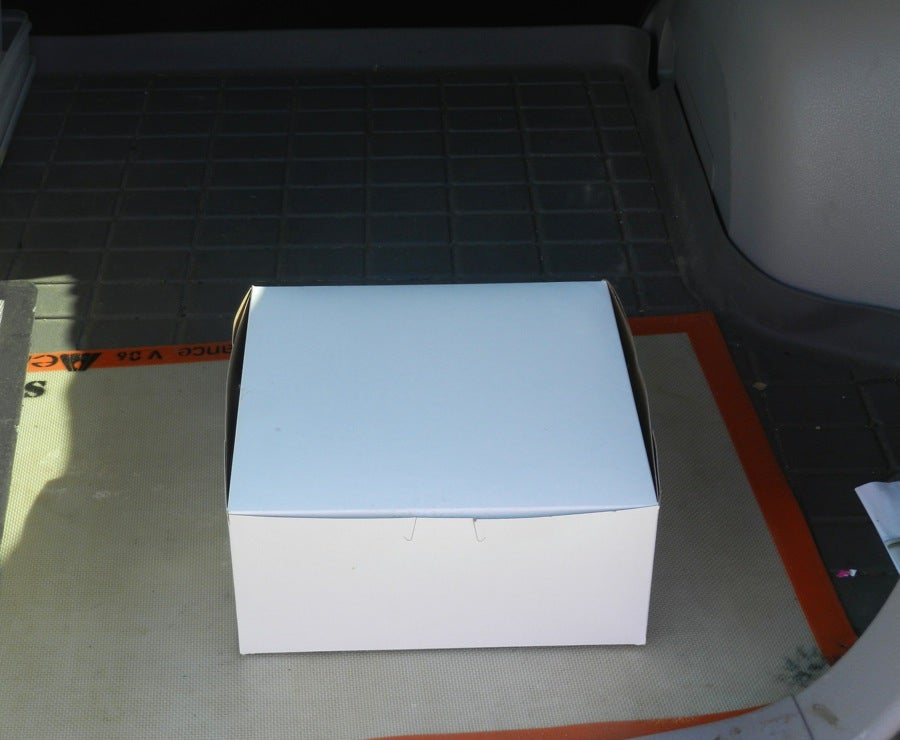
Luckily, the test kitchen is also in the warehouse building. I had plenty of boxes to choose from when looking for one big enough to fit the cake base.
One last, important thing: our rolling mats and/or Silpats have a hidden talent. If you put them on a flat surface and put any kind of cake box on top, the cake box DOES NOT MOVE. It's amazing and wonderful and lets you turn both left and right, and go up and down hills without fear of anything sliding around.
Another piece of very useful advice from Dede that I heartily endorse: before you drive off, make sure you have a cake repair kit with you. It should have extra frosting in whatever colors you need already in pastry bags; a small and large offset spatula; any extra piped or shaped decorations you have, and some paper towels for wiping off any surface or your hands. That way, heaven forbid, if the cake is jostled or bumped into, you can make whatever fixes you need once you're at your destination
Setting up: If you're handing the cake off to someone, that's really all you have to do. Make sure they don't put it in a cooler with a bunch of fish! To taste its best, the cake should be given some time to warm up to room temperature. The bigger the cake, the more time this takes. Usually, if the cake is on display before people come into the room for the reception, it works out – as long as the room isn't sweltering. See the notes below about getting your equipment back.
If you're setting the cake up yourself, give yourself 45 minutes to get the cake in the door, set up, and the table decorated (maybe an hour if you're also a guest at the wedding. Best to set up the cake first and put on the glad rags after).
If you're just handing off, be sure you make arrangements with someone specific to get your pillars, separator plates, and base back. In particular, get the banquet salesperson's name as well as the banquet captain's, and let them know you're expecting to get everything back. Then tape a note to your car keys or your car's steering wheel to remind you to collect the stuff.
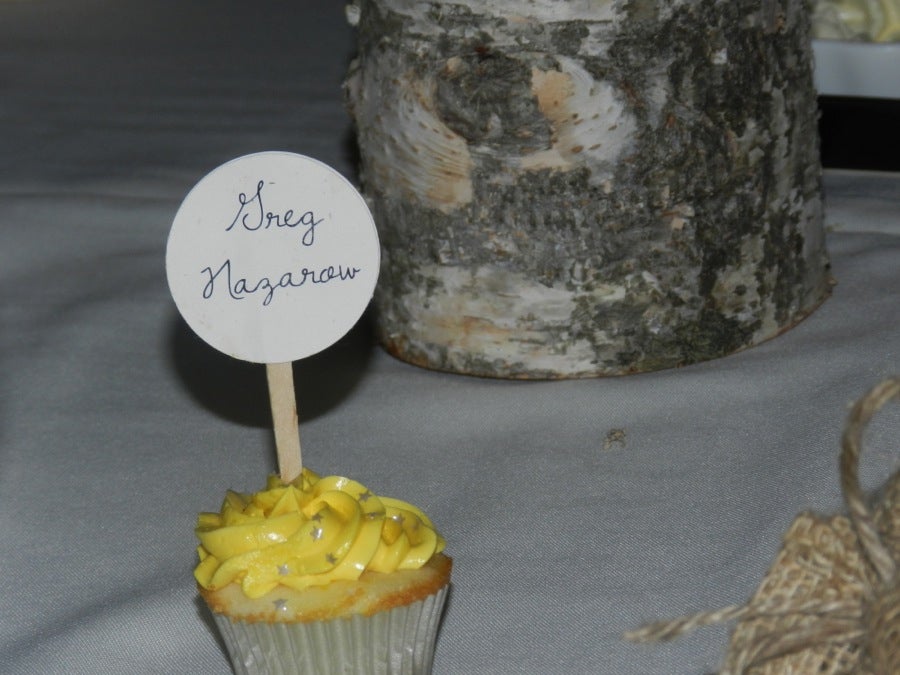
For Gwen's wedding, I also made cupcake seating card holders in their flavors and colors.There was a little bit of extra setup time for that, too, putting everyone's name card in place.
Gwen's cake had fresh flowers in addition to the piped and chocolate ones. The first thing I did after putting the cake on its table was put a ribbon around the base to help tie the colors of the roses into the presentation.

Then I placed the rest of the roses in front, some petals for more fun, and breathed a very big sigh of relief.
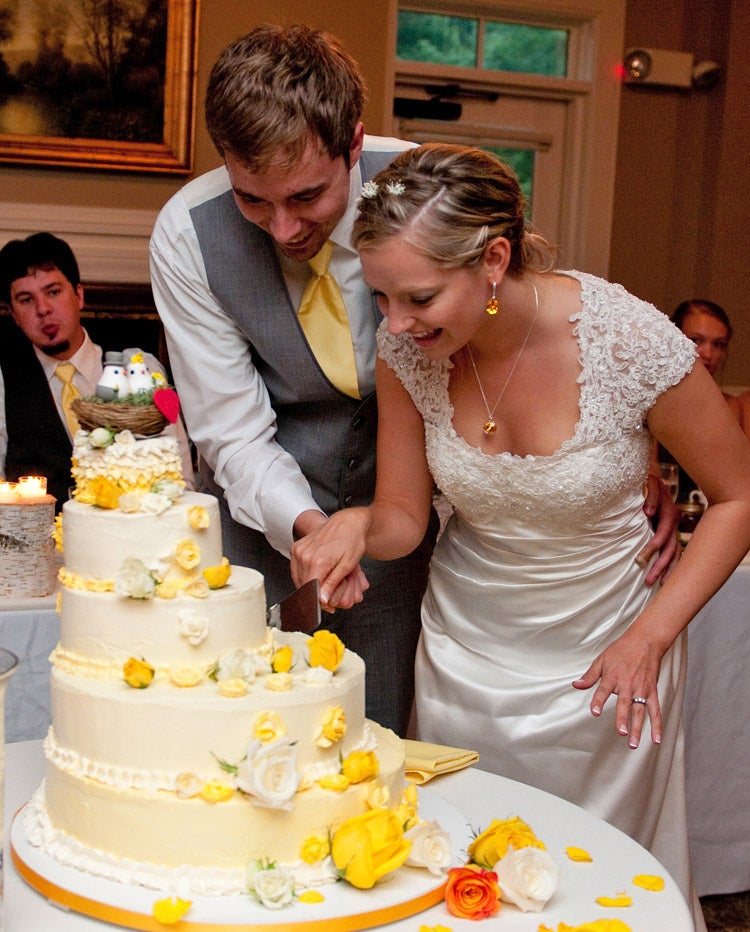
After a lovely ceremony and tasty meal the big moment happened: cutting the cake! In this case, most people had a little sneak taste preview from their name/table seating cupcakes.
It was an honor to have the chance to make the best cake I could for these two wonderful people, and to be part of their special day. So far I've had that privilege for Matt and Emily, Allison and Sean, Ian and Jordan, and Jen and Dan.
If you're the cake baker, I'm sure it will happen to you, sooner or later. If it does, I'll leave you with these words of advice.
Make a sample cake for the couple, so you can practice the recipe and they can give you their feedback and you can make use of it. An 8" layer is a good place to start. It's big enough to give you a sense of what you're getting into, small enough not to scare you to death. I guarantee that after you do this one cake you'll realize three or four things you want to do differently when it's time for the real show.
Make three batches of frosting. Then make one more. There's nothing worse than running out/dropping a layer/having to bang out another batch on the fly. And there's nothing better than having a stash of good buttercream in the freezer, should you be lucky enough to have left over.
You'll be doing this four times: (three tiers plus a side cake): Measure, mix, and bake layers (45 to 60 minutes); soak with flavored simple syrup (20 minutes); chill layers to firm them up before handling (20 to 30 minutes); fill; stack; crumb coat (20 to 30 minutes), and finish coat (30 to 45 minutes). Those time estimates are for a fairly confident and organized baker. Allow more if you're going down this path for the first time.
Give yourself twice as much time as you think it will take. If you add up my estimates for simply getting the cake made and nominally frosted, we're talking between 2 and 3 hours per tier. Not to scare you, but we're up to 8 to 12 hours already. Add to that the time it takes to buy your ingredients, gather your materials, hoe out the refrigerator, buy flowers if you're using them, and make a ton of frosting. We haven't said a word about decorating anything yet, either. This is not something you can leave for the last minute.
Stay in your comfort zone when decorating. And do some practicing on that sample cake. Choose a technique that comes easily to you. Not every wedding cake has to be super formal. Some of the best looking ones I've ever seen were frosted with nothing more elaborate than the back of a spoon.
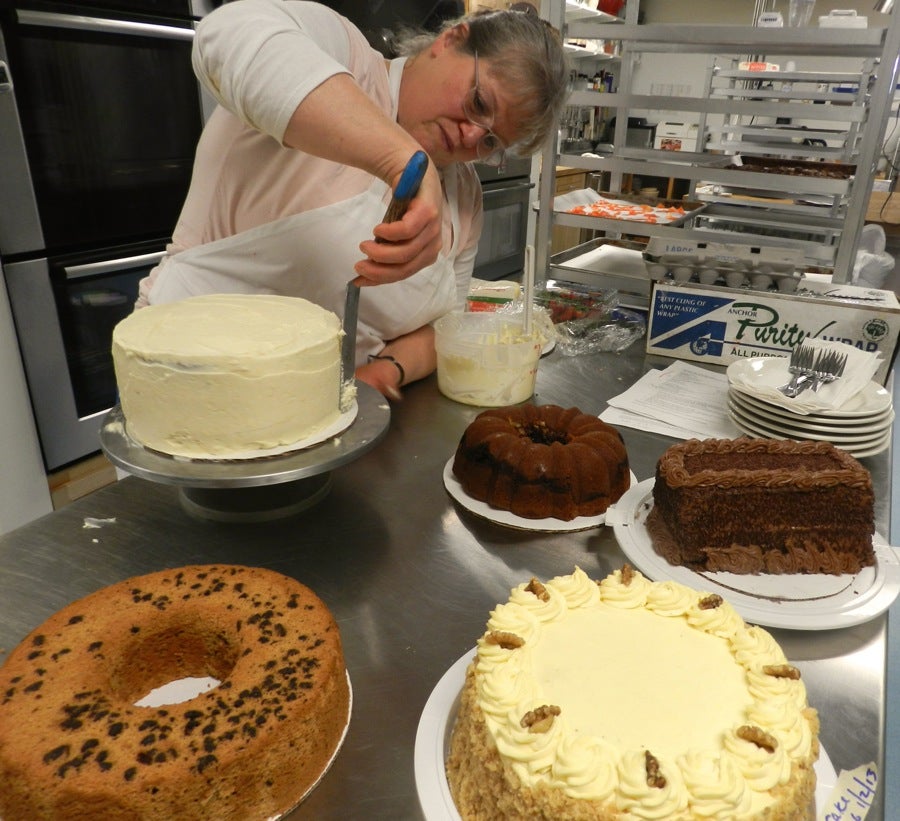
Chocolate cake with mocha buttercream, left; and almond cake with raspberry filling
Enjoy the process and put some love in that cake. I spend a lot of time when I do a wedding cake thinking happy thoughts about the couple, wishing them good things, and putting my hope and care for their future into what I'm doing. No matter what happens (and something always does), you'll know you did your best for a couple you care about. And everyone will be able to taste that.
Have you made a wedding cake before? Share your experience in the comments below; we'd love to hear how it went!