


Bagels for babies? Think toddlers sitting in the shopping cart, happily gnawing their way through a chewy bagel half as mom shops. Or those of us eating “baby-sized” portions in order to take off those 5 pounds that magically appeared during the holidays; this recipe makes cute little 3 1/2”, 2 1/2-ounce bagels, over a third smaller than normal bagels.
Or maybe these bagels are for you bagel-baker wannabes who've never made this signature treat before. Because this particular recipe, while exacting in both ingredients and timing, produces a pretty darned good bagel if you simply follow the directions.
Are you a bagel babe in the woods? This one's for you.
The usual method for making classic bagels involves a boiling water bath. But I've always found it a bit tricky to fish those roiling, boiling bagels out of the water. What do you use? Grab ’em with a set of tongs, they deflate. Poke ’em with a fork—ditto. A spatula works OK, but many's the time I've dropped an unbalanced bagel back into the pot, knocking it into another bagel and splashing boiling water onto the counter (and me). A chopstick works well, if you can manage to get it through the hole and lift without dropping...
So I thought, why not steam? Steam is just as hot as water—hotter, actually. What you're trying to do, by boiling or steaming bagels before baking, is to kill the yeast, so the bagels won't rise in the oven and become puffy, rather than staying rather dense and chewy. You're also adding a very thin coating of sugar—malt, in this case—which gives bagels their distinctive shiny crust.
Eureka! As it turned out, steaming was easy (so long as I steamed the bagels for exactly 2 minutes; you'll see what happens with shorter or longer steams at the bottom of this post). The bagels, sitting securely on a rack set over the boiling water, were easy to move around with a spatula. And, unlike boiling, they didn't need to be flipped over midway.
So that's my steamy story, and I'm sticking with it. Want to try making bagels? Start here. Not quite as solidly dense as store-bought, I find these—both because of their smaller size, and their slightly easier “chew”—perfect for kids.
Bagels for babies.
Want to read the recipe as you follow along with the pictures? Here it is: Baby Bagels.
Let's start with the chewy bagel's best friend: high-gluten flour, or “strong” (high-protein) flour. Our High-Gluten Flour checks in at 14.2% protein—12% stronger than our bread flour. This extra strength translates into chewiness, a hallmark of traditional bagels.
Most bagels don't begin with an overnight starter. But, let's face it, bagels are pretty bland-tasting; they're mostly about what you sprinkle on top, and what you spread inside. An overnight starter lends a bit of flavor to the bagel itself. So, mix Lancelot, cool water, and a pinch of instant yeast in a container, and cover. I'm using a 32-ounce yogurt container here.
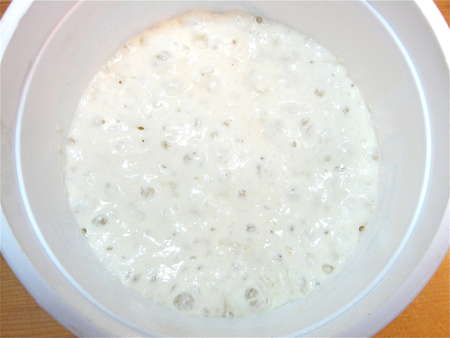
Next morning, the starter should be nice and bubbly, and should have expanded.
I'm going to make this dough in the bread machine, as it does such a good job developing Lancelot's abundance of stretchy gluten. A stand mixer is also fine. It's really difficult to fully develop dough made of high-gluten flour by hand-kneading, so if you're not an expert kneader with lots of energy, resort to a machine, please, for best results.
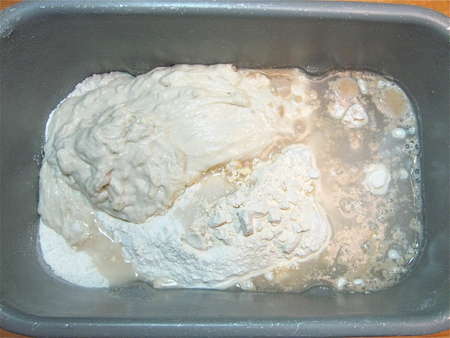
I've put all of the ingredients into the pan of the bread machine, and set if for “dough,” which means the machine will mix, knead the dough, then provide it with a cozy-warm, draft-free rising place for an hour—all with the simple push of a button. This is why the bread machines in our King Arthur test kitchen are such workhorses; they're great for us multi-tasking test bakers, who can't afford to spend too long on any one project. Push a button and walk away? Works for us.

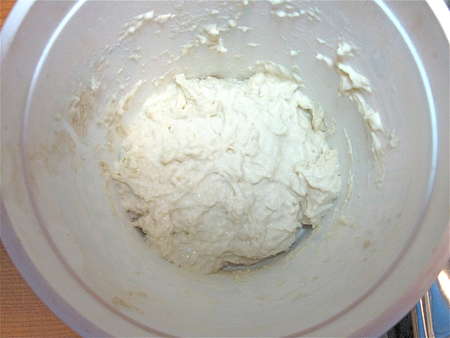
Here's the kneaded dough. It'll be a bit craggy; that's OK. Bagel dough is one of the few doughs that's supposed to be stiff, rather than soft.
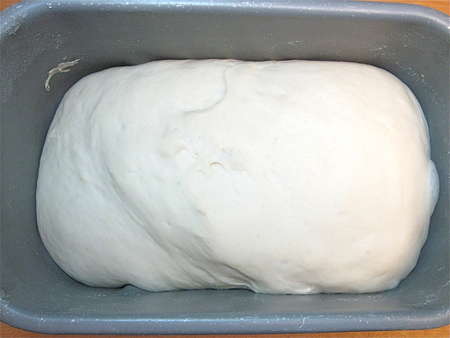
Here's the dough after its hour-long rise...
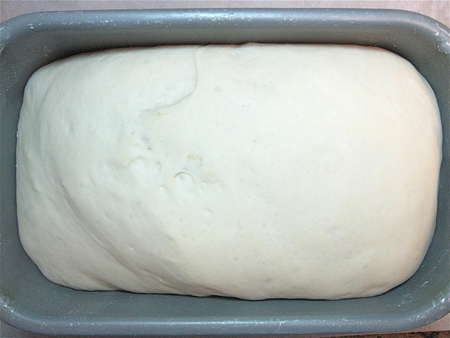
...and here it is after an additional 30 minutes, for a total of 90 minutes rising time.

See that stretch? That's gluten that's well developed. This dough will make chewy bagels.
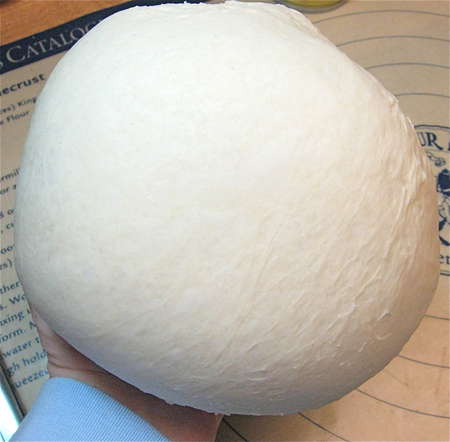
You can actually see the gluten strands, if you look towards the right side and bottom of the ball of dough.
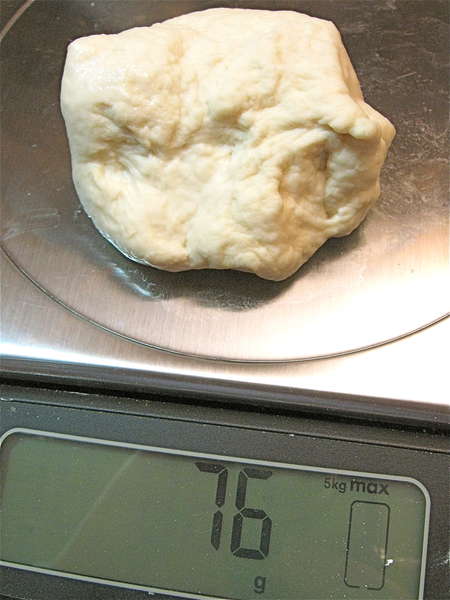
Divide the dough into 12 pieces; a scale makes this easy. Each piece will weigh between 2 1/2 and 2 3/4 ounces, or 76g.
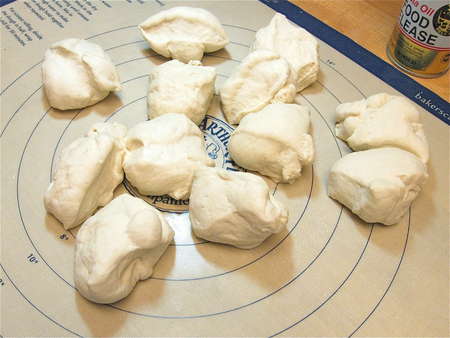
Here are your pre-bagels.
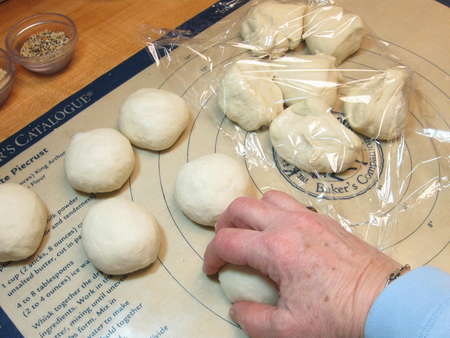
You're going to work with six at a time, so cover half with plastic wrap. Round the other six into smooth balls, rolling them under your gently cupped fingers.
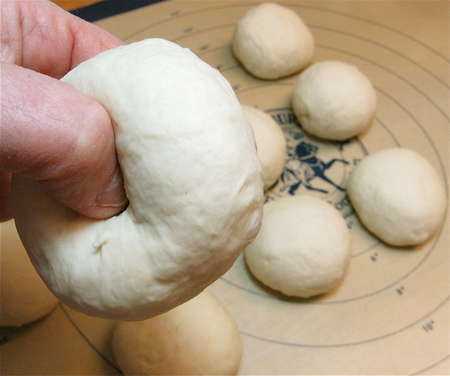
Next comes the hole. Stick your thumb and finger right through the center of each.
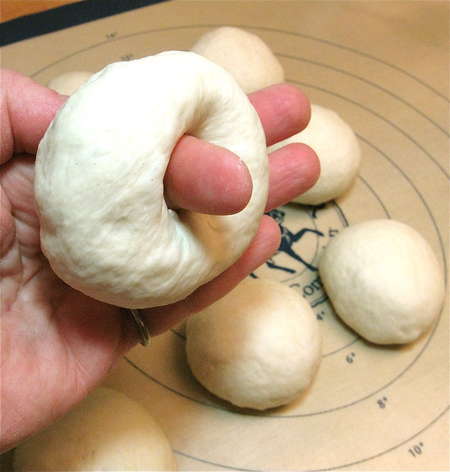
Twirl each bagel on your finger to widen the hole to about 1 1/2” diameter.
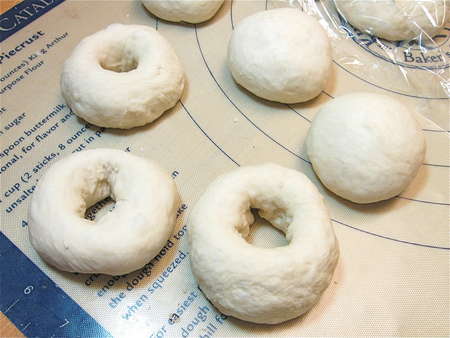
the holes will shrink a bit as the bagels sit, but they're not going to be sitting too long. For best results, the process needs to go quickly from here on in, so be prepared.
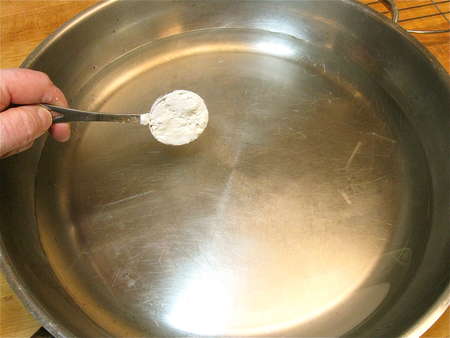
Heat about 1” of water in a large, flat skillet; this one is about 12 3/4” diameter. Add a tablespoon of non-diastatic malt powder; this will give the bagels their distinctive shine. Substitute brown sugar if you like; it won't be quite the same, but it'll work.
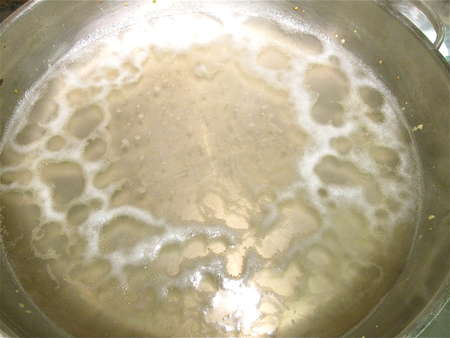
Bring the mixture to a boil. You should actually get this steam bath heating at the same time you're putting the holes in the bagels.
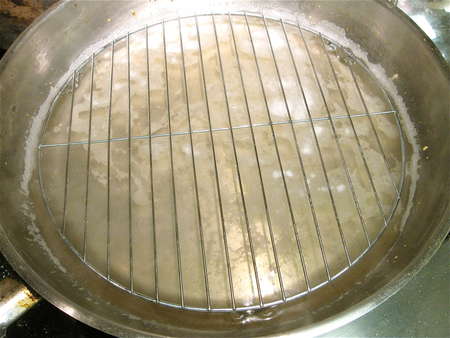
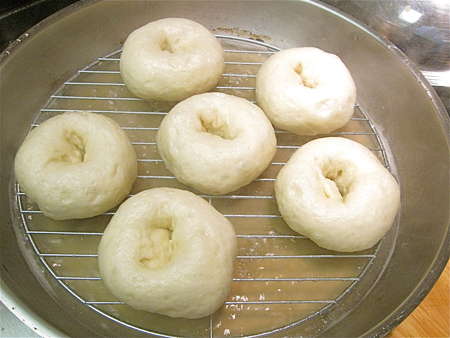
Add a rack; grease the rack with non-stick vegetable oil spray.
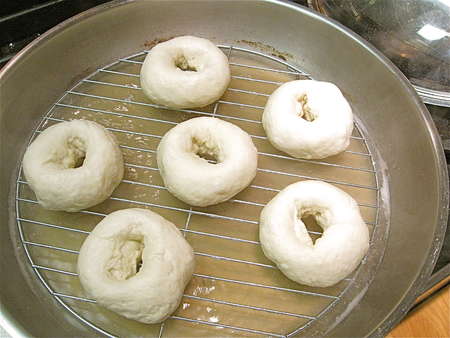
Place the six bagels on the rack over the gently boiling water, and cover.
Exactly 2 minutes later, remove the cover...
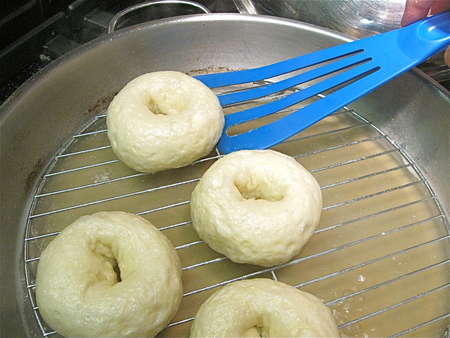
...and transfer the puffy bagels to a lightly greased or parchment-lined baking sheet. Put the bagels in the oven to bake for 20 minutes.
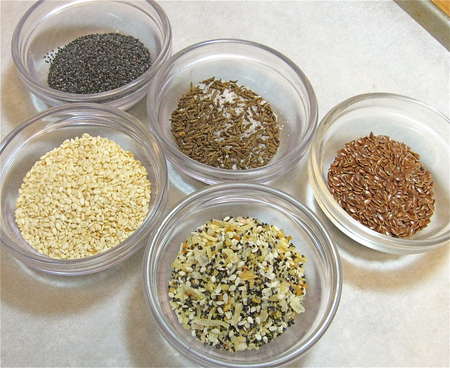
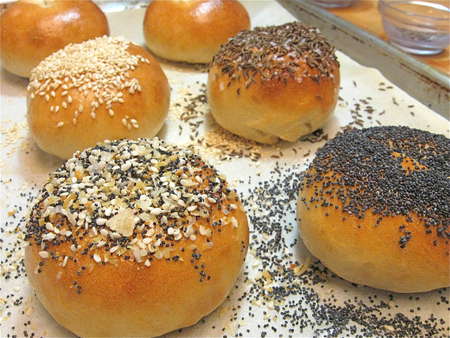
While the bagels are baking, get your seeds ready. Here I have (l to r) poppy, toasted sesame, caraway mixed with coarse sea salt, “everything bagel,” and flax.
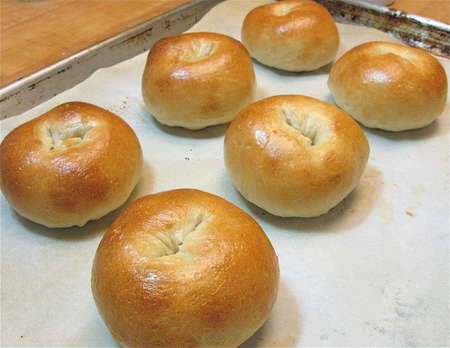
Here are your beautifully shiny bagels after their 20-minute bake.
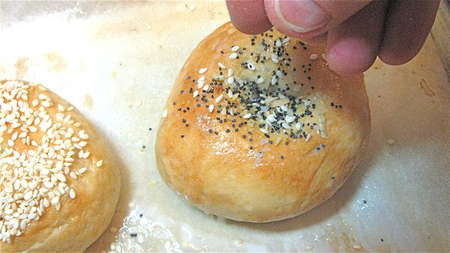
Spray with water or brush with beaten egg white), and add seeds. Or not.
Here they are, ready to go back into the oven.
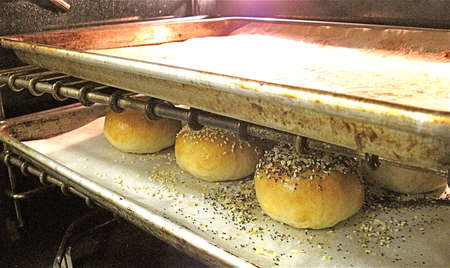
Put the bagels back into the oven on a middle rack, then set another pan on a rack above; this will keep the seeds from browning too much. Just 5 more minutes is all they need.

Ah, lovely! Place them on a rack to cool.
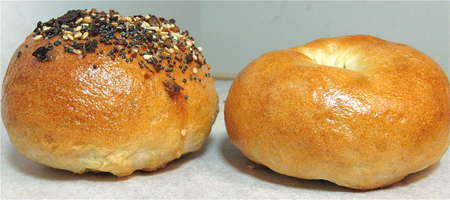
Here's something interesting: the first time I tried this recipe, I steamed the bagels for just 1 minute. The result? The yeast wasn't completely killed by that short a steam, and the bagels rose some more as they baked, resulting in very tall, puffy, un-bagel-like bagels (pictured on the left, compared to a bagel that steamed for 2 minutes on the right).
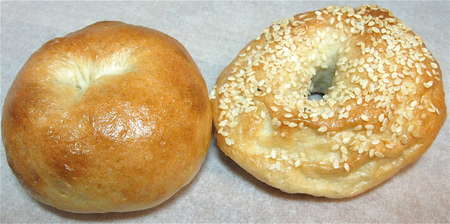
I also tried steaming for 3 minutes. The bagel on the right is an example of that experiment: they rose too much, then collapsed in folds as soon as I took them out of the steam. Again, the bagel on the left was steamed for 2 minutes. So a 2-minute steam it is.
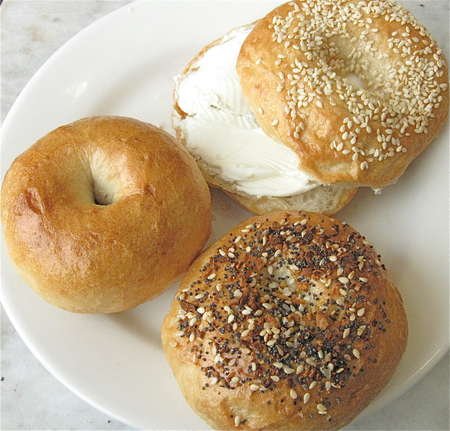
And what's a bagel without cream cheese, right?
Read, rate, and review (please!) our recipe for Baby Bagels.
