Sunny days, sunny flavors. Yellow daffodils, yellow chicks, bright lemon yellow filling.
I am a lover of all things lemon. I love lemon drops, lemonade, and lemon sherbet. Trying Limoncello, preserved lemon, and making homemade lemon peel are on my bucket list, and I used to eat the lemon wedges my parents would get with their dinners at restaurants. So, what is it about lemons that I don't like? ...
Nothing!! Well, I guess if I'm being really honest, it's the color yellow. I've never been a big fan of yellow. I don't wear much in the way of yellow clothing, it tends to make me look ill. I'm a pretty pale New Englander with Scottish heritage, and both yellow and green outfits usually have people coming up to me asking if I feel OK; the color just reflects right off of my white, white skin. I did have a tan once, though, and saffron yellow looked pretty good on me that year.
Lemon yellow is pretty good as far as color goes, though. It's clear, it's strong, and in the right doses it can chase away even the deepest of blue funks. It can really brighten up your day, and citrus scents are proven mood lifters.
I'm getting chickens for the first time this year, so soon we'll have a boxful of little yellow peepers in our spare bedroom. I can't wait to see those fuzzy little yellow babies tripping over each other and cuddled up under the lamp. I think that may help me learn to love yellow a bit more, too.
I'm super-excited about another yellow – the bright yellow yolks that I'll get with my own fresh eggs. Jessica Meyers is a fellow instructor here at the Baking Education Center here KAF; and some of you may have met her at the free demos in Utah earlier this year. Jess is an avid chicken lady, and recently sold me some of her fresh eggs; I was stunned at the deep golden yellow of the yolks when I hard-boiled some for a snack last week. And the flavor was out of this world!
I've been begging my husband for chickens for nearly 20 years now, and we finally agreed that he could build a big new shed if I could have a small corner for chickens. I guess we'd better get crackin' on the coop, since I've ordered my chicks already! They're going to be White Leghorns, who according to my friendly folks at the local feed store are great layers of white eggs (perfect for pysanky, I might add). I'll probably have more eggs than I can handle each week, so lots of baking is in the forecast. What's the best way to combine my love of lemon and my newfound wealth of eggs?
It's Braided Lemon Bread: a sweet, egg-enriched dough surrounding a sweetened cream cheese filling with a luscious layer of lemon curd and a sprinkling of pearl sugar. The truly impressive thing about this loaf, besides the lovely lemon, is the presentation. The loaf is mock braided, a very simple technique that never fails to draw ohhs and aaahs from those to whom you serve it. All you'll need is a sturdy rolling pin and a bench knife or scissors to cut the dough, and you'll be wowing the crowds in no time.
So pop a lemon drop, and let's get started on the Braided Lemon Bread.

The dough for this bread is an enriched dough. This means it has sugar and eggs and butter in it. These ingredients will make for a rich dough with sweetness and flavor, but it also makes it a bit harder for the yeast to work with all those rich and heavy ingredients to deal with.
To give the yeast a head start, we'll make a sponge. A sponge typically includes some water, some flour, a bit of yeast, and perhaps a bit of sugar. Think of this as the “good breakfast” for the yeast to get it working to its fullest before diving into the hard work of raising your dough.
Place the sponge ingredients in the bowl of your bread machine or stand mixer, cover, and let it sit for 10 to 15 minutes.
Now is a good time to make sure your sour cream and cream cheese for the filling are out of the fridge and warming up.
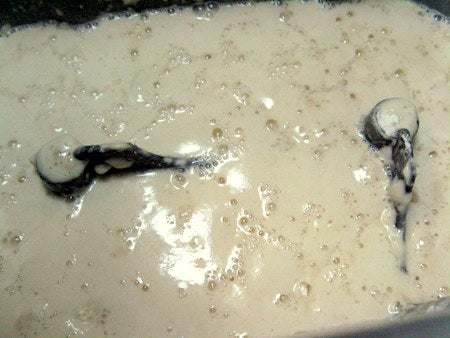
Look at that lovely sponge – lots of bubble action and foaminess. If you check out the paddles in the first picture, then compare the second picture, you'll see how much the sponge developed in that short amount of time.
Add the rest of your dough ingredients, and set the machine for the dough cycle.
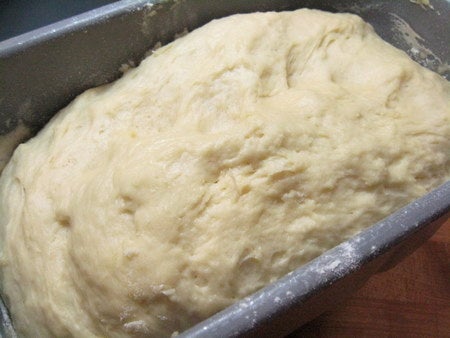
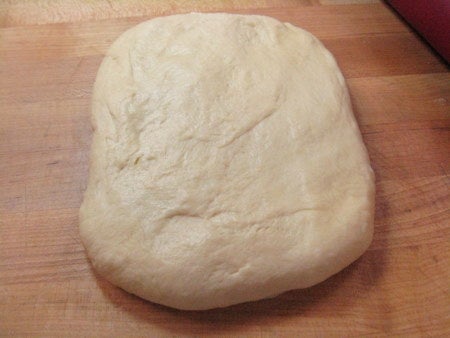
Mamma mia, that's a beautiful dough! And the scent is wonderful.
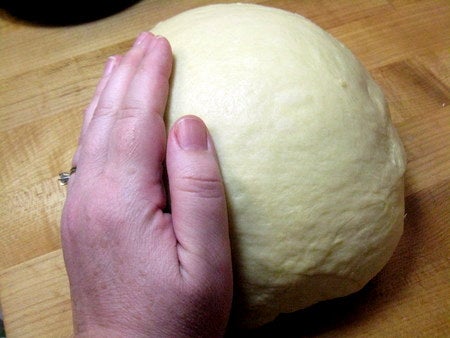
Remove the dough and smooth it out. Allow the dough to rest for 5 to 8 minutes.
Divide the dough into 2 equal portions.

Set one half of the dough aside under plastic wrap, so that it doesn't dry out as you roll the first half. You're shooting for approximately 10” x 15”.
Pat the dough into a rough rectangle. Dough is like an elephant. It has a memory, and if you set it up as a rectangle, it will remember that it wants to be a rectangle. If you just plop it down and start rolling, it won't have a good idea of what shape it should be.
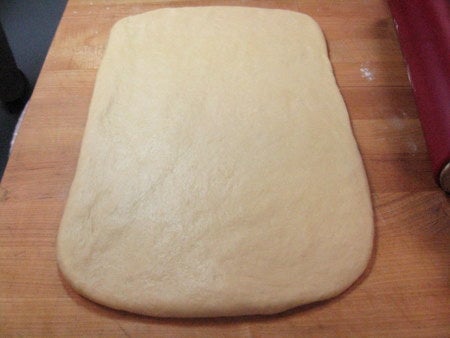
See, it remembered. This dough is great to work with, supple and smooth. At this point, you would want to gently fold the dough in half and transfer it to a sheet of parchment paper. I say this with all good intentions, as I forgot to do it, and it led to many troubles moving the braid later.
Now that we've moved the dough to the parchment, let's make the cream cheese filling and lemon curd while we let the dough rest for a bit, allowing the gluten to relax.
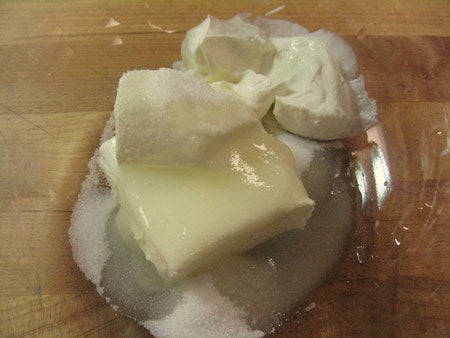
Combine the softened cream cheese, sour cream, lemon juice, and sugar in a medium mixing bowl. Beat until lightly combined.
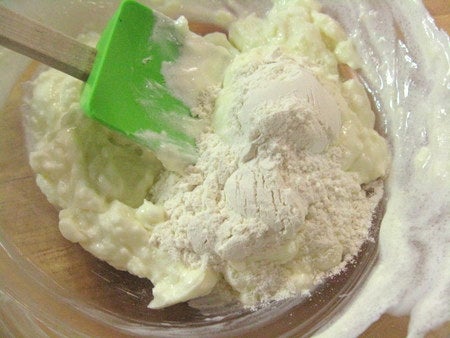
Add the flour and beat until creamy and smooth.
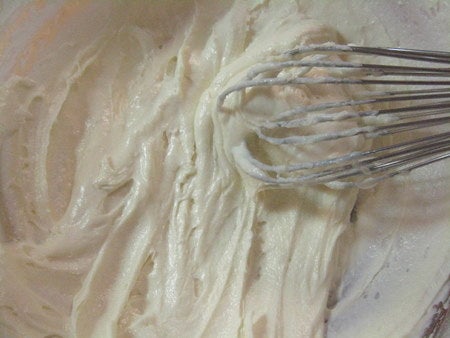
Just right.
Next, whip up a batch of Easy Microwave Lemon Curd.
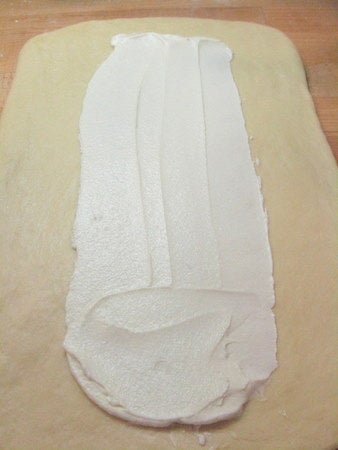
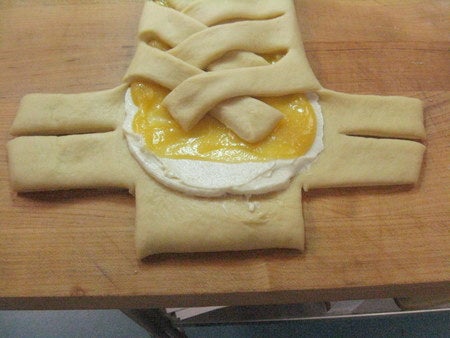
Spread half of the cream filling down the center of the rectangle. Leave about 2” on the sides and 1” on the top and bottom bare.
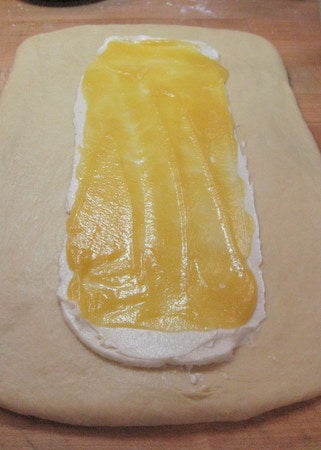
Spread about 1/4 cup of the lemon curd on top of the cream filling. Even though “more filling” sounds like a good thing, it's better to be moderate and avoid burst sides and messy spillovers.
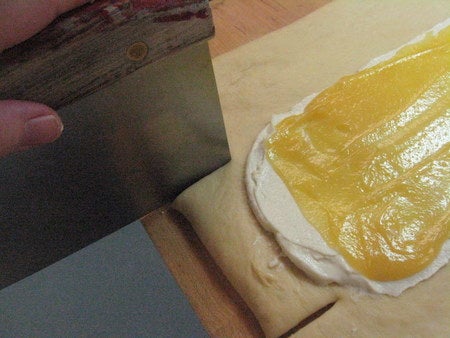
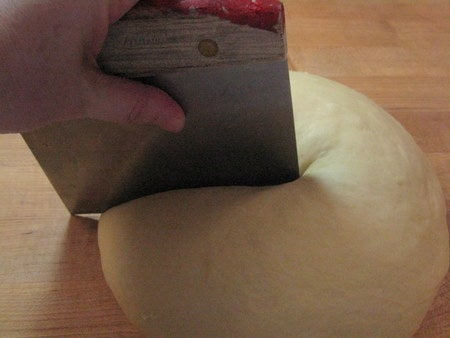
Now for the fun part, the mock braid. Begin by using your bench knife to cut the top and bottom of the rectangle, even with the edges of the filling, about 1” deep.
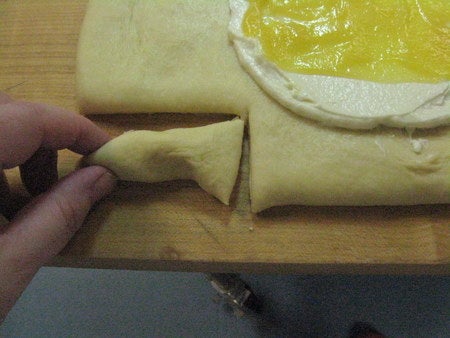
Next cut in from the side edges to just the edge of the filling. Remove the little piece of dough. Do this on all four corners.
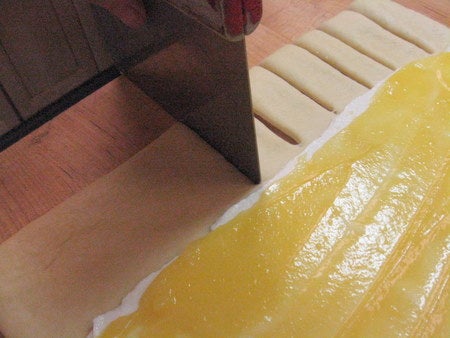
From here, use the bench knife to cut 1” wide strips along the side of the rectangle. You'll be doing this on both sides. Keep count of your strips, as you need an equal number on both sides.
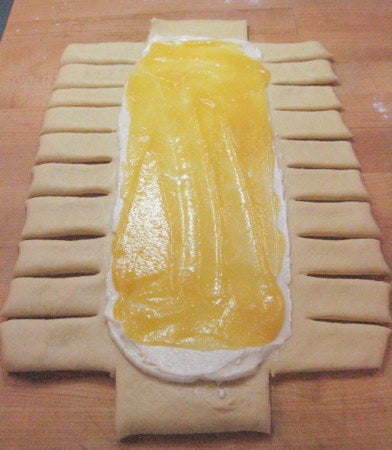
There. It looks rather like a totem pole or maybe a rib cage, but that's exactly how it should look. You're doin’ fine.
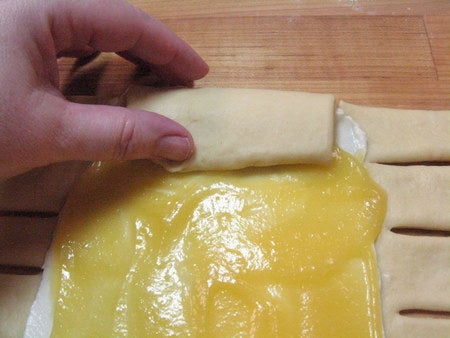
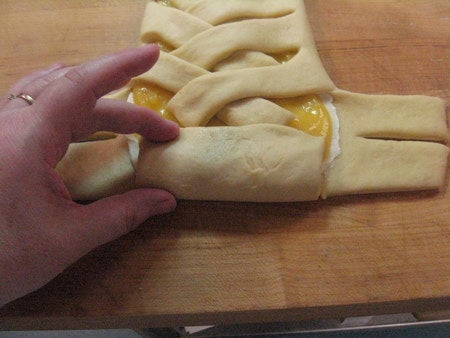
Fold down the top strip over the filling. For every fold, keep in mind that the bread will still need to rise, so be gentle and don't pull tightly.
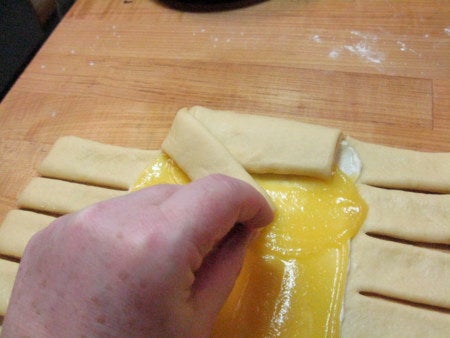
Draw the first strip over the filling towards the center at an angle. It should cover the lower corner of the folded-down top strip.
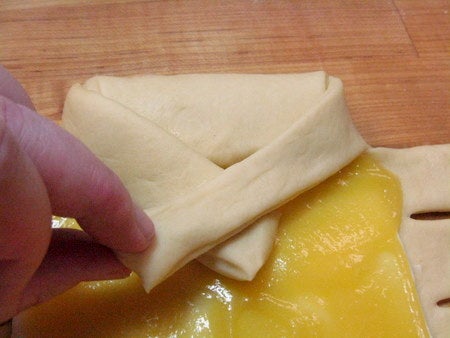
Draw the first opposite strip inward, again at an angle. It should over the bottom corner of the top piece of dough, and crisscross over the first side strip There should be a small gap in the very center, exposing the filling.
Go back to the first side and draw over the second strip. It shouldn't touch the first strip, but should cover the bottom tip of the last strip.
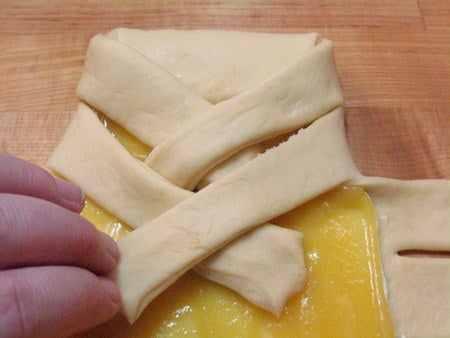
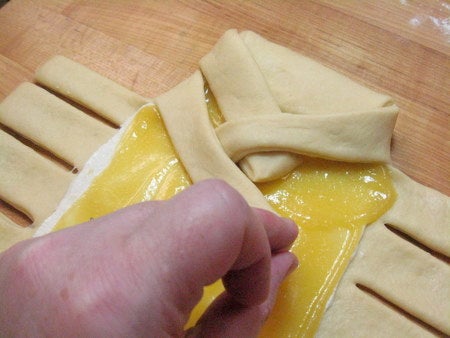
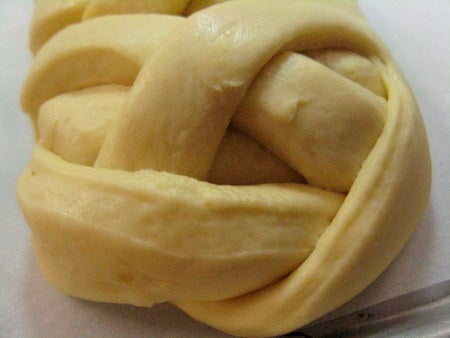
Now we're getting the hang of it, and you can see the braid beginning. Keep going down the whole bread, stopping just short of the bottom.
When you get to the bottom strips and end piece, you need to treat it a bit differently.
Before you fold over the side strips, fold up the bottom edge.
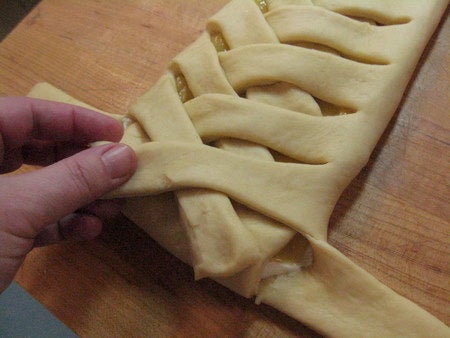
Now finish folding over the side strips, covering the end piece and sealing it in place.

There, you did it! Can you believe the simple act of folding strips of dough can lead to such a stunning outcome?
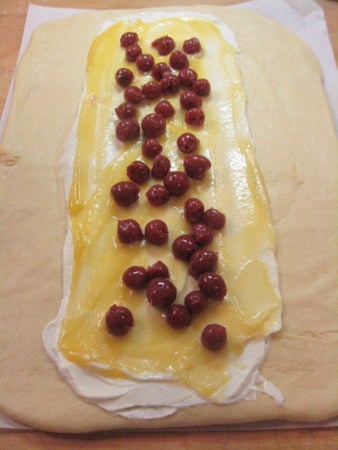
Let's backtrack a bit. When you're filling the loaf, you can add fresh or canned or frozen fruit. Remember, less can be more and too much can really be a hassle. Here, I've added some cherries to my second bread.
*Repeat the rolling, filling and braiding steps with your second piece of dough. Cover both and set aside to rise.*
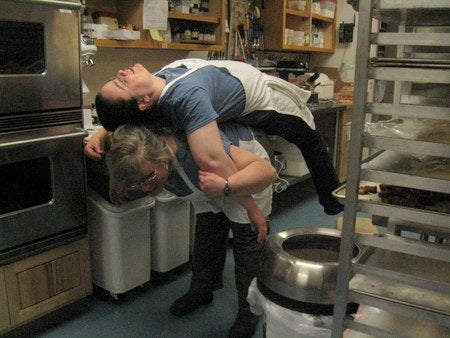
And now for something completely different. Andrea had a bit of a stiff back and Susan was happy to give her a hand with stretching. How can you resist taking a picture of your co-workers when they look like a pushmi-pullyu? (You DO remember your Dr. Dolittle, don't you?)
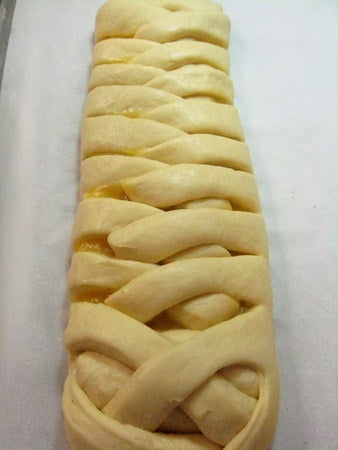
Back to our beautifully risen loaves. This loaf is the one I forgot to put on parchment before beginning my braid. It survived the move, but just barely. It took a lot of tucking and nudging to get it back into shape, and some of the strips pulled out towards the bottom of the loaf. Oh well, live and learn. YOUR bread will look more like the top of the loaf.
See how puffy this dough looks? That's a great indicator that it's ready to go.
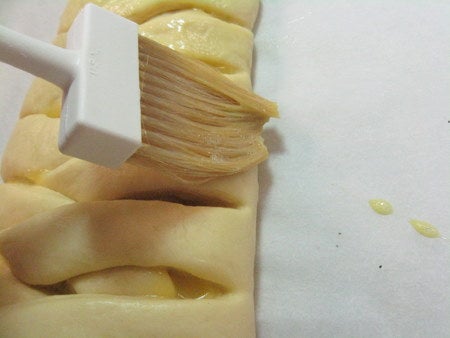
Brush the risen loaf gently with egg wash and sprinkle with pearl sugar or sparkling white sugar, your choice. I like the pearl sugar for the contrast on the golden baked dough.
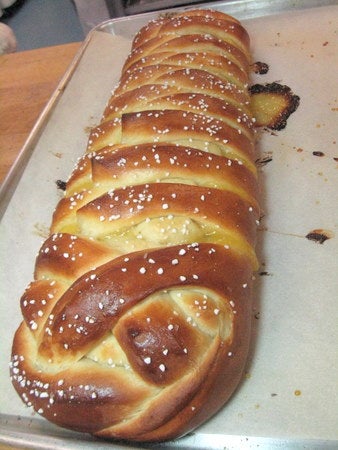
Sing with me now... Isn't she lovely... isn't she won-der-ful?
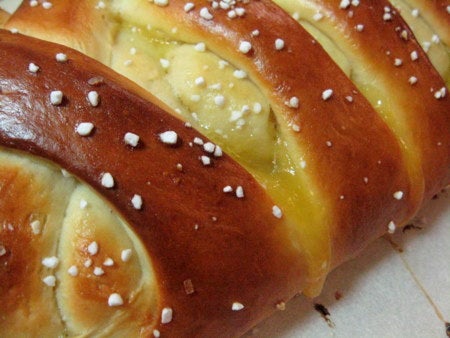
The dough is a deep golden brown, the filling has puffed up, and the lemon curd peeks seductively out from the seams.
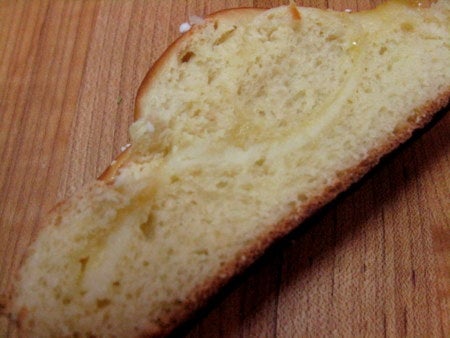
Give the loaf about 15 to 20 minutes to cool, then slice and enjoy the sweet and tangy fillings swirling through the bread.
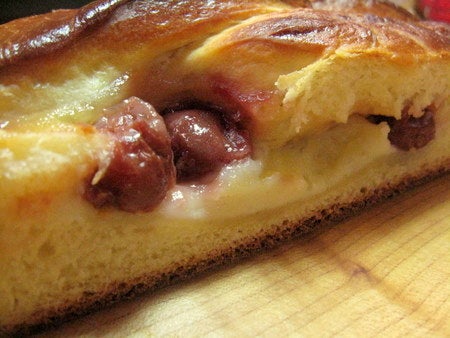
Here's the cherry version. I'm thinking blueberry-lemon for summer – what do you think?
Now that you know the mock-braid technique, you'll find many different uses for it. Braid over Cinnamon Filling, for instance ... the possibilities are just beginning.
Please bake, rate, and review our recipe for Braided Lemon Bread.