Freezing tips and time-saving tricks for the holidays
Get ahead with these freezer-friendly recipes


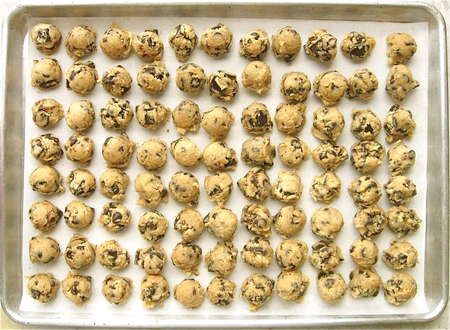
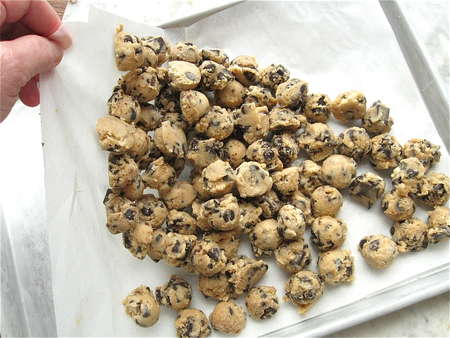
So what's up with this enormous baking sheet of unbaked chocolate chip cookies?
“Surely you're not going to bake them like THAT,” you say.
You're right. I'm not going to bake them like THAT.
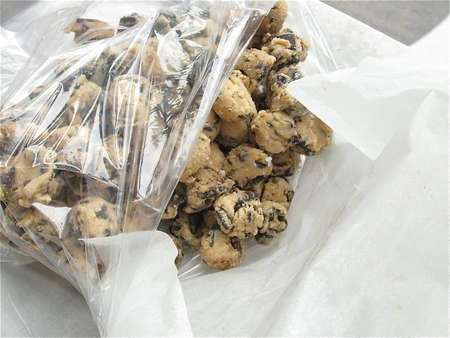
I'm going to freeze them...
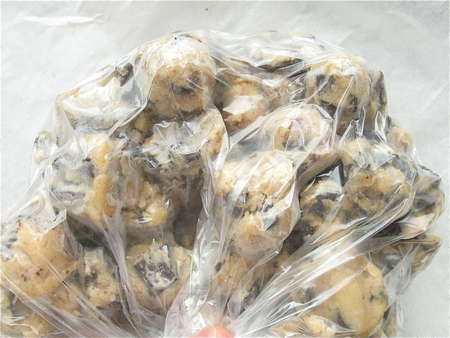
...like this. And put ’em in a plastic bag, and leave them in the freezer till I need them.
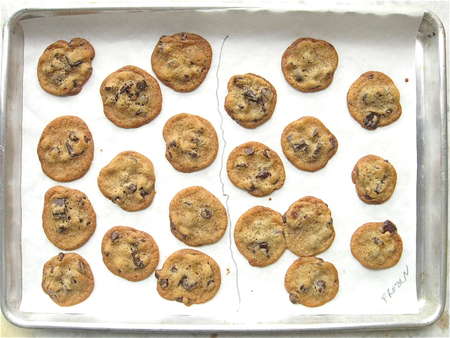
And then, when the need arises, bake them...
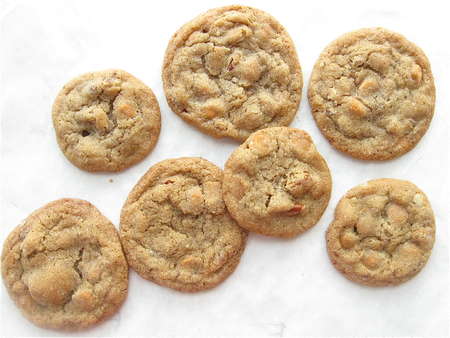
...like this.
Serving my holiday guests fresh, hot, homemade chocolate chip cookies within a mere 15 minutes or so of the time they unexpectedly drop by.
And then there's the age-old quandary of how to serve hot sticky buns for breakfast without getting up at 3 a.m.
And how to put warm, bacon-and-cheese breakfast scones on the table in less than an hour.
And what to do about those times when late afternoon stretches into early evening, and you're enjoying a glass of wine with your girlfriend, and you're both craving something hot and flaky and savory and CHEESY...
The answer to all of these conundrums is simple.
Make. FREEZE. Bake. Enjoy.
Here's how:
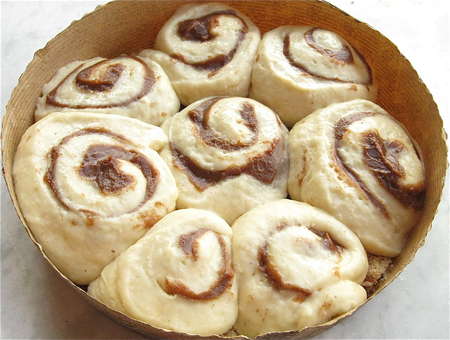
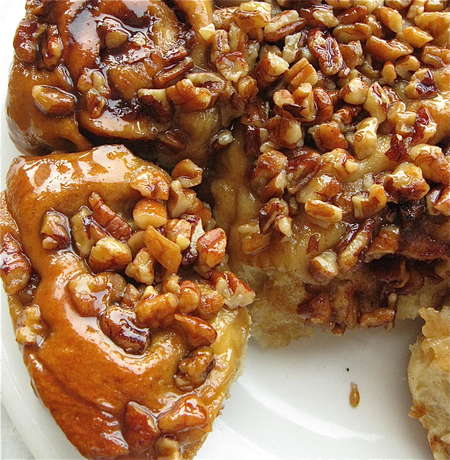
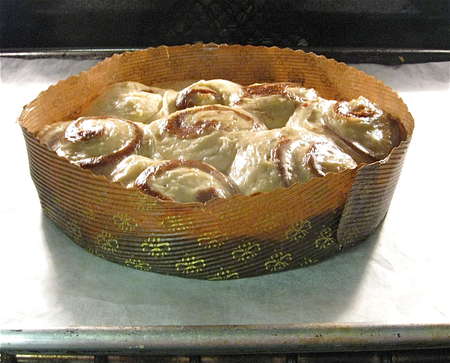
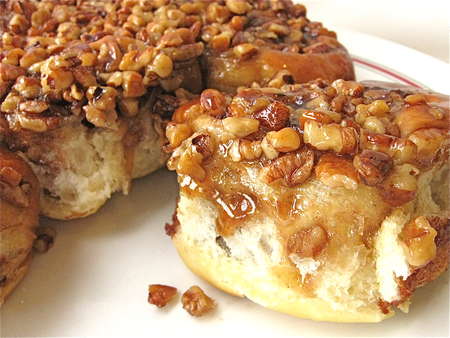
Let's start with sticky buns.
Make our Ridiculously Easy No-Knead Sticky Buns up to the point where they've risen in the pan, prior to baking. (Since these buns were slated to be a gift, I made them in one of our 8" bakeable paper pans – no worries about getting the pan back.)
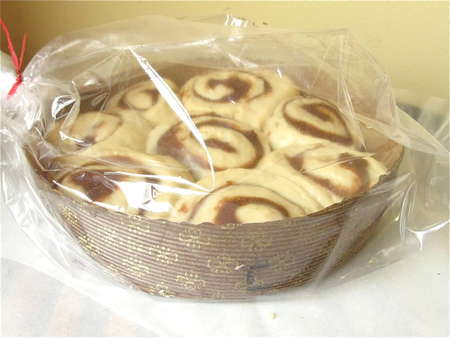
Carefully place them in a plastic bag, one large enough to “tent” over the risen buns. Place the bag in the freezer. When the buns are frozen solid, gently press the bag more tightly around them, and reseal.
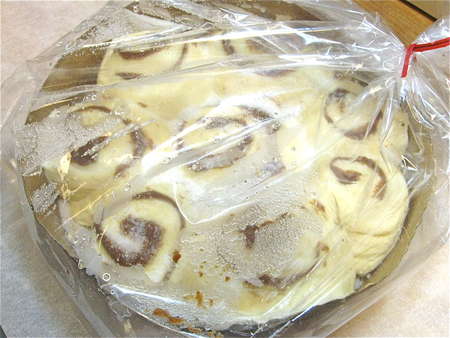
The late-afternoon before the morning you want to serve the buns, remove them from the freezer. Unseal, and “poof” the bag up a bit, so it's not touching the buns. Reseal, place the buns in the refrigerator, and let them thaw overnight.
Next morning, remove them from the fridge, and take them out of the bag. Let them sit at room temperature while you preheat your oven.
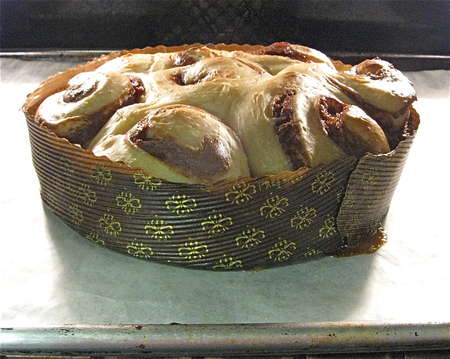
Bake as directed in the recipe, adding about 5 to 10 minutes to the total time. Nice oven-spring, eh?
Remove from the oven, and serve hot, to great acclaim from your wondering family.
“How did she DO that so fast?!”
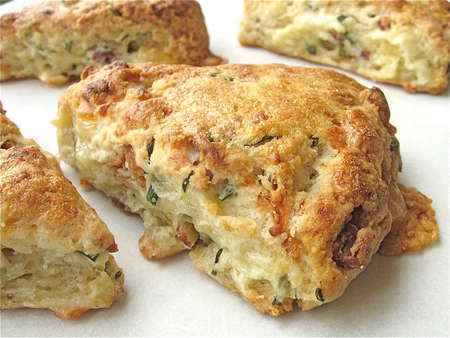
Now, let's look at those Bacon Cheddar-Chive Scones, a decadent breakfast treat. If you plan ahead, you can take them from freezer to table in just about 45 minutes.

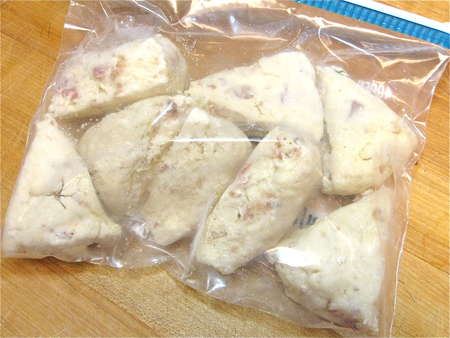
Make Bacon-Cheddar-Chive Scones up to the point where you've shaped them and put them on the baking sheet. Don't brush with cream.
Instead, tent with plastic wrap and put them in the freezer. When they're totally frozen, put them in a plastic bag, and seal the bag.
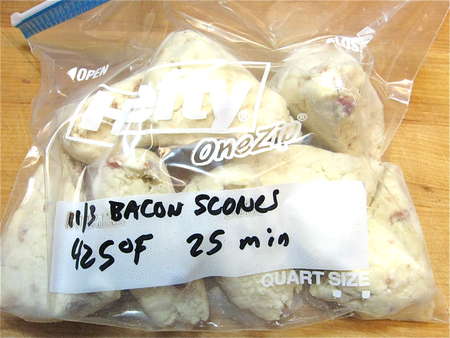
It helps to label the bag: what's in the bag, date, and baking instructions.

When you hear the family starting to stir around, preheat your oven to 425°F, and take the scones out of the freezer. Put them on a lightly greased or parchment-lined baking sheet, and brush with cream.
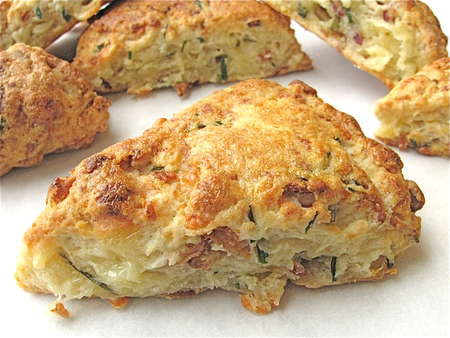
If they weren't frozen, they'd bake for about 25 minutes, as noted on the bag. But since they're frozen, they'll need more time – about 40 to 45 minutes, total.
“How did she DO that so fast?!”
Let's go back to those cookies. There's nothing, and I mean NOTHING, so warm and inviting as chocolate chip cookies right out of the oven. The melting chips, the crumbly/chewy, brown-sugary cookie... Well, you can just imagine. As I'm sure you're doing, right now.
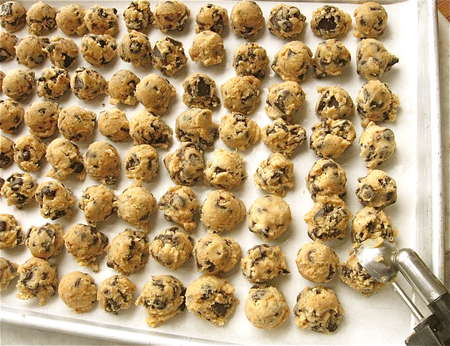
Make the dough for Chocolate Chip Cookies, and scoop it onto a parchment-lined baking sheet, one that'll fit in your freezer.
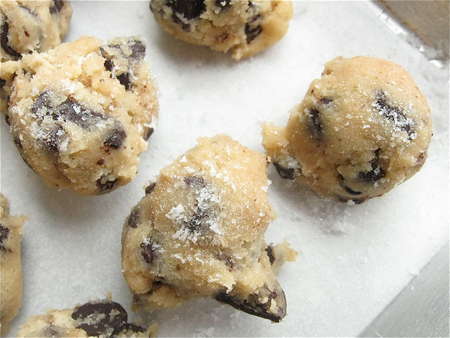
Freeze till the scooped cookies are frozen solid. See the ice crystals? This will take an hour, maybe. No need to cover with plastic wrap.
Parchment makes the next part of the process easy. Just lift the parchment...
And use it to funnel frozen cookies into a large plastic bag.
Press as much air out of the bag as possible. Label, and return to the freezer.
When guests arrive, preheat your oven to 375°F. Take the cookies out of the freezer, put them on a lightly greased or parchment-lined baking sheet, and bake as the recipe directs: 10 to 11 minutes.
How come they don't have to bake longer, like the scones did?
Because I like to chill chocolate chip cookie dough before baking; I think chilling gives the resulting cookies a richer, more caramelized flavor. The frozen, scooped cookies are small enough that they quickly go from frozen to simply chilled, once they hit the oven's heat.
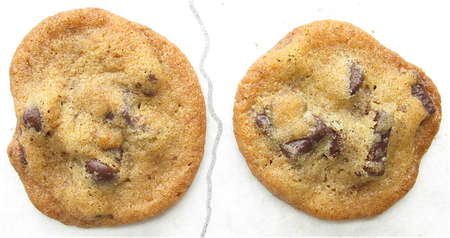
Q: What's the difference between cookies baked from chilled dough (left), and frozen (right)?
A: None.
I'm telling you, scooped chocolate chip cookie dough in the freezer is money in the bank for those moments when you HAVE to have warm cookies.
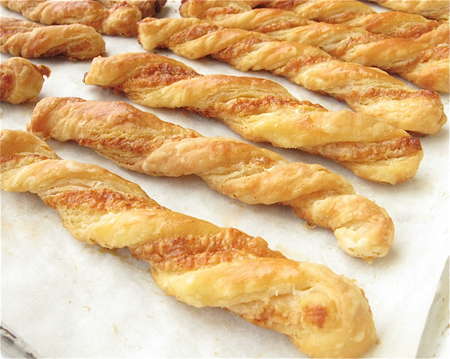
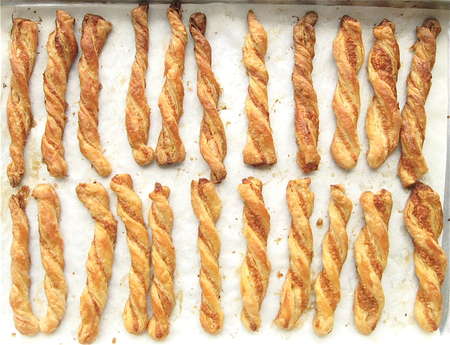
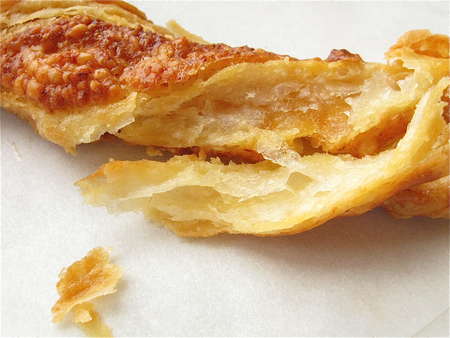
And now, for your viewing pleasure: Flaky Cheese Twists.
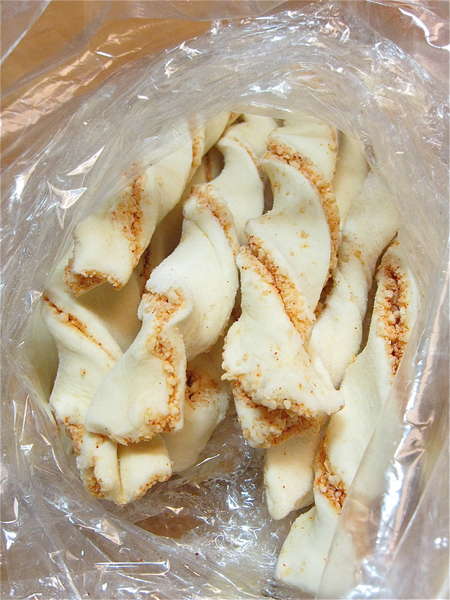
We'll take them from the freezer...
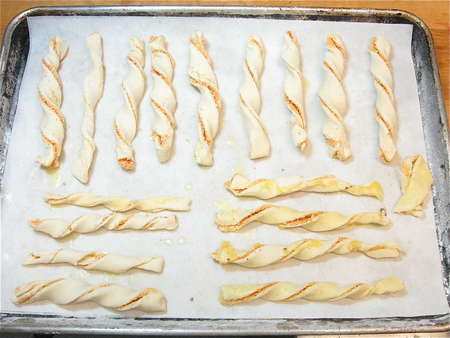
...to the pan...
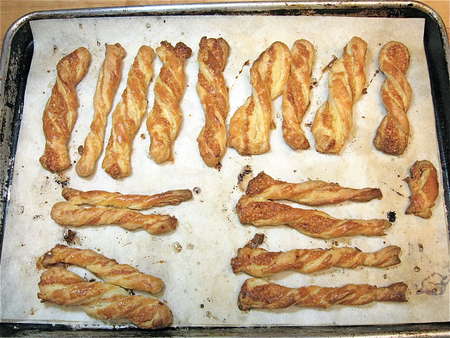
...to the oven...
(Whoops, excuse the rather slipshod look of these particular twists – I was in a hurry!)
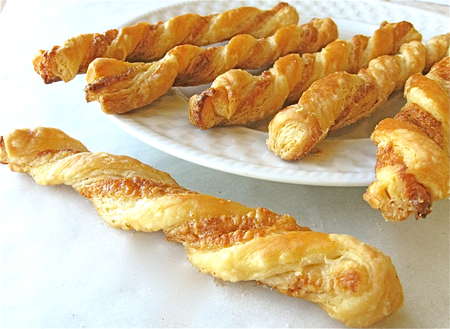
...to the appetizer plate, in just about 20 minutes.
How easy is that?
Easy, when you've made them ahead. Here's how:
The first thing we'll do is make Fast and Easy Puff Pastry.
Did I mention money in the bank? Think flaky turnovers. Think of everything you do with supermarket freezer-case puff pastry sheets, only homemade – no partially hydrogenated vegetable shortening, no mono- and diglycerides. EVER so much tastier.
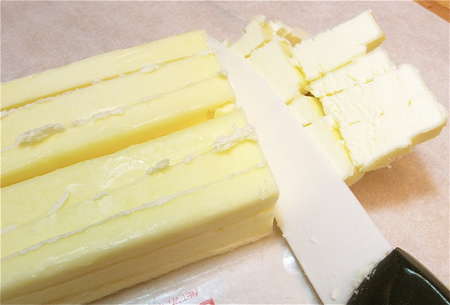
Start by cutting 1 cup (8 ounces) butter into little cubes. Cut each stick twice lengthwise. Turn 90°, and make two more lengthwise cuts. Now slice crosswise into pats; each pat will consist of 9 little cubes.
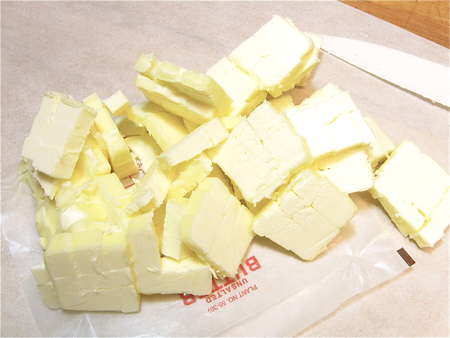
The cubes are all stuck together here, but they'll separate once you start mixing them with the other ingredients.
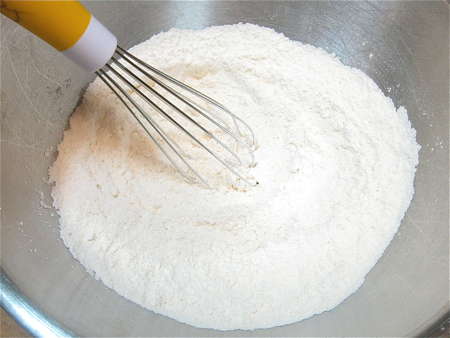
Whisk together 1 1/2 cups King Arthur Unbleached All-Purpose Flour, 1/2 teaspoon salt, and 1/2 teaspoon baking powder. If you're using salted butter, reduce the amount of salt to 1/4 teaspoon.
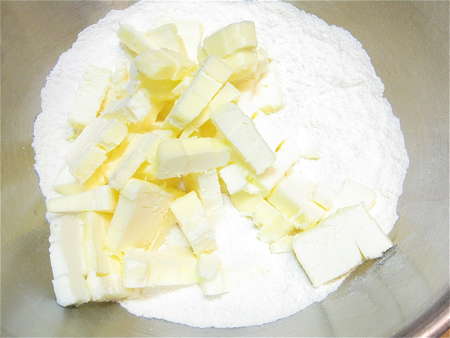
Add the butter.

Use your fingers to mix it with the flour.
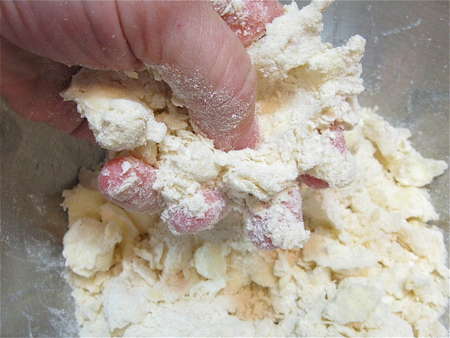
Keep mixing and squeezing/flattening the butter...
...till it looks like this – VERY unevenly crumbly, with big flattened chunks of butter.
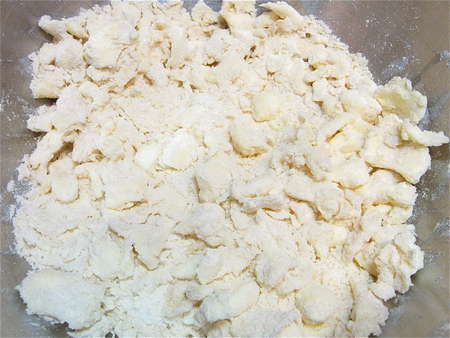
You can also do this whole process in your stand mixer.
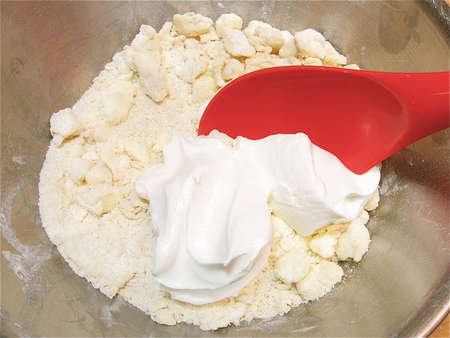
Mix in 1/2 cup sour cream.
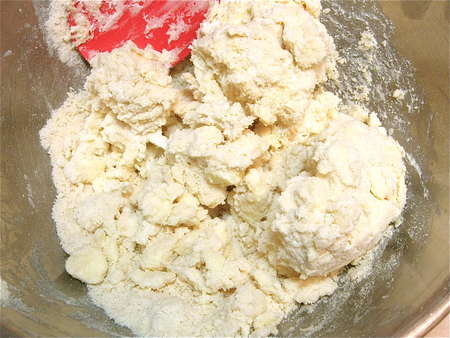
The dough won't be totally cohesive; see that dry, floury residue in the bottom of the bowl?
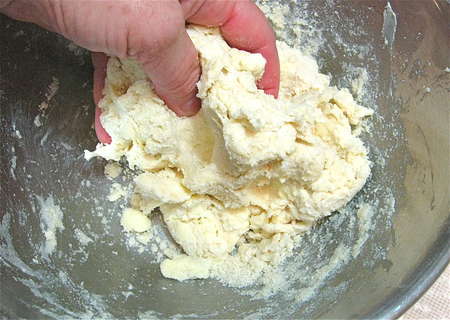
Knead the dough with your hands, picking up the dry stuff as you go.
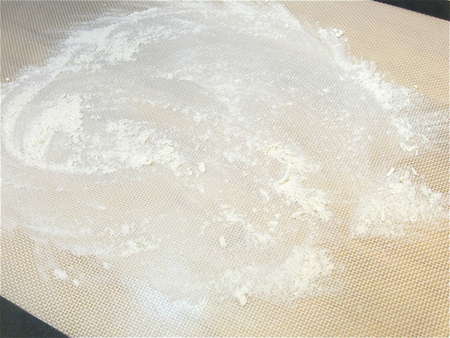
Flour a clean work surface. A silicone mat makes cleanup easy.

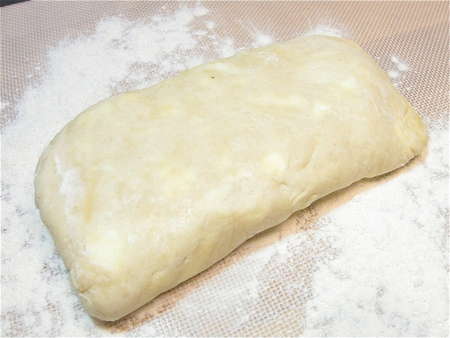
Put the rough dough on your work surface...
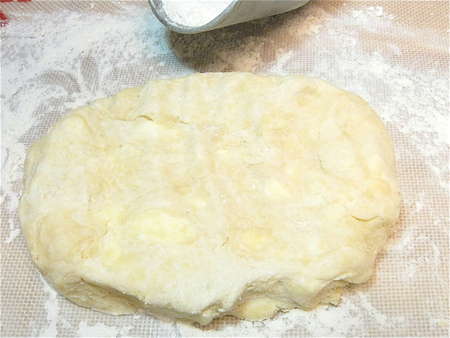
...and shape it into a rough oval.
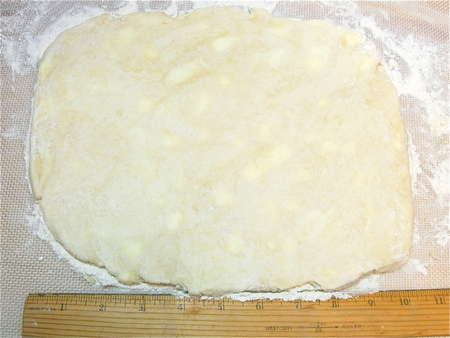
Roll it into an 8” x 10” rectangle. Trust me when I tell you it doesn't need to be EXACTLY 8” x 10”; this is an approximation.
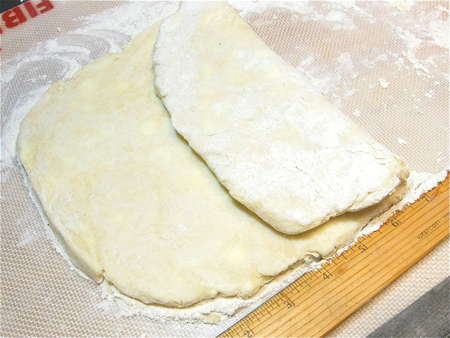
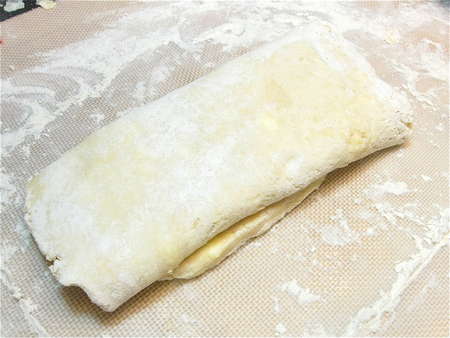
Fold the dough like a letter. One short side goes into the middle...
...then the second short side goes into the middle, and laps over the first.
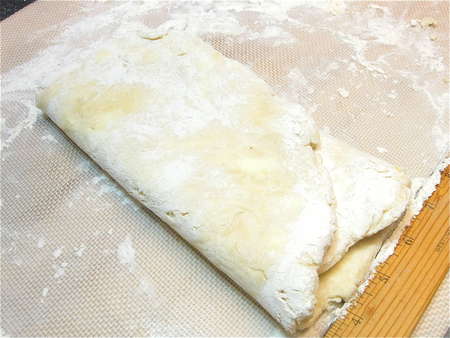
Like this.
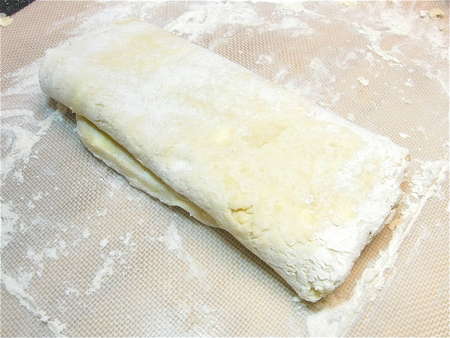
Turn the dough 90°...

...and roll it into an 8” x 10” rectangle again.
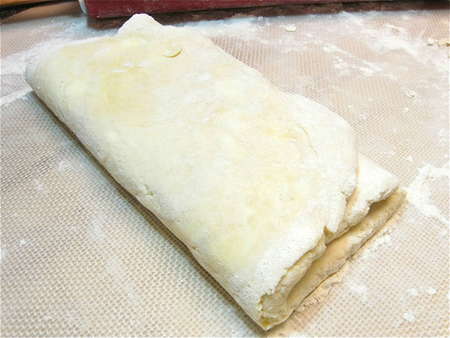
Fold it like a letter again.
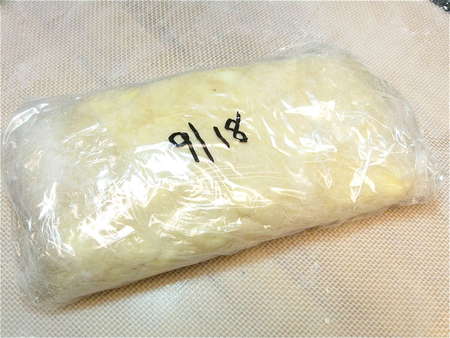
Wrap tightly in a double layer of plastic. Date it – and label it too, if you're liable to forget what that frozen wad of dough is.
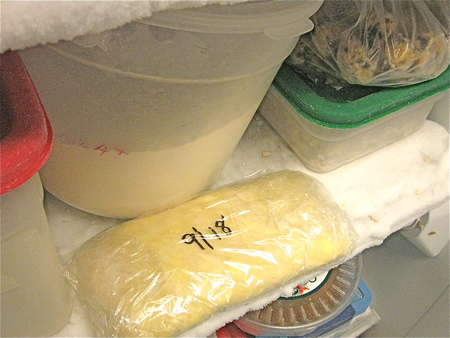
I'm telling you – money in the bank!
Because just look what that dough can aspire to… Flaky Cheese Twists.
Did I mention these twists are absolutely irresistible?
OK, detour. You don't have to freeze your pastry dough before making these twists. In fact, if you know the dough's destination will eventually be cheese twists, simply chill the fresh dough for 30 minutes; then proceed with the following recipe.
If you're working with frozen dough, however, take it out of the freezer, and put it in the refrigerator overnight (still in its plastic wrap) to thaw. Then proceed as follows.
Ready a baking sheet by lining with parchment, if you have it; otherwise, just get out a baking sheet, no need to grease it.
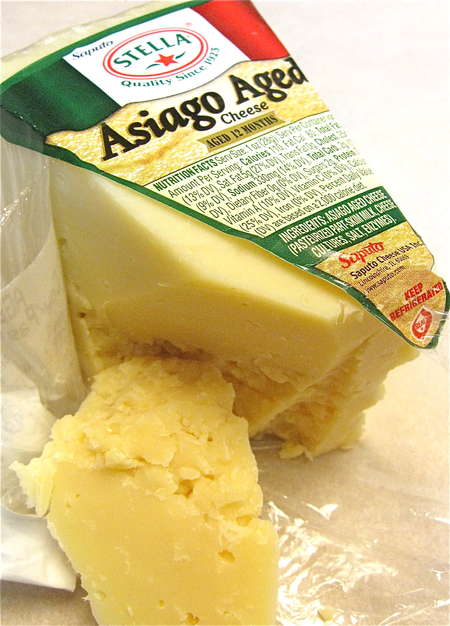
Next, select your cheese. Since you don't use a whole lot of it, considering how many twists this makes, you want something assertive. Like Asiago. Or Parmesan. NOT mozzarella or Muenster! Think SHARP and HARD.
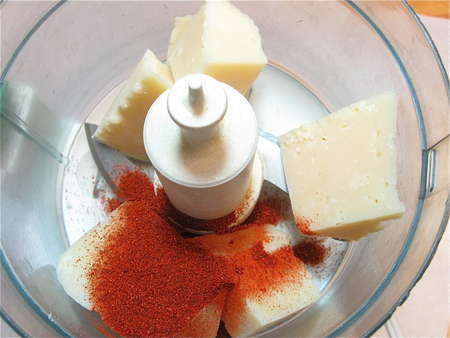
Combine 3 ounces of Parmesan (or the hard, sharp cheese of your choice) with 1 teaspoon paprika in a food processor. The paprika is simply for color; if you think you won't like it, leave it out.
If you don't have a food processor, finely grate enough cheese to measure 3/4 cup, then mix with paprika.
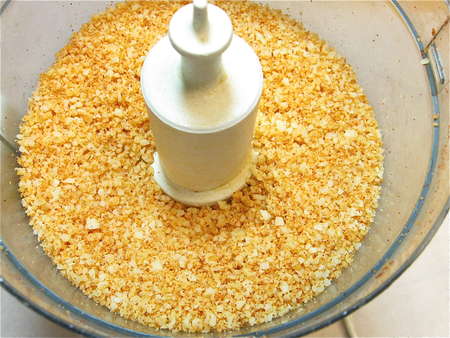
A food processor certainly makes short work of grating cheese.
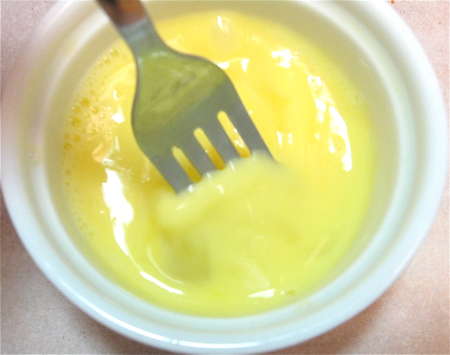
Whisk together 1 large egg, and 1 tablespoon cold water. This is the glaze that'll both hold your twists together, and help give them their golden color as they bake.
Place the thawed (but still cold) pastry on a well-floured work surface.
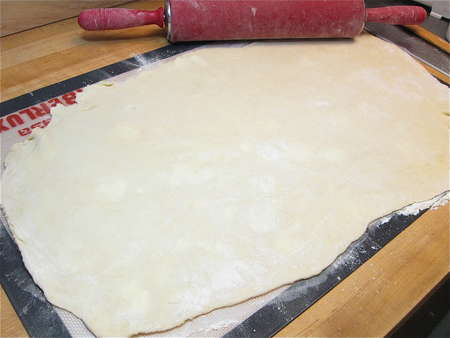
Roll it into a 12” x 24” rectangle, about 1/8” thick. As you can see, I'm not stressing about straight edges here.
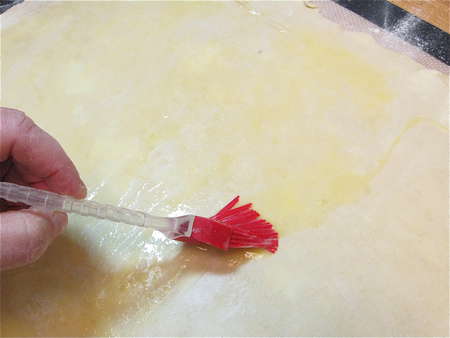
Brush the dough with the glaze. You won't use all of it; that's OK, you're going to use it again later.
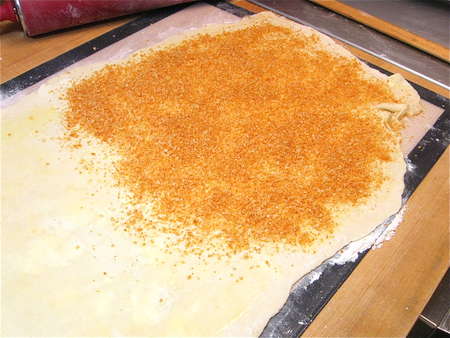
Sprinkle half the dough with the cheese.

Then fold the bare half over the cheese half, making a 12” (more or less) square. Roll the square gently, to press the dough together.
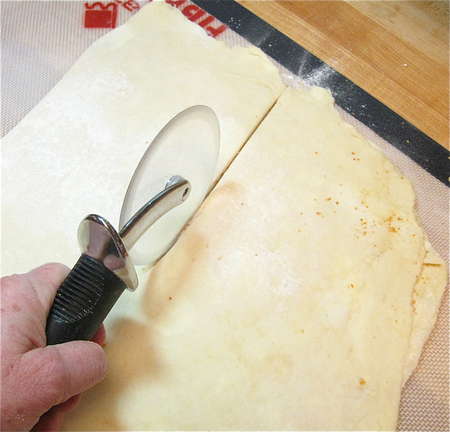
Cut it in half.
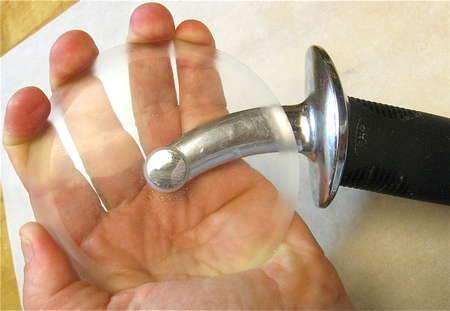
Pizza wheels have always given me the heebie-jeebies, much like mandolines do. But not this one. I LOVE my acrylic pizza cutter. It cuts everything from crusty pizza to soft dough. But it doesn't cut ME. With a good grip on its blade here, I'm feeling no pain.
It's also safe on my silicone rolling mat. Unless I act like a fool and bear down just as hard as I can, in which case the cutter WILL slice into silicone. So caveat emptor: you can use an acrylic pizza cutter on a silicone mat, but TAKE IT EASY.
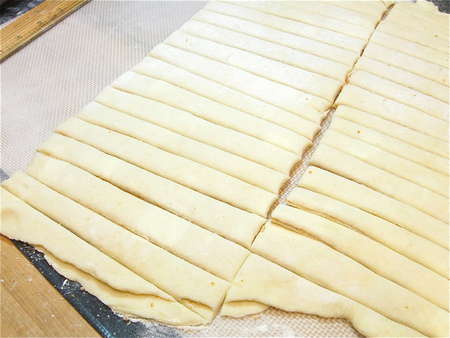
Cut the two halves of dough into 1/2” strips (for thin twists), or 3/4” strips (for thicker, wider twists).
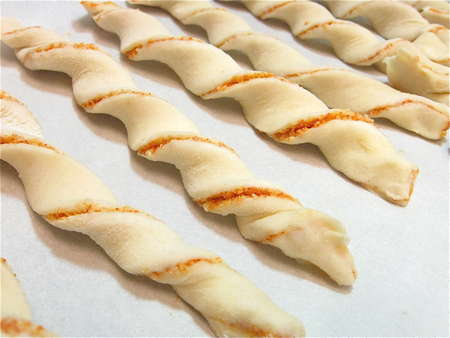
Pick up a dough strip and twist each end in opposite directions until the dough is a spiraled cylinder. Place it on the prepared baking sheet. Repeat with the remaining dough strips, leaving about 3/4" between them.
Yes, some of the cheese is bound to sift out; don't worry about it, you're doing it right.
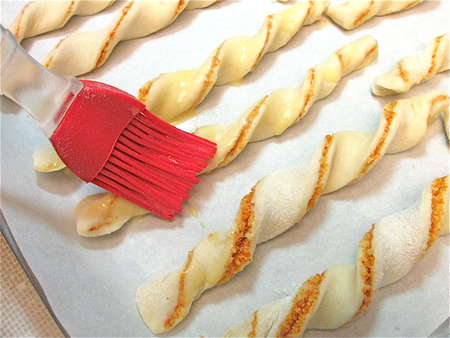
Put the twists on the prepared baking sheet. Remember that leftover egg-water glaze? Use it.
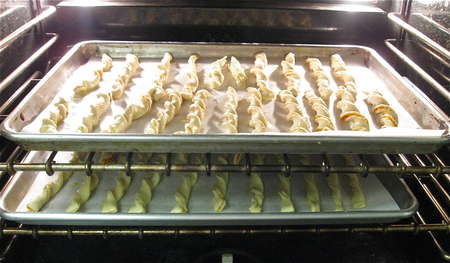
OK, now you have two choices. You can bake the twists immediately – which is your goal, if you're using frozen-then-thawed dough.
Or you can tent the pan of shaped twists with plastic wrap, put it in the freezer, and freeze till hard, about 1 hour. Take the twists off the baking sheet, and bag them airtight. Freeze till you're ready to bake.
Back to that glass of wine with your girlfriend. Wouldn't Flaky Cheese Twists go just right with that Pinot Grigio?
Preheat the oven to 400°F.

Bake freshly made twists for 12 to 15 minutes, until they're golden brown.
Bake frozen twists for 17 to 22 minutes, till they attain the same golden state.
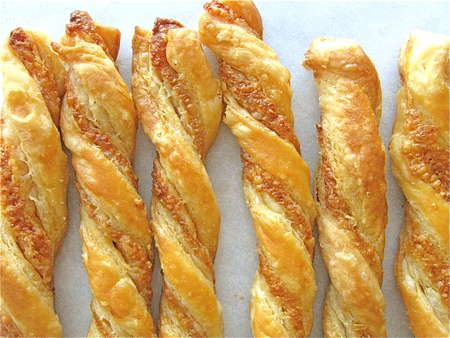
Remove from the oven. Heave a blissful sigh. Enjoy warm.
Did I mention flaky? As they say in Maine, these are SOME good!
So, we come to the end of our “How to get ahead of the holiday curve” saga. And I can hear your question – yes, all the way from Eureka, California...
“How far ahead can I freeze this stuff?”
And the answer is – I'm not sure. Freezers vary a LOT in how cold they get. A self-defrosting freezer, since it continuously raises and then lowers its temperature, doesn't keep frozen food as well as an old-fashioned freezer, one you have to defrost with buckets of hot water.
My rule of thumb is, the shorter the amount of time in the freezer, the better. That said, I believe everything I've made here today would be fine to freeze for up to about 6 to 8 weeks.
Longer than that, you're on your own.
But with just 33 days till New Year's Eve, you should be golden.
Just like your sticky buns, scones, cookies, and cheese twists.
Happy holidays, one and all!
Want to read more about how to prepare and freeze just-in-time holiday treats? Check out our blog posts about freezing cinnamon buns, fruit pie, and rollout cookies for more bake ahead tips.
